
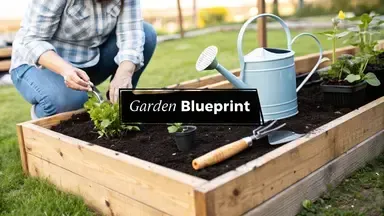
Building a Raised Garden: Your Complete Success Blueprint
Building a Raised Garden: Your Complete Success Blueprint
Why Smart Gardeners Are Making The Switch To Raised Beds
Let’s be honest: traditional, in-ground gardening can be surprisingly tough. If you’ve ever found yourself with an aching back after hours of weeding or watched your plants struggle in dense, clay-heavy soil, you're not alone. Many experienced gardeners will tell you that the secret to a more enjoyable and productive garden isn't about working harder—it's about working smarter. This is why so many are now focused on building a raised garden.
The shift toward raised beds goes far beyond just saving your back. These contained structures offer a powerful solution to some of the most persistent gardening frustrations. They provide an immediate fix for poor native soil, giving you complete control over the growing medium your plants live in.
The Power of a Perfect Environment
Imagine creating the ideal soil mix from scratch—rich, well-draining, and perfectly balanced for whatever you want to grow. That's the core advantage of a raised bed. You’re no longer at the mercy of compacted earth or poor drainage that leaves plant roots waterlogged after a heavy downpour. This level of control directly impacts plant health and productivity. The concept isn't new; gardeners have historically used raised beds to overcome challenging soil conditions, especially in urban areas with limited or compromised ground.
This strategic advantage translates into impressive results. In fact, well-managed raised beds can boost plant yields by up to 20-30% compared to traditional plots, a significant increase for anyone aiming for a bountiful harvest. For more details on this, you can explore the market research behind raised bed performance.
More Than Just a Box of Dirt
Beyond better soil and bigger harvests, raised garden beds bring a host of other practical benefits that make gardening more manageable and successful:
Fewer Weeds: By elevating your garden and filling it with clean soil, you drastically reduce the number of weed seeds that can find their way in. The weeds that do appear are much easier to pull from the loose, friable soil.
Extended Growing Season: The soil in raised beds warms up faster in the spring and drains more efficiently, allowing you to plant earlier and often extend your growing season later into the fall.
Improved Accessibility: The height of a raised bed makes planting, tending, and harvesting significantly more comfortable, turning gardening from a physical chore into a more relaxing activity.
Ultimately, building a raised garden is an investment in a more controlled, productive, and enjoyable gardening experience. It empowers you to sidestep common obstacles and focus on what truly matters: growing healthy, delicious food.
Finding Your Garden's Sweet Spot And Getting The Dimensions Right

Before you ever think about cutting a board or buying a kit, the most important decision you'll make is where your raised garden bed will live. A poorly placed bed can lead to seasons of frustration and weak plants, so let's make sure your garden is set up to thrive from the very beginning. The first non-negotiable factor is sunlight. Most vegetables and herbs need at least six to eight hours of direct sun every day. Don't just guess; spend a full day watching your yard. I like to check where the sun is hitting at 9 a.m., noon, and 4 p.m. to get a real sense of the sunniest spots.
Once you’ve found a few sunny candidates, think about water and drainage. Is the spot at the bottom of a hill where water pools after a big rain? Even though raised beds have great drainage, starting on soggy ground can still lead to waterlogged roots. On the flip side, is it close enough to a hose? I learned the hard way that hauling a heavy watering can across the yard every other day gets old fast. Position your bed for convenience, not just for sun. This is a core idea for anyone getting started, and you can learn more about these foundational principles in our guide on homesteading for beginners.
Sizing for Success and Comfort
With the location pinned down, it's time to talk dimensions. This is a critical part of building a raised garden that many people gloss over. While a massive bed might seem like a great idea, accessibility is far more important for day-to-day gardening.
Width: The golden rule is to never make your bed wider than you can comfortably reach across. For most people, this means a maximum width of four feet. Any wider, and you'll be tempted to step into the bed to weed or harvest, which compacts your carefully prepared soil.
Length: The length is much more flexible and can be based on your available space and the lumber you're using. Common lengths like 8 or 10 feet work well, but the main thing is to ensure you have clear pathways around the entire structure.
Height: A bed that’s 12 inches deep gives plenty of root space for most common vegetables, from leafy greens to peppers. If you plan on growing deep-rooted crops like big carrots or potatoes, or if you just want to save your back from bending over, consider a height of 18 to 24 inches.
Finally, think about your pathways. Always leave at least two to three feet of walking space around each bed. This gives you enough room to kneel down, get a wheelbarrow through, and work without feeling cramped. Proper spacing turns your garden from an obstacle course into a place you actually want to spend time in.
The Real Story On Materials That Actually Last
Picking out the right materials for a raised garden bed can feel like a big decision. Walk into any garden center, and you'll see options ranging from classic wood to sleek metal, each one promising to be the best. But the truth is, there isn't a single "best" material for everyone. The right choice really comes down to your local climate, your budget, and how much time you're willing to spend on upkeep down the road. It's about finding a practical fit for your garden, not just what's trendy or cheap.
Wood: The Classic Choice
There's a good reason wood is still the most popular material for raised beds. It has a natural, timeless look that just fits in a backyard. Untreated cedar is a top pick because it's naturally resistant to rot and insects, often lasting a solid 10-15 years without any chemical treatments. This is super important if you're growing food, as you'll want to avoid treated lumber where chemicals could find their way into your soil.
From my own experience, I always suggest using boards that are at least two inches thick. They're much sturdier and resist bowing under the weight of wet soil way better than thinner one-inch planks.
This popularity is clear in the market. Current data shows wood holds over 50% of the market share for raised bed materials. However, other materials are gaining ground because they last longer and require less maintenance. You can discover more insights on garden bed material trends and see how the options are changing.
To help you sort through the options, I've put together a comparison table that breaks down the most common materials. It covers everything from how long they'll last to how much they cost upfront.

As you can see, the trade-off is often between the initial cost and long-term durability. While untreated pine is cheap to start, you'll be replacing it much sooner than a steel or composite bed.
Metal and Composite: The Long-Term Players
If you're someone who values longevity and wants to do as little maintenance as possible, then galvanized steel and composite materials are fantastic choices. Galvanized steel beds are incredibly tough, easily lasting 20 years or more. They won’t rot, warp, or become a meal for pests. Another neat benefit is that they warm up faster in the spring, which can give your plants a nice head start.
Composite boards, which are made from a blend of wood fibers and recycled plastics, give you the look of wood without the worry of it decaying. They are a brilliant "set it and forget it" choice, although they do usually have a higher price tag to begin with.
Assembly Secrets That Ensure Your Bed Stays Strong

Now comes the fun part: actually putting the pieces together and watching your raised bed take shape. This is where the real satisfaction of building a raised garden kicks in. But before you grab your drill, let’s talk about a few simple techniques that separate a sturdy, long-lasting bed from one that looks wobbly after just one season. The goal is to build something that can easily withstand the immense pressure of wet soil year after year.
One of the most common pitfalls is assuming all your lumber is perfectly straight. I can tell you from experience, it almost never is. A great tip is to lay out your boards and find the "crown," which is the slight upward curve along the edge of a board. When you assemble your walls, make sure all the crowns face inward. This way, when you fill the bed with soil, the pressure will push against the curve, helping to straighten the boards rather than making a bow worse.
Assembling for Strength and Stability
Getting your corners tight and square is absolutely critical for structural integrity. A simple framing square is your best friend here. As you join the corners, don't just rely on your eyes; place the square inside the corner to ensure you have a true 90-degree angle. This little check prevents you from ending up with a lopsided, diamond-shaped bed that puts uneven stress on the joints.
If you’re building a wooden bed, think carefully about how you’ll join the corners. While simply screwing the board ends together works, it creates a weak point. I’ve found that using steel framing angles on the inside corners provides much greater strength. These inexpensive brackets, found in the decking aisle of most hardware stores, act like internal braces.
Pro Tip: Attach the brackets to two adjoining boards first to create an "L" shape. Then, attach the next boards to build out from there. This makes the assembly process more manageable, especially if you're working alone.
Tackling Uneven Ground
Few of us have a perfectly level yard. When you place your assembled bed, you'll likely notice gaps under some of the sides. Resisting the urge to just fill it with soil and hope for the best is key. An unlevel bed not only looks off, but it will also cause water to pool on one side and soil to wash out on the other.
A better approach is to dig a shallow trench for the high side of the bed, allowing it to settle down and become level with the low side. Use a level across the top edges of the bed as you work. For minor gaps, you can shim the low corners with flat stones or bricks. Taking an extra 20 minutes to level your bed properly will save you countless headaches and prevent your structure from warping over time. It ensures an even distribution of weight and water, setting the stage for a healthy, productive garden.
Creating The Perfect Soil Mix For Thriving Plants
With your raised bed built, you’re past the heavy lifting. Now comes the part that truly makes or breaks your garden’s success: the soil. You can build the most beautiful, sturdy bed, but filling it with lifeless dirt will only get you lackluster plants and a disappointing harvest. Think of it like baking a cake; the quality of your flour, eggs, and butter directly determines the final result.
Creating a rich, living soil is the single most important step after the build, and thankfully, it’s much simpler than most people think.
This focus on creating the ideal growing environment from the ground up is a huge reason why so many people are building a raised garden. This trend is growing as more gardeners look for ways to grow their own food sustainably. The desire for better food starts with better soil. You can discover more insights about the growing demand for raised beds on marketresearchintellect.com.
The “Perfect” Soil Recipe
If you ask a dozen seasoned gardeners for their soil recipe, you might get a dozen different answers. But most successful mixes come down to a simple, effective formula that balances three key elements: nutrients, structure, and aeration. Forget the overly complicated online recipes; this proven mix works.
Compost (50%): This is the heart and soul of your garden bed. Good, finished compost is packed with life. It slowly releases essential nutrients, feeds beneficial soil microbes, and gives the mix a beautiful, crumbly structure. It’s the powerhouse of your garden.
Topsoil (30%): This gives your mix some body and substance. I recommend looking for a screened sandy loam topsoil if you can find it. It adds minerals and texture without turning into a dense, compacted brick like heavy clay can. Try to avoid using fill dirt from your own yard, as it often comes with a ton of weed seeds and poor texture.
Aeration Material (20%): This is the secret ingredient for light, fluffy soil. Materials like perlite, vermiculite, or small pine bark fines create air pockets, which prevent compaction and ensure excellent drainage. This allows plant roots to breathe and spread out with ease.
Sourcing Your Ingredients Smartly
Getting all these materials can seem like a big task, but your local landscape or garden supply company is almost always the most affordable option, especially for filling bigger beds. They sell materials by the cubic yard, which is dramatically cheaper than buying countless small bags from a home improvement store. To put it in perspective, a single cubic yard is equal to about 27 of those one-cubic-foot bags.
When you have your soil components ready, don't just dump them all in at once. A better approach is to fill the bed about halfway, then give it a good soaking with the hose. This helps the soil settle naturally. Once it has settled, go ahead and add the rest. This little trick prevents major soil drop later in the season after your first big rain.
With this nutrient-dense foundation in place, you’re ready to grow just about anything. It's a perfect setup for easy wins like leafy greens. For more on that, check out our beginner's guide to growing lettuce anywhere.
Smart Planting Strategies For Maximum Harvest Success

With your raised bed built and filled with rich soil, it's time for the best part: planting. But success isn't just about sticking plants in the dirt. It's about a smart approach that makes the most of every square inch of your new garden. Many beginners make the mistake of following the spacing instructions on seed packets, which are really meant for long, single rows in traditional gardens.
In a raised bed, where you won't be compacting the soil by walking on it, you can use intensive planting methods. This means arranging your plants in a grid or triangular pattern to fit more into the space without causing problems. For example, instead of a single row of lettuce, you can plant a whole grid of them about 6 inches apart in all directions. This creates a "living mulch" that shades the soil, keeps moisture in, and naturally suppresses weeds. It's one of the best strategies when building a raised garden for serious food production.
Companion Planting That Actually Works
Companion planting often gets a bit of a romantic reputation, but some pairings offer real, down-to-earth benefits. While planting marigolds won't magically ward off every single pest, certain combinations are proven winners in the garden.
Basil and Tomatoes: Planting basil close to your tomato plants can help deter tomato hornworms. The strong fragrance of the basil seems to confuse the pests that are searching for your prized tomatoes.
Rosemary and Carrots: In a similar way, rosemary's strong scent can help mask the smell of carrots from the dreaded carrot rust fly.
Nasturtiums as a Trap Crop: Aphids find nasturtiums absolutely irresistible. If you plant them a short distance from your main crops, they can act as a lure, drawing aphids to them and away from your vegetables.
These pairings are all about creating a more resilient little ecosystem in your garden. Using smart planting techniques like these is a huge part of successful gardening, especially if you're exploring different backyard homesteading ideas and want to maximize what you get from your space.
To help you get started, here's a quick guide to planting times and spacing for some common raised bed crops.
Raised Bed Planting Schedule and Spacing Guide
This table provides optimal planting times and spacing requirements for common vegetables and herbs in raised beds.

This schedule is a great starting point for planning your garden. Remember that by planting densely and choosing good companions, you create a healthier, more productive bed.
Extending Your Harvest with Succession Planting
Don't just plant your garden once and consider it done for the season. Succession planting is the secret to getting a continuous harvest from your raised bed from spring until fall. The idea is simple: as soon as you harvest a fast-growing crop like spinach or radishes, have another seedling ready to pop into its place.
A perfect example is planting an early spring spinach crop. Once it's harvested, you can plant bush beans in early summer. After the beans are finished, you can then plant a fall crop of garlic in that same spot. This method keeps your bed productive from the first thaw to the first frost, making sure your hard work pays off all season long.
Your Raised Garden Success Roadmap
Let's pull all this information together into a clear path forward. Building a raised garden is more than just putting together a frame; it's about creating a small, thriving ecosystem. Your success starts with smart choices long before you even pick up a tool.
Your Actionable Checklist
This isn't a list of strict rules but a set of foundational principles that lead to a truly productive garden. Think of these as the core strategies that make all the difference.
Prioritize Placement: Before you do anything else, be absolutely certain your chosen spot gets six to eight hours of direct sunlight every day. For most vegetables, good sun exposure is the single most important factor for healthy plants and a heavy harvest.
Build for Strength: Whether you decide on cedar, steel, or a composite material, assemble your bed with longevity in mind. Using 2-inch thick boards, properly reinforcing the corners, and taking the extra time to get the frame perfectly level on the ground will pay off for years to come.
Perfect Your Soil Mix: Don't be tempted to skimp on what fills your bed. A balanced blend, typically around 50% compost, 30% topsoil, and 20% aeration material like perlite, creates the perfect foundation for strong, vigorous root growth.
Plant Intelligently: Make the most of your space by using intensive spacing and companion planting. This not only maximizes your yield but also helps deter pests naturally. Plan ahead for succession planting to keep your harvest going all season long.
By focusing on these key areas—a great location, solid construction, premium soil, and smart planting—you're not just building a box for dirt. You're setting the stage for seasons of bountiful harvests and genuine enjoyment.
Ready to dig deeper and continue your journey toward a more self-sufficient lifestyle? Join our community at The Grounded Homestead for more guides, tips, and inspiration. Explore The Grounded Homestead to get started.


Facebook
Instagram
X
Youtube