
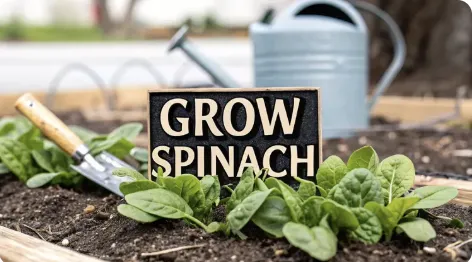
How to Grow Spinach for an Amazing Harvest
How to Grow Spinach for an Amazing Harvest
So, you want to grow your own spinach? You’ve come to the right place. Growing vibrant, delicious greens is easier than you think. It really just boils down to a few key things: planting at the right time (think cool weather), giving your soil plenty of rich compost, and harvesting leaves often to keep the plant productive.
This guide will walk you through every step, from picking the right seeds for your garden to dealing with the handful of problems that might pop up.
Why Spinach Is the Perfect Cool-Season Crop
Spinach is a fantastic starting point for new gardeners and a reliable old friend for those of us who have been digging in the dirt for years. It absolutely thrives in the cooler temperatures of spring and fall, often giving you armfuls of greens when summer vegetables are still a distant dream. This adaptability makes it one of the most rewarding plants you can grow.
Honestly, one of the best parts of homegrown spinach is the taste. Freshly picked leaves are incredibly sweet and tender, a world away from the bland, bagged stuff you find at the store. Because spinach starts losing nutrients almost as soon as it's cut, harvesting it right before you toss it in a pan means you’re getting the absolute most out of it.
The Growing Popularity of Homegrown Greens
It’s not just us gardeners who love spinach; it's a global powerhouse. You can see its popularity in the booming seed market, a trend driven by a bigger focus on healthy, whole foods. The global spinach seeds market was valued at USD 48.10 billion in 2024 and is expected to shoot up to USD 86.22 billion by 2033.
That number tells a story: people want nutrient-dense foods packed with iron, calcium, and antioxidants. You can learn more about the rising demand for spinach seeds from Market Data Forecast.
This enthusiasm for spinach makes learning to grow it a truly valuable skill. When you cultivate your own, you have total control over the process, ensuring your food is fresh, organic, and free from anything you don't want on your plate.
Key Takeaway: Growing your own spinach not only gives you far superior taste and nutrition but also plugs you into a global trend of health-conscious eating. The fact that it’s so easy to grow in cool weather makes it the perfect crop for stretching your gardening season.
What Makes Spinach So Easy to Grow?
A few things make spinach a low-effort, high-reward crop that I recommend to just about everyone. It’s forgiving, productive, and doesn't ask for much.
Fast Growth: Many varieties go from a tiny seed to a full-on harvest in just 40-50 days. You can even start snipping tender baby leaves much sooner than that.
Minimal Space: Its compact size and shallow root system make it perfect for all kinds of setups. You can grow it in containers, fill a raised bed, or tuck it into a small patch in your garden.
Cool-Weather Hardy: Spinach plants can handle a light frost. In fact, a little cold often makes the leaves even sweeter.
Cut-and-Come-Again Harvesting: This is my favorite part. You can harvest the outer leaves over and over, and the plant will just keep producing more from the center. It’s like a little salad factory that ensures a continuous supply.
To get started, it helps to have a quick reference for what spinach needs to thrive.
Here’s a snapshot of the ideal conditions and timeline for a successful spinach crop.
Spinach Growth At a Glance

Getting these basics right from the start will set your spinach up for a long and productive season.
Choosing the Best Spinach Varieties for Your Garden

The secret to a fantastic spinach harvest often starts long before you even touch the soil. It begins with the seed packet you choose.
With dozens of options out there, picking the right one can feel a bit overwhelming, but it gets simple once you understand the main types. Every variety falls into one of three categories, each with its own texture and best use in the kitchen.
The Three Main Types of Spinach
Your local garden center or favorite seed catalog will likely group spinach into these classifications. While they all have that classic spinach flavor, their leaf structure makes them suited for different jobs.
Savoy: This is the classic, crinkly-leafed spinach. The leaves are thick and deeply textured, which helps them hold up exceptionally well to cooking. Think of them for sautés and creamed spinach.
Smooth-Leaf: Just as the name implies, these varieties have flat, smooth leaves. This makes them much easier to wash, which is why they're the go-to for fresh salads and the type you’ll almost always find pre-bagged at the grocery store.
Semi-Savoy: A perfect middle ground. Semi-savoy types have a slightly crinkled texture but are less pronounced than full savoy varieties. They are versatile, working well both raw in salads and cooked in various dishes.
For my own garden, I often plant a mix. I’ll use a smooth-leaf type for quick salads and a savoy variety specifically for hearty cooked meals throughout the fall.
Understanding Important Garden Terms
When you start browsing seed packets, you’ll run into terms like "slow-bolt" and "heirloom." These aren't just marketing buzzwords; they provide critical clues about how a plant will perform in your garden. Knowing what they mean is key to a successful harvest.
One of the most important traits to look for is bolt resistance. Bolting is when a spinach plant prematurely sends up a flower stalk in response to stress—usually from heat or long daylight hours. Once it bolts, leaf production stops, and the existing leaves turn bitter.
A "slow-bolt" variety gives you a much longer harvest window, especially during the unpredictable weather of late spring.
You'll also see seeds labeled as heirloom or hybrid. Heirloom seeds come from plants that have been passed down for generations, prized for their unique flavor and traits. Hybrid seeds are created by cross-pollinating two different parent plants to produce a new variety with specific desirable characteristics, like disease resistance or higher yields. Neither is inherently better; the choice depends on your priorities as a gardener.
A Gardener's Insight: I've found that slow-bolt varieties like 'Tyee' are lifesavers for spring planting. They give you an extra couple of weeks of harvesting before the summer heat shuts things down. For fall, I often turn to a classic heirloom like 'Bloomsdale Long Standing' for its incredible cold tolerance and rich flavor.
Comparing Popular Spinach Varieties
With the basics covered, let's look at some specific, tried-and-true varieties that have earned their place in gardens everywhere. To help you find the best fit for your space and your kitchen, here's a quick comparison of a few popular choices.
, Tyee (semi-savoy, bolt resistant, good for spring salads), Catalina (smooth-leaf, fast-growing, baby leaf salads), Giant Noble (smooth-leaf, large harvests, slow to bolt).")
Ultimately, the best way to learn is by doing. Don't be afraid to experiment with a few different types of spinach in your first few seasons. You might find that a smooth-leaf variety thrives in your spring garden, while a crinkly savoy type becomes your go-to for autumn planting.
Creating the Ideal Soil for Healthy Spinach

Think of your garden soil as the fuel for your spinach plants. Get this part right, and you’re setting yourself up for a harvest of lush, tender leaves. Skimp on it, and you'll likely end up with small, struggling plants.
Spinach isn’t too picky, but it draws a hard line on soil quality. It absolutely thrives in soil that’s loaded with organic matter, drains well, and gives its roots plenty of room to spread out. Neglecting this foundation is a classic mistake that often leads to a disappointing harvest.
Getting the Soil pH Just Right
Before you start adding anything to your garden bed, it’s a smart move to figure out what you're working with. Spinach does its best work in a slightly acidic to neutral pH range, ideally between 6.5 and 7.0. If your soil is too acidic (meaning a low pH), the plant can’t pull up the nutrients it needs, which often results in yellowing leaves and stunted growth.
A simple soil test is the only way to get a true reading. You can grab an at-home kit or send a sample to your local cooperative extension for a more detailed breakdown. This little bit of effort up front gives you a clear roadmap for what your soil actually needs. For more on this, check out our guide on the simple steps for https://thegroundedhomestead.com/post/soil-testing-at-home.
Building a Rich and Fertile Bed
Once you know your soil’s pH, the real fun starts—building a nutrient-rich home for your spinach. Your goal here is to create a loose, loamy texture that’s teeming with life.
Start by working in a generous layer of organic matter. Spreading a 2- to 4-inch layer of well-aged compost or rotted manure and mixing it into the top foot of soil is a fantastic way to boost fertility. This doesn't just feed the plants; it dramatically improves the soil structure, helping it hold onto moisture while still letting excess water drain away.
A Gardener's Tip: When I'm prepping a new bed, I always make a point to loosen the soil to a depth of at least 12 inches with a garden fork. This breaks up any compacted layers and gives the spinach roots plenty of room to grow deep, making the plants much more resilient.
Adapting to Your Soil Type
Not all garden soil is created equal, of course. You might need to tweak your approach depending on whether you're starting with heavy clay or fast-draining sand.
For Heavy Clay Soil: Clay is great at holding onto nutrients, but it can easily become waterlogged and compacted. The name of the game is improving drainage. Working in coarse materials like compost and shredded leaves will help break up those dense particles and create air pockets.
For Sandy Soil: Sand gives you excellent drainage but struggles to hold onto water and nutrients. Here, the goal is the exact opposite: you want to improve retention. Amending with compost, peat moss, or coco coir will act like a sponge, keeping moisture and nutrients right where the plant's roots can access them.
The Perfect Potting Mix for Containers
Growing spinach in containers is a great option for small spaces, but it demands a specialized soil mix. Never use garden soil in a pot—it’s far too heavy and will quickly compact, suffocating the roots. Instead, you'll want to create a custom blend that provides drainage, aeration, and nutrition.
A reliable recipe is:
One part peat moss or coco coir (for moisture retention)
One part compost or worm castings (for slow-release nutrients)
One part perlite or vermiculite (for aeration and drainage)
This creates a light, fluffy medium that gives container-grown spinach everything it needs to thrive. This focus on soil quality mirrors a broader trend, too. The global spinach seeds market is projected to grow from USD 0.76 billion in 2025 to USD 1.26 billion by 2035, driven by shoppers actively seeking out iron-rich foods. You can discover more insights about this market trend from Business Research Insights. Preparing your soil well is the first step to harvesting those coveted, healthy leaves right from your own garden.
How to Plant Spinach for a Continuous Harvest
With your soil prepped and ready, it's time to get those tiny seeds into the ground. This is where a lot of gardeners stumble. The right timing and a little technique are what separate a long, productive harvest from a short, frustrating one.
Spinach is a cool-season crop through and through. Your entire goal is to give it the mild temperatures it loves while avoiding the summer heat that causes it to "bolt"—or go to seed way too early. This gives you two main planting windows each year: early spring and late summer for a fall crop.
Mastering Your Planting Windows
For a spring harvest, you’ll want to sow seeds as soon as the soil can be worked. In my garden, this is usually 4 to 6 weeks before our last expected frost date. Don’t worry about a late cold snap. Spinach is surprisingly tough and can handle a light frost, which often makes the leaves taste even sweeter.
For a fall harvest—which I personally find more reliable—the timing is a bit different. You'll want to plant seeds in late summer, about 6 to 8 weeks before your first expected fall frost. This gives the plants enough time to get established before the cold sets in, leading to an incredibly sweet crop that you can often keep harvesting well into the winter months.
This simple breakdown covers the core steps from soil prep to getting those first seedlings thinned out.

As you can see, the process is straightforward: get the soil ready, sow your seeds shallowly, and then thin them out so each plant has room to flourish.
Sowing Seeds for a Strong Start
Spinach seeds look like tiny pebbles, so they don’t need to be buried deep. In fact, one of the most common reasons for poor germination is planting them too deep. A depth of about half an inch is perfect.
You’ve got two main ways to get them in the ground:
In Rows: I like to create shallow furrows about 12-18 inches apart. Then, I drop a seed every inch or so down the line and gently cover it with soil.
Broadcasting: If you’re after a dense patch of baby spinach, you can just scatter the seeds evenly over the prepared bed. Lightly rake them in to ensure they’re covered with about half an inch of soil.
No matter which method you choose, press the soil down gently afterward. This ensures good seed-to-soil contact. Then, give the area a good watering.
Pro Tip: Spinach seeds can be frustratingly slow to germinate sometimes. To speed things up, I "prime" them. Just wrap the seeds in a damp paper towel, place it in a plastic bag, and leave it in the refrigerator for 5-7 days before planting. This cold, moist treatment mimics perfect early spring conditions and can really boost your germination rates.
The Secret to a Never-Ending Supply
The real game-changer for getting spinach all season long is a technique called succession planting. Instead of planting all your spinach at once, you sow a new, small batch every 10 to 14 days.
This simple strategy staggers the maturity of your plants, so you always have a steady supply of fresh, tender leaves ready for picking. As one batch is hitting its peak, the next is just a couple of weeks behind it. It completely solves the problem of having a massive glut of spinach all at once, with most of it going to waste.
You can even take this a step further in colder climates. By planting a late-fall crop and protecting it with a simple structure, you can often harvest spinach right through the winter. Our detailed guide on how to build a cold frame can show you exactly how to extend your growing season and enjoy fresh greens even when there's snow on the ground.
Giving Your Spinach What It Needs to Thrive
Once your seedlings are up, the real work begins. It’s not hard work, but it is consistent. Getting spinach established is one thing; helping it flourish into a plant with big, tender leaves requires paying attention to the details. The good news? Spinach isn't a diva. It responds incredibly well to just a little bit of the right care.
We're going to focus on three things: giving it a steady supply of water, making sure each plant has enough room to breathe, and feeding it at just the right moment. Get these simple routines down, and you'll be rewarded with more lush, green leaves than you know what to do with.
The Importance of Consistent Watering
Spinach has shallow roots. That means it can’t dig deep into the soil to find moisture when the surface dries out, making it really sensitive to drought stress. Inconsistent watering is one of the fastest ways to tell your spinach it's in trouble, which can lead to tough, bitter leaves or trigger it to bolt (flower prematurely).
The goal is to keep the soil consistently moist—think of a well-wrung-out sponge—but never soggy. Instead of one deep soak a week, spinach often prefers a little water every day or two. This is especially true for containers, which dry out much faster.
You should aim to provide about 1 to 1.5 inches of water per week, counting any rainfall. The easiest way to check is to just stick your finger into the soil. If the top inch is dry, it’s time to water.
A Gardener's Insight: I've found that using a soaker hose or drip irrigation right at the base of the plants is far more effective than watering from above. It gets moisture straight to the roots where it's needed most and keeps the leaves dry, which is a huge help in preventing common fungal problems like downy mildew.
Thinning for Bigger, Healthier Leaves
This might be the hardest thing for new gardeners to do. It just feels wrong to pull out perfectly good seedlings you worked so hard to grow. But trust me, thinning is probably the most critical step for getting a harvest of large, healthy spinach leaves. When seedlings are crammed together, they fight for sunlight, water, and nutrients. The result is a crowded patch of small, weak plants.
Once your seedlings have their first set of "true leaves"—that’s the second pair of leaves that show up—it’s time to thin. You're giving each remaining plant the personal space it needs to really spread out.
Spacing: Use a small pair of scissors and snip the extra seedlings right at the soil line. Leave the strongest-looking ones spaced about 4 to 6 inches apart.
Why Snip? Cutting them instead of pulling them out is key. It keeps you from accidentally disturbing the delicate roots of the neighboring plants you want to save.
Don't Waste Them: Those tiny seedlings you just thinned are delicious! Treat them like microgreens and toss them into your next salad. It's your very first tiny harvest.
This simple act of giving each plant some elbow room directly translates to bigger leaves and a much more productive spinach patch.
When and How to Feed Your Spinach
If you did your homework and prepared the soil with plenty of rich compost, your spinach might not need much extra food at all. But since spinach is all about producing lush foliage, it really appreciates a boost of nitrogen, the nutrient responsible for healthy leaf development.
The best time to feed your spinach is about four weeks after planting, or once the plants have several sets of leaves. A little mid-season snack can reinvigorate them and encourage one last flush of vigorous growth before you start harvesting heavily.
Go for an organic, nitrogen-rich fertilizer. Things like blood meal, a compost "tea," or a balanced liquid feed work great. Just be sure to follow the package instructions. Too much nitrogen can be just as bad as too little. This timely boost will support the plant through its most productive phase, ensuring your harvest is as generous as possible.
Battling Spinach Pests and Other Headaches
Even with the best soil and watering habits, you’re bound to run into a few challenges growing spinach. Most issues are pretty minor and can be handled with a gentle, organic touch. Honestly, just knowing what to look for is half the battle in keeping your plants healthy and churning out leaves.
From tiny insects to frustrating plant behaviors like bolting, being prepared helps you solve problems quickly without reaching for harsh chemicals. A little vigilance goes a long way.
Managing Common Garden Pests
Notice some small holes or weird-looking tunnels in your spinach leaves? That’s often the work of common pests who find your greens just as delicious as you do.
Aphids: These are tiny, pear-shaped insects that love to cluster on the undersides of leaves. They suck the sap right out, causing the leaves to curl up. A strong spray of water from the hose is usually enough to knock them off. If they’re stubborn, a good organic insecticidal soap will do the trick.
Leaf Miners: These pests are known for the distinctive tunnels, or "mines," they create as they eat their way through the inside of a leaf. The best defense here is just to pluck and toss any affected leaves as soon as you spot them. Using floating row covers from the moment you plant is an even better preventative measure.
For a deeper dive into solutions, check out our guide on common spinach pests and how to solve them.
Preventing Disease and Bolting
While pests are a nuisance, diseases and natural plant responses can also mess with your harvest. As with most things in the garden, prevention is your best strategy.
Downy mildew, a fungal disease, can pop up as yellow spots on leaves with a purplish mold underneath, especially when it’s damp. Make sure you give your plants good air circulation by spacing them correctly, and always water at the soil level to keep the leaves dry. Crop rotation—not planting spinach in the same spot year after year—is also a huge help.
The most common frustration for spinach growers, though, is bolting. This is when the plant shoots up a flower stalk because it’s stressed, usually from warming temperatures or longer days.
A Gardener's Tip: Once a spinach plant bolts, its energy shifts from making leaves to making seeds, and the leaves left behind will turn bitter. Harvest the whole plant right away. To delay bolting in late spring, you can use a shade cloth to help keep the soil cool.
Growing high-quality spinach has become a major focus for gardeners and farmers, and it lines up with what people want to eat. Globally, fresh spinach is projected to hold a 48.3% market share in 2025, showing a strong preference for nutrient-rich, unprocessed veggies. You can learn more about this trend and the rising demand for fresh spinach from Coherent Market Insights. By managing issues like bolting, you’re making sure your homegrown crop meets that high-quality standard.
Frequently Asked Questions About Growing Spinach

Even after covering the basics, a few questions always seem to pop up. Let's tackle some of the most common things gardeners run into when they're learning how to grow spinach. Getting these details right can help you solve problems before they start and get a much better harvest.
I've gathered some straightforward advice to clear up any lingering confusion and help you fine-tune your technique.
How Long Does Spinach Take to Grow?
Patience is a virtue, but thankfully, spinach doesn't ask for much of it. Most varieties are incredibly fast growers, giving you a satisfyingly quick turnaround from seed to salad bowl.
You can expect most types of spinach to be ready for a real harvest in about 40 to 50 days. But you don't have to wait that long to get a taste. I often start snipping individual "baby leaves" as early as 25 days after planting.
A Quick Tip: The "cut-and-come-again" method is perfect for spinach. By snipping only the outer leaves from each plant, you encourage the center to keep producing new growth. This way, you can enjoy a continuous harvest for weeks from the very same plants.
This rapid growth is exactly what makes spinach such a rewarding crop for both spring and fall gardens.
Why Is My Spinach Growing Tall and Thin?
If you see your spinach plant suddenly shoot up with a thick central stalk, it's doing something called bolting. This is the plant's panic signal—it’s stressed and has decided to shift all its energy from making tasty leaves to producing seeds before its life cycle ends.
This change is almost always triggered by a few specific environmental cues:
Too Much Heat: Consistently warm temperatures are the number one cause. Spinach is a cool-weather crop, through and through.
Longer Days: The increased daylight of late spring and early summer also signals the plant that it's time to flower.
Stress: Things like inconsistent watering or a lack of nutrients can also push a plant to bolt prematurely.
Once a plant bolts, the leaves quickly turn bitter and tough. The best thing to do is harvest the entire plant right away to salvage what you can. To avoid this in the first place, plant bolt-resistant varieties and consider using shade cloth to keep the soil cool as the weather warms up.
Can I Grow Spinach in Pots?
Absolutely! Spinach is a fantastic choice for container gardening, especially if you're short on space. Its shallow root system and compact growth make it perfectly suited for pots, window boxes, and other containers.
Just make sure to choose a container that is at least 8-10 inches deep and wide to give the roots enough room to spread out. Good drainage is non-negotiable, so ensure your pot has plenty of holes. Spinach hates soggy feet.
Using a high-quality potting mix is also key, as regular garden soil gets way too compacted in pots. And remember, containers dry out much faster than garden beds, so you'll probably need to water your potted spinach more often.
At The Grounded Homestead, we believe growing your own food is one of the most rewarding steps toward a healthier life. For more tips, guides, and inspiration for your garden and homestead journey, visit us at https://thegroundedhomestead.com.


Facebook
Instagram
X
Youtube