
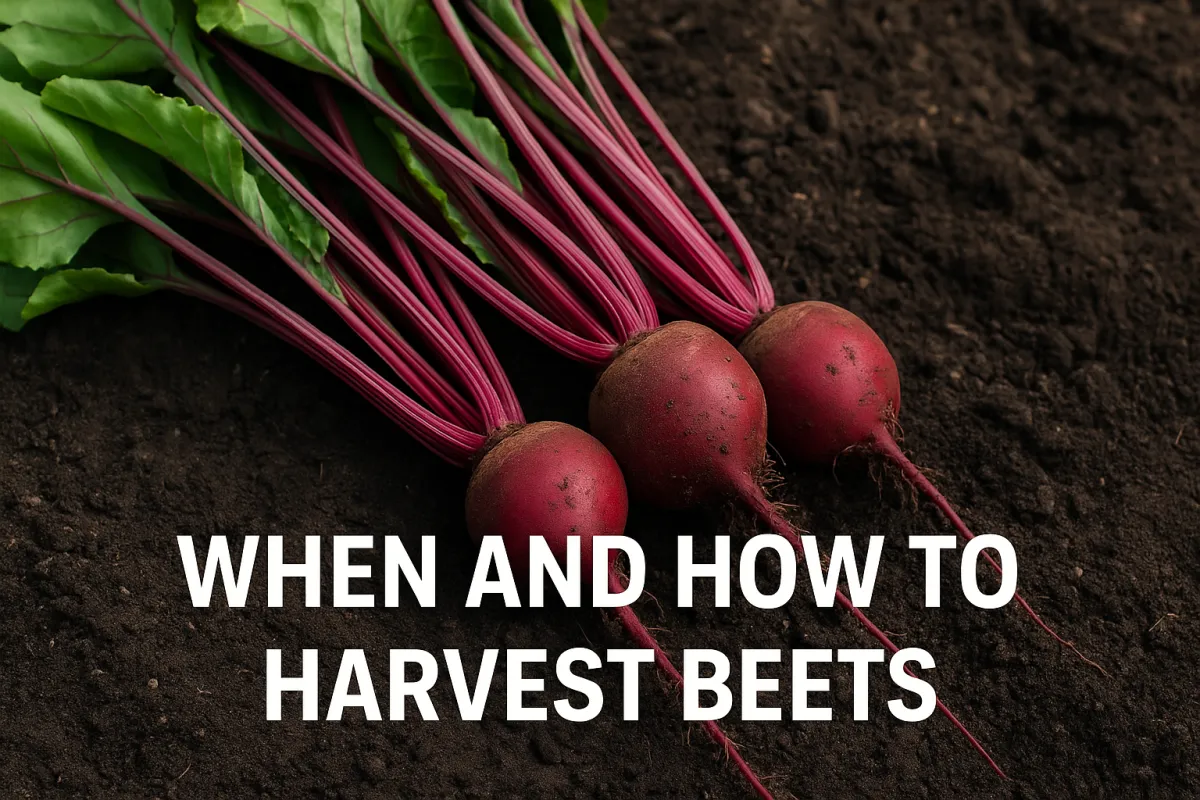
When and How to Harvest Beets (Without Damaging the Crop)
When and How to Harvest Beets (Without Damaging the Crop)
The First Time I Pulled Too Soon
The first time I planted a full row of beets in my backyard garden, I got impatient.
I’d been watching those deep green leaves stand tall for weeks—watering, thinning, checking for pests. Everything looked healthy above ground. So I figured I’d check how things looked below. Gave one a gentle tug.
What came up was barely bigger than a radish.
Tried again. Same story.
By the time I realized my mistake, I’d sacrificed half the row for roots that weren’t ready—and the rest didn’t exactly thrive after that. That’s when I learned the real lesson: harvesting beets isn’t about guessing—it’s about timing, feel, and protecting the root crop you’ve worked so hard to grow.
If you’ve ever wondered how to check beet size before harvesting, or how to pull beets without damaging the greens or snapping the roots, this guide walks through every step. You’ll learn exactly:
When to harvest beets for best flavor and texture
How to preserve both roots and greens
The right way to prep your harvest for long shelf life in the kitchen or root cella
 Look for shoulders by brushing soil back with fingers, (2) Check diameter for 1.75–2.5 inches width, and (3) Feel for firmness—mature beets feel solid, not spongy. Bonus pro tip shows that thinning early improves spacing and root development. Rustic wood background and vintage farm-style illustrations accompany each section.")
How to Check Beet Size Without Pulling Them Up
If you're growing beets for flavor, nutrition, or storage, harvest time is everything—and it starts before you ever touch the plant.
The most common mistake gardeners make? Pulling beets too early or too late, thinking the leaf size reflects the root’s maturity. But if you want to learn how to harvest beets without damaging them, start here: learn to read the signs without disturbing the plant.
Here’s how to check beet size before harvesting—step by step:
1. Look for the Shoulders
As the root develops, it usually pushes up through the topsoil. This “shoulder” is the top portion of the beetroot that you can see and feel. In loose, well-drained garden beds, it’s often visible even before brushing away soil.
Dark red shoulders on Detroit Dark Red
Striped tops on Chioggia
Elongated crowns on Cylindra
2. Use Your Fingers, Not Tools
Tools can scar the root or disturb neighboring plants. Instead, use your hands to gently brush away the top ½ inch of soil. If your soil has good moisture and texture—thanks to compost or mulch—it should lift easily.
A soft paintbrush also works in tight rows or around companion plants like onions or lettuce.
3. Check Diameter, Not Just Height
Ideal beet harvest size is 1.75 to 2.5 inches across. Any smaller, and flavor may be underdeveloped. Any larger, and texture may turn woody—especially in hotter climates or dry soil conditions.
Under 1.5" – likely underdeveloped
1.75–2.5" – ideal for flavor and shelf life
3”+ – can still be used, but check for firmness and fiber
4. Feel for Firmness
A fully matured beetroot will feel solid and heavy for its size. If it feels light or slightly spongy, it’s still developing. Moisture and nutrient content directly affect density, so don’t rely on visuals alone.
5. Spacing Matters Early On
Crowded seedlings = stunted roots. If you didn’t thin properly during early sowing, don’t expect full-size bulbs now. The healthiest beets often come from rows with proper spacing, drainage, and full sun.
Checking beet size before harvesting protects your yield, preserves neighboring plants, and ensures every pull counts. It’s one of the simplest things you can do to stop wasting good crops.
Ideal Root Size for Best Flavor and Texture
Once you’ve checked the shoulder, soil, and spacing, the next step is knowing when to harvest beets for best flavor. Timing matters—too early, and you lose yield; too late, and texture suffers.
So what’s the sweet spot?
Target Root Diameter: 1.75 to 2.5 Inches
This is the golden range for maximum taste, ideal texture, and best shelf life. Roots harvested at this size will be:
Tender enough to roast whole or steam without peeling
Earthy-sweet in flavor, with a pleasant bite and balanced sugar levels
Dense and firm, not woody or fibrous
For growers looking for research-backed guidance on harvest size, South Dakota State University Extension notes that beets are generally ready when they reach golf-ball size up to about three inches in diameter, depending on variety, and that size influences both texture and flavor.
Anything much larger than 3 inches starts losing kitchen value—especially in hot climates or gardens with inconsistent watering. If your beets have been through drought stress or poor drainage, bigger isn’t better.
Why Size Affects Storage
Smaller roots (<1.5 inches) tend to dehydrate or shrivel faster in cold storage. Oversized beets, on the other hand, may crack or rot if stored too long in a crisper drawer or root cellar.
Beets in the 2-inch range give the best balance of flavor and longevity in both fresh use and food preservation.

Variety Matters
Different types of beta vulgaris mature a little differently. Here’s how the common garden varieties handle sizing:
Detroit Dark Red – classic round shape; great flavor at 2–3 inches
Cylindra – elongated roots that can be harvested at 5–6 inches long without going woody
Chioggia – beautiful interior striping, but loses texture quickly once oversized
If you’ve let yours go too long and they’re looking more like a softball than a beet, don’t panic. You can still chop and use them for freezing, pickling, or soup stock—but don’t expect the soft bite of a young roast beet.
Grandma’s Rule: “If it looks like a turnip, you waited too long.”
, Harvesting Technique (lift by hand, don’t yank by tops), and Troubleshooting Snapped Beets (use broken beets quickly, within 48 hours). Illustrated with beet plants, a watering can, garden fork, and jars of chopped beets. Set on a wooden backdrop with earthy tones and rustic design.")
Harvesting Beet Roots and Greens at the Same Time
When you grow beets, you’re not just growing a root—you’re growing two crops in one. The leafy tops are just as valuable as the root vegetable below, especially when harvested at the right time.
Handled right, you can harvest both in a single pass without damaging flavor, texture, or shelf life.
Here’s how to make the most of both beet greens and roots:
1. For Full Harvest: Roots + Greens Together
When you’re ready to pull the full plant:
Use garden shears or a sharp knife to cut the greens off 1–2 inches above the crown.
For clean, effortless trimming of beet greens before storage or while harvesting roots and tops together, a pair of quality bypass shears like these Fiskars pruning shears makes quick work of leafy stems without bruising the plant.
This leaves the root intact and prevents bleeding, which helps preserve color and taste.
Trimmed this way, the roots will store better, and the tops will stay fresher a bit longer.
If you plan to store roots in the refrigerator or root cellar, never leave greens attached—they pull moisture from the root.
2. For Ongoing Greens: Staggered Harvests
If your goal is fresh greens over several weeks:
Snip only the outer leaves from each plant, leaving the center growth untouched.
This lets the plant continue funneling energy into the root while you enjoy the greens early.
Ideal for kitchen gardens where you want a steady stream of leaves for sautéing or salad.
3. Use the Greens Fast or Preserve Them
Beet greens don’t last long. After harvest:
Use fresh within 2–3 days for best flavor and vitamin retention.
If you can’t use them quickly, blanch and freeze for future soups, stir-fries, or quiche.
Compost any yellowed or wilted leaves immediately to keep pests and disease out of the garden.
Grandma always said: “Don’t waste the top half—it’s where the color is.” Her favorite recipe? Beet greens sautéed in olive oil with garlic and a splash of vinegar.
Pro Tip: Beet greens are part of the same plant family as chard and spinach. They’re nutrient-rich, fast-cooking, and great in everything from eggs to soup.
Utah State University Extension highlights both the nutritional value of beet roots and greens and offers evidence‑based tips on harvest timing and soil practices, reinforcing why properly sized and timed beet harvesting matters for flavor and garden yields

Loosening Soil Before Harvesting Beets
Even if you’ve timed your beet harvest perfectly, it only takes one wrong pull to damage the crop. Beets are root vegetables, and roots don’t like being yanked.
To harvest beets without damaging them, you need to loosen the soil first. Especially in dry beds, compacted rows, or when roots have grown deep and wide.
Here’s how to pull beets clean without breaking the bulb or bruising the skin:
1. Water the Day Before
Beets come up easier when the soil has moisture, but not when it’s soaked. If the ground is bone dry or hardened, give it a light watering the night before harvest. You want the soil crumbly, not muddy.
2. Use a Garden Fork, Not a Shovel
Insert the garden fork 4–6 inches away from the beet base.
Wiggle gently to loosen the soil around the root.
Avoid jabbing too close, as punctured roots rot quickly and won’t store well.
3. Don’t Yank by the Tops
Even healthy beet leaves can tear under pressure. If the root is resisting, stop pulling and loosen more soil. Tugging too hard often results in:
Snapped roots
Torn tops
Bruised skin (shorter shelf life)
4. Lift with Your Hands
Once the soil is loose, slide your hands under the bulb and lift the beet straight up. It should release cleanly if prepped right.
5. Snapped One? Use It Fast
If a beet snaps or bruises during harvest:
Don’t discard it—just move it to the use first pile.
Cook, ferment, or freeze within 48 hours.
Avoid long-term storage; broken skin invites rot and moisture loss.
Loosening the soil is one of the most overlooked steps in harvesting, especially for new growers. But in real garden conditions—dry beds, tight rows, fall roots—it makes all the difference between a clean pull and a wasted crop.
For loosening heavy clay or compacted rows before lifting beets, I rely on a sturdy digging fork like the HORIJUNKE Garden Digging Fork — it slides into the soil and lifts roots clean without bruising them.

Best Time of Day to Harvest Beets & How to Prep Them for Storage
Even the best-grown beets can lose their edge if you pick them at the wrong time, or store them without care.
If you want to preserve nutrients, avoid wilted tops, and extend shelf life in the crisper drawer or root cellar, this step matters just as much as planting and thinning.
Here’s how to time your harvest and prep beets for long storage:
1. Harvest in the Early Morning
Cooler temperatures = firmer roots and crisp greens.
The plant is fully hydrated after overnight soil moisture builds.
Avoid mid-afternoon heat, which wilts leaves, softens bulbs, and lowers nutrient retention.
After harvesting and trimming your beets, a set of stackable storage bins makes it easy to organize roots by size and type before refrigerating or moving them to a root cellar — and they pull double duty for other garden tasks once beet season wraps up.
2. Rinse Lightly — Don’t Scrub
After pulling, gently shake off soil. You can rinse with water, but don’t scrub or peel the beet skin if you plan to store them.
Why?
The skin acts as a natural barrier against moisture loss.
Damaging it shortens the beet’s shelf life.
Let washed beets dry on a towel or wire rack in the shade before storing.
3. Trim the Greens Immediately
Cut tops 1–2 inches above the crown.
Don’t leave the full leaf attached—it’ll draw moisture from the root, causing shriveling.
Use a clean knife or garden shears to avoid bruising.
For research‑backed guidance on storing beets after harvest, Penn State Extension’s recommendations on preserving beets cover proper trimming, refrigeration, and long‑term storage best practices that align with home garden harvest routines.
4. Choose the Right Storage Spot
Refrigerator: Store in a plastic bag or bin in the crisper drawer. Roots last 3–4 weeks.
Root Cellar or Cool Basement: Layer beets in damp sand or sawdust. Ideal temp is 32–40°F with high humidity. This method can preserve them for months.
If you're looking for step-by-step storage methods — whether you’ve got a full root cellar or just a corner in the fridge — check out our complete guide: How to Store Beets Long-Term (With or Without a Root Cellar)
5. Know Which Varieties Store Best
Some beet types handle long-term storage better than others:
Cylindra – Long shape, stores well in bins
Detroit Dark Red – Round, hardy, excellent for winter use
Chioggia – Beautiful, but softens faster; eat these first
Storage-ready beets start with proper harvest timing and gentle handling. A bruised, sunbaked beet won’t last long in any environment. But a firm, cool-harvested root can take you well into the winter cooking season.
. Bed prep advice includes removing root debris, loosening soil, and avoiding excess nitrogen. Shows succession planting every 2–4 weeks to maintain harvest. Visuals include garden fork, nitrogen warning sign, calendar markers, and progression of beet growth. Textured background with warm autumn tones.")
What Comes Next: Second Plantings and Fall Crops
Once you’ve pulled your beets, the garden bed doesn’t have to sit empty. Beets thrive in cool conditions, and they’re one of the easiest root vegetables to plant again in the same season.
If you're gardening in Zones 4–6, there's still time to sow a second crop, and in many climates, fall beets taste even better than summer ones.
Beets Love Cool Soil and Shorter Days
Beets germinate best in soil temperatures between 50–85°F. Fall brings:
Fewer pests and insects
More consistent soil moisture
Cooler nights that boost sugar content
Fall-grown roots tend to be sweeter and denser, with less risk of bitterness.
When to Replant by Zone
Zone 5–6: Re-seed around early August
Zone 4: Late July is ideal
Zone 7 and warmer: You may get three full plantings per year
Use a fast-maturing variety like Early Wonder if frost threatens early. From seed to table, beets can mature in as little as 50–60 days.
Prep the Bed Like You Mean It
After your first harvest:
Remove all root debris to reduce disease pressure
Loosen the soil and add a fresh layer of compost
Avoid over-fertilizing—too much nitrogen = leafy growth and small roots
If you’re working a small kitchen garden, this second crop keeps your soil active, your meals fresh, and your pantry well-stocked.
Succession planting is one of the most overlooked skills in home gardening. But learning when to replant and how to reset the soil makes you more productive, season after season.
Harvesting Beets Is a Skill You Build
No garden tool or chart will ever replace the feel you develop over time.
Each growing season teaches you something: how soil moisture affects density, how different varieties behave, how sunlight and spacing change everything.
And harvesting? That’s where it all comes together.
After a few rounds, you’ll know without measuring when a beet’s ready. You’ll feel it in the way the root resists, the way the soil gives, the way the crown swells up from the earth. You’ll trust your eye, your timing, and your patience.
There’s something sacred about pulling food from soil you tended with your own hands. It’s a quiet reminder that provision often comes through patience.
Whether this is your first season growing beets or your tenth, I hope this guide gives you a steadier hand, fewer broken roots, and better meals at the table.
Frequently Asked Questions About Harvesting Beets
What happens if I harvest beets too early?
If you harvest too soon, the roots will be small, underdeveloped, and low in flavor. Beets pulled too early tend to shrivel quickly, store poorly, and have a bitter or grassy taste instead of the deep, earthy sweetness they’re known for.
Can I harvest beet greens without pulling the root?
Yes. You can trim just the outer leaves and leave the center intact. This lets the beetroot continue developing underground. Avoid over-harvesting the greens or the plant won’t have enough energy to size up the root.
How can I tell when beets are ready to be picked?
Check for visible shoulders about 1.75–2.5 inches wide, feel for firmness in the root, and ensure leaf size is proportional—not too tall and spindly. A beet that resists a gentle pull likely still needs time to grow.
What tools should I use to harvest beets without damaging them?
Use your hands and a garden fork. Loosen the soil 4–6 inches away from the beet to avoid snapping the root. Avoid pulling directly by the greens—especially if your soil is compacted or dry.
Should I wash beets before storing them?
You can rinse off excess soil, but don’t scrub or peel them. The skin protects the root during storage. Let them air dry and then store them in the crisper drawer or a root cellar layered in sand or sawdust.
What’s the best way to store beets for winter?
Trim the greens, keep the roots unwashed, and store them in a cool, humid place. Beets do best at 32–40°F with high humidity. A root cellar, cool basement, or refrigerator drawer all work well if properly managed.
Do different beet varieties mature at different sizes?
Yes.
Detroit Dark Red: best at 2–3 inches
Cylindra: grows long and narrow, harvest at 5–6 inches
Chioggia: delicate flavor, best at 2 inches or less
Harvesting based on variety ensures the best texture, flavor, and shelf life.


Facebook
Instagram
X
Youtube