
When and How to Harvest Walnuts (English and Black) the Right Way
When and How to Harvest Walnuts (English and Black) the Right Way
The Year We Missed the Harvest
The first year on this property, I thought walnuts would politely wait. The trees were loaded, walnut husks still green, and I figured I had time. A week later, I walked out to mushy black walnut hulls on the ground—and squirrels had already hauled off the best ones. Lesson learned: walnuts wait for no one.
If you want a clean, flavorful crop, you have to know when to harvest black walnuts and be ready to move the moment the husks start splitting. Miss that window and you invite problems—ground-harvested nuts sitting too long, rising moisture content, early mold pressure, and a slide in kernel quality.
This guide walks through how to husk and cure walnuts the right way—step by step—so you avoid green stains, prevent off-flavors, and set yourself up for storing walnuts long term without bitterness or loss. Timing is the work. Everything else follows.

How to Know When Walnuts Are Mature
Knowing when to harvest black walnuts comes down to reading the tree—not the calendar. The signs are physical, repeatable, and hard to miss once you know what to look for.
Watch the Walnut Husks
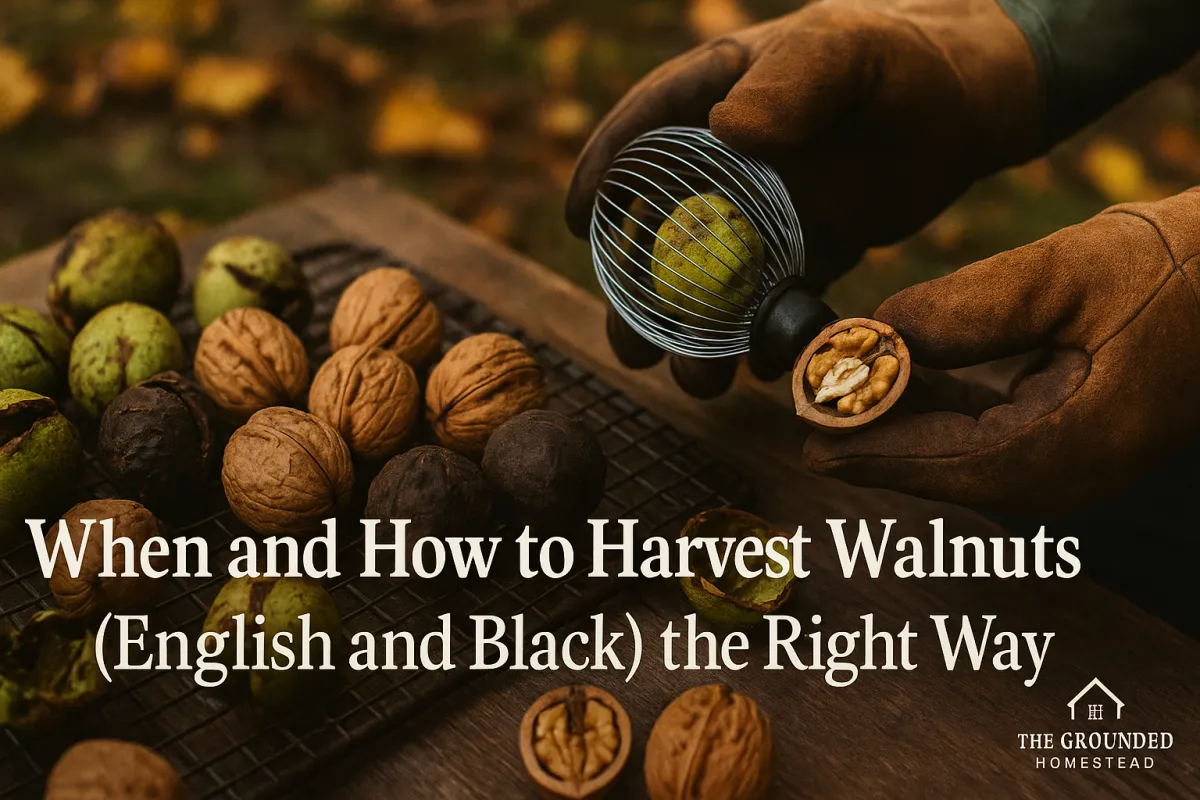
Mature walnuts announce themselves through the husk. As the nut finishes developing, the walnut husks begin to soften and split.
English walnuts: The green husk cracks open and often releases the nut with little effort.
Black walnuts: The black walnut hulls stay thicker and tougher, but you’ll see yellowing, soft spots, and early splits.
Once husks start breaking down, delay invites trouble—especially fuzzy grayish-black mold and staining from decomposing hulls.
Timing by Variety (and Why It Matters)
While weather plays a role, variety sets the pace.
English (Persian) walnuts:
Typically mature first—mid-September in most Zones 5–7.Black walnuts:
Usually follow 1–2 weeks later. In my Zone 5b climate, late September into early October is the window.
Harvesting too early leads to poor shell hardness and underdeveloped kernels. Too late, and you risk mold, insects, and declining kernel quality.
The Shake Test
This is the simplest field check I know.
Grab a branch and give it a firm shake.
If multiple nuts drop cleanly, maturity has arrived.
If they cling tight, give it a few more days.
When trees start dropping nuts on their own, that’s your cue to begin daily nut collection. At that point, timing becomes more important than technique.
UC Davis breaks down harvest timing and post-harvest handling—from hull removal to drying targets—so you can sanity-check your process against industry standards.

Best Practices for Gathering Walnuts
Once walnuts start dropping, harvest shifts from observation to discipline. This is where a lot of good crops are lost—not in the tree, but on the ground.
Walnut harvest is a daily job, especially once you’re in the window for when to harvest black walnuts. Miss a day or two and you invite mold, insects, and animals to beat you to it.
Why Daily Collection Matters
Walnuts that sit on the ground too long are exposed to:
Rising moisture content from dew and rain
Early insect damage after harvest
Breakdown of walnut husks, which leads to staining and rot
Increased risk of fuzzy grayish-black mold
The longer a nut sits, the more its kernel quality drops.
How to Gather Walnuts Efficiently
You don’t need fancy equipment, but the right setup saves time and your back.
Small harvests:
A bucket and heavy gloves work just fine.Larger trees or volumes:
A rolling nut gatherer speeds things up and keeps you moving.When tackling walnut harvest, a tool like the Garden Weasel Large Nut Gatherer makes daily nut collection faster and easier by rolling up nuts and hulls without bending—perfect for beginner homesteaders.

Ground conditions:
Focus on clean pickup of ground-harvested nuts. Skip anything already soft, cracked, or moldy.
Safety and Stain Awareness
Walnut harvest is messy by nature.
Husks can be slick—wear boots with good traction.
Avoid gathering over concrete or decks unless you want permanent green walnut stain.
Keep harvest buckets dedicated to walnuts only.
This part of the process sets the stage for everything that follows in how to husk and cure walnuts. Clean, timely gathering makes husking easier, curing cleaner, and storage more reliable.

Husking Without the Green Mess
Husking is where most people get frustrated—and where shortcuts show up fast. Walnut husks are loaded with tannins, and once that juice hits skin, concrete, or clothing, the green walnut stain is there to stay.
Done right, husking is straightforward and controlled. Done wrong, it’s a mess that lingers for weeks.
Why Husking Quickly Matters
Once walnuts hit the ground, the walnut husks start breaking down. Leaving them on too long leads to:
Staining and sticky residue
Increased moisture content trapped against the shell
Early mold growth inside the black walnut hulls
Bitter flavors later from poor post-harvest handling
Husking promptly protects both shell integrity and kernel quality.
Gear Up First
Before you start, protect yourself and your work area.
Gloves: Thick rubber or leather—no exceptions
When you’re dealing with wet husks and stubborn black walnut hulls, a grippy, latex-coated gardening glove like the DOFOWORK set protects your hands from stains while still giving you the dexterity to work efficiently.
Clothes: Old, dedicated workwear
Surface: Gravel, dirt, cardboard, or plywood (never bare concrete)
Reliable Husking Methods
Choose what fits your scale and setup.
Stomp Method
Lay walnuts on gravel or dirt and apply steady pressure with your boot until the husk splits.Animal Method
Cattle will often eat the husks from black walnuts and spit out the walnut, resulting in clean black walnuts and edible enrichment for your cattle.Dedicated Husking Tools
Hand tools or a drill-mounted paint mixer can strip black walnut hulls quickly without crushing the shell.
Remove husks completely. Any leftover material invites mold and off-flavors during the walnut curing process.
Pro Tip: Never do this on concrete unless you don’t care about permanent black stains. Cardboard or plywood makes a great work surface.
Once husked, don’t let the nuts sit. Washing comes next, and timing matters.

Washing, Curing, and Drying Walnuts Properly
This is the step that separates good walnuts from bitter, moldy ones. You can harvest at the perfect time and husk cleanly, but if the walnut curing process is sloppy, quality drops fast.
If someone asks me what matters most in how to husk and cure walnuts, this is it: clean shells, steady airflow, and patience.
Wash Immediately After Husking
Once the husks are off, wash the nuts the same day.
Hose them down to remove pulp, dirt, and residue
Use a stiff brush if needed
Discard any nuts with cracks, soft spots, or visible mold
This first wash is critical mold prevention. Leftover husk material traps moisture and invites problems later.
Set Up for Proper Curing
Curing is controlled drying—not baking.
Spread walnuts in a single layer
Use screens, wire racks, or slatted trays
Choose a shaded, dry location with good air circulation during curing
Avoid direct sun. Excess heat can damage oils, weaken shell hardness, and shorten storage life.
For effective walnut curing with good airflow and space to spread nuts in a single layer, a sturdy hanging drying rack like this gives you plenty of surface area and helps avoid moisture traps that invite mold.
Drying Walnuts in the Shell
Drying times vary by variety and conditions.
English walnuts: 7–10 days
Black walnuts: 10–14 days
During this time, manage temperature and humidity control as best you can. Ideal conditions are cool, dry, and breezy.
You’ll know curing is complete when:
Nuts feel lighter in the hand
The kernel rattles inside the shell
No surface moisture remains
Rushing this stage leads directly to rancidity in walnuts and poor long-term results.
Pro Tip: If you smell anything sour or musty during curing, stop and reassess airflow. That’s moisture talking.
If you want a clear, research-backed walkthrough for black walnuts, Iowa State Extension lays out harvesting, washing, drying, and storage in plain steps.”
Once fully cured, the nuts are finally ready for storage—and storage choices matter.
Storing Walnuts Long-Term (In-Shell vs. Shelled)
Proper storage is what protects all the work you’ve already done. Even perfectly cured walnuts can go downhill fast if walnut storage conditions aren’t right. Heat, moisture, and air are the enemies here—and all three affect flavor.
If your goal is storing walnuts long term without bitterness or spoilage, your storage method matters just as much as your harvest timing.
In-Shell Storage (Best for Longevity)
Storing walnuts in the shell offers the most protection.
Use mesh bags, baskets, or crates
Keep them in a cool, dry, well-ventilated space
Ideal temperature range: 32–45°F
Avoid sealed containers that trap moisture
Properly cured, in-shell walnuts can last 6 months or longer with minimal loss of kernel quality.
Shelled Walnut Storage
Once shelled, walnuts become more vulnerable to air and heat.
Refrigerator:
Airtight containers; good for up to 6 monthsFreezer:
Best option for long-term storage—up to a year or more
Shelled walnuts stored warm will develop rancidity in walnuts quickly. You’ll taste it as sharp bitterness.
Why the Pantry Is a Bad Idea
Room-temperature storage invites:
Oxidation of oils
Rapid flavor loss
Increased bitterness
If you’re investing time in how to husk and cure walnuts, don’t undo it by cutting corners here.
Pro Tip: If walnuts ever smell like paint or old oil, they’re past their prime. No recipe fixes that.
Storage is the quiet final step—but it’s the one that decides whether your harvest feeds you all winter or ends up wasted.
UC ANR has a solid home-gardener guide on walnut storage conditions—especially how temperature and humidity affect quality and shelf life.
Grandma’s Tip
“If the squirrels are getting them before you, it’s time to get busy!”
Grandma never needed a calendar to know when to harvest black walnuts. She watched the ground, the husks, and the wildlife. Once squirrels start hauling nuts off in earnest, the window is open—and closing fast.
That simple rule captures the heart of good post-harvest handling: pay attention and act. Walnuts don’t wait for perfect weather or a free afternoon. If you stay ahead of the drop with daily nut collection, you protect kernel quality, reduce mold pressure, and make every later step—husking, curing, and storage—easier.
Sometimes the best advice really is that plain.

Common Mistakes to Avoid When Harvesting and Curing Walnuts
Most walnut problems don’t show up all at once—they compound quietly. A small delay here or a shortcut there can undo an otherwise solid harvest. These are the mistakes I see most often when people learn how to husk and cure walnuts the hard way.
Waiting Too Long to Harvest
Letting nuts sit too long in the tree or on the ground leads to:
Breakdown of walnut husks
Darkened shells and stained kernels
Increased bitterness from poor timing
Once husks soften and split, harvest begins. Miss that window and quality slides fast.
Letting Ground-Harvested Nuts Sit
Skipping daily nut collection invites trouble:
Rising moisture content from dew and rain
Early insect damage after harvest
Rapid spread of fuzzy grayish-black mold
If a nut feels soft or smells off, it’s already past saving.
Drying in Direct Sun
Walnuts aren’t firewood. Direct sun:
Overheats shells
Weakens shell hardness
Shortens storage life by damaging oils
Shade and airflow beat heat every time.
Poor Airflow During Curing
Stacked nuts or sealed containers trap moisture. Without proper air circulation during curing, mold wins. Always cure in a single layer with space between nuts.
Skipping Gloves During Husking
This one sounds minor—until it isn’t.
Green walnut stain can last weeks on skin
Tannins soak into concrete and wood permanently
Protect yourself and your workspace from the start.
Avoiding these mistakes isn’t about perfection—it’s about respect for the process. Walnuts reward patience and attention every step of the way.
Faith, Timing, and Your Next Step
Walnut harvest has a way of reminding me that timing isn’t optional—it’s built into the work. “To everything there is a season, a time for every purpose under heaven” (Ecclesiastes 3:1). Walnuts don’t bend to convenience. They’re ready when they’re ready, and the reward comes to the person who shows up in season and does the work faithfully.
That’s true in the grove and just about everywhere else on a homestead. When you pay attention, act on time, and finish the job well—how to husk and cure walnuts, dry them properly, and store them with care—you’re practicing stewardship, not just harvesting food.
Your Next Step
Don’t wait for the “perfect” day. Go check your trees today.
Look for splitting walnut husks
Gather what’s already fallen
Husk a small batch right away
Set them up to cure with good airflow
Once you’ve walked through the process once, it stops feeling complicated and starts feeling natural.
Frequently Asked Questions About Harvesting and Curing Walnuts
How do I know when black walnuts are ready to harvest?
Black walnuts are ready when the husks begin to soften and split, turn yellowish, or when nuts start dropping naturally from the tree. A simple shake of a low branch is a good test—if several nuts fall, it’s time to start harvesting.
Can I pick walnuts off the tree instead of waiting for them to fall?
You can, but it’s usually better to let them drop naturally. Walnuts that fall on their own are fully mature. Knocking them down too early often results in underdeveloped kernels and poor flavor.
How long can walnuts sit on the ground before they go bad?
Not long. Walnuts should be collected daily once they begin falling. Sitting on the ground exposes them to moisture, insects, mold, and husk breakdown, all of which quickly reduce kernel quality.
Do I have to husk walnuts right away after harvesting?
Yes. Leaving husks on too long leads to staining, sticky residue, increased moisture, early mold growth, and bitter flavors. Prompt husking protects both the shell and the kernel inside.
What’s the best way to cure walnuts at home?
After washing, spread walnuts in a single layer on screens or wire racks in a shaded, dry area with good airflow. Avoid direct sunlight. Cure English walnuts for about 7–10 days and black walnuts for 10–14 days.
How can I tell when walnuts are fully cured and dry?
Properly cured walnuts feel lighter in the hand, have no surface moisture, and the kernel will rattle inside the shell when shaken. If they feel heavy or damp, they need more time.
Why do cured walnuts sometimes taste bitter?
Bitterness usually comes from delayed harvest, leaving husks on too long, poor airflow during curing, or storing walnuts too warm. Each step matters—harvest timing, quick husking, proper curing, and cool storage all protect flavor.


Facebook
Instagram
X
Youtube