
Boiling Sap into Syrup: From Steam to Finish
Boiling Sap into Syrup: From Steam to Finish
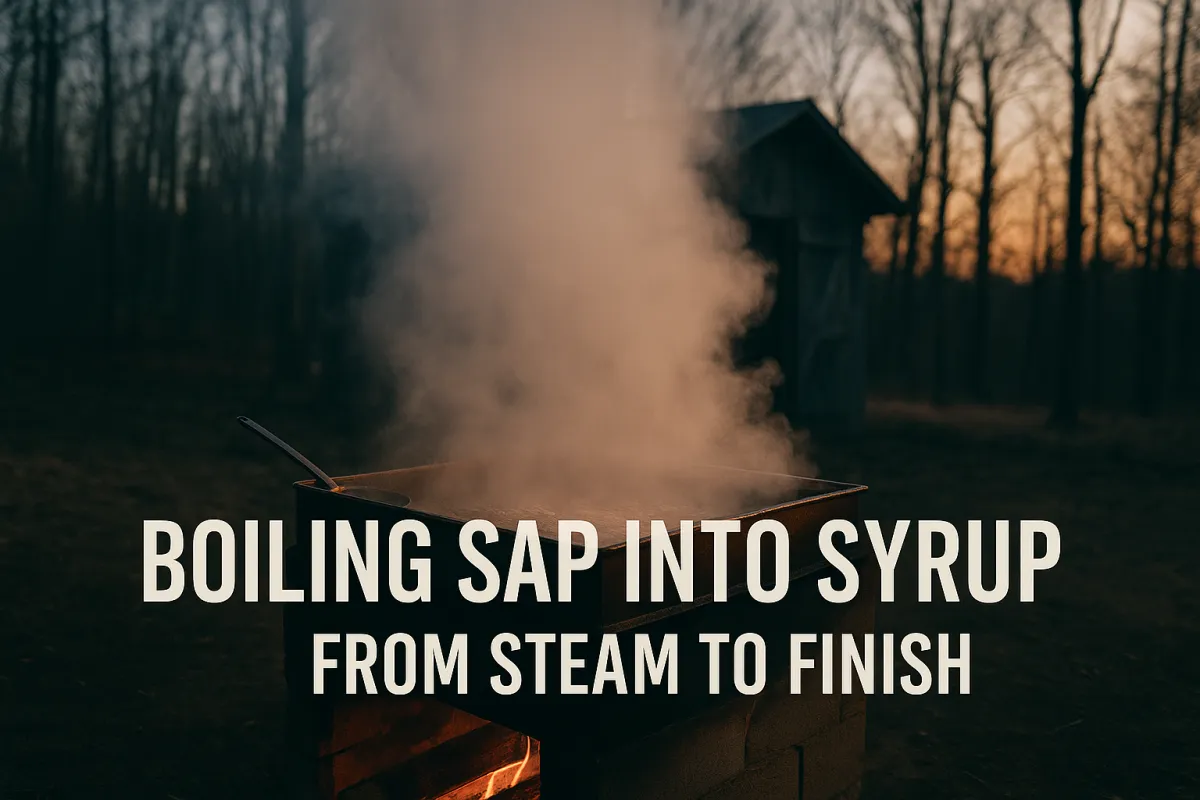
When the Steam Finally Means Something
Every boil day starts the same way. Fire lit. Flat-pan heating. Sap rolling hard. Steam pouring out of the sugarhouse like you’re getting somewhere fast.
And you are—every minute sap spends boiling, water is leaving and sugar is concentrating.
But early on, the work is forgiving. You’re driving off water. Temperature is loose. Density is low. You can push heat, feed the firebox, and let the steam do its thing without much risk.
That changes near the end.
As the sap concentrates, maple syrup boiling temperature and density start to tighten together. The margin for error shrinks. The boil slows, the bubbles stack, and suddenly how to boil maple sap into syrup becomes less about force and more about control. This is where finishing decisions determine whether you end up with clean, shelf-stable syrup—or problems like scorching, off-flavors, mold, or crystallization.
This guide is about that final stretch. Not when syrup magically starts being syrup—but when finishing, density, and attention matter more than steam, draft, or how hot the fire is burning. From here on out, the work rewards patience, not speed.

Concentration Methods Before Finishing: Direct Boiling vs. Reverse Osmosis
Before sap ever becomes syrup, water has to leave. Every producer does that one of two ways—or a combination of both: direct boiling or reverse osmosis. The method you use changes how fast concentration happens, how early finishing begins, and how careful you need to be near the end.
Direct Boiling: Removing Water with Heat
Direct boiling is the original method, and it’s still the most common on small and mid-scale operations.
When you boil sap directly:
95–98% of the water is removed by heat
Sap stays low in density for most of the process
High heat and strong draft are assets, not liabilities
The process is forgiving early on
This is why producers can push fire hard in the beginning. Thin sap tolerates aggressive boiling. You can feed the firebox, keep a rolling boil, and focus on volume reduction without worrying much about scorching or boil-over.
As long as the density is low, the sap behaves like water. Problems usually don’t appear until later, when sugar concentration rises and finishing approaches.
Reverse Osmosis: Removing Water Before the Fire
Reverse osmosis does the same job as boiling—water removal—but without heat.
RO works by forcing sap through membranes under pressure, separating water from sugar. The result:
Sap enters the evaporator at higher Brix
Less total boiling time is required
Fuel use drops significantly
Concentration happens earlier in the process
RO doesn’t change the finish line. Syrup still finishes at the same maple syrup boiling temperature and density. What it changes is when you need to start paying attention.
How RO Changes the Boiling Dynamic
RO concentrate behaves differently than raw sap:
Density climbs sooner
Finishing temperatures arrive faster
Scorching risk appears earlier
Boilovers happen with less warning
This is where people get burned—literally. RO sap looks like sap, but it behaves more like early-stage syrup. Treat it like thin sap and you’ll overshoot density or burn a pan before you realize what happened.
The Practical Truth
Whether water leaves through heat or pressure, the rules at the end don’t change.
Syrup still finishes at ~66 brix
Thermometer readings still matter
Hydrometer checks still decide doneness
Finishing still demands control, not force
Direct boiling gives you time. Reverse osmosis gives you efficiency. Both demand attention once concentration tightens.
Evaporator Options — From DIY to Small-Scale Rigs
You don’t need a fancy rig to make good syrup. But you do need to understand what actually moves the process forward—because efficiency has less to do with horsepower and more to do with surface area, airflow, and control.
Whether you’re concentrating by direct boiling or finishing RO sap, your evaporator determines how manageable the work feels once density starts climbing.
DIY Setups: Simple, Functional, and Limited
DIY rigs are where many producers start, and they can absolutely work—within their limits.
Turkey Fryer Setups
Cheap and widely available
Portable and easy to store
Limited surface area slows evaporation
Higher risk of boilover as density increases
Turkey fryers remove water, but they struggle once sap thickens. Finishing requires close attention to prevent scorching.
Flat-Pan Block Rigs
Shallow pans increase evaporation
Better control over boil rate
Fuel-hungry if draft is poor
Wind protection is critical
Flat pans shine because syrup doesn’t care how hot the fire is—it cares how much surface area is exposed. Wide and shallow beats deep and narrow every time.
Entry-Level Evaporators: Where Control Improves
Purpose-built evaporators (2×3 or 2×4 rigs) change the experience entirely.
Increased evaporation without excessive heat
More even temperature across the pan
Better draft through the firebox
Reduced risk of hot spots and scorching
These rigs don’t magically make syrup faster—but they make it more predictable, especially as maple syrup boiling temperature and density tighten near the finish.
Matching Equipment to Tap Count
Oversizing costs money. Undersizing costs time, fuel, and patience.
10–20 taps: DIY setups are workable
20–50 taps: Entry evaporators save sanity
More taps without more surface area = burnout
Undersized rigs don’t just slow the boil—they force rushed finishing decisions, which is where mistakes happen.
What Actually Matters Most
No matter the setup:
Surface area beats flame size
Even heat prevents scorching
Good draft improves consistency
Control matters more than speed
If your rig lets you manage heat as density climbs, it’s doing its job.

Understanding Density, Temperature, and Doneness
This is where syrup is won or lost. Not because boiling stops—but because control replaces force.
As sap concentrates, maple syrup boiling temperature and density begin to move together. Early in the process, temperature is a loose guide. Near the finish, it becomes a warning sign. Density—not steam, not color, not time—is what tells you when syrup is done.
Temperature Is a Guide, Not the Goal
You’ll hear the rule everywhere: syrup finishes about 7°F above the boiling point of water.
That rule is useful—but incomplete.
Boiling point changes with weather and barometric pressure
Elevation affects finishing temperature
Thermometers drift and need calibration
If you want a clear, plain-English explanation of why finishing syrup runs about 7°F above water’s boil—and why barometric pressure matters—Ohio State Extension lays it out well.
Temperature tells you when to start paying attention. It does not finish syrup for you.
A rising thermometer means sugar concentration is increasing. It does not guarantee proper density.
Density Is the Finish Line
Finished syrup is defined by density, not guesswork.
Target: ~66 brix
Too thin → poor shelf-life, mold risk
Too thick → crystallization
This is where a hydrometer matters. Not as a suggestion—as the deciding tool.
When finishing syrup, density, not looks, decides when you’re done, and a maple syrup hydrometer with a proper test cup takes the guesswork out of hitting the right finish every time.

How to Use a Hydrometer Correctly
Test syrup hot, at the correct temperature
Or cool a sample and use a cold test scale
Adjust readings based on temperature
Skipping this step is how good syrup gets ruined at the very end.
How Density Changes the Boil
As density rises:
Bubbles slow and stack
Foam tightens and rises faster
Boilover risk increases
Scorching happens faster than expected
The syrup hasn’t changed—it’s just no longer forgiving. This is the moment when finishing demands attention.
The Takeaway
Thermometers tell you where you are.
Hydrometers tell you when you’re done.
If you understand that distinction, you understand how to boil maple sap into syrup without guessing—and without fixing mistakes later.

Avoiding Scorch and Off-Flavors
Most syrup problems don’t come from bad sap. They come from rushed finishing and missed cues once density starts climbing. The same boil that felt safe an hour ago can turn destructive fast if you don’t adjust.
This is where experience shows—or gets taught the hard way.
How Syrup Gets Scorched
Scorching almost always comes down to one thing: too much heat for the density in the pan.
Common causes:
Thin or uneven pans over high heat
Letting syrup sit over flame without movement
Walking away once finishing temperatures are reached
Underestimating how quickly concentration accelerates
As maple syrup boiling temperature and density tighten, heat transfer becomes less forgiving. What boiled cleanly five minutes ago can burn in thirty seconds.
Once syrup scorches, it cannot be fixed. Dilution won’t help. Filtering won’t help. The flavor is set.
How Off-Flavors Develop
Off-flavors are usually subtle at first—and permanent once bottled.
Common sources:
Late-season or “buddy” sap
Sap held too long before boiling
Smoke or ash contamination
Dirty pans or residue buildup
Woodsmoke is especially sneaky. A strong draft is helpful, but uncontrolled smoke exposure during finishing can carry flavor straight into the syrup.
Pro Tip — Avoid This Mistake
Once sap turns to syrup, do not walk away.
This is not the moment to split wood, refill coffee, or check on something “real quick.” Finishing syrup demands presence. Attention now saves entire batches later.
The Takeaway
Scorching and off-flavors aren’t beginner problems—they’re finishing problems. Respect the final stretch, and syrup rewards you. Rush it, and it punishes you without warning.
Filtering Basics — What Niter Is and Why It Shows Up
Filtering is not about fixing bad syrup. It’s about finishing good syrup properly.
If you’ve never seen niter before, it can feel like something went wrong. It didn’t. In fact, niter usually shows up because you did things right.

What Niter (Sugar Sand) Really Is
Niter—often called sugar sand—is mineral material that naturally falls out of solution as sap concentrates.
As density increases:
Minerals precipitate
Sugar concentration rises
Syrup clarifies itself by dropping solids
More niter often means:
Higher sugar sap
Cleaner finishing
Proper maple syrup boiling temperature and density
Niter is not dirt. It’s not contamination. And it does not mean the syrup is unsafe.
If niter is new to you (or your filters keep plugging), this OSU Maple write-up explains what’s happening and why filtering hot matters
When Niter Appears
Niter forms:
Near the end of boiling
During finishing
As syrup cools slightly after reaching density
That timing is normal—and expected.
Trying to avoid niter usually means you stopped boiling too early or finished too thin.
Basic Filtering Options
You don’t need complex systems to filter syrup effectively.
Prefilters remove coarse particles
Felt filters polish syrup
Gravity filtering works well for small batches
Filtering should always be done hot. Cold syrup thickens, traps niter, and refuses to move.
A dedicated maple syrup filter with disposable prefilters makes it easy to remove niter while the syrup is still hot. No improvising, no clogged strainers.
What Filtering Does—and Doesn’t—Do
Filtering:
Improves clarity
Removes mineral solids
Prepares syrup for bottling
Filtering does not:
Fix scorching
Remove off-flavors
Correct improper density
That work happens earlier.
The Takeaway
Niter is a sign of proper concentration, not failure. Filter hot, filter calmly, and move on. Good syrup doesn’t need to be rescued—it just needs to be finished.

Bottling Syrup the Right Way
Bottling is where finished syrup becomes finished product. The boil is done, density is set, and now the goal is simple: lock in quality and protect shelf-life.
Most bottling problems don’t show up immediately. They show up weeks later—cloudiness, mold, or leaking lids. Almost all of them trace back to temperature, cleanliness, or timing.
Bottling Temperature Matters
Syrup should be bottled using a hot-pack method.
Target bottling range: 180–190°F
Hot enough to sanitize containers
Hot enough to create a vacuum seal
Not so hot that flavor is damaged
Below that range, syrup may not sterilize the container. Above it, you risk darkening flavor or increasing crystallization.
A reliable thermometer matters here—not for boiling, but for finishing the job correctly.
For a straightforward, food-safety-focused reference on hot-packing temps and storing syrup without mold issues, Michigan State Extension is a solid source.
Containers That Actually Work
The container doesn’t make syrup better—but the wrong one can ruin it.
Glass offers the longest shelf-life and best flavor protection
Food-grade plastic works for short-term storage
Always use clean, undamaged containers
Always use new lids
For bottling, clean glass maple syrup bottles with new lids hold up well to hot-pack temperatures and help finished syrup store cleanly without flavor loss.
Reusing jars is fine. Reusing lids is not.
Shelf Stability Explained Simply
Properly bottled syrup is shelf stable because:
Density is correct
Syrup is hot-packed
Containers are sealed
Mold is almost always a contamination issue—not a syrup issue. If mold appears:
Remove mold
Reboil syrup
Refilter if needed
Rebottle hot
Finished syrup can be corrected if caught early. Bottling mistakes don’t have to be permanent.
The Takeaway
Bottling isn’t an afterthought—it’s the final control point. Treat it with the same care as finishing, and your syrup will store cleanly, pour well, and keep its quality intact.
Yield Realities — Why “Less Syrup” Isn’t Failure
Yield is one of the fastest ways new producers talk themselves into thinking they did something wrong. They didn’t. They just misunderstood what controls output.
Syrup yield is not a measure of effort. It’s a reflection of sugar content, season conditions, and restraint during finishing.
Sap Sugar Content Changes Everything
The biggest factor in yield is sap sugar concentration before boiling ever begins.
As a rough guide:
1.5% sap → ~86 gallons of sap per gallon of syrup
3% sap → ~43 gallons of sap per gallon of syrup
That difference alone can cut yield in half—without a single mistake being made.
Sugar content varies with:
Tree genetics
Weather patterns
Freeze–thaw cycles
Timing within the season
Two producers can boil the same number of gallons and finish with very different results.
Why Finishing Correctly Reduces Yield (and Why That’s Good)
Proper finishing often produces less syrup because:
Thin syrup is rejected
Over-dilution is avoided
Density is actually correct
When syrup is finished to proper brix, there’s nowhere to hide extra volume. The hydrometer doesn’t care how long you boiled or how hard you worked.
That’s not failure—that’s accuracy.
The Trap of Comparing Yields
Photos lie. Charts oversimplify. Online numbers rarely reflect sap quality, RO use, or finishing standards.
Chasing volume leads to:
Thin syrup
Poor shelf-life
Mold issues
Flavor problems
Producers who finish correctly almost always make less syrup their first year—and better syrup every year after.
The Takeaway
Yield tells you very little by itself. Flavor, density, and stability tell you everything.
If your syrup finishes clean, bottles well, and keeps without issue, the yield was exactly what it was supposed to be.
Uncle Gary’s Wisdom
Uncle Gary boiled syrup the same way he did most things—quietly, deliberately, and without rushing.
His rule was simple:
“If you’re in a hurry, you’re about to mess it up.”
He watched the pan more than the fire. He stopped boiling before he was tired. And he never chased the last drop at the expense of the batch.
That lesson holds every season. Syrup doesn’t reward urgency. It rewards attention.
A Quiet Order to the Process
Finishing syrup has a way of teaching you something whether you’re looking for it or not.
You can’t rush density. You can’t force brix to land where you want it. You respond to what’s happening in the pan, not what you wish would happen. Every good finish comes from attention, restraint, and timing—not pressure.
There’s an order built into the work:
Water leaves
Sugar concentrates
Maple syrup boiling temperature and density rise together
Finishing demands patience instead of speed
When producers get into trouble, it’s almost always because they try to break that order—pushing heat too long, ignoring signals, or chasing yield instead of doneness.
Scripture names this pattern plainly:
“To everything there is a season,
A time for every purpose under heaven.” (Ecclesiastes 3:1, NKJV)
Syrup doesn’t reward urgency. It rewards attention—knowing when to act and when to wait. Stewardship here isn’t about doing more. It’s about doing what’s required, in its proper time, and stopping when the work is finished.


Facebook
Instagram
X
Youtube