
Pruning Pear Trees Without Hurting Next Year’s Crop
A Lesson From the Orchard
I’ll never forget the first time I got too aggressive with a pear tree. It was early spring, and I figured more cutting meant better shape. That summer the tree looked clean and open — but come harvest, I realized I had cut away most of the fruiting spurs. Half the pears I was counting on never showed up. That mistake taught me quick: pruning is less about hacking and more about balance.
If you prune pears right, you’ll get a tree that’s healthy, productive, and built for years of crops. Do it wrong, and you’ll sacrifice next season’s harvest. Let’s walk through how to prune without hurting your yield.
Why Timing Matters
Pruning pears isn’t a one-size-fits-all job. The timing changes what the tree does next year.
Dormant pruning (late winter to very early spring): Best for shaping structure and encouraging strong new growth. Work just before buds swell, when you can see the branch framework clearly.
Summer pruning (after fruit set, mid-June through August): Light thinning to control vigor, open the canopy, and let more sunlight reach ripening fruit.
Region-specific note: If you’re in a northern USDA zone (Zones 4–6), wait until late winter to prune — cutting too early risks frost damage to fresh cuts. Southern growers (Zones 7–9) can often prune a little earlier in winter.
Know Your Fruiting Spurs
The secret to keeping pears productive is knowing where the fruit actually grows.
Pears produce mainly on short-lived fruiting spurs — stubby little shoots that last just a few years.
Spurs look different from leafy shoots: they’re compact, with fat buds that swell into flowers.
If you cut too many spurs, you won’t see fruit next year. The tree will grow plenty of leaves, but you’ll be staring at empty branches.
Rule of thumb: Preserve as many healthy spurs as possible while still thinning for light and airflow.
Step-by-Step: How to Shape for Airflow and Sunlight
Start with the obvious: Remove any dead, diseased, or broken wood.
Cut out crossing branches: Anything rubbing or growing inward needs to go.
Thin crowded spots: Open pockets where branches are too close — pears need space for sunlight.
Maintain structure: Keep a strong central leader with evenly spaced scaffold branches.
Stand back and check: Every few cuts, step away from the tree and make sure it looks balanced and open, not butchered.
Pro Tips: Avoid These Mistakes
Don’t over-prune young trees — cutting too much slows fruiting.
Never remove all the spurs from a branch — leave enough for production.
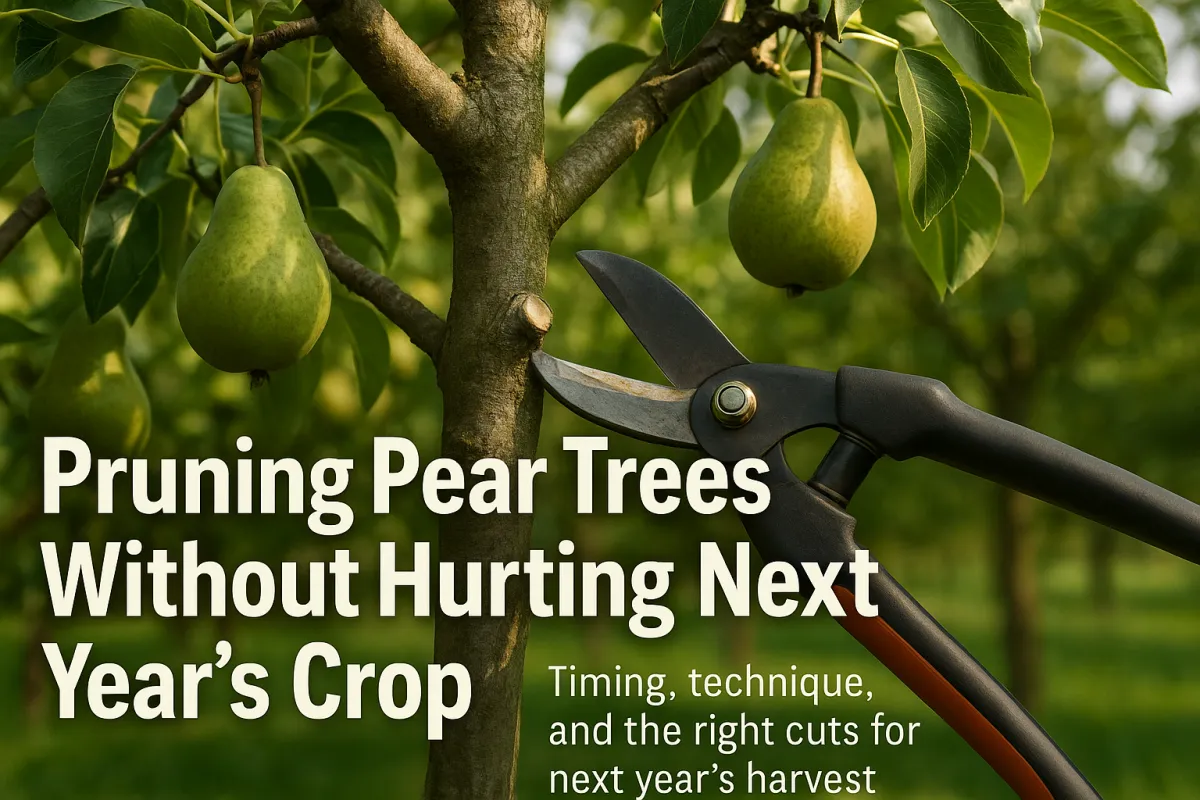
Avoid leaving ragged, torn cuts. Always cut clean, just outside the branch collar.
Tools and Clean-Cut Techniques
Pruning is only as good as your tools.
Bypass pruners: For small branches, always sharp.
Loppers or pruning saw: For thicker wood.
Sanitize blades: Wipe with rubbing alcohol between trees to keep disease from spreading.
Make clean cuts: Just outside the branch collar — that slight swelling where the branch meets the trunk or limb. This helps the tree seal the wound naturally.
Grandma’s Tip
“Less is more — don’t overcut pears. You can always take more off next year, but you can’t glue a branch back on.”
That little reminder is what I replay in my head every time I feel tempted to get too aggressive.
Faith Tie-In
Every time I prune, I think of the words in John 15: “Every branch that bears fruit He prunes, that it may bear more fruit.” Pruning looks like loss in the moment — a pile of branches on the ground. But it’s really preparation. You’re setting the tree up to bear even more fruit. The same goes for us. Sometimes we’re cut back so we can grow stronger.
Closing: Prune With Confidence
Pruning pears isn’t complicated once you know what to look for. It comes down to timing, protecting spurs, and keeping the canopy open. Take it slow, step back often, and remember: less is more.
Your next step? Print out a checklist and keep it with your pruning tools. Note the date you prune each year and how the tree responds. Over time, you’ll build a pruning rhythm that works for your orchard.


Facebook
Instagram
X
Youtube