
Start a U-Pick Strawberry Business (Even on 1 Acre)
Start a U-Pick Strawberry Business (Even on 1 Acre)
Start a U-Pick Strawberry Business (Even on 1 Acre)
1. Planning Your Patch for People
5. Is It Worth It? Let’s Talk Numbers
Build the U-Pick You’d Want to Visit
Frequently Asked Questions About Starting a U-Pick Strawberry Farm
Looking for more professional guidance & homesteading resources?
From Patch to Profit
The first time a neighbor asked if they could pick strawberries from my garden, I thought it was just small talk. But the next week, another family asked. Then another. That’s when it clicked: this wasn’t only a patch of berries—it was the beginning of a small farm business idea with real potential.
You don’t need 20 acres, a farm store, or a tractor to make it work. Even a single acre of well-managed strawberry beds can become the foundation of a profitable U-pick strawberry farm. Families get fresh fruit straight from the field, and you get both income and connection with your community.
If you're just getting started with strawberries, I recommend reading Start with Strawberries first—it walks you through planting a resilient, perennial strawberry bed that pays off year after year.
In this guide, I’ll show you how to grow strawberries for profit—from patch layout and customer flow to pricing, liability, and real revenue numbers. It’s the blueprint I'm drawing up to let people in and open the gate.

1. Planning Your Patch for People
U-Pick Strawberry Bed Layout for Customer Flow
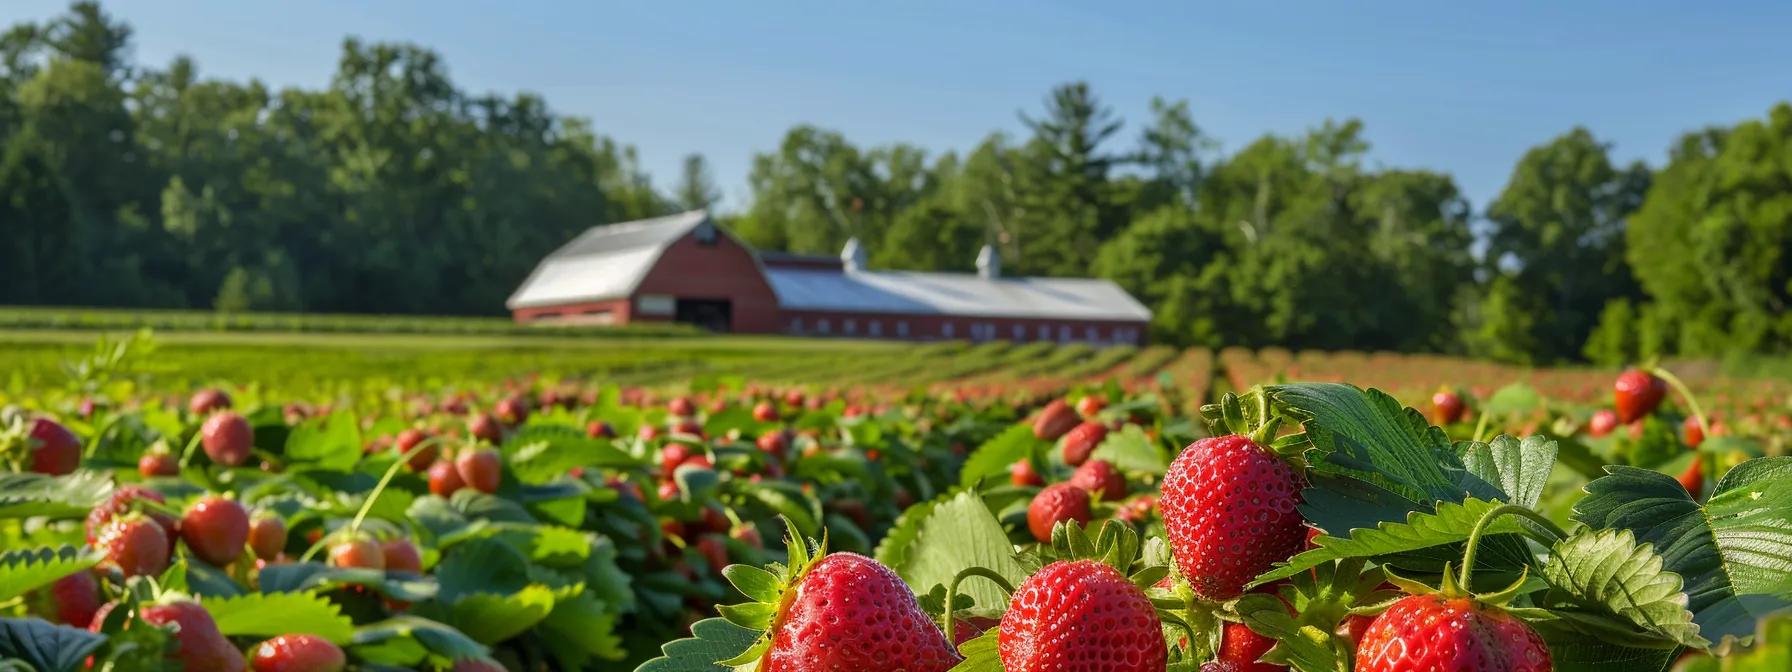
If you want to start a U-pick strawberry farm, the design of your one-acre patch is the foundation. Customers need space to move, and plants need spacing that maximizes yield without creating a jungle.
A typical one-acre layout looks like this:
Row spacing: 3–4 feet between rows for walkways and airflow
Plant spacing within rows: 12–15 inches apart
Number of rows per acre: about 14–18 rows if you keep 3–4 feet between each row
Plants per row: roughly 300–400 plants per 100-foot row, depending on spacing
That means a one-acre U-pick can hold 12,000–18,000 plants comfortably. According to North Carolina State University, with conservative average yields of 1 pound per plant, you’re looking at 10,000–15,000 pounds of berries per acre in a good season.
Design Tips:
Raised or mounded beds improve drainage and help with weed control.
Mulch or plasticulture (plastic mulch) keeps fruit clean, holds soil moisture, and reduces labor.
Straight, uniform rows are easier for customers to navigate—and easier for you to manage when irrigating, fertilizing, or spraying organically.
Add wide central lanes or “cross paths” every 3–4 rows so families can move without backtracking.
A clean, well-marked field improves crop yield; and makes customers feel welcome, safe, and confident as they pick.
Parking, Accessibility, and Guest Movement
Even a small farm business needs to handle cars and crowds. On a busy weekend, a single acre can bring in 10–15 cars at a time. A mowed field, gravel lot, or well-drained grassy space is enough, as long as:
Entrances and exits are clearly signed
Parking rows are obvious and safe
There’s enough space for families to unload comfortably
Accessibility makes a difference, too. Add a few stroller- and wheelchair-friendly paths with bark mulch or compact gravel. Not only does this help families, but it also shows you’ve thought about infrastructure and customer experience—two big factors in agritourism success.
Timing the Growing Season
The timing of your U-pick depends on your climate and strawberry variety. In USDA Zones 5–6, expect a June harvest; in Zones 7 and warmer, berries often ripen by late May.
Start prepping 30–45 days before opening day. That means:
Test ripeness daily during the week before opening.
Set up signage and fencing to define harvest zones and keep out livestock or wildlife.
Inspect every row and remove diseased plants or overripe berries to protect crop quality.
Good soil management, irrigation, and weed control in the preseason make for a smoother customer experience—and higher profit when the gates open.
2. Stay Legal and Protected
, 2. Use a Basic Waiver Form for adults, and 3. Do a Weekly Walk-Through to inspect the patch for hazards. Illustrated with clipboard and checklist icons.")
Insurance & Liability Basics for U-Pick Farms
If you’re inviting the public onto your land, liability insurance isn’t optional—it’s protection for both you and your customers. Look for policies that specifically cover agritourism or small farm business operations, since standard homeowner’s insurance usually won’t cut it. Expect an annual cost between $300–$800, depending on property size, location, and coverage level.
When shopping for liability protection, ask for multiple quotes filtered by ‘agritourism / pick‑your-own’ riders, not just standard farm liability. Many insurers exclude visitor risks unless you request the correct endorsements. I recommend getting at least three quotes and comparing coverages line by line. Nationwide, Agritainment, FLIP, and Insureon all offer variable forms of agritourism insurance and can make great first stops in your research.
Post clear, visible signage that lays out basic rules:
Children must be supervised
No pets in the strawberry beds
Handwashing required before sampling
Some farms add a simple waiver form at check-in, especially if they sell drinks, baked goods, or other prepared food. It’s a low-cost way to strengthen your regulatory compliance.
Sanitation and Safety Setup
Food safety and customer confidence go hand in hand. At a minimum, you’ll need a handwashing station. That could be:
A five-gallon jug with a spigot, soap, and paper towels
A foot-pump sink built from scrap wood and buckets
A rented portable handwash unit if you expect bigger crowds
These setups not only keep customers safe but also demonstrate good farm management practices—something people will notice.
Providing clean handwashing stations isn’t just polite. It’s part of following Good Agricultural Practices (GAP) to ensure food safety on small farms.
Other must-haves:
A stocked first aid kit with bandages, allergy medication, and cold packs
Posted emergency contact info at your check-in area
Shade and fresh water access to protect families on hot days
Covering these basics gives your U-pick patch credibility. Customers want fresh berries—but they also want to feel safe, respected, and cared for while they’re on your property.
3. Make the Experience Work

Tools of the Trade for U-Pick Success
A smooth customer experience starts with the right tools. For containers, you’ve got options:
Reusable buckets
One of the easiest upgrades for a beginner U-pick is offering hands-free berry buckets—like this 6-pack of 1-gallon picking buckets—that kids and adults can carry without spilling.
Recyclable clamshells for grab-and-go convenience
Cardboard berry flats that double as storage and transport
Don’t stop at containers. You’ll also need:
Signage: clear, bold signs showing price per pound, picking instructions, and checkout points
Simple, reusable chalkboard signs like these waterproof 30-packs make it easy to label rows, post picking tips, or list prices without wasting paper or guessing at paint.
Scale setup: a sturdy table or crate system for weighing and bagging berries
Extras: sunscreen, wipes, or paper towels—small touches that make a big difference for families
Pricing, Payment, and Customer Flow
Your pricing model is the backbone of profitability. The two most common methods are:
Per-pound pricing – fair, accurate, but requires a reliable scale
Flat-rate buckets – simple, family-friendly, and easy to manage if you mark a fill line
If you go the price-per-pound route (more common); A reliable weighing scale is a must for transparent pricing—consider something like this price computing scale, which balances precision and durability for farm use.

For crowd control at checkout:
Offer multiple payment options—cash, Venmo, or a point-of-sale app like Square—so you don’t lose sales when folks show up without cash
Customer Experience Tips That Keep People Coming Back
Running a profitable strawberry field isn’t just about the fruit—it’s about how people feel while they’re there. Plan for peak times by:
Resting rows with a sign when picking has been heavy
Offering appointment slots or limiting open hours to prevent overcrowding
Make the visit memorable with low-cost touches:
A tasting station with ripe berries or sample jam
A shady seating area for families to rest and regroup
A simple photo backdrop—a painted barn board or rustic sign—for Instagram-worthy shots
These little details transform your patch from “just another farm” into an agritourism experience worth sharing.
4. Go Beyond the Berry

Add-On Revenue Streams That Boost Profit
If you want to grow strawberries for profit, don’t stop at fresh fruit. Smart U-pick farms add value with extras that increase both revenue and customer satisfaction. Popular options include:
Homemade goods: jam, syrup, strawberry lemonade, or baked goods
Local partnerships: neighbor-made honey, farm-fresh eggs, or artisan bread
Bundled boxes: a “Strawberry Breakfast Pack” with berries, biscuit mix, and jam
These products transform your patch from a simple harvest into a mini-market garden experience. Use clear signage at check-in to feature these options, and promote bundles on social media so customers come ready to buy.
Marketing and Promotion Essentials
A good harvest is worthless if nobody shows up. Marketing doesn’t have to be expensive—it just needs to be consistent.
Practical Low-Cost Local Marketing Strategies include:
Roadside signs with simple wording: “Fresh U-Pick Strawberries →”
Google Business profile with updated hours, photos of the patch, and directions
Local groups: Facebook, Nextdoor, or community bulletin boards
Email list: capture customer addresses at checkout for future promotions
Think of it as your digital marketing backbone. Every post, every photo, and every follow-up email is an investment in next year’s turnout.
💡 Pro tip: Snap photos of customers enjoying their visit (with permission). Use them to build a photo archive that fuels advertising, CSA signups, and reputation-building. It’s grassroots promotion at its best.
5. Is It Worth It? Let’s Talk Numbers
, pinch and roll, don’t yank using thumb and forefinger, avoid stepping on the rows to protect roots, and use two hands when needed to prevent tearing the plant. Ends with the reminder: “Be gentle with the plants—and the berries will give back.”")
Real-World Yield and Revenue by Acre
The big question: can a U-pick strawberry farm actually turn a profit? The answer is yes—and a full acre can surprise you with its earning potential. Under good management, a U-pick strawberry field produces 10,000–15,000 pounds of berries per acre each season. Yields vary by growing system: plasticulture often reaches 1 lb per plant, while matted-row systems may produce 0.5–1 lb.
Here’s how that breaks down with current price averages:
At $3.00 per pound: $30,000–$45,000 gross revenue
At $3.50 per pound: $35,000–$52,500 gross revenue
At $4.00 per pound: $40,000–$60,000 gross revenue
Not every berry makes it to checkout. Between overripe fruit, pest pressure, and customer snacking, expect a 10–15% loss. Even with that reduction, a single acre remains one of the most profitable small farm business ideas per acre, especially compared to crops like corn, beans, or hay.
Typical Expenses for One Acre:
Strawberry plants, mulch, irrigation or drip irrigation: $3,500–$5,000
Liability insurance for agritourism: $300–$800
Signage, scales, and infrastructure: ~$500–$1,000
Containers and packaging: $300–$600
Labor (if hired): variable; a family-run U-pick can minimize this cost
A realistic net margin after expenses often lands between $25,000–$50,000 per acre, depending on management, marketing strategy, and customer demand.
, Weather Woes (too much rain or sun), Rot and Mold (Botrytis, anthracnose, gray mold), and Overripe Berries (pick regularly). Each challenge is paired with simple icons like animals, weather symbols, and strawberries.")
In-Season Challenges to Expect
Profit doesn’t come without risk. A one-acre strawberry operation still demands daily oversight.
Common threats to your harvest include:
Wildlife: birds, deer, and rabbits require fencing or netting
For a full breakdown of the most common threats to your crop—and how to stop them organically—check out The 6 Pests That Wreck Strawberry Crops
Crop loss from weather: heavy rain or heat waves can wipe out ripening berries
Rot and overripe berries: regular picking and row rotation keep quality high
Your contingency plan should cover:
Communicating closures or delays via social media
Offering pre-picked quarts when U-pick rows are light
Closing rows that are overpicked or diseased—customers respect honesty when you explain why
Disease pressure builds fast when the patch gets crowded. Here's a complete guide to natural strawberry disease control to help you spot and stop problems early.
Handled well, your one-acre U-pick isn’t just about fruit sales. It’s a sustainable business model rooted in agriculture, agritourism, and community building.
6. Wrapping the Season Right
🧹 Clean-Up and Reset Tips
When the last berry is picked and the crowds head home, the work isn’t over. How you close out your U-pick strawberry farm sets the tone for next year’s success.
End-of-season tasks include:
Compost leftover fruit to reduce pests and disease pressure
Sanitize containers and tools before storing them away
Dry-store signage, tables, and scales so they’re ready to use again
Walk the property and note any repairs needed to parking, fencing, or infrastructure
Take time to jot down lessons while they’re fresh:
Which add-on sales (jam, honey, lemonade) performed best
Whether parking or customer flow caused issues
If rows held up under foot traffic or need better mulch/weed control
These notes are gold when you plan your next season.
🌱 Next Year Starts Now
A successful small farm business is always looking ahead. Once your patch is closed:
Consider sowing a cover crop like clover, rye, or oats to rebuild soil nutrients and protect against erosion
Rotate beds or rest sections of the strawberry field to improve long-term productivity
Want to expand your patch for next year without spending a dime? Learn how to root and manage your own runners in Runner Management 101
Review your email list and stay connected:
Share seasonal gardening tips in the fall
Promote spring pre-orders for CSA shares
Offer early access or discounts to loyal customers
By treating your close-out as the first step toward next season, you’re building not just a farm but a sustainable agritourism business that improves year after year.
Build the U-Pick You’d Want to Visit
What made Grandma’s patch unforgettable wasn’t just the strawberries—it was the care, the welcome, and the planning that made visitors feel like part of the farm. That same principle applies when you start a U-pick strawberry farm of your own. Customers don’t just remember the fruit; they remember the experience.
The good news? You don’t need acres of land or expensive infrastructure to make it work. By focusing on thoughtful layout, simple marketing, and a customer-first mindset, even one acre of strawberry beds can become a profitable venture and a trusted part of your community.
This guide has given you the blueprint for how to grow strawberries for profit—from field design and liability insurance to pricing, marketing strategy, and end-of-season wrap-up. The next step is yours: start small, learn as you go, and keep building toward the kind of U-pick you’d be proud to visit yourself.
Sometimes, all it takes is a single acre, a weekend of picking, and a gate left open to transform a patch of fruit into one of the most rewarding small farm business ideas you’ll ever try.
Frequently Asked Questions About Starting a U-Pick Strawberry Farm
Q: How much land do I need to start a U-pick strawberry farm?
A: You can begin with as little as ¼ acre of strawberry beds, though 1 acre gives you more flexibility for parking, pathways, and customer flow. Even a small patch can be profitable if it’s well-managed.
Q: What’s the best pricing model—per pound or per container?
A: Both work. Per-pound pricing feels fair but requires scales. Flat-rate buckets are simple and family-friendly. Many farms experiment with both and stick with what customers prefer.
Q: Do I need special insurance for a U-pick farm?
A: Yes. Standard homeowner’s insurance won’t cover visitors picking berries. You’ll need a policy that includes agritourism liability insurance. Expect to budget $300–$800 annually.
Q: How many strawberries can one acre produce?
A: A well-managed acre can yield 10,000–15,000 pounds per season. On a ¼-acre patch, you might see 2,500–4,000 pounds, depending on soil, drainage, irrigation, and climate.
Q: What add-ons help boost profit?
A: The most common are homemade jam, strawberry lemonade, baked goods, and local partner products (like honey or eggs). Bundling them with fresh berries makes for easy, high-margin sales.
Q: How do I market my U-pick strawberry farm?
A: Use roadside signs, a Google Business profile, and local Facebook or Nextdoor groups. Build an email list at checkout so you can notify customers about opening weekends, CSA shares, or fall farm events.
Q: When should I start preparing for the season?
A: Begin 30–45 days before opening. Test berry ripeness daily, put up signage and fencing, and walk rows to remove diseased plants or overripe fruit.
Q: Can U-pick strawberries really be profitable?
A: Yes. With modest startup costs, strong demand, and low overhead, U-pick operations are among the most profitable small farm business ideas—especially when combined with smart marketing and add-on sales.
Video Summary of this issue:
As always, the tools and supplies I mention are the same ones I rely on here at The Grounded Homestead. Some are affiliate links, which means I may earn a small commission—at no extra cost to you—but every recommendation is based on real use and trust.
Looking for more professional guidance & homesteading resources?
Explore our trusted guides to learn more about growing healthy food, managing your land, and building lasting systems for your homestead. Whether you're looking for planting tips, seasonal checklists, or natural solutions that actually work—we’ve got you covered.
Start with these helpful reads:
Everything to know about Strawberries:
Start with Strawberries: Ground Your Garden with Fruit that Grows Back
6 Common Strawberry Plant Diseases and How to Treat Them Naturally
The 6 Pests That Wreck Strawberry Crops—and How to Beat Them Naturally
Beyond Straw: Choosing the Right Mulch for Every Strawberry Bed
Runner Management 101: Multiply Your Strawberry Patch with Purpose
Frost, Flood, and Fungus: Protecting Strawberries in Extreme Weather
The Best Strawberry Varieties for Continuous Summer Harvests
Top 14 Practical Uses for Fresh Strawberries (Beyond Jam)
How to Fertilize Strawberries for Yield, Flavor, and Runner Control
Strawberries in Small Spaces: Balcony, Border, and Vertical Growing Techniques
Wild Strawberries vs. Cultivated: Should You Grow Fragaria vesca?
The Complete Guide to Propagating Strawberries: Growing Strawberries from Seed


Facebook
Instagram
X
Youtube