
The Best Way to Water Plants for Vibrant Growth
The Best Way to Water Plants for Vibrant Growth
If there’s one piece of advice that separates frustrated plant owners from those with thriving indoor jungles, it’s this: stop watering on a strict schedule.
The single biggest mistake I see new gardeners make is giving their plants a little splash of water every day. It feels attentive, but it’s actually one of the worst things you can do. This habit only wets the top inch of soil, training the roots to stay shallow and weak, always waiting for their next tiny sip.
It creates a dependent, fragile plant.
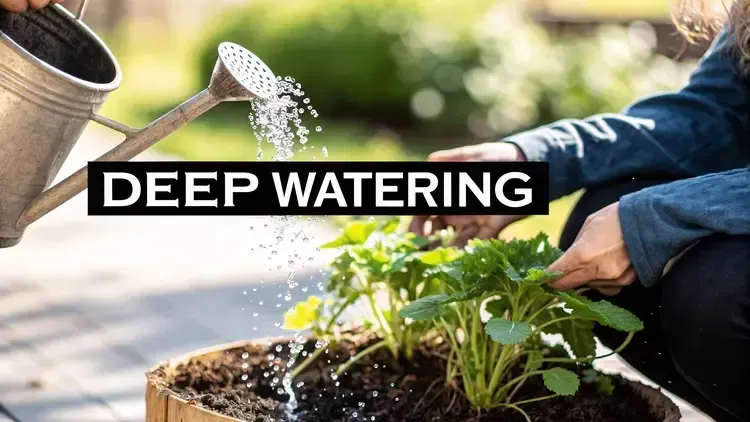
Ditch the Schedule, Read the Plant

The secret isn’t some complex formula. It’s about shifting your mindset from a rigid calendar to a responsive conversation with your plant. Instead of watering every Tuesday because an app told you to, you water when the plant actually needs it. This is the foundation of the deep and infrequent watering method.
This approach mimics how plants get water in nature. Rain doesn't arrive in small, predictable daily doses. It comes in big downpours that soak the earth, followed by dry spells. That cycle is exactly what forces a plant to build a strong, resilient root system that can search for moisture deep in the soil.
Why Deep and Infrequent Watering Works
When you adopt this method, you’re not just keeping your plant alive; you’re helping it build a foundation for long-term health.
You'll build stronger roots. Forcing the roots to grow downward in search of moisture makes the whole plant more stable and robust.
Nutrient uptake improves. A bigger, deeper root system can access a wider range of nutrients stored throughout the potting mix.
You'll avoid root rot. Letting the soil dry out between waterings is the best defense against root rot, which is probably the number one killer of houseplants.
A plant’s strength is built in the dry spells between waterings, not from constant moisture. This is when the roots are actively growing and searching, building the resilience they need to thrive.
Learning to water this way is the most powerful skill you can develop as a plant owner. You stop being a passive rule-follower and become an active, observant caretaker who understands what your plants are trying to tell you. Master this, and you're well on your way.
How to Tell When Your Plants Are Actually Thirsty

Plants are living things, and just like us, they have their own ways of communicating. The real secret to watering isn't following a rigid calendar—it’s learning to read their signals. Over time, you’ll develop an intuition that turns you from a plant owner into a true plant partner.
Ditching a strict schedule for a more responsive approach is the single best thing you can do for your indoor garden. But first, you have to move past assumptions. A droopy leaf doesn't always scream "I'm thirsty!" It can also be a sign of the exact opposite: overwatering. Before you even think about grabbing that watering can, it's time to play detective and gather some clues.
Go Beyond a Surface-Level Glance
Your most reliable tools are built right in—your own senses. While those little moisture meters you see at the store can be tempting, I've found they're often inaccurate and can lead you astray. Nothing beats the direct feedback you get from physically checking the soil and the plant itself.
This hands-on method builds a much deeper connection and helps you understand what each plant truly needs.
The classic finger test is your best friend here. It’s simple: just push your index finger into the soil up to your second knuckle. What you feel tells you almost everything.
If the soil feels damp and cool: Your plant is still perfectly hydrated. Hold off on watering for now and check again in a day or two.
If the soil feels completely dry and even a bit dusty: It’s definitely time for a drink. The plant has used up its available moisture.
Of course, this test needs context. The soil for a tropical fern should rarely feel bone-dry, whereas a succulent or snake plant is happiest when its soil dries out completely between waterings.
Learn to Read the Visual and Physical Cues
Your plant will give you other clues that go way beyond the soil. Once you learn to spot these signs, your watering instincts will sharpen, and you’ll be able to step in before the plant ever gets stressed.
One of my favorite, yet often overlooked, methods is the weight test. Get a good feel for your potted plant's weight right after you've given it a thorough watering. Then, just pick it up every couple of days. You'll be amazed at how much lighter it feels as the soil dries out. A pot that feels surprisingly light is a dead giveaway that it’s time to rehydrate.
One of the most common mistakes is watering based on a fixed schedule. Factors like humidity, light, and seasonal changes drastically alter a plant’s thirst. You can learn more by exploring our detailed guide on how often you should water your plants.
Take a look at the soil itself, too. As soil dries, it actually contracts. You might see the potting mix pulling away from the sides of the pot, creating a distinct gap. This is a sure sign the soil is parched and ready for a good, deep soaking.
Finally, just observe the leaves. While drooping can mean a few different things, thirsty leaves often look limp and soft—not yellow and mushy like they do when overwatered. They might lose their vibrant sheen and appear dull. For plants like a Pothos or a Peace Lily, this is one of the first and most dramatic ways they tell you they need water.
By combining all these observations, you’ll know exactly when it’s the right time to give your plant a refreshing drink.
Mastering Different Watering Methods

Choosing how you water is about more than just convenience; it’s about matching the method to the plant’s needs. The best way to water often comes down to the plant itself, its pot, and its environment. Let’s walk through the most common approaches, starting with the one we all know best.
Top-watering with a can or a hose is the default for most of us. It feels natural because it mimics rainfall. The trick to doing it right is to water the soil, not the leaves. Wet foliage is an open invitation for fungal diseases, especially on susceptible plants like tomatoes or zinnias.
Always aim the stream at the base of the plant until you see water running from the drainage holes. This simple step ensures you’ve soaked the entire root ball, encouraging roots to grow deep instead of just hanging out near the surface.
The Bottom-Up Approach to Watering
For some plants, watering from the top is a flat-out bad idea. Plants with fuzzy leaves, like African violets, despise getting their foliage wet. Others that are prone to crown rot do much better when the soil surface stays dry. This is where bottom-watering becomes a total game-changer.
The technique is simple: place your potted plant in a larger tray or basin of water and let it soak up moisture through its drainage holes. The soil acts like a sponge, pulling water upward through capillary action. It’s an incredibly effective method for a few key reasons:
Promotes Stronger Roots: It encourages roots to grow downward toward the water source, building a more robust and stable root system.
Prevents Overwatering: A plant will only absorb as much water as its soil can hold, which dramatically lowers the risk of waterlogged roots.
Keeps Foliage Dry: It’s the perfect fix for plants that are sensitive to moisture on their leaves or stems.
To bottom-water, just fill a saucer with an inch or two of room-temperature water and set the pot inside. Let it sit for 15-30 minutes, or until the top of the soil feels slightly moist. Once it's done soaking, take the pot out and let any excess water drain away completely.
Bottom-watering is my go-to method for reviving a severely dried-out plant. When soil becomes hydrophobic (meaning it repels water), top-watering just runs down the sides of the pot without soaking in. A good soak from the bottom ensures the entire root mass gets rehydrated evenly.
Advanced Systems for Outdoor Gardens
For outdoor gardens, especially larger beds or in dry climates, hand-watering can become a serious chore. This is where automated systems deliver a huge boost in both efficiency and water conservation.
One of the most effective methods out there is drip irrigation. This system uses a network of tubes with small emitters that deliver water slowly and directly to the base of each plant. This precision practically eliminates water loss from evaporation and runoff. The results are stunning; drip irrigation can cut water use by as much as 60% compared to sprinklers while actually boosting crop yields.
Setting up a basic system is a perfect weekend project. If you're curious about giving it a shot, you can build your own with our DIY drip irrigation system guide. It’s a fantastic way to give your garden consistent moisture, even when you’re busy or away from home.
Your Practical Guide to a Perfect Watering Routine
Let’s turn all that theory into a practical, repeatable routine. Getting your watering right isn’t about following a rigid set of rules; it's about developing a mindful, consistent approach. Once you get the hang of these core practices, they'll become second nature.
First things first, always use room-temperature water. Think about the jolt of an ice-cold shower—that's what you're doing to your plant's roots when you use frigid water straight from the tap. A sudden temperature drop can shock the root system, stunting growth and stressing the plant out. Just let your watering can sit out for an hour or so. It’s a small step that makes a big difference.
The Drench and Drain Technique
For most houseplants, the gold standard is a method often called "drench and drain." It’s designed to mimic a natural, soaking rainfall, which is exactly what plants need to develop deep, healthy root systems.
The process is simple:
Saturate the Soil: Water the plant until the entire soil surface is wet. Keep going until you see water flowing freely from the drainage holes at the bottom of the pot.
Let It Drain Completely: This is the most important part. After watering, let the pot sit for a few minutes so all the excess water can escape. Never, ever let your plant sit in a saucer full of water—that's a one-way ticket to root rot.
This deep watering method encourages roots to grow downward in search of moisture, creating a stronger, more resilient plant.
The best routines are built on observation, not a calendar. A plant's thirst can change dramatically with the seasons, its growth cycle, or even just a move to a sunnier window.
This chart gives you a general idea of the weekly water needs for different types of plants.

As you can see, vegetables need way more water than succulents. It’s a great visual reminder of why a one-size-fits-all schedule just doesn’t work.
Watering Technique Comparison
Choosing the right watering method can feel tricky, but it really comes down to the type of plant and its container. Drench and drain is a fantastic all-rounder, but other techniques have their place. Here’s a quick comparison to help you decide.

Ultimately, the best technique is the one that works for your plants and your lifestyle. Don't be afraid to mix and match methods based on what each plant needs.
Timing and Environment Matter
When you water is almost as important as how you water. The best time of day is almost always in the morning. This gives the plant the entire day to soak up the moisture it needs while allowing any water on the leaves or soil surface to evaporate. Watering at night can create a damp environment, which is a perfect breeding ground for fungus.
Your choice of pot also plays a huge role. Porous terracotta pots are fantastic because they "breathe," wicking moisture away from the soil and helping it dry out faster. On the other hand, non-porous plastic or glazed ceramic pots hold onto moisture for much longer. You have to adjust your watering frequency accordingly.
It’s interesting to look at how far irrigation has come. Large-scale agriculture used to rely on flood irrigation, a method that, while cheap, loses a ton of water to evaporation and runoff. Today, modern farming uses precision irrigation based on real-time data to deliver water much more effectively—a concept we can easily apply in our own homes by watering based on what the plant actually needs, not just what the calendar says. For anyone curious about how these large-scale systems work, you can explore how these technological advances optimize water use in agriculture.
Common Watering Mistakes and How to Avoid Them
Even the most dedicated gardeners get it wrong sometimes. I’ve been there. The real skill isn't in avoiding mistakes altogether—it's in learning to spot the signs of trouble and knowing how to steer the ship back on course. When it comes to stressed plants, most problems can be traced back to one simple thing: water.
The number one killer of houseplants, hands down, is overwatering. It’s usually an act of love, but it’s a love that suffocates. Plant roots need oxygen just as much as they need water. When the soil stays soggy, the roots can’t breathe. They start to rot, turning soft and mushy, and completely lose their ability to pull up nutrients.
The Problem with Too Much Water
The tricky part? The signs of overwatering can look a lot like a thirsty plant, which often leads well-meaning gardeners to add even more water. Here’s how to spot the real red flags before it’s too late.
Yellowing Leaves: This is the classic sign. If leaves are turning yellow, especially the lower ones, and feel soft or limp to the touch, you’re likely dealing with too much water.
Mushy Stems: A stem that feels soft or squishy right at the soil line is a major warning sign. This means root rot is creeping up from below.
Fungus Gnats: Seeing these pesky little flies buzzing around? They absolutely love to lay their eggs in consistently damp soil. An infestation is a clear signal that your soil isn't getting a chance to dry out.
If you think you've overwatered, you need to act fast. Gently slide the plant out of its pot and take a look at the roots. Healthy roots are firm and white or light-colored. Rotted roots will be brown, black, and mushy. With a clean pair of scissors, trim off all the rotted sections, then repot the plant in fresh, well-draining soil. From here on out, be much more reserved with that watering can.
An overwatered plant is often in more danger than an underwatered one. While a thirsty plant can usually be revived with a good drink, a plant with severe root rot is much harder to save. When in doubt, let it dry out.
Recognizing and Fixing Underwatering
On the flip side, of course, is letting your plants get too dry too often. While it’s generally less deadly in the short term, chronic underwatering still puts a huge amount of stress on your plants. Thankfully, the signs are usually a bit more straightforward.
You'll probably see things like:
Crispy, brown edges on the leaves.
Wilting or drooping leaves that feel dry, not soft.
Soil pulling away from the sides of the pot.
Bringing a parched plant back from the brink is usually pretty simple. Give it a thorough, deep soak—bottom-watering is fantastic for this—and it should perk right back up within a few hours. For a plant to make a full comeback, it needs more than just water; it also needs nutrients to fuel its recovery. Once it has stabilized, you can support its rebound with a gentle feeding. Learning how to apply a good natural fertilizer for your vegetables and other plants can make a world of difference in their resilience.
Other Common Watering Blunders
Beyond just the amount of water, a few other common missteps can set your plants back. Try to avoid using ice-cold water straight from the tap, as the sudden temperature drop can shock the root system. Room temperature water is always a safer bet.
Also, be mindful of splashing water on the leaves of sensitive plants like African violets or tomatoes. Wet foliage can invite fungal diseases to take hold. And finally, never let your pot sit in a saucer full of drainage water. After you water, give it about 15-20 minutes, then dump out any excess. This simple step keeps your plant’s feet from sitting in a puddle, which is a fast track to root rot.
Your Top Watering Questions, Answered
Once you get the hang of the basics, the real questions start popping up. You’ll notice things—a white crust on your terracotta pots, a Calathea with crispy edges—and wonder what you’re missing. This is the good part. It means you’re moving beyond just keeping plants alive and starting to help them truly thrive.
Let’s tackle some of the most common questions I hear from fellow gardeners.
Is My Tap Water Okay?
This is probably the number one question I get. For most of the tough, easy-going houseplants out there, the answer is yes, tap water is perfectly fine. It’s convenient and gets the job done.
However, tap water isn’t pure H₂O. It often contains chlorine, fluoride, and dissolved minerals. Over time, these can build up in the soil, sometimes leaving a white, crusty residue on your pots. For sensitive plants like Calatheas, carnivorous plants, or certain ferns, this mineral buildup can cause brown, crispy leaf tips.
If you’re seeing those signs or just want to give your plants the best, you have a few options:
Let it sit. Fill your watering can and let it sit out for at least 24 hours. This allows much of the chlorine to evaporate. It’s a simple, no-cost improvement.
Filter it. A simple charcoal water filter, like a Brita pitcher, can remove many of the impurities that bother picky plants.
Collect rainwater. This is the gold standard. Rainwater is naturally soft, slightly acidic, and free of the additives found in municipal water. It’s what plants were made to drink.
How Should I Change My Watering with the Seasons?
Your watering schedule should never be set in stone. It needs to breathe with the seasons, just like your plants do. As fall turns to winter, the days get shorter and the light becomes less intense. Most of our plants respond by slowing way down, entering a state of semi-dormancy.
They aren't actively pushing out new leaves, so they need a lot less water. During the winter, your main job is to prevent root rot.
Water less often. The time between waterings will naturally get longer. Instead of watering every week, you might find yourself watering every two or three weeks.
Be a stickler for soil checks. Winter is when overwatering is most dangerous. The soil stays wet longer because the plant isn't drinking as much and evaporation is slower. Never water on a schedule—always check the soil first.
Once spring rolls around and you see signs of life—new leaves, new stems—you can gradually start watering more frequently again to match the plant's renewed energy.
One of the biggest mistakes a plant owner can make is carrying a summer watering schedule straight through the winter. Let the plant and the soil tell you what they need, not the calendar.
Does the Pot Really Matter That Much?
The pot you choose is more than just a decorative accessory; it’s a critical part of your plant’s environment, directly impacting your watering success.
A common question I get is about self-watering pots. These pots have a built-in reservoir that wicks water up to the roots. They can be a lifesaver for notoriously thirsty plants (looking at you, ferns) or if you’re someone who travels a lot. But they’re not a perfect solution for everyone. For plants that need to dry out completely between waterings, like succulents and cacti, a self-watering pot can be a death sentence, keeping the soil constantly damp.
And what about drainage? This one isn’t a suggestion—it’s a non-negotiable rule. Your pot must have drainage holes. Without them, any excess water pools at the bottom, turning the soil into a swamp and suffocating the roots. It’s a guaranteed path to root rot.
Fallen in love with a beautiful decorative pot that has no holes? No problem. Use it as a cachepot (a decorative outer pot). Keep your plant in its plastic nursery pot, place it inside the stylish one, and just lift it out to water. Let it drain completely before putting it back. It’s the perfect compromise between aesthetics and plant health.
At The Grounded Homestead, we believe that growing your own food and building a healthier lifestyle starts with understanding the fundamentals. Explore our resources to deepen your gardening knowledge and document your own journey. Learn more at The Grounded Homestead.


Facebook
Instagram
X
Youtube