
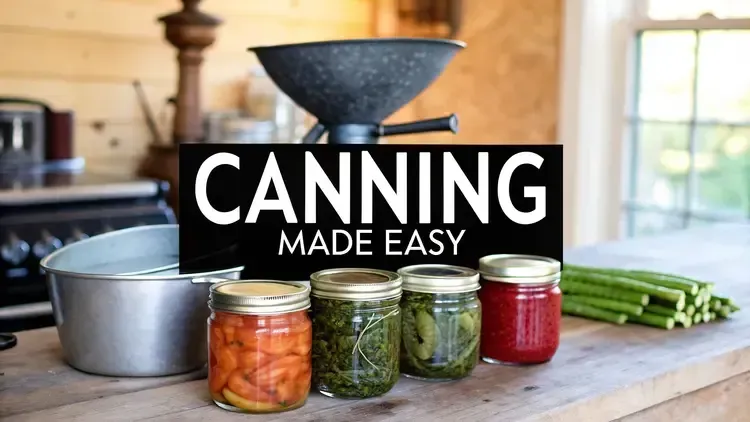
Canning Vegetables for Beginners: Easy Preserving Tips
Canning Vegetables for Beginners: Easy Preserving Tips
There's a timeless satisfaction that comes from lining your pantry shelves with jars of your own garden harvest. Canning vegetables is more than just a kitchen skill; it's a way to capture the peak flavors of summer, take full control of your ingredients, and enjoy the fruits of your labor all year long.
The two main paths you'll walk are water bath canning, which is perfect for high-acid foods, and pressure canning—the only safe method for preserving the low-acid vegetables we'll focus on here.
Why You Should Start Canning Vegetables Today

Jumping into canning for the first time is a deeply rewarding practice that connects you directly to the food on your table. Think about it: capturing the vibrant, sun-ripened taste of a summer tomato or the crisp snap of a garden-fresh green bean to crack open on a cold winter day. It’s a game-changer. This skill hands you the power to sidestep the preservatives, excess sodium, and mystery additives common in store-bought goods.
And this isn't some forgotten art. Canning is seeing a huge resurgence as more people look for healthier, more sustainable ways to eat. The global market for canned vegetables actually grew to $23.06 billion in 2024 and is expected to keep climbing, largely thanks to a growing interest in plant-based diets and premium, organic options. By learning this skill, you're joining a massive movement toward self-sufficiency and more mindful living.
The Core Benefits of Home Canning
The real advantages of canning your own vegetables go way beyond just having a full pantry. For many of us, it becomes a cornerstone of a more intentional, resilient lifestyle.
Unbeatable Flavor and Quality: There's simply no comparison. Vegetables canned at home, picked at their absolute peak, taste worlds better than anything you can buy. You're locking in flavor and nutrients right at their high point.
Significant Cost Savings: Canning lets you buy produce in bulk when it's in season (and cheap!), or even better, preserve the incredible bounty from your own garden. Over time, this makes a real dent in your grocery bill.
Reduced Food Waste: Got a bumper crop of zucchini? Don't know what to do with all those green beans? Canning is the answer. Every single jar you fill is food you've saved from the compost pile.
A pantry stocked with your own canned goods is more than just food security. It’s a beautiful, visual reminder of your hard work and a tangible connection to the changing seasons. It stands for a real commitment to healthier living and self-reliance.
A Foundational Homesteading Skill
If you've ever felt the pull toward a more self-sufficient life, canning is one of the best places to start. It’s a gateway skill that teaches you fundamental lessons about food safety, eating with the seasons, and managing your resources wisely. It's a key part of modern homesteading for a reason.
If you're just starting to explore ways to live more sustainably, our guide on homesteading for beginners is a great place to get a feel for the journey ahead.
Ultimately, once you master canning, you’ll have the confidence to preserve almost anything. You're ensuring your family has wholesome, delicious food ready to go, no matter what season it is.
Gathering Your Essential Canning Gear
Before you can line your pantry shelves with jars of your own homegrown goodness, you’ve got to get the right tools for the job. Walking into the world of canning can feel a little intimidating—you see all these lists of equipment, and it’s easy to think it’s complicated or expensive. But it doesn’t have to be.
Let’s break down exactly what you’ll need, starting with the single most important decision you’ll make.
Pressure Canner vs. Water Bath Canner
The type of canner you buy will determine what you can safely put up. This is the big one.
For low-acid vegetables—which is pretty much everything you’ll pull from your garden, like green beans, carrots, corn, and potatoes—a pressure canner is non-negotiable. It’s the only home canning method that reaches the 240°F (116°C) needed to destroy dangerous botulism spores.
A boiling water bath canner, which is basically a big, deep pot with a rack, only ever gets to 212°F (100°C). That’s perfectly fine for high-acid foods like fruits, jams, and pickles, but it is flat-out unsafe for plain vegetables. My advice? Invest in a quality pressure canner from the start. It’s the smartest, safest move you can make.
Essential Canning Equipment Checklist
Once you have your canner sorted out, the rest of the gear is pretty straightforward. You can often find these tools sold in handy starter kits, and each one is designed to make the canning process safer, cleaner, and a whole lot less fussy. Here's a quick checklist to help you get organized.

Think of your canning gear as a long-term investment. A good pressure canner will last a lifetime, and the supporting tools will see you through countless seasons. It's far better to get the right equipment once than to risk food safety or waste your hard-earned harvest with the wrong gear.
What You Might Already Have in Your Kitchen
You don't need to run out and buy every specialized gadget right away. You probably have a few key items in your kitchen already that will work just fine, helping to keep those initial costs down.
A large stockpot, for instance, is perfect for blanching vegetables before you pack them or for keeping your jar lids warm. You’ll also need the basics: a ladle for filling jars with brine or syrup, a good cutting board, and a few sharp knives for chopping your produce.
Of course, having a plan for your harvest is just as important as having the right canning tools. If you’re still figuring out what to grow, our guide on garden planning for beginners can help you map out a productive season from seed to pantry.
By focusing on the essentials first—a pressure canner, the right jars, and a few key tools—you can build your canning kit over time. This approach makes getting started feel much more manageable and gets you one step closer to that satisfying feeling of a well-stocked pantry.
How to Choose and Prep Your Vegetables

Here's a little secret that experienced canners know: the most incredible canned vegetables have nothing to do with fancy recipes or expensive gear. It all comes down to the produce you start with. If there’s one rule to live by, it's this: always use the freshest, highest-quality produce you can get your hands on.
Think of canning as hitting the pause button on your harvest. A limp carrot or a soft green bean will only turn into a mushy, disappointing product in the jar. Whatever quality you put in is exactly what you’ll get out.
This is why timing is everything. Ideally, you want to get your vegetables from the garden (or farmers' market) into the jar within 6 to 12 hours. This narrow window is when you’ll capture them at their absolute peak of flavor, texture, and nutritional value.
If you're buying from the grocery store, be picky. Hunt for vegetables that are firm, vibrant in color, and completely free of bruises, soft spots, or blemishes. Skip anything that looks tired or has been sitting on the shelf for a while. Your future self will thank you.
Your First Steps in Vegetable Prep
Once you’ve got your beautiful produce, the real work begins. This stage is straightforward, but it’s absolutely critical for both food safety and the quality of your final product. The goal here is simple: clean everything thoroughly and get it ready for the jars.
Your first move, always, is to wash everything well under cool, running water. You don’t need any special soaps. Just use your hands or a soft vegetable brush to gently scrub away any dirt, debris, or lingering garden pests. This step is non-negotiable—soil can harbor bacteria you definitely don't want invited to the party.
After a good wash, it’s time to trim, peel, and chop. This is where you’ll remove any stems, tough ends, or peels as your specific recipe directs. For instance, you’ll want to snap the ends off your green beans or peel your carrots.
The key here is consistency. Try to chop your vegetables into uniform pieces. Whether you’re dicing carrots or cutting corn off the cob, keeping the pieces the same size ensures they’ll cook evenly during processing. This simple trick prevents some bits from turning to mush while others stay stubbornly hard.
The Critical Role of Blanching
For many vegetables, there's one more prep step that beginners often skip, but shouldn't: blanching. It might sound a bit technical, but it’s really just a quick dip in boiling water followed by an ice bath.
Blanching isn't about cooking the vegetables all the way through. Its main purpose is to stop the enzyme actions that cause a loss of flavor, color, and texture during storage. It also helps shrink vegetables just slightly, which makes them much easier to pack neatly into jars.
For example, blanching green beans for just a few minutes before you pack them is the difference between beans that stay bright green with a firm bite and beans that turn a sad, dull olive-green and get overly soft.
Here’s a quick guide to this simple but powerful technique:
Boil: First, bring a large pot of water to a rolling boil.
Scald: Add your prepared vegetables. As soon as the water returns to a boil, start your timer. Most vegetables only need 1-5 minutes.
Shock: Using a slotted spoon, immediately scoop the vegetables out and plunge them into a large bowl of ice water. This instantly halts the cooking process.
Drain: Once the veggies are cool to the touch, drain them thoroughly. Now they're ready to be packed into your hot jars.
This little bit of effort makes a world of difference in the final quality of your home-canned vegetables. It’s a pro touch that ensures your preserved food looks as good as it tastes, truly capturing the essence of a summer garden and setting you up for pantry success.
Getting to Know the Core Canning Methods
Alright, let's get to the heart of the matter. If there’s one thing you absolutely must get right in home canning, it's knowing which canning method to use and when. Getting this wrong isn't just a simple mistake; it's a serious food safety risk.
We're going to break down the only two approved methods for canning vegetables. By the end, you'll know exactly what to do with that bumper crop of green beans or tomatoes.
The entire practice of canning hinges on one critical factor: acidity. It’s the acidity of the food that dictates which method you must use to make it safe and shelf-stable.
The Science That Keeps Us Safe
Think of it this way: a particularly nasty bacterium, Clostridium botulinum, can produce deadly spores. These spores love low-acid, oxygen-free environments—which is exactly what you create inside a sealed canning jar.
Here's the problem: those spores are tough. Just boiling them at the standard 212°F (100°C) isn't hot enough to kill them.
To reliably destroy them in low-acid foods, you have to hit a much higher temperature: 240°F (116°C). The only way to reach that temperature in a home kitchen is with a pressure canner. This is the science that modern canning safety is built on.
This rule is simple and non-negotiable: All low-acid vegetables must be processed in a pressure canner. There are no exceptions. This covers all the garden favorites like green beans, corn, carrots, potatoes, and beets (unless you're pickling them).
The renewed interest in home food preservation has really brought these safety rules to the forefront. The global market for canned vegetables hit around $35.46 billion in 2024, largely because people want healthier foods and trust the science behind safe preservation. It just goes to show how important it is to learn these tested methods. You can read more about this trend and its growth on Globenewswire.com.
Pressure Canning for Low-Acid Vegetables
A pressure canner isn’t just a big pot; it’s a specialized piece of equipment designed to trap steam. It has a locking lid and a vent pipe, and by holding that steam, it builds pressure. That pressure is what raises the boiling point of water far beyond 212°F, creating an environment hot enough to make your low-acid vegetables safe.
Let's walk through a real-world scenario. Say you just brought in a beautiful basket of fresh green beans from the garden. Here’s what the process looks like:
Prep the Canner. You'll add a few inches of water (your manual will specify, but it's usually 2-3 inches) and place the rack inside. Get the heat going.
Pack the Jars. Fill your hot, clean jars with the green beans, leaving the right amount of headspace—typically 1 inch for veggies. Add boiling water, then run a chopstick or bubble-freer tool around the inside to release trapped air.
Seal and Load. Wipe the jar rims clean, screw on the bands until just "fingertip-tight" (don't crank them down!), and place the jars on the rack inside the canner.
Vent! Lock the lid on, but leave the weighted gauge off for now. Turn the heat to high. Once you see a strong, steady funnel of steam shooting out of the vent pipe, start a timer for 10 minutes. This step is called venting, and it's critical for pushing all the air out of the canner.
Build Pressure and Process. After 10 minutes of venting, place the weighted gauge on the vent pipe. You'll see the pressure start to rise on the dial. Once it hits the target for your recipe and altitude (let's say 10 pounds of pressure), you start your main processing timer.
Cool Down Naturally. When the timer goes off, turn off the heat. Now, you wait. Let the canner cool down on its own until the pressure gauge reads zero. Don't rush this part. Once it's fully depressurized, remove the weight, wait another few minutes, and only then should you carefully open the lid, tilting it away from your face to avoid a steam burn.
I know it sounds a bit intense at first, but I promise, after you've done it once or twice, it becomes second nature.
This image gives you a great visual overview of the whole journey, from garden to sealed jar.

It really simplifies the flow, showing the key stages every batch of canned goods goes through.
Water Bath Canning for High-Acid Foods
The second method, boiling water bath canning, is much simpler and is what most people picture when they think of canning. This method is only safe for high-acid foods. Here, the natural acidity of the food works together with the heat of boiling water to stop spoilage and kill off harmful bacteria.
You'll use a water bath canner for things like:
Most fruits, jams, and jellies
Pickled vegetables (like your grandma's dilly beans or pickled beets)
Salsas and most tomato products (which often require added acid, like lemon juice)
The key takeaway here is that for a vegetable to be canned safely in a water bath, you must add acid—usually vinegar.
For example, plain beets are a classic low-acid vegetable and require a pressure canner. But once you add a boatload of vinegar to make pickled beets, you've transformed them into a high-acid food. Now, they are perfectly safe to process in a simple pot of boiling water.
The process is far more straightforward: you just submerge your sealed jars in a big pot of boiling water, making sure they're covered by at least an inch of water, and boil them for the time your recipe calls for. It's a fantastic place to start for beginners since the equipment is less intimidating.
The Final Steps: Storing Your Canned Goods Safely

Your jars are finally out of the canner, glistening on the counter and full of summer goodness. It’s tempting to call it a day, but what you do next is just as important for making sure all your hard work pays off with safe, delicious food.
The first rule of this final phase is simple: patience.
After you’ve carefully lifted the hot jars onto a towel-lined countertop, you have to leave them completely alone. Don't poke them, don't tighten the bands, and don't move them for at least 12 to 24 hours. This cooling-off period is when the real magic happens—as the contents cool and contract, they pull the lid down tight, creating that all-important vacuum seal.
During this time, you’ll start to hear the satisfying ping or pop of the lids sealing. It’s one of the best sounds in the world for a canner!
How to Check for a Proper Seal
Once the jars are completely cool to the touch, it’s time to run a few quick checks. Start by removing the screw bands from every jar. The bands are only there to hold the lids in place during processing; leaving them on can trap moisture, cause rust, and even hide a bad seal.
Now, check each jar in three ways:
Look: A properly sealed lid should be concave, meaning it curves slightly downward in the middle. If it’s flat or bulging up, it didn’t seal.
Feel: Press down on the center of the lid with your finger. If it’s solid and doesn’t move or make a popping noise, you’ve got a good seal. If it flexes, it failed.
Listen: Gently tap the lid with a spoon. A sealed jar will give you a high-pitched, ringing sound. A dull thud usually means a poor seal.
Don’t get discouraged if a jar or two fails to seal—it happens to even the most seasoned canners. An unsealed jar isn’t a failure; it’s just dinner for tonight! Pop any unsealed jars in the fridge and plan to use them within a few days. You shouldn’t try to re-process them.
Labeling and Storing Your Harvest
The last thing to do is get your beautiful jars ready for the pantry. Proper labeling is more important than you might think. Grab a permanent marker and write the contents and the date (month and year is fine) on each lid. Trust me, six months from now, you won't remember if that jar is full of carrots or sweet potatoes.
Store your labeled jars in a cool, dark, and dry spot, like a pantry, basement, or a dedicated cupboard away from the stove. The ideal storage temperature is between 50°F and 70°F (10°C and 21°C). Keep them out of direct sunlight and away from places with wild temperature swings or high humidity, as these conditions can weaken the food's quality and even cause seals to fail over time.
After all, the quality of your preserved harvest started way back with the soil it grew in. To circle back to that foundational element, you can learn about the best soil for growing vegetables in our detailed guide.
By following these simple storage rules, you can be sure that every time you open a jar, you're enjoying the safe, delicious taste of your own hard work.
Common Questions from Beginner Canners
It’s completely normal to have a long list of questions when you first start canning. In fact, it’s a great sign. It means you’re already thinking about safety and quality—the two pillars of putting up food that lasts.
Over the years, I've heard just about every "what if" and "how do I" imaginable. Let's tackle some of the most common ones so you can get started with confidence and build safe habits from your very first batch.
What Vegetables Are Easiest for a Complete Beginner?
When you're just getting your feet wet, it's smart to pick a project that practically guarantees success. The best place to start is with high-acid pickled vegetables, which only require a simple boiling water bath canner. The vinegar does the heavy lifting on the safety front, so you don’t have to jump into pressure canning just yet.
Pickled Beets: A timeless classic for a reason. The process is incredibly straightforward, and the reward is a pantry full of tangy, delicious beets ready for salads or side dishes.
Dilly Beans (Pickled Green Beans): This is another fantastic water-bath project. It’s the perfect way to handle a huge green bean harvest without needing a pressure canner.
If you feel ready to dive right into pressure canning, I always recommend starting with green beans. They are incredibly easy to prep—just snap, wash, and pack into jars. Following a tested recipe for plain green beans will teach you every single fundamental of using a pressure canner safely, from venting and processing to the final cool-down.
What Are the Most Common Beginner Mistakes?
Every seasoned canner has a story about a mistake they made early on. Learning from the most common slip-ups can save you a ton of time, frustration, and perfectly good food.
Without a doubt, the single most critical mistake is using the wrong canning method. Processing low-acid vegetables—like plain green beans, corn, potatoes, or carrots—in a boiling water bath canner is incredibly dangerous. A water bath simply cannot get hot enough to destroy the spores that cause botulism. No exceptions.
Other frequent errors I see include:
Ignoring altitude adjustments. If you live above 1,000 feet, you must increase your processing time.
Using old or damaged equipment. Bent bands, jars with chipped rims, and old rusty rings are all recipes for seal failure.
Improper headspace. Leaving too much or too little space at the top of the jar will prevent a strong, lasting seal.
Skipping the bubble-removal step. Trapped air can affect food quality and even compromise the seal.
The surest way to avoid these problems is to follow a modern, tested recipe from a trusted source like the National Center for Home Food Preservation. Never, ever trust old recipes from grandma’s cookbook that call for unsafe methods like oven canning or open-kettle canning.
Can I Reuse Canning Lids and Bands?
This is probably the most-asked question in canning, and the answer has two very different parts.
You absolutely can—and should—reuse the screw bands (the metal rings). As long as they aren’t bent out of shape, badly rusted, or damaged, they are perfectly fine to use again and again. Their only job is to hold the flat lid in place while the jar processes and seals.
However, the flat metal lids are strictly for one-time use. That reddish sealing compound on the underside is what creates the airtight vacuum seal. Once it's been heated and sealed, it cannot be trusted to create another safe seal. Using a brand-new flat lid for every single jar is a tiny investment for guaranteed food safety.
How Do I Know If My Canned Food Is Bad?
Knowing how to spot spoilage is a non-negotiable skill for every home canner. Your senses are your best tools here, and you should always live by the motto: "When in doubt, throw it out."
Before you even think about opening a jar, give it a good, hard look. Check for these immediate red flags:
A bulging or swollen lid.
Any signs of leakage or dried food residue around the seal.
A loose or unsealed lid (it should be concave and not move when pressed).
Weird cloudiness, rising air bubbles, or unnatural colors in the liquid.
When you open a properly sealed jar, you should hear a distinct pop or whoosh as the vacuum releases. If it’s silent, be suspicious.
After opening, your nose and eyes take over. Check for spurting liquid, any kind of off-smell, visible mold, or a slimy texture. If you notice any of these signs, do not taste the food. Discard the contents immediately and safely where no person or animal can get to it. Your health is never, ever worth the risk.
This guide is just the beginning of your journey into creating a more self-sufficient and healthy lifestyle. At The Grounded Homestead, we're dedicated to providing the knowledge you need to grow your own food and preserve your harvest with confidence. To continue learning with us, explore more resources and articles at https://thegroundedhomestead.com.


Facebook
Instagram
X
Youtube