
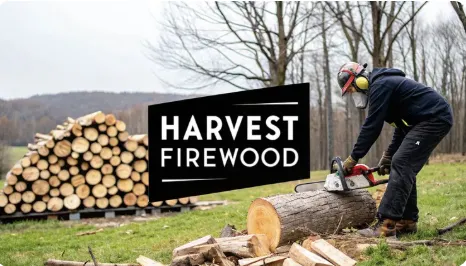
Master the Art of Harvesting Firewood Safely & Efficiently
Master the Art of Harvesting Firewood Safely & Efficiently
Harvesting good firewood starts long before you ever light a match. It begins in the woods, with the simple act of choosing the right tree. Get this part right, and you'll have a woodshed full of dense, hot-burning fuel. Get it wrong, and you'll spend your winter fighting smoky fires and constantly reloading the stove.
Success really boils down to two things: knowing the difference between good wood and bad wood, and understanding when a tree is ready for harvest.
Sourcing and Selecting the Right Trees
The quality of the heat in your home is decided out in the forest. Picking the right trees is easily the most critical part of the process, and it impacts everything that follows—from how long your fire burns to how much work it takes to get the wood seasoned and ready.
Not all wood is created equal. Knowing what to look for will save you a world of time and sweat.
Identifying Prime Firewood Species
Your best bet will always be dense hardwoods. Trees like oak, hickory, maple, and ash are famous for their high heat output—measured in British Thermal Units (BTUs). A well-seasoned log of hickory can smolder for hours, kicking out steady, reliable warmth all night long. They’re the workhorses of the woodpile.
Softwoods like pine, spruce, and fir, on the other hand, burn incredibly hot and fast. They're fantastic for kindling because they catch fire so easily, but they fizzle out quickly. Because of their high resin content, they can also lead to a dangerous buildup of creosote in your chimney.
Think of it this way: hardwoods are your long-haul logs, and softwoods are your fire-starters.
Some woods, like black walnut, are excellent but have their own unique properties. If you're managing your own land, it pays to know the specifics. You can learn more in our detailed guide on planting and caring for walnut trees.
The difference in burn time between wood types is no small thing, as this chart shows.

As you can see, hardwoods give you far more burn time for your effort, making them a much more efficient fuel for heating.
For those just starting out, picking the right wood can feel a bit overwhelming. This table breaks down some of the most common species you'll encounter.
Best Firewood Species Comparison

This table just scratches the surface, but it gives you a good idea of what to look for. Hardwoods like hickory and oak deliver incredible heat but require more patience for seasoning and a bit more muscle to split.
Assessing a Tree's Health
Once you know what kind of tree you're looking for, you need to judge its condition. The absolute best find is standing deadwood—a tree that has died but is still upright. These trees have already started drying out naturally, which gives you a huge head start on the seasoning process.
Here are the tell-tale signs of good standing deadwood:
No leaves or green needles. This is the most obvious giveaway.
Loose or peeling bark. If the bark is flaking off easily, the wood underneath is drying out.
Faded, gray wood. The tree will have lost its color and look weathered by the elements.
Steer clear of trees showing signs of serious rot. Things like large fungal growths (often called conks), soft or spongy wood, and tons of insect holes mean the wood has lost its density. Rotted wood will produce very little heat and just isn't worth the effort.
A classic rookie mistake is grabbing a tree that's been lying on the ground for a long time. Once a log makes contact with the forest floor, it soaks up moisture like a sponge and starts to rot fast, turning good firewood into punky, useless junk.
Green Wood vs. Deadwood
Of course, felling green, living trees is also an option, particularly if you're managing your own woodlot. Just be prepared for the wait. Green wood is incredibly heavy with water—sometimes more than 50% of its total weight. It needs a much longer seasoning period, often at least a full year, before it's ready to burn.
If you go this route, try to cut green trees in the late fall or winter. The sap content is at its lowest then, which will shorten the drying time.
Practicing Sustainable and Legal Harvesting
Harvesting responsibly isn't just about being a good steward of the land; it's about making sure you have a firewood source for years to come. That means practicing selective thinning instead of clear-cutting, and leaving some dead trees standing as habitat for wildlife.
Before your chainsaw ever touches bark, make sure you have the right to be there.
On private land, get explicit, written permission from the owner. A handshake deal isn't enough.
On public lands, like national and state forests, you can often buy a firewood permit for a small fee. These permits come with strict rules about where, what, and how much you can cut.
Always check the local regulations. Many areas have rules against transporting firewood to prevent the spread of invasive pests like the emerald ash borer. A little foresight ensures your harvest is both productive and responsible.
Mastering Chainsaw Safety and Felling Techniques
Harvesting your own firewood is one of the most satisfying acts of self-sufficiency. But it’s a job that demands absolute respect. A chainsaw is an incredible tool, but it has no conscience. Your safety, and the safety of anyone around you, comes down to your preparation, your awareness, and your technique.
Before I even think about pulling the starter cord, my first priority is protecting myself from head to toe.
Gear Up First: Your PPE Isn't Optional
I never start my saw without a full set of Personal Protective Equipment (PPE). This isn’t a suggestion; it’s the non-negotiable first step for any wood-cutting. Think of it as your uniform for the job.
Helmet with Face Shield and Hearing Protection: This setup guards you against falling branches—we call them "widowmakers" for a reason—and shields your face from flying debris. The integrated earmuffs are essential for preventing long-term hearing damage from the saw’s roar.
Chainsaw Chaps or Pants: These are arguably the most important piece of gear you can own. They’re made with specialized fabric layers designed to instantly clog a chainsaw's sprocket and stop the chain on contact.
Steel-Toed Boots: Good boots protect your feet from falling logs and give you solid, non-slip footing on uneven forest ground.
Sturdy Gloves: A good pair of gloves improves your grip on the saw and saves your hands from countless splinters and minor cuts.
The Pre-Start Chainsaw Inspection
Just like you wouldn't drive a car without checking the basics, you should never fire up a chainsaw without a quick but thorough inspection. This routine takes less than a minute but can prevent equipment failure and serious injury. It’s a habit I’ve drilled into my own process for years.
I run through this mental checklist every single time:
Chain Tension: Is it right? The chain should be snug against the bar but still pull away just a little. A chain that's too loose can fly off, while one that's too tight causes excessive wear.
Chain Sharpness: A sharp chain cuts efficiently and makes nice, distinct wood chips. A dull chain creates fine sawdust and forces you to push the saw, which is always dangerous.
Fuel and Bar Oil: Are both tanks full? Running out of bar oil is a fast way to ruin your bar and chain.
Safety Features: Does the chain brake work? Test it to make sure it engages and disengages properly. This is your number one emergency stop.
Reading the Tree and Planning Your Felling
Once you and your saw are ready, the real skill begins. Felling a tree is a calculated process, not a brute-force attack. It all starts with carefully observing the tree and everything around it.
First, figure out the natural lean of the tree. Even a slight lean will heavily influence where it wants to fall. I like to look up at the top from a few different angles to get a clear picture. You also need to check the weight distribution of the branches—heavy limbs on one side will pull the tree in that direction.
Next, identify your felling zone. This is the area where you intend for the tree to land. It absolutely must be clear of other trees it could get hung up on, as well as any obstacles like big rocks or stumps.
The most critical step is planning your escape. Identify two clear paths away from the stump, each at a 45-degree angle from the direction of the fall. You never, ever turn your back on a falling tree.
Making the Felling Cuts
With your plan locked in, you can start cutting. The standard technique uses three primary cuts that work together to control the tree's fall.
The notch cut, or undercut, is made on the side of the tree facing your felling zone. It removes a wedge of wood and basically tells the tree where to go. A common and effective method is the conventional notch, which has a flat bottom cut and an angled top cut that meets it perfectly. This notch should go about one-third of the way into the tree's diameter.
The last one is the back cut. This is a horizontal cut made on the opposite side of the tree, just a little bit above the bottom of your notch. As you make this cut, you leave a small strip of uncut wood called the hinge. This hinge is everything—it acts just like a door hinge, guiding the tree safely to the ground. Never cut through your hinge.
Handling trees on your property, whether for firewood or general upkeep, requires understanding their specific needs. For instance, knowing the best time to prune fruit trees is just as critical as knowing how to fell a pine for winter heat.
Processing Your Wood from Tree to Log
With the tree safely on the ground, the quiet focus of felling gives way to the repetitive, physical work of turning a massive trunk into something you can actually handle. This is where the real workout begins. Processing a tree efficiently isn’t just about brute force; it’s about working smart to save your back and your chainsaw.

First thing's first: limbing. You've got to remove all the branches from the main trunk. It might feel like tedious cleanup, but this step clears your workspace, making everything that follows safer and easier. A clean log is a predictable log.
Safe and Smart Limbing
Start at the base of the tree and work your way toward the top. If there's any slope at all, always stand on the uphill side of the trunk. This simple habit prevents the log from rolling onto you once it’s free of the branches anchoring it in place.
When you're cutting, use the body of the saw to brace against the trunk itself. This gives you leverage and control, stopping the saw from jerking around unexpectedly. Cut the branches as flush to the trunk as you can without digging your chain into the main log.
And keep a sharp eye out for branches that are bent and under tension. These can spring back with violent force when cut. The trick is to always cut from the opposite side of where the tension is pulling.
Bucking Logs to a Consistent Length
Once the trunk is clean, it's time to start bucking it into rounds. This is just the fancy term for cutting the trunk into shorter, more manageable lengths. For most wood stoves, the gold standard is 16 inches.
Consistency is your best friend here. Cutting all your logs to the same length makes splitting and stacking so much more efficient. A uniform pile is stable and allows for better airflow—something that’s absolutely critical for proper seasoning. I just use a piece of chalk or a marking crayon to measure everything out beforehand.
Some folks even make a simple 16-inch guide stick to quickly mark the entire log before making a single cut. It's a small step that pays off big time when you're looking at a neat, well-stacked woodpile.
My biggest piece of advice for bucking is to let the saw do the work. A sharp chain should pull itself through the wood with minimal downward pressure from you. If you find yourself forcing the saw, it's a clear sign your chain is dull and needs sharpening.
How to Avoid a Pinched Chainsaw Bar
There's nothing more frustrating than pinching your chainsaw bar mid-cut. This happens when the cut you're making—called the "kerf"—closes in on the bar and traps it. It’s caused by the immense weight of the log creating pressure points.
To avoid this, you need to learn how to "read" the log. Figure out how it's supported and identify the tension and compression zones.
Compression Side: This is where the wood fibers are getting squeezed together. If you cut here first, the kerf will pinch your bar shut.
Tension Side: This is where the wood fibers are being stretched apart. The kerf will actually open up as you cut on this side.
Here’s how that plays out in the real world:
Log Supported on Both Ends: Imagine a log bridging a small ditch. The top is under compression, and the bottom is under tension. Start by making an upward cut from the bottom about a third of the way through. Then, finish with a downward cut from the top to meet your first cut.
Log Supported in the Middle: Now, picture the log balanced on a rock. The situation is reversed. The bottom of the log is compressed, and the top is under tension. Make a shallow cut on top first, then finish the job by cutting upward from the bottom.
If the log is just lying flat on the ground, the compression is at the very bottom. You can usually cut almost all the way through from the top without a problem. Just be careful not to run your chain into the dirt—it'll dull it in an instant. Taking a moment to read these forces transforms bucking from a frustrating chore into a smooth, satisfying process.
Splitting and Stacking for Perfect Seasoning
Alright, once your logs are bucked down to stove-length, it's time to get down to the real work of making firewood. This is where you turn those heavy, dense rounds into pieces that will actually dry out and burn clean when you need them. Splitting wood is as much about technique as it is about brute force, and how you stack it is every bit as important as how you split it.
This step is absolutely critical. A lot of people don't realize firewood dries from the inside out, not the other way around. Bark is nature’s perfect raincoat, and it will keep moisture locked inside a log for years. Splitting a round busts that seal wide open, exposing the inner wood to sun and air and kickstarting the seasoning process.
Choosing Your Splitting Method
You’ve got two main ways to go here: old-fashioned muscle with a splitting maul, or the mechanical muscle of a log splitter. The best choice really comes down to how much wood you’re processing and what kind of wood it is.
A good splitting maul is a classic for a reason. It’s cheap, it doesn’t need fuel or much maintenance besides a sharp edge, and it’s one heck of a workout. If you're just putting up a couple of cords of straight-grained wood like ash or maple, a maul is often all you need.
But if you’re looking at a mountain of wood, or you’re dealing with tough, stringy stuff like oak or elm, a hydraulic log splitter is a game-changer. It turns hours of back-breaking labor into a manageable afternoon. They’re an investment, for sure, but their value becomes crystal clear when you have a whole winter's worth of wood to get through. If you're thinking about one, it pays to see what's out there. You can check out our guide on the top electric log splitters of 2025 to get an idea of what might work for you.
The real secret to splitting by hand isn't about swinging like a madman. It's about reading the wood. Look for the small cracks, or "checks," radiating out from the center. Aim your maul along those lines. You're just helping the wood do what it already wants to do—split along its weakest points.
The Art of a Good Stack
Once your wood is split, don’t just toss it in a heap. A proper stack is probably the single most important part of getting truly seasoned firewood. The whole point is to get as much airflow and sunlight hitting every single piece of wood as possible.
There are a dozen ways to stack wood, but every good method follows the same basic rules:
Get it off the ground. Wood sitting on dirt will wick up moisture and start to rot before it ever dries. A couple of 2x4s, old pallets, or even just some long, straight logs laid down as a base will do the trick.
Leave room to breathe. Don't pack the rows tightly together. Leave a few inches of space between them so the wind can whistle right through.
Give it a roof, not a raincoat. You want to cover the top of the pile to keep rain and snow off, but leave the sides completely open to the wind. A simple tarp held down with rocks or a sheet of old corrugated metal is perfect.
A classic method is the rick (or a simple linear stack). You build two end towers by crisscrossing pieces of wood, then fill in the row between them. It's sturdy, simple, and gives you fantastic airflow.
For those who want to take it to the next level, there's the German holz hausen ("wood house"). It’s a circular stack that’s completely self-supporting and creates a natural chimney effect, pulling air up through the center of the pile. It’s a bit more work to build, but it dries wood incredibly fast.
Finding the Perfect Location for Your Woodpile
Where you put your woodpile matters just as much as how you build it. You’re looking for a spot that gets blasted by the sun and is exposed to the wind. You want to let nature do as much of the drying work for you as possible.
And whatever you do, avoid stacking wood right up against your house or shed. I know it’s convenient, but it traps moisture against your siding and is a flashing invitation for termites, carpenter ants, and mice to move from the woodpile straight into your home. As a rule of thumb, keep your stacks at least 20-30 feet away from any buildings.
You’ve done the hard work. The trees are felled, the logs are bucked, and the wood is stacked neatly, drying in the sun and wind. But all that effort comes down to one simple question: is it ready to burn?
Throwing wet, or "green," wood into your stove is one of the biggest mistakes a homesteader can make. It’s a frustrating, smoky, inefficient mess that chokes your fire and, worse, lines your chimney with dangerous creosote.

Think of it this way: when you burn green wood, the fire has to boil off all the water trapped inside the cells before it can actually produce heat for your home. This process wastes a massive amount of energy—up to 30% of the wood's potential BTUs are lost just turning water into steam. Properly seasoned firewood, on the other hand, puts all that energy where you want it: into warming your house.
Reading the Signs of Seasoned Wood
With a little practice, you can learn to spot well-seasoned wood just by looking at it, feeling it, and listening to it. These sensory checks will become second nature, letting you size up your woodpile at a glance.
Color Fades to Gray: Freshly split wood is bright and vibrant. As it seasons, the color dulls to a faded gray or a weathered yellowish-brown. Old-looking wood is good wood.
Cracks and Checks Appear: Take a look at the ends of your logs. You should see small cracks, known as checks, spreading out from the center. This is a classic sign that the wood is shrinking as it dries from the inside out.
The Sound Test: This one is my favorite. Knock two pieces together. Seasoned wood makes a sharp, hollow clack. Green wood just gives you a dull, heavy thud. The difference is unmistakable.
Another good tell is the bark. On a well-seasoned piece of hardwood, the bark is often loose and might even peel off easily. If it’s still clinging on for dear life, that log probably needs more time in the stack.
The Ultimate Test: A Moisture Meter
While your eyes and ears are great tools, they can sometimes be fooled. For a definitive, no-nonsense answer, nothing beats a wood moisture meter. This little gadget is an absolute must-have for anyone serious about burning wood.
The golden rule for firewood is a moisture content of 20% or less. A moisture meter takes all the guesswork out of the equation, giving you a hard number so you know for sure your wood is safe and ready.
To get a true reading, don't just test the outside of a log. The surface always dries faster. Grab a piece from your stack, split it open, and test the freshly exposed inner face. That’s where you’ll find the real moisture content.
How Long Does It Really Take?
Planning is everything when it comes to firewood. You can’t rush the seasoning process. Dense hardwoods like oak and hickory need a full 12 to 24 months to cure properly. Lighter woods, like maple, ash, or pine, can be ready much faster, often in just 6 to 12 months.
This is why so many of us work on a two-year cycle—the wood we’re burning this winter was cut and stacked last winter. As more households turn to renewable energy, having properly prepared fuel is more important than ever. The global firewood market, valued at USD 1034 million in 2024, shows just how many people rely on this fundamental resource. If you're interested, you can explore more about this growing market and its trends.
By understanding these timelines and using these simple tests, you can guarantee that every log you carry inside is perfectly seasoned—ready to give you maximum heat and minimal hassle all winter long.
Got Questions About Harvesting Firewood?
Once you start putting up your own firewood, you'll find that nothing teaches you better than a few seasons of trial and error. But every year, I hear the same questions from homesteaders just getting into the rhythm of heating with wood. Getting a straight answer to these common hurdles can save you a world of frustration and help you build a safer, smarter process from the get-go.
Here are a few of the most common questions that come up when you're relying on your own woodpile to stay warm.
How Can I Tell If Wood Is Ready to Burn?
This is the big one. The single most important part of a good, clean fire is properly seasoned wood. Your goal is to get the internal moisture content below 20%. Thankfully, you don't have to guess; your senses will tell you a lot.
First, just look at it. Seasoned wood isn't vibrant or fresh-looking. It's faded to a dull gray or a weathered yellow. The bark is often loose and cracked, or it might have fallen off completely. You should also see cracks, known as "checks," spreading out from the center of the log's end. That's a classic sign of wood shrinking as it dries out.
Next, listen to it. Grab two pieces and smack them together. Properly seasoned wood makes a sharp, hollow clack or ping. If you hear a dull, solid thud, that wood is still holding a lot of water. It's a surprisingly reliable test once you get the hang of it.
For a foolproof answer, a simple wood moisture meter is one of the best cheap tools a wood-burner can own. To get a true reading, split a piece from your main stack and test the freshly exposed face. That tells you what the internal moisture is, not just the reading from the dry surface.
What Is the Best Time of Year for Harvesting Firewood?
Timing your harvest can give you a massive head start on the seasoning process. The absolute best time to fell trees is in the late fall and winter. During this dormant season, deciduous trees have dropped their leaves, and the sap content is at its lowest point of the year.
This means the wood starts out with a much lower moisture level, which can easily shave months off your drying time. Cutting in the colder months has other perks, too. You're not fighting off bugs, the undergrowth has died back, and frozen ground can make it a whole lot easier to drag heavy logs out of the woods.
By cutting in the fall or winter, you give that wood a full spring and summer of sun and wind to do its thing. This simple schedule almost guarantees your woodpile will be perfectly cured and ready for the following heating season.
What Are the Most Common Dangers to Avoid?
A chainsaw is an incredible tool, but it demands your full respect every single time you fire it up. The most notorious danger is kickback. This happens when the upper tip of that moving chain snags on something, causing the bar to fly violently up and back toward you. The best prevention is good technique: always keep a firm, two-handed grip and never, ever cut with the tip of the bar.
Another common headache is a pinched bar. This is when the weight of the log closes the cut you're making, trapping your saw. You can avoid this by learning how to "read" the tension and compression in a log before you ever start a cut.
Finally, just be aware of where you are and what's around you. Always watch your footing, especially on uneven ground. Before you start cutting, look up and check for "widowmakers"—those dead, hanging branches that could fall while you work. Never fell trees alone, and always wear your full Personal Protective Equipment (PPE). These simple habits are what separate a productive day from a trip to the emergency room.
At The Grounded Homestead, we believe that self-sufficiency is a journey built on knowledge and experience. For more tips on growing your own food, sustainable living, and practical homesteading skills, visit us at https://thegroundedhomestead.com.


Facebook
Instagram
X
Youtube