
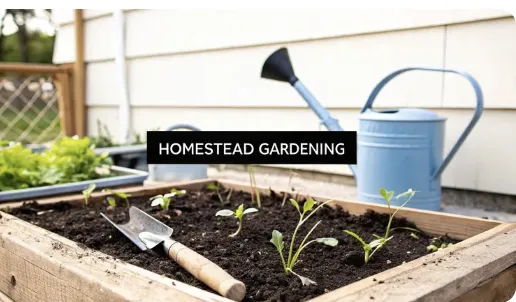
Homestead Gardening for Beginners Guide
Homestead Gardening for Beginners Guide
Starting a homestead garden isn't about turning your whole yard into a farm overnight. It’s about starting small, learning the ropes, and building your confidence one season at a time. The secret to a great first year really boils down to three things: choosing the right spot, building incredible soil, and picking plants that are easy to love.
Get those right, and you’re golden.
Starting Your Homestead Garden Without Feeling Overwhelmed

Jumping into homestead gardening can feel like a huge leap. But this is more than just sticking seeds in the ground; it’s about creating a real connection to your food and building a more self-sufficient life. So many beginners get stuck before they even start, worried they’ll fail or that they weren't born with a "green thumb."
Let me tell you, success has nothing to do with talent and everything to do with a solid, simple plan. Focus on a few core principles, and you'll sidestep the burnout and make your first season a rewarding one.
You’re not alone in this, either. The desire for real, homegrown food is growing. The global home gardening market is expected to jump from USD 15.78 billion in 2025 to USD 26.47 billion by 2034. People are waking up to the benefits of knowing exactly where their food comes from.
The Three Pillars of a Successful First Garden
To keep things from getting complicated, let's break it down into three foundational pillars. If you master these, you're setting yourself up for years of successful harvests and making the whole process feel way more manageable.
Think of this as your roadmap.
Strategic Site Selection: This is more than just finding a sunny patch. We’re talking about understanding how the sun moves across your property, where your water spigot is, and how easy it is to get to.
Building Incredible Soil: Great gardeners don't just grow plants; they cultivate living soil. This is hands-down the most important factor for healthy, productive crops.
Choosing Beginner-Friendly Plants: Not all vegetables are created equal. Starting with tough, high-yield varieties is the best way to guarantee a harvest that boosts your morale.
Zeroing in on these three things simplifies the whole idea of homestead gardening for beginners. It turns a big, intimidating project into a series of clear, doable steps.
The secret to avoiding overwhelm is to start smaller than you think you should. A well-managed 10x10 foot plot will produce far more food and joy than a 50x50 foot plot that's overrun with weeds and pests. Your goal this first year is to learn, not to feed the entire neighborhood.
Creating Your Quick Start Plan
Before you pick up a shovel, a little bit of planning goes a long way. This simple table breaks down the three pillars into your very first actions. It's a straightforward framework to keep you focused on what truly matters from day one.
Here’s a quick-start guide to keep things simple as you get started.
Homestead Garden Quick Start Pillars
, Soil Health (test nutrients/drainage), Plant Choices (research 5–7 easy crops).")
Using this table as your guide ensures your energy is invested where it will have the biggest impact, setting you up for a garden you can be proud of.
Finding the Perfect Spot for Your Garden

The success of your garden is often decided before you ever break ground. Choosing the right spot is the first—and I’d argue most important—decision you'll make. It’s about more than just finding a patch of grass; it's about learning to observe your property and think like a plant.
When you invest this time upfront, you save yourself countless headaches later. A well-placed garden works with your landscape and your daily routine, not against them. This mindful placement is a key part of homestead gardening for beginners, turning what could be a chore into a simple, enjoyable task.
Conduct a Simple Sun Audit
Most of the vegetables and fruits you'll want to grow are sun-worshippers. They convert sunlight into energy, which means more sun equals a bigger, healthier harvest. Your main goal is to find a spot that gets at least 6-8 hours of direct, unfiltered sunlight every day. This is non-negotiable for crops like tomatoes, peppers, and squash.
Don't just guess. Take a day to do a simple "sun audit" of your property.
Morning (around 9 AM): Walk outside and make a mental note of exactly which areas are getting full sun.
Noon (12 PM): Check again. Is that same spot still sunny, or has a shadow from your house or a big oak tree crept in?
Afternoon (3 PM): Do one last check. A spot that looked perfect in the morning might be in complete shade by the time the afternoon heat rolls in.
This little observation exercise will reveal the prime real estate on your land. You might be surprised to find the most convenient spot isn't actually the sunniest.
Think Beyond the Sunlight
While sunshine is critical, a few other practical things will make your gardening life infinitely easier. Overlook these, and you risk turning a joyful hobby into a frustrating burden. Remember, the best garden is one you actually enjoy tending.
Proximity to Water
Your garden will need consistent water, especially during its first few weeks and in the peak of summer heat. Trust me, lugging heavy watering cans clear across the yard gets old fast.
Position your garden as close to a water source as possible. A spot within easy reach of a garden hose will save you an incredible amount of time and physical effort throughout the season.
Protection from the Elements
Strong winds can snap delicate seedlings, stress bigger plants, and dry out your soil in a hurry. Look for a location with a natural windbreak—like the side of a house, a solid fence, or a line of shrubs. This can offer valuable protection. If you live in a windy climate, try to avoid wide-open, exposed areas.
Choose Your Garden Layout
Once you’ve scouted a few potential spots, it's time to think about the physical structure of your garden. For someone just starting out, there are two main layouts to consider, and each has its pros and cons.
In-Ground Gardens
This is the traditional method: tilling or digging directly into the existing ground. It’s the most cost-effective way to get started since it requires minimal materials. The catch? You're completely dependent on the quality of your native soil, which might need a lot of work to become plant-ready.
Raised Garden Beds
Raised beds are contained structures, usually made of wood or metal, that you fill with a high-quality soil mix. This gives you complete control over your growing medium from day one—a massive advantage for beginners. They also offer excellent drainage and can be a lot easier on your back.

Ultimately, a well-planned garden adds more than just food to your table; it also enhances your property. Investing in your landscape can significantly boost property value. In fact, well-maintained gardens can increase residential property resale values by 10-20%, showing the powerful return on your efforts. You can find more details about how landscaping impacts home value on Raleigh Realty.
How to Build Rich and Healthy Garden Soil

Let's get one thing straight: Great gardeners don't just grow plants; they build soil. This is the single most important lesson in homesteading. Forget "feeding your plants"—your real job is to feed the soil. Do that, and the soil will give your plants everything they need to thrive.
A rich, living soil is a bustling underground city, teeming with billions of microorganisms that create the perfect home for strong roots. Building this foundation is the best investment you can make in your garden. It’ll turn even the toughest ground into a productive powerhouse.
Know What You're Starting With
Before you can make your soil better, you need to know what you’re working with. Most garden soils are a mix of sand, silt, and clay. The ratio of these three things determines your soil’s texture and how it behaves when you water it or try to dig in it.
A simple "jar test" can give you a surprisingly clear picture. Just fill a mason jar about halfway with soil from your garden, top it off with water, shake it like crazy, and then let it settle for a day. You'll see distinct layers form: sand on the bottom, silt in the middle, and clay on top.
Heavy Clay: If you have a thick clay layer, your soil holds moisture well but can get compacted and waterlogged. This suffocates roots, starving them of oxygen.
Sandy Soil: A big sand layer means your soil drains fast—sometimes too fast. It can wash away valuable nutrients before your plants even get a chance to use them.
Loamy Soil: The dream soil for any gardener. Loam is a balanced mix of all three, holding just enough moisture while still allowing for excellent drainage and airflow.
Knowing your soil type helps you choose the right amendments. Clay soil needs things that open it up and improve airflow, while sandy soil needs organic matter to help it hold onto water like a sponge.
The Magic of Organic Matter
No matter what kind of soil you have, the answer is always the same: add organic matter. This is the secret ingredient that transforms dead dirt into a living, fertile ecosystem. It breaks up heavy clay and helps sandy soil retain moisture, improving the structure of both.
Organic matter is just decomposed plant and animal material. As it breaks down, it releases a steady supply of essential nutrients for your plants. Think of it as the ultimate slow-release fertilizer, and the best part is, you probably have access to it for free.
The goal isn't sterile dirt; it's a bustling underground community. By consistently adding organic material, you're not just improving texture—you're feeding the beneficial bacteria, fungi, and earthworms that make a garden truly thrive.
Key Amendments for Building Soil
Building great soil isn’t a one-and-done job; it's an ongoing conversation with your garden. Each season gives you another chance to add more life back into your beds. For a deeper dive, our comprehensive guide on preparing garden soil for planting has a ton of extra detail.
Here are the workhorses every new homesteader should get to know:
Compost: This is the gold standard, period. Good, well-rotted compost adds balanced nutrients, improves soil structure, and inoculates your garden with beneficial microbes. Make it yourself from kitchen scraps and yard waste, or buy it by the bag.
Aged Manure: Manure from animals like chickens, cows, or horses is a fantastic source of nitrogen. The key word here is "aged." It absolutely must be composted for at least six months, because fresh manure is too "hot" and will burn your plants to a crisp.
Leaf Mold: This is just what it sounds like: decomposed leaves. Pile up your autumn leaves, let them rot for a year or two, and you’ll have a phenomenal soil conditioner that’s especially good at holding moisture.
Cover Crops: Also known as "green manure," these are crops like clover, winter rye, or vetch that you plant in the off-season. Right before they go to seed, you just chop them down and turn them into the soil, where they release a huge boost of organic matter and nutrients.
Working a few inches of these materials into the top layer of your garden each year will dramatically improve its health and productivity. This simple habit is the cornerstone of successful homestead gardening, creating a resilient garden that gets better—and easier—over time.
Choosing Your First Crops and Creating a Planting Plan
Walking through a garden center in spring is almost intoxicating. With all those colorful seed packets promising massive harvests, it's easy to get carried away and buy one of everything. But for your first year on the homestead, a little bit of strategy goes a long way.
The secret isn't growing everything; it's growing a few things really well. Success is the best motivator. When you see baskets overflowing with zucchini, bush beans, and cut-and-come-again lettuces, you build the confidence to tackle more demanding crops next season. Start with the easy wins.
Know Your Climate Zone Before You Buy
Before you get attached to that picture of a beautiful melon on a seed packet, you need to find your USDA Plant Hardiness Zone. It's a simple number that tells you the average coldest winter temperature in your area. This is critical—it helps you pick plant varieties that are actually built to survive where you live.
Finding your zone is easy. Just pop your zip code into the USDA website. Taking this one small step saves you the heartache of watching a plant fail because it was never meant for your climate.
Seeds vs. Starts: What's Right for You?
This is a classic crossroads for every new gardener: do you start from seed or buy young plants (often called "starts" or "transplants")? Honestly, there’s no wrong answer, and the best approach often depends on the specific plant.
Starting from Seed: This is the cheapest route and gives you access to a much wider world of unique and heirloom varieties. It's the perfect method for crops that grow fast and hate having their roots messed with—think beans, peas, carrots, and radishes.
Buying Starter Plants: This is a fantastic shortcut, especially for plants with a long growing season. Things like tomatoes, peppers, and eggplant need a big head start to produce before the first fall frost. Buying healthy starts from a local nursery gives you that jumpstart.
For your first go at homestead gardening for beginners, I'd recommend a hybrid approach. Sow easy crops like beans, squash, and lettuce directly in the garden, but invest in a few high-quality tomato and pepper starts. It's the best of both worlds.
The single most important date for any gardener is the average last spring frost date for their area. This one date dictates your entire planting schedule. It tells you exactly when it's safe to put tender plants in the ground without risking a late freeze.
Top 10 High-Yield Plants for Beginner Homesteaders
To get you started, here are some reliable, productive crops that are perfect for a first-year garden. These have been chosen because they are forgiving, produce a lot of food in a small space, and will help you feel successful right out of the gate.

Focusing on a few of these tried-and-true plants will ensure you have something delicious to bring to the table, which is the whole point of this endeavor.
Creating a Simple Planting Schedule
Now that you have your plant list and your last frost date, you can sketch out a basic planting calendar. This doesn't need to be a complex spreadsheet—a piece of paper or a note on your phone will do just fine.
The idea is to work backward from your last frost date. For instance, hardy crops like peas and spinach can usually go in the ground 2-4 weeks before the last frost. Tender plants like tomatoes and zucchini are the opposite; they need to wait until 1-2 weeks after all danger of frost is gone. The back of your seed packet is your best friend here—it will give you the specific timing for each variety.
This simple visual shows how spacing differs between common vegetables, a key detail to add to your plan.

As you can see, giving sprawling plants like tomatoes plenty of elbow room is non-negotiable, while you can pack root vegetables like carrots in much tighter. Getting this right from the start prevents overcrowding, which means better airflow, less disease, and ultimately, a much bigger harvest from every single plant. A simple sketch of your garden beds with circles for each plant is all you need to create an organized, productive, and successful first garden.
Practical Garden Care and Natural Pest Control
Once your plants are in the ground, your role shifts from builder to caretaker. This is where the real rhythm of homestead gardening begins, moving into the daily and weekly tasks that keep a garden alive and thriving. Your focus is no longer on digging and planting, but on the thoughtful, consistent maintenance that builds healthy, resilient plants.
This phase isn't about back-breaking labor. It's about developing smart, proactive habits. We'll get into simple watering techniques that build strong roots, weeding strategies that actually work, and how to manage pests without ever reaching for a chemical spray bottle.
Smart Watering and Weeding Habits
Watering seems simple enough, but how you water can make or break a plant's ability to withstand a dry spell. The real goal is to encourage deep, robust root systems that can find moisture long after the surface has dried out.
Water Deeply, Not Daily: A light sprinkle every day just encourages shallow, lazy roots. Instead, give your garden a deep, long soak once or twice a week, letting the water penetrate 6-8 inches into the soil. This forces the roots to grow downward in search of water, creating much stronger, more drought-tolerant plants.
Water the Soil, Not the Leaves: Splashing water all over the foliage is an open invitation for fungal diseases. Use a soaker hose or a watering wand to deliver water directly to the base of your plants. This keeps the leaves dry and cuts down on the risk of blight and mildew.
Time It Right: The best time to water is early morning. Plants get a chance to drink up before the hot afternoon sun causes evaporation, and any moisture that does hit the leaves has plenty of time to dry.
Weeds are just a fact of life in any garden, but they don't have to win. The key is to get ahead of them before they get established. A thick, 3-4 inch layer of mulch—like straw, shredded leaves, or wood chips—is your best defense. It smothers new weeds before they see the light of day, holds moisture in the soil, and even helps regulate soil temperature.
Mulching is the single most effective labor-saving technique in a homestead garden. It drastically cuts down on weeding time, reduces your watering needs, and feeds your soil as it breaks down.
An Introduction to Natural Pest Management
A truly healthy garden is a balanced ecosystem, not a sterile, lifeless plot. Seeing a few bugs is normal; an infestation, however, usually points to an underlying imbalance. The whole point of natural pest control is to create a garden so healthy and diverse that pests never get the chance to take over.
This approach, often called Integrated Pest Management (IPM), is all about prevention. It’s about building up your garden's own natural defenses instead of just reacting to every problem that pops up. A huge part of this is simply learning to work with nature, not against it. For a much deeper dive, check out our guide on building a natural pest control plan for your homestead.
The interest in sustainable practices like this is a big reason why home gardening has exploded. In fact, residential gardening makes up over 45% of the global gardening market, which was valued at around USD 120 billion in 2024. This trend shows a real shift toward self-sufficiency and healthier ways of living.
Your Garden's Security Team
Why do all the work yourself? You can actively recruit a team of beneficial creatures to help protect your crops from the bad guys.
Attract Beneficial Insects: These are the "good bugs" that prey on common garden pests. Plants like dill, fennel, yarrow, and sweet alyssum provide the nectar and pollen that attract ladybugs, lacewings, and hoverflies. These guys are voracious predators of aphids and other little pests.
Work with Companion Plants: Some plants are natural pest repellents. Marigolds are famous for warding off nematodes in the soil, while strong-smelling herbs like rosemary, mint, and basil can confuse pests like cabbage moths that hunt by scent. Planting nasturtiums near your squash can also act as a "trap crop," luring squash bugs away from your prized zucchini.
Manual Removal: Sometimes the old ways are the best. For bigger pests like tomato hornworms or Japanese beetles, there's nothing more effective than picking them off by hand and dropping them into a bucket of soapy water. It's direct, chemical-free, and surprisingly satisfying.
If you're looking to control garden pests with things you already have in your kitchen, you can find a lot of great ideas in these effective homemade insect killer solutions. By putting these simple care and pest management strategies into practice, you'll be well on your way to a garden that's not just productive, but also resilient and largely self-sustaining.
Of course. Here is the rewritten section, crafted to sound completely human-written and natural, following the style of the provided examples.
Got Questions? Every New Homesteader Does.
Jumping into homestead gardening feels like learning a new language. You're going to have questions. Don't worry, every single one of us started right where you are, wondering if we were doing it right.
This isn't about theory. It’s about getting you clear, practical answers so you can get your hands dirty with confidence. Let's tackle some of the most common questions that pop up when you're just starting out.
How Much Space Do I Really Need to Start?
The phrase "homestead garden" conjures images of massive, sprawling fields, but that’s not where you start. The reality is much more manageable, and you can grow a surprising amount of food in a small footprint.
For your first year, aim for a plot around 100-200 square feet. That could be a couple of 4x8 foot raised beds in the yard or even a well-planned collection of large pots on a sunny patio. The goal isn't to feed your family for a year right out of the gate. It's to learn the ropes—the rhythm of watering, weeding, and harvesting—in a space you can control. Master that first, then expand.
What Is the Biggest Mistake Beginners Make?
Hands down, the most common mistake is starting too big. That first rush of spring enthusiasm is a powerful thing, and it's easy to let it convince you to till up a huge plot. But a garden that’s too large quickly becomes an overwhelming jungle of weeds, pests, and chores, leading straight to burnout.
The second biggest mistake? Ignoring the soil. So many new gardeners focus only on the plants, but your soil is the true foundation. Just digging a hole and dropping in a plant without improving the ground first is a recipe for weak growth and disappointment.
Building rich, living soil is the single best investment you can make for your garden's long-term health. Everything else depends on it.
How Do I Know When My Vegetables Are Ready to Harvest?
Learning the specific cues for each vegetable just takes a little practice. Your seed packets are your first clue—they almost always give a "days to maturity" estimate. Use that as a rough calendar for when to start paying close attention.
But here are a few real-world signs to look for:
Tomatoes: They should be fully colored and feel firm, with just a slight give when you gently squeeze them.
Zucchini: Don't wait for them to turn into giant clubs! They're most tender and flavorful when they’re about 6-8 inches long.
Leafy Greens: For lettuce, chard, and kale, you can start harvesting the outer leaves as soon as they're big enough for a salad. This "cut-and-come-again" method keeps the plant producing from its center for weeks.
Bush Beans: The pods should feel firm and full. They’ll snap cleanly in two when you bend them. If they’re limp or rubbery, they need more time.
A great habit to get into is doing a quick search for "how to harvest [vegetable name]" before you think it's ready. You'll learn the little tricks for each crop.
Do I Need to Buy a Lot of Expensive Tools?
Absolutely not. The tool aisle at the garden center is tempting, but you only need a few high-quality basics to get going. Resist the urge to buy every shiny gadget and focus on tools that will last.
Your essential toolkit really just comes down to these four things:
A Sturdy Garden Fork: Perfect for loosening and aerating soil without destroying its structure like a tiller can.
A Comfortable Hand Trowel: You'll use this for everything from transplanting seedlings to digging out stubborn weeds.
A Sharp Pair of Pruning Shears: Essential for harvesting herbs, snipping tough vegetable stems, and trimming back unruly plants.
A Good Watering Can or Hose Nozzle: Find one with a gentle "shower" setting that won't blast your delicate seedlings out of the ground.
Invest in these four, and you'll be set for years. You can always add more specialized gear later on as your garden and skills grow.
At The Grounded Homestead, our goal is to provide you with the practical knowledge and confidence you need to grow your own food and live a more self-sufficient life. Explore our other guides and join our community to continue your homesteading journey.


Facebook
Instagram
X
Youtube