
Your Guide to Preparing Garden Soil for Bumper Crops
Your Guide to Preparing Garden Soil for Bumper Crops
Preparing your garden soil is about so much more than just digging a hole. You're actually creating a living, breathing ecosystem for your plants. The real work involves understanding what your soil is made of, adding the right amendments to fix what’s missing, and then conditioning it to support strong, healthy growth. The end goal is a foundation rich in organic matter, with a great structure and a full pantry of nutrients.
The Secret Below Your Feet: Why Great Soil Matters

The true foundation of a thriving garden isn’t just about sunshine and rain—it’s the world happening right under your boots. So many new gardeners think soil is just dirt. But it's a bustling community of minerals, air, water, and countless living organisms. Once you move past the simple advice of just "add compost," you discover a complex system where soil structure, fertility, and biology have to work in perfect harmony.
When you start preparing your garden beds, you're not just making a spot for roots to take hold. You’re building a home that provides everything a plant needs to flourish.
Why Exceptional Soil Is Your Best Partner
I've learned from years in my own garden that when you treat soil like an active partner instead of just a patch of dirt, everything changes. Your entire approach shifts. It's a mindset that sets you up for success before you even pick up a shovel.
Exceptional soil grows resilient plants that naturally fight off diseases and give you incredible harvests.
Healthy soil is the single most important factor in a successful garden. It’s the difference between struggling plants and a truly abundant, low-maintenance harvest.
It seems the rest of the world is catching on, too. The global garden soil market was valued at around USD 3.34 billion and is expected to climb to USD 5.12 billion by 2033. That kind of growth shows just how much focus is shifting toward soil quality and preparation. You can see more on this trend in the garden soil market analysis on businessresearchinsights.com.
The Three Pillars of Soil Health
To make this all a bit more practical, I like to think of great soil as being held up by three core pillars. If you neglect any one of them, you’re setting yourself up for disappointment, whether it’s weak growth, endless pests, or a pitiful harvest.
The table below breaks down these three pillars. Understanding them is the first step to truly transforming your garden from the ground up.

Each of these pillars is absolutely vital. This guide will walk you through exactly how to assess and improve all three in your own garden. For a closer look at what your food crops need, don't miss our guide on the best soil for growing vegetables.
How to Read Your Soil Like a Pro
Before you can start building better garden soil, you have to learn to read what’s already there. Think of yourself as a soil detective; the clues are right there in your hands and under your feet. This isn’t about guesswork. It’s about making smart choices based on what your specific patch of earth is telling you.
The best way to start is by simply getting a feel for your soil’s texture. This first clue tells you if you’re working with a base of sand, silt, or clay.
The Feel Test: Your First Clue
Go grab a handful of slightly damp soil from your garden bed. Squeeze it firmly in your fist, then open your hand. What you see and feel will reveal its basic identity.
Sandy Soil: If it feels gritty and falls apart the second you open your hand, you’ve got sandy soil. It’s great for drainage but struggles to hold onto moisture and nutrients.
Clay Soil: If the soil forms a tight, dense ribbon when you rub it between your thumb and forefinger and feels slick or sticky, you’re dealing with clay. It holds water well—sometimes too well—and can become compacted and waterlogged.
Loamy Soil: If it holds its shape but crumbles easily when you poke it, congratulations! You have loam, the ideal starting point for most gardens.
This simple squeeze test is your first step toward understanding the physical foundation you'll need to work with.
Is Your Garden Thirsty or Drowning?
Next, you need to see how well your soil handles water. Good drainage is crucial because plant roots need oxygen just as much as they need a drink. This is where a basic percolation test comes in handy.
Dig a hole about one foot deep and one foot wide. Fill it to the top with water and let it drain completely. Then, fill it a second time and get your timer out.
If the water disappears in less than a couple of hours, your soil is likely sandy and drains too quickly. If it takes more than four hours to drain, you have slow-draining clay.
A professional soil analysis is the single most valuable investment you can make when preparing garden soil. It removes all the guesswork and provides a clear, scientific roadmap for what your garden actually needs to thrive.
Getting a Professional Soil Analysis
While hands-on tests are great for assessing structure, a professional lab test is a game-changer for understanding your soil’s chemistry. These tests reveal precise pH levels and nutrient deficiencies that are impossible to see with the naked eye. You can grab a test kit from your local county extension office or order one online.
Once you get the report back, don't let the numbers intimidate you. Just focus on these key metrics:
Soil pH: This measures how acidic or alkaline your soil is. Most vegetables and flowers are happiest in a pH range of 6.0 to 7.0. If your pH is way off, plants can't access the nutrients that are already in the soil.
Organic Matter (OM%): This percentage tells you how much decomposed life is in your soil. You should aim for at least 5%. High organic matter is the secret to great soil structure, water retention, and a steady supply of nutrients.
N-P-K Levels: This shows you the available amounts of Nitrogen (N), Phosphorus (P), and Potassium (K)—the big three macronutrients. The report will tell you if these are low, sufficient, or high, guiding exactly what kind of fertilizer or amendments to add.
Reading these results empowers you to stop guessing and start building the perfect soil recipe for your garden.
Matching Soil Amendments to Your Garden's Needs
With your soil test results in hand, you’ve officially moved from guessing to knowing. This is the part I love—playing garden scientist and mixing up the perfect recipe for your specific ground. Preparing garden soil isn't about just dumping a generic bag of topsoil; it’s about taking targeted action to fix what’s wrong and enhance what’s right.
Whether you're battling sticky clay that holds water like a bucket or sand that drains faster than you can fill it, the right amendments can completely transform your garden's potential. This step is so critical, in fact, that the entire manufactured soil industry is booming. It's projected to grow from USD 1.84 billion to USD 3.21 billion by 2029, a surge that shows just how many of us have realized our native soil needs a helping hand. If you're curious about the market trends, you can read the full research on the manufactured soil market from databridgemarketresearch.com.
Correcting Problematic Soil Structures
Let's get practical. If your soil test and feel test both screamed "clay," your main job is to improve aeration and drainage. Heavy clay soil is made of tiny, dense particles packed so tightly there’s no room for air or for water to escape. This suffocates plant roots.
For this common problem, compost is your best friend. I always recommend adding a generous 2-4 inches of good compost and working it into the top 6-8 inches of soil. The organic matter physically forces the clay particles apart, creating those all-important air pockets. If your clay is especially compacted, gypsum can also work wonders by chemically changing the clay's structure, causing it to clump together into larger, more favorable aggregates.
On the flip side, if you're dealing with sandy soil, your challenge is retention. Water and nutrients pass right through it, leaving your plants thirsty and hungry. Here, you need to add materials that act like a sponge. Peat moss and vermiculite are excellent choices because they absorb and hold moisture. Well-rotted manure and compost are also fantastic—they improve water retention while slowly releasing nutrients right where the roots need them.
The most impactful amendment for nearly any soil type is high-quality organic matter. Whether it's compost, aged manure, or leaf mold, it improves both heavy clay and loose sandy soils, acting as the ultimate equalizer.
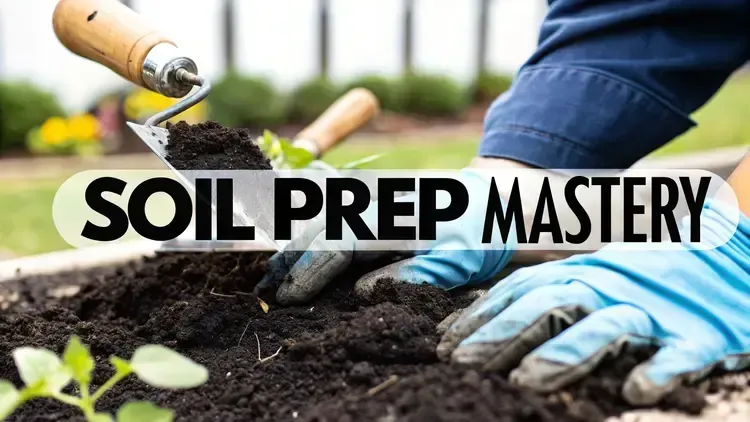
The image below shows the simple but powerful act of mixing organic matter into your soil. It’s a fundamental step for preparing any garden bed, and it’s where the magic really begins.

This visual really drives home how adding rich compost directly addresses soil structure, which is the physical foundation for healthy, thriving plant roots.
Common Soil Problems and Their Organic Solutions
To make things even clearer, I've put together a quick-reference table. Think of it as a cheat sheet for matching the right organic fix to your soil's specific issue.

This table should help you quickly diagnose and treat the most frequent soil troubles you'll encounter in a home garden.
Adjusting Your Soil pH
Your soil test also gave you a crucial pH number. If this number is off, your plants can't access the nutrients already in the soil, no matter how much you fertilize. I like to think of it as a locked pantry; all the food is there, but the plants simply can't get to it.
Here’s a quick guide for getting your pH in the right range:
For Acidic Soil (pH below 6.0): To raise the pH and make it more alkaline, you'll need to add lime. Dolomitic lime is a great choice because it also provides essential magnesium and calcium. Always follow the application rate on the bag based on what your soil test recommends.
For Alkaline Soil (pH above 7.5): To lower the pH and make it more acidic, elemental sulfur is the most common amendment. This is especially important if you're trying to grow acid-loving plants like blueberries, azaleas, or rhododendrons.
A word of caution: changing your soil’s pH is a slow-and-steady process. It’s best to apply these amendments in the fall to give them plenty of time to work their magic before spring planting. As you continue to build your soil, you can learn more about how to feed it throughout the season with our guide on a natural fertilizer for vegetables.
Tilling vs. No-Till: Which Method Is Right for Your Garden?
Once you have your amendments measured out, the next big question is how to get them into the soil. This is where gardeners often part ways, falling into two main camps: traditional tilling and the increasingly popular no-till (or no-dig) method.
This isn’t just about choosing what’s easiest. It’s a decision that directly impacts the long-term health of your soil. Tilling can feel incredibly satisfying—it gives you that clean, fluffy slate—but it can also be a wrecking ball to the delicate soil ecosystem you’re trying to build.
The Case for Tilling (and When to Use It Sparingly)
Let's be honest: sometimes, you just have to break new ground. Tilling, whether with a rototiller or by double-digging with a good shovel, is the fastest way to incorporate a mountain of amendments or bust through a heavily compacted patch of earth. If you're turning a section of lawn into a garden for the first time, tilling can feel like the only way to create a plantable bed.
But there’s a golden rule I learned the hard way: never, ever till wet soil. If you work soggy ground, especially heavy clay, you’ll destroy its structure. The soil particles smear together and dry into concrete-like clods that are a nightmare to work with—far worse than what you started with. Always wait until the soil is just damp enough to crumble easily in your hand.
Traditional tilling is a reset button for your soil's biology. While useful for establishing a brand-new bed, it pulverizes soil structure, kills earthworms, and disrupts the beneficial microbes you want on your side.
Over-tilling is another common mistake. It burns through organic matter and can create a compacted "hardpan" layer just below where the tines reach. My advice? If you must till, treat it as a one-time event for a new garden bed, not a yearly chore.
Embracing No-Till Gardening
The no-till (or "no-dig") philosophy is all about working with nature, not against it. It focuses on preserving the natural soil structure and the complex web of life thriving within it. Instead of aggressively mixing amendments in, you simply layer them on top. This approach mimics how soil is built in a forest, with organic matter breaking down from the top and feeding the layers below.
I’ve come to rely on these no-till techniques because they’re both gentle and incredibly effective:
Lasagna Gardening: Also known as sheet mulching, this is my go-to for starting new beds. You layer materials like cardboard, compost, fallen leaves, and straw right on top of the ground (even over grass). By spring, these layers have decomposed into rich, beautiful soil without you ever lifting a shovel.
Top-Dressing: For your existing garden beds, this is as simple as it gets. Just spread a few inches of good compost over the surface in the fall or early spring. The earthworms and soil microbes will handle the rest, pulling those nutrients down into the root zone for you.
Using a Broadfork: If you have compacted soil but want to avoid the destructive nature of a tiller, the broadfork is your best friend. This large, U-shaped fork has long, heavy-duty tines that you step on to loosen the soil deeply. It creates channels for air and water to penetrate without inverting the soil layers or destroying its structure.
So, which path should you choose? It really depends on your starting point. For a brand-new plot with compacted, lifeless soil, a single, well-timed till might be a necessary first step. But for any established garden, switching to no-till methods will build a far healthier, more resilient, and more productive soil ecosystem in the long run.
Keeping Your Soil Alive All Year Long

Getting your garden soil right isn’t a one-and-done project you cross off the list in spring. It's more like a long-term relationship you build throughout the year. The hard work you’ve put into amending and conditioning your soil is a fantastic start, but now the real goal is to protect that investment and keep building its health through every season.
Think of it this way: the effort you put in now pays dividends for many harvests to come. You learn to work with the natural rhythm of your garden, constantly improving the very foundation of your future crops.
It’s a mindset that more and more people are adopting. The garden soil market itself has seen a jump from $4.09 billion to a projected $4.44 billion, a shift largely driven by the boom in home gardening and organic practices. You can discover more insights about this trend on einpresswire.com.
Protect and Enrich with Cover Crops
My absolute favorite trick for fall is planting a cover crop. After clearing out the last of the summer vegetables, sowing seeds like winter rye, hairy vetch, or crimson clover is a total game-changer for protecting bare soil.
These living mulches act as a green blanket all winter. Their roots hold everything in place, preventing your valuable topsoil from eroding away under harsh winter winds and rain.
Then, in the spring, you simply cut them down and lightly turn them into the soil. As they decompose, they provide a free, slow-release dose of nitrogen and organic matter, feeding the soil life and setting your spring plants up for massive success.
Feed Your Garden During the Growing Season
Your work doesn’t stop once the summer plants are in the ground. Heavy feeders like tomatoes, corn, and squash can burn through available nutrients pretty quickly. To keep them thriving, I rely on a simple technique called top-dressing.
This is just the act of spreading a thin layer of nutrient-rich material around the base of your plants mid-season. It’s an easy way to give them a gentle boost without disturbing their roots.
Think of top-dressing as giving your garden a mid-summer snack. It provides a slow and steady supply of food that keeps plants vigorous and productive right up until harvest.
Some great options for top-dressing include:
Finished Compost: A 1-2 inch layer provides a balanced mix of nutrients and feeds those crucial soil microbes. If you're looking for guidance, check out our guide on how to compost at home.
Worm Castings: This stuff is a powerhouse amendment, packed with nutrients that are immediately available to your plants.
Well-Rotted Manure: Apply a light layer to give plants a solid nitrogen boost, which is perfect for encouraging leafy growth.
The Secret Weapon: Mulch
Finally, one of the most important steps for maintaining healthy soil all year is applying a thick layer of mulch. A 2-4 inch layer of organic material like straw, shredded leaves, or wood chips is the secret to conserving water and keeping weeds at bay.
Mulch acts as a protective barrier, insulating the soil from extreme temperature swings and dramatically reducing water evaporation. This means you’ll water less, and your plants will be much happier for it. As the mulch slowly breaks down, it continuously adds organic matter, further improving your soil’s structure and fertility over time.
When you’re out in the garden with your hands in the dirt, the same practical questions always seem to pop up. Preparing garden soil isn't a one-and-done task; it's a process, and it's perfectly normal to run into little puzzles along the way. I get asked these questions all the time, so let's walk through them with some straightforward answers to help you move forward with confidence.
Can I Amend My Soil Right Before I Plant?
This is probably the biggest question I hear. The short answer is, it depends on what you're adding. While you can add finished compost pretty much anytime without issue, major structural and pH changes are a different story. They're best done in the fall.
Think of it like marinating a tough cut of meat. Amendments like lime (to raise pH) or elemental sulfur (to lower it) need time to work their magic. Giving them the entire winter to break down and integrate into the soil creates a much more stable and balanced environment by the time spring planting rolls around. If you try to make those big changes at the last minute in spring, you can sometimes shock the soil's ecosystem.
How Much Is Enough?
Another common sticking point is quantity. Just how much compost or amendment is the right amount? For general soil improvement—making what you have better, richer, and more alive—a good rule of thumb is to spread 2-3 inches of quality compost over the entire bed. If you're starting with really tough stuff like heavy clay or pure sand, don't be afraid to go up to 4 inches.
Now, if a soil test has pointed you toward specific amendments like lime or sulfur, it's critical to follow the application rates on the product's label. This isn't a "more is better" situation. Adding too much can be just as damaging as adding too little, locking up nutrients or drastically throwing off your pH.
I see this mistake all the time: under-mulching. A thin, decorative layer of mulch isn't doing much. To really suppress weeds, hold in precious moisture, and protect that soil life you're building, you need a substantial 2-4 inch layer. Don't be shy with the mulch!
What If My Soil Is Still Bad After Amending?
First off, don't get discouraged. Building great soil is a marathon, not a sprint. If you've added amendments and still feel like your soil is lacking, that's often part of the process. It can take a few seasons of consistent effort to truly transform poor soil, especially if you're working with heavy, compacted clay or ground that's been depleted for years.
The key is persistence. Here are the strategies that make a difference over the long haul:
Keep adding organic matter: Make it a habit. Top-dress your beds with compost every spring and fall. Every single application helps.
Use cover crops: In the fall, plant something like winter rye or clover. As it grows, its roots break up compacted soil, and when you turn it in, it adds a huge boost of organic matter and nutrients.
Mulch relentlessly: A continuous layer of organic mulch (like straw, shredded leaves, or wood chips) will slowly break down and feed the soil from the top down, just like in a forest.
If you’re still not seeing the progress you want after a couple of years, it might be time for a follow-up soil test. This can tell you if you're dealing with a persistent nutrient deficiency or if your pH has crept back to its old ways, allowing you to make more targeted adjustments.
At The Grounded Homestead, we believe that growing your own food starts from the ground up. Our goal is to provide the knowledge you need to turn your patch of earth into a productive oasis. Find more tips and follow our journey at https://thegroundedhomestead.com.


Facebook
Instagram
X
Youtube