
A Beginner's Guide to Hoop House Gardening
A Beginner's Guide to Hoop House Gardening
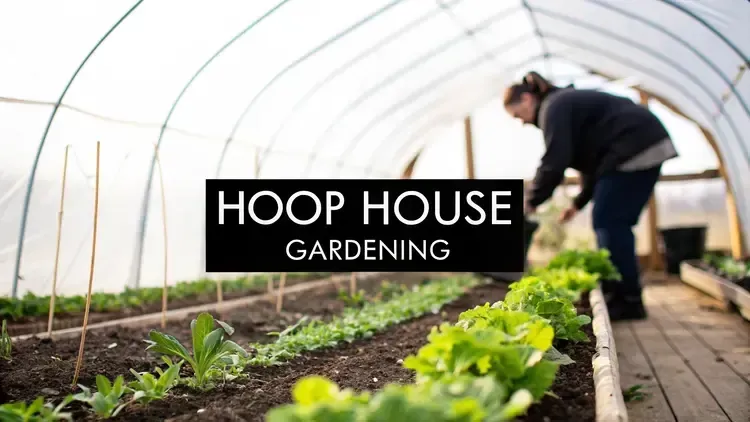
So, what exactly is a hoop house? At its core, it’s a simple, tunnel-like structure—think of it as a big, protective hug for your garden. It’s built from a series of arched hoops covered in a special kind of greenhouse plastic. This setup creates a protective microclimate, shielding your plants from wild weather, pests, and frost.
The real magic is in how this simple structure extends your growing season. With a hoop house, you can start harvesting much earlier in the spring and keep picking fresh produce long into the fall.
Why Hoop House Gardening Is a Game Changer
Think of a hoop house less as a structure and more as a superpower for your garden. It’s a practical, no-fuss way to grow more of your own food with less worry about what the weather is doing. These simple tunnels act like a personal bodyguard for your plants, creating a stable, protected space where they can truly thrive.
This gives you a huge leg up over traditional outdoor gardening. By trapping the sun's warmth, the inside of a hoop house stays several degrees warmer than the air outside, especially overnight. That small temperature buffer is often the difference between a plant surviving a surprise late frost or being wiped out completely.
Extend Your Harvests and Improve Crop Quality
The single biggest reason people fall in love with hoop house gardening is the ability to stretch the growing season. Imagine picking fresh salads in November or getting a two-month head start on your tomatoes. This isn't just a dream—it's completely doable with a hoop house.
But it’s not just about a longer season. The protected environment also leads to much better-looking produce. Your plants aren’t getting beat up by harsh winds, pummeling rain, or hail.
This means you can expect:
Healthier Plants: With less environmental stress, plants put their energy where it counts—into strong growth and making fruit.
Fewer Blemishes: Fruits and vegetables are shielded from physical dings and damage, giving you more picture-perfect harvests.
Pest Protection: While it’s not a fortress, the plastic cover does a great job of keeping many common garden pests at bay.
A hoop house gives you a level of control that’s just impossible in an open field. It’s about creating predictability in an unpredictable world, making sure your hard work pays off with a rewarding, consistent harvest.
To give you a clearer picture, here’s a quick rundown of the main advantages.
Key Benefits of Hoop House Gardening at a Glance

These benefits all work together, creating a more resilient and productive garden from the ground up.
A Growing Trend for Modern Gardeners
The desire to grow food at home has exploded, and hoop houses are a huge part of this movement. They offer an affordable and approachable way to get into controlled-environment growing. This isn't just a feeling; the numbers back it up. The home gardening sector was valued at $14.9 billion in 2024 and is expected to climb to over $26 billion by 2034.
This boom is driven by people wanting fresh, local food and reliable results—two things hoop houses deliver in spades. You can learn more about the expansion of the home gardening market and what it signals for growers.
Ultimately, hoop house gardening is about taking back control. It empowers you to grow more of your own food, to stop worrying so much about the forecast, and to enjoy the deep satisfaction of a bountiful harvest for more months of the year. It’s a practical, rewarding, and increasingly popular way to elevate your gardening game.
How to Plan Your Ideal Hoop House

The real work of a successful hoop house starts long before you pound the first stake into the ground. A well-thought-out structure becomes a year-round asset, but one thrown together in a poor spot can turn into a constant headache.
Think of this planning stage as drawing the blueprints for your season-extending machine. Your first—and most critical—decision is where it will live. Get the location right, and everything else gets a whole lot easier.
Selecting the Perfect Site
Choosing the right spot is a mix of common sense and working with your landscape, not against it. You're looking for a location that maximizes the good (sun, warmth) and minimizes the bad (wind, water).
There are three non-negotiables for a healthy, low-maintenance hoop house:
Sunlight Exposure: Your hoop house is a solar collector. It needs full sun, especially during the short, weak-light days of winter. Find a spot that gets at least 6-8 hours of direct sunlight. Orienting the longest side of your structure to face south is the best way to capture that precious winter sun, passively warming the soil and air inside.
Proper Drainage: Nothing will ruin your enthusiasm faster than a muddy, unusable hoop house. Avoid low-lying areas where water pools. Look for level ground or a gentle, even slope that lets rain and snowmelt run off and away from the structure.
Wind Protection: The plastic covering is the most vulnerable part of your hoop house, and wind is its biggest enemy. If you can, use a natural windbreak—like a tree line, barn, or shed—to shield it from the strongest prevailing winds. If you're out in the open, orienting the narrowest end of the structure to face the wind will help it cut through the gusts.
A well-sited hoop house is a partnership with your landscape. By choosing a sunny, well-drained, and protected location, you set the stage for a productive growing environment that requires far less intervention.
Thinking through these elements is a core part of the process. If you’re new to laying out a growing space, you might find our complete guide to garden planning for beginners helpful.
Designing Your Structure
With your site picked out, it’s time to think about the hoop house itself. The two big decisions here are the frame material and the plastic covering. These choices directly affect your budget, how long the structure will last, and how well it performs.
You’ll generally be choosing between metal and PVC for the hoops.
Metal vs PVC Hoops

The "skin" of your hoop house is just as important as its bones. Greenhouse plastic isn't just any old plastic sheet from the hardware store; it's a specialized product engineered for this job.
The industry standard for most growers is a 6-mil, 4-year, UV-treated polyethylene film. That "UV-treated" part is absolutely critical—without it, the sun would bake the plastic to a brittle mess in a single season. This thicker, more resilient film gives you the durability and light quality you need for a truly productive hoop house.
Building Your Hoop House From a Kit or Scratch
With your ideal location picked out, you’re ready for the exciting part: turning your hoop house dream into a physical reality. This is where the project really comes to life, but it also brings a critical decision to the table. Will you build from a pre-made kit or go the do-it-yourself (DIY) route from scratch?
There’s no single right answer here. The best path for you comes down to your personal balance of time, budget, and building confidence. Understanding the trade-offs is the key to making a choice you’ll be happy with for years to come.
Hoop House Kit vs DIY Build Comparison
Choosing between a kit and a DIY build is the first major fork in the road of your construction journey. A kit is all about convenience and predictability, while a DIY project offers total control and the potential for serious cost savings.
To help you figure out which road to take, let's break down how they stack up against each other.

Ultimately, a kit gets you growing faster, while a DIY build lets you create a structure perfectly suited to your land and your vision—if you have the time and skills to pull it off.
The image below gives you a sense of the hands-on work involved, whether you're assembling pre-made parts or crafting every piece yourself.

Key Milestones for a DIY Build
Decided to embrace the satisfaction of building it yourself? Smart move. Breaking the project down into manageable stages makes the whole process feel less intimidating.
Setting the Foundation: This all starts with your ground posts, which are heavy-duty metal pipes driven deep into the earth. These are the anchors for your entire structure. Getting them perfectly spaced, level, and plumb is absolutely crucial for the stability of your hoop house. No shortcuts here.
Forming the Arches: Next, the hoops—usually made from bent galvanized steel conduit—slide right over the ground posts to create that iconic tunnel shape. The spacing between hoops is a critical decision, typically four to five feet apart. This spacing determines how well your structure will stand up to wind and snow.
Constructing the End Walls: Your end walls provide structural rigidity and are where you'll frame in your doors and ventilation. Most people build them with wood. This is your chance to design large doors for easy wheelbarrow access or smaller, adjustable vents to help you dial in the temperature.
The final step—stretching the plastic—is a make-or-break moment. A loose, flapping cover will shred itself in the first big wind. A drum-tight finish, on the other hand, provides the best durability and insulation. It’s definitely a two-person job, and you should always do it on a calm, warm day when the plastic is more pliable.
Pro Tips for a Durable Structure
A well-built hoop house is one that stands strong against whatever Mother Nature throws at it, season after season. A few pro techniques can make a huge difference in the longevity and effectiveness of your new growing space.
One of the most important upgrades you can make is using wiggle wire channels, also known as lock channels. These are aluminum tracks that you screw onto your baseboards and end wall frames. You lay the plastic over the channel, then "wiggle" a coated spring wire into it, locking the plastic in place. This creates a continuous, secure seal that is far superior to just using staples.
Don’t skimp on reinforcement, either. Adding wooden or metal purlins—which are long braces running the length of the structure to connect the hoops—dramatically increases rigidity. A little cross-bracing at the corners will also help stop the structure from racking or shifting in heavy winds. These extra steps are what ensure your investment in a hoop house pays off for many seasons to come.
Choosing the Best Crops for Every Season
Getting a hoop house fundamentally changes your gardening clock. You’re no longer a slave to the rigid first and last frost dates. Instead, you start thinking in "hoop house seasons"—longer, more forgiving windows for planting, growing, and harvesting. It's your ticket to year-round production, but success hangs on picking the right plants for the right time.
A hoop house doesn't magically create a summer oasis in the dead of winter. What it does do is create a milder, more stable microclimate that buffers against the worst of the weather. Your job is to work with that advantage by choosing crops that will appreciate the specific conditions your structure offers in each season.
Thriving in the Deep Cold of Winter
Winter hoop house gardening isn't about promoting fast, active growth. It's about preservation and harvesting on demand. The trick is to select incredibly cold-hardy crops, get them planted in the fall so they can grow to near-maturity, and let them go dormant as the deep cold sets in.
Think of it like having a living refrigerator in your backyard. These plants will hold in the soil, fresh and ready for you to harvest as needed, even if there's a blanket of snow on the plastic. The best choices for this are often leafy greens that actually get sweeter after a frost.
Spinach: The undisputed king of the winter hoop house. Varieties like ‘Tyee’ and ‘Bloomsdale’ can handle freezing temperatures and bounce right back.
Mâche (Corn Salad): This delicate green has a wonderful, nutty flavor and is exceptionally cold-tolerant, making it a perfect winter salad green when nothing else is growing.
Claytonia (Miner's Lettuce): A surprisingly vigorous green that keeps producing succulent, tender leaves all through the coldest months.
The real secret to winter success is all in the timing. You need to plant these cold-hardy crops in late summer or early fall. That gives them enough time to get established before the daylight hours shrink and the temperatures plummet. The hoop house then acts like a protective blanket, keeping them alive and harvestable all winter.
The demand for season-extension methods like this is growing fast. The global greenhouse horticulture market was estimated at $32.62 billion in 2024 and is projected to hit $54.77 billion by 2029, largely because more people want local food and climate-resilient ways to grow it. You can see more data on this expanding horticulture market.
Capitalizing on the Shoulder Seasons
Spring and fall—what we call the "shoulder seasons"—are where a hoop house really proves its worth. This is your chance to get a massive head start or extend your harvest by months. The protected space shields plants from unpredictable frosts and biting winds, creating the perfect nursery for cool-weather crops to absolutely flourish.
In early spring, you can sow crops like carrots, beets, and radishes directly into the hoop house soil weeks before your outdoor garden is even workable. It's also the ideal place to transplant young brassicas that love a cool, gentle start to life.
Top Picks for Spring and Fall

Speaking of strawberries, a hoop house is an amazing place for getting new plants established. If you're feeling particularly ambitious, you might even be interested in our guide on how to grow strawberries from seed.
Jump-Starting Summer Favorites
Finally, a hoop house is your secret weapon for an early and longer summer harvest. You can give heat-loving plants like tomatoes, peppers, and cucumbers a serious head start by transplanting them into the hoop house a good 4-6 weeks before your area's last frost date. The warmer soil and air kickstart explosive early growth.
This little trick means you could be picking ripe, juicy tomatoes while your neighbors' outdoor plants are still just starting to flower. And when the real summer heat finally arrives, you just roll up the sides for ventilation and let them keep on producing, often yielding fruit long after outdoor plants have given up due to disease or cool autumn nights. It’s the best way to squeeze every last bit of production out of your garden.
How to Manage Your Hoop House Environment

Getting your hoop house built is a huge milestone, but the real work—and the real fun—of hoop house gardening starts now. The secret to a bursting, year-round harvest isn't the structure itself, but learning how to steer the world inside it. Think of your hoop house less like a building and more like a living, breathing space that you get to guide.
Don't worry, this doesn't require a bunch of expensive gadgets or a degree in horticulture. It really just comes down to paying attention to four things: temperature, ventilation, water, and soil. Get these right, and you'll unlock the true power of your new growing space, keeping your plants happy and productive no matter what the weather is doing outside.
Mastering Temperature Control
At its core, a hoop house is a solar collector. That’s fantastic for trapping heat on a chilly spring day, but it can turn into a plant-roasting oven in the middle of summer. Your main job is to play moderator, keeping those temperature swings from getting too extreme. You're looking for that "Goldilocks zone"—not too hot, not too cold.
The simplest and most effective tool for this is a set of roll-up sides. These crank-operated systems let you open up the entire length of the structure, creating a cross-breeze that cools things down fast. On those scorching hot days, a shade cloth is your best friend. Tossing a cloth rated for 30-50% shade over the top can drop the internal temperature in a hurry, saving your lettuce from bolting and protecting your tomatoes from sunscald.
Your plants will tell you what they need. Watch them. If the leaves are droopy and sad in the afternoon, they're probably feeling the heat. If they're standing tall and vigorous, you’ve got it just right. It’s all about active management.
The Critical Role of Ventilation
If temperature is about comfort, ventilation is about health. Stagnant, humid air is an open invitation for fungal diseases like powdery mildew and blight to move in and wreck your hard work. Good, consistent air circulation is your best defense.
Even on cooler days, it’s a good idea to crack the doors or vents for a bit to let the old air out and the new air in. This one simple habit helps dry any lingering moisture off the leaves and breaks the life cycle of airborne pathogens. When you combine roll-up sides with big doors on the end walls, you create a natural wind tunnel that clears out stale air in minutes.
Choosing Your Irrigation Method
Inside a hoop house, you're the rainmaker. Nothing gets watered unless you do it. This gives you incredible control, but it also means your plants are completely counting on you. How you deliver that water makes a huge difference.
Drip Tape/Soaker Hoses: This is, hands down, the best way to water in a hoop house. It puts water right where it's needed—at the soil level—which cuts down on evaporation and keeps the plant leaves dry. Dry leaves are happy leaves, much less likely to develop the fungal problems that thrive in damp conditions.
Overhead Sprinklers: While they seem easier, overhead sprinklers create a humid, disease-friendly environment. If you must go this route, always water first thing in the morning. This gives the foliage the entire day to dry out before the cool of the evening sets in.
For a deeper dive into smart watering, our guide on how often you should water your plants has some great tips that work just as well in a hoop house as they do in an outdoor garden.
Nurturing Your Soil
The soil in your hoop house is your most precious resource, and it gets worked a lot harder than the soil in your outdoor beds. With a longer, more intense growing season, nutrients get used up much faster. You can't just count on nature to replenish things; you have to put the good stuff back in yourself.
This isn't something you can skip. Before you even plant your first seed—and at least once a year after that—you need to feed your soil. Work in 2-4 inches of high-quality compost or well-rotted manure to build a rich, living foundation. This will help hold moisture, provide a slow, steady supply of nutrients, and keep your plant roots healthy. Planting a cover crop like clover or vetch during any downtime is another fantastic way to add organic matter and keep your soil from getting compacted.
This idea of growing in a controlled space is a big deal globally. Europe holds over 40% of the greenhouse horticulture market, an industry that hit $33.43 billion worldwide in 2024 and is expected to almost double by 2033. This boom is all about finding ways to grow food reliably as weather gets more extreme, proving just how powerful techniques like hoop house gardening are. You can discover more insights about this growing market on imarcgroup.com.
Common Hoop House Questions (And Straightforward Answers)
Every gardener, no matter how experienced, runs into questions. When you’re tending a hoop house, you’re managing a whole new environment, and a few common challenges pop up time and again. Think of this as your go-to troubleshooting guide, built from the questions we hear most often from new growers.
These are practical answers for the day-to-day realities of hoop house gardening. They’re here to help you solve problems quickly and build the confidence to handle whatever the season throws at you.
How Do I Keep My Hoop House From Overheating in Summer?
Your biggest job in the summer is keeping your hoop house from turning into a sauna. It all comes down to one thing: airflow. The single best tool for this is installing roll-up sides. They create a massive opening along the entire length of the structure, letting cross-breezes whisk hot, stale air out. It's a game-changer.
Pair those roll-up sides with open doors or vents on the end walls. This creates a natural chimney effect—cool air gets pulled in from the low sides, and the rising hot air has a clear escape route out the high ends.
If you live where the summer sun is especially intense, a 30-50% shade cloth draped over the top is your best friend. This simple step can drop the internal temperature dramatically.
A shade cloth is your best defense against summer stress. It protects sensitive plants like lettuce from bolting (flowering too early) and prevents sunscald on the shoulders of tomatoes and peppers. You'll get a much higher-quality harvest during the hottest months.
Finally, don’t forget to water. Well-hydrated plants handle heat stress far better. Water deeply in the cool of the early morning to prepare them for the day and minimize evaporation.
What Is the Best Way to Manage Pests Inside a Hoop House?
A hoop house is a fantastic physical barrier against pests, but once a few critters get inside, they can multiply like crazy in that protected space. The smartest approach is Integrated Pest Management (IPM), which is all about prevention and balance, not just reacting with sprays.
Your first line of defense is keeping them out.
Install Insect Netting: Cover every opening—doors, vents, and roll-up sides—with fine insect netting. This physically blocks pests like cabbage moths and cucumber beetles from ever getting in.
Scout Your Plants Regularly: Make it a weekly habit to walk your rows, checking the undersides of leaves and new growth. Catching an aphid colony when it’s small is a whole lot easier than fighting a full-blown infestation.
If you do find pests, start gently. A strong jet of water from a hose can knock aphids and spider mites right off your plants.
If that doesn’t cut it, bring in the good bugs. Beneficial insects like ladybugs are voracious aphid eaters, and lacewings will happily munch on all sorts of soft-bodied pests. Only as a last resort should you turn to organic-approved sprays like neem oil or insecticidal soap. Always apply them in the late evening when pollinators are done for the day, which also prevents the sun from burning the sprayed leaves.
Should I Replace the Soil Inside My Hoop House?
Absolutely not! One of the biggest perks of a hoop house is that you get to work with and improve your native ground soil. There’s no need for the back-breaking and expensive job of hauling it out and replacing it. What you do need to do, however, is actively feed it.
Because you can grow so intensively year-round, a hoop house depletes soil nutrients much faster than an outdoor garden. The key is to build fertility over time.
Before you plant a single seed, get a soil test. It gives you a baseline for your soil’s pH and nutrient levels, telling you exactly what it’s hungry for.
Start by working several inches of high-quality compost or well-rotted manure into the topsoil. This gives an immediate boost to the organic matter, which is vital for fertility, water retention, and a healthy soil ecosystem. From then on, plan to top-dress your beds with a fresh 1-2 inch layer of compost at least once a year, usually between crop plantings. This keeps your soil alive and productive season after season.
How Much Does a Typical DIY Hoop House Cost?
The cost of a DIY hoop house can swing wildly depending on its size, the materials you choose, and how resourceful you are. But we can break it down into a couple of general ranges to help you budget.
A small, entry-level structure—say, 10x20 feet—built with more affordable materials like PVC or electrical conduit, can usually be put up for $300 to $700. This is a fantastic way to get started without a huge investment.
For a bigger and more durable hoop house, maybe a 14x40 foot structure built with galvanized steel pipes, you’re looking at a higher cost, typically from $1,200 to $3,000 or more. The upfront investment is bigger, but these structures are built to handle serious wind and snow, giving them a much longer lifespan.
Key Cost Factors

You can keep costs down by sourcing materials locally to avoid shipping fees and building as much as you can from scratch instead of buying pre-made kits for things like doors.
At The Grounded Homestead, we believe that growing your own food is one of the most rewarding steps you can take toward a healthier, more self-sufficient lifestyle. We hope this guide empowers you with the knowledge and confidence to start your own hoop house journey. Explore more tips and tutorials at https://thegroundedhomestead.com.


Facebook
Instagram
X
Youtube