
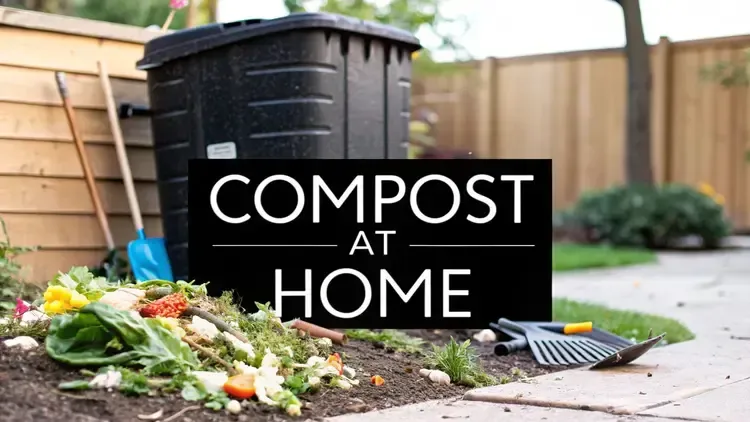
How to Compost at Home a Simple Guide
How to Compost at Home a Simple Guide
How to Compost at Home a Simple Guide
Your Composting Journey Begins Here
Why Your Garden Will Thank You
For the Gardener with Room to Spare
The Contained and Convenient Option
Home Composting Methods Compared
Your Perfect Compost Recipe: What to Add and What to Avoid
How to Maintain a Healthy Compost Pile
Troubleshooting Common Composting Issues
When and How to Use Your Finished Compost
Ready to turn your kitchen scraps into black gold? The secret to composting at home is simpler than you might think. It all comes down to one thing: balancing your 'green' materials (like vegetable peels and coffee grounds) with 'brown' materials (like dry leaves and cardboard).
If you can get that simple recipe right, you’re already on your way to creating incredible, nutrient-rich soil for your garden.
Your Composting Journey Begins Here

Starting a compost pile isn't about mastering complex science. It's about building a rewarding, sustainable habit—and turning everyday waste into something truly valuable. You’re not just getting rid of trash; you’re actively creating what gardeners call "black gold." It’s a soil amendment packed with life that will make your plants absolutely thrive.
This simple act is a cornerstone of a more self-sufficient lifestyle, right up there with learning to grow your own food. If you're new to this world, our guide on homesteading for beginners can offer a broader view of how small changes lead to a more grounded life. And trust me, composting fits right in.
More Than Just Reducing Waste
Sure, keeping food scraps out of landfills is a huge environmental win. But for me, the real magic of composting lies in getting your hands dirty and participating in a natural cycle of decay and renewal. It’s incredibly satisfying to watch seemingly useless stuff like eggshells, banana peels, and yard trimmings break down into a vital resource.
This hands-on connection brings a powerful sense of accomplishment. It’s a small tweak to your daily routine that delivers a big, visible impact right in your own backyard. Instead of bagging up nutrients and sending them away, you’re capturing them and putting them back into your own soil.
The beauty of applying compost is that your garden can benefit from it at any time. It's a continuous cycle of giving back to the earth what it provided.
Why Your Garden Will Thank You
Think of compost as a superfood for your soil. It does so much more than just feed your plants. When you learn how to compost at home and mix that finished product into your garden, you’re fundamentally improving its structure for the long haul.
Here’s what you’re really adding to your garden beds:
Improved Soil Structure: Compost helps bind sandy soils so they hold water better. In dense clay, it loosens things up, improving drainage and aeration. It's a win-win.
Essential Nutrients: It provides a slow-release source of key nutrients, which means you can rely less on synthetic fertilizers.
Beneficial Microorganisms: A healthy scoop of compost is teeming with billions of beneficial bacteria and fungi. These microscopic helpers protect plants from diseases and help them absorb nutrients from the soil.
Better Water Retention: Soil amended with compost acts like a sponge. It holds onto moisture longer, which means you won't have to water as often.
By embracing composting, you’re not just following a trend. You’re adopting an age-old practice that builds healthier soil, grows more resilient plants, and fosters a deeper connection to the food you grow.
Let's get started on your adventure.
Choosing the right composting method isn't about finding the single "best" way to do it. It's about finding the right fit for your life—your space, your schedule, and what you’re trying to accomplish. Whether you have a sprawling yard or a tiny apartment balcony, there’s a system that will work for you.
The great news is that you've got options. Lots of them. The world of home composting is booming, with the global market valued at around USD 483.5 million in 2024 and expected to nearly double by 2034. This isn't just some niche trend; it's a movement driven by people who want practical ways to reduce their waste. You can see the full picture in this household composters market outlook.
Let’s dig into the most popular systems to find your perfect match.

For the Gardener with Room to Spare
If you have a yard, the classic open-air compost pile is an honest, effective, and low-cost choice. This is composting at its most fundamental: you find a good spot in your yard, and you start layering your green and brown materials. It's that straightforward.
This method is perfect for anyone who generates a lot of yard waste—grass clippings, fall leaves, and old plant trimmings. It requires almost no money to start. You can build a simple bin from old wood pallets or wire fencing, or you can just let the pile take its own shape.
The main trade-off? It’s exposed to the weather and takes its time, often six months to a year, to break down completely. It also requires a bit of muscle to turn with a pitchfork.
The Contained and Convenient Option
Looking for something tidier and faster? An enclosed compost tumbler is a fantastic solution. These are sealed barrels or drums that sit on a stand, making it easy to turn and mix the contents just by giving the whole unit a spin.
A tumbler has some serious perks:
Speedy Decomposition: The sealed container traps heat and moisture, which kicks the composting process into high gear. You can get finished compost in as little as one to three months.
Pest-Proof: The design keeps rodents and other curious critters out.
Clean and Tidy: It’s a self-contained system that won't look out of place in a suburban backyard.
Tumblers are a great fit for families producing a steady stream of kitchen scraps but not a ton of yard waste. They do cost more upfront than an open pile, but the convenience and speed are often worth it.
Real-World Scenario: Imagine a suburban family of four with a small yard. They mostly have kitchen scraps and the occasional bag of lawn clippings. A dual-chamber compost tumbler, like this, would be perfect. They can add fresh scraps to one side while the other side "cooks," ensuring they always have finished compost ready for their garden beds.

Composting Without a Yard
No yard? No problem. You can absolutely still compost. Vermicomposting, also known as worm composting, is an brilliant solution for indoor or balcony setups. It uses a special bin and a colony of red wiggler worms to break down food scraps into some of the most nutrient-rich compost you can get.
Worm bins are compact, odorless (when managed right!), and incredibly efficient. They are tailor-made for apartment dwellers who want to do something with their fruit and veggie peels, coffee grounds, and eggshells. Best of all, the worms do all the turning for you.
The only real limitations are that you can't overload the bin with huge amounts of scraps at once, and you need to skip things worms hate, like citrus, onions, and garlic.
Anyone tight on space, a compact worm bin like this makes it easy to compost right in your kitchen or balcony—no smell, no mess, just incredibly nutrient-rich castings for your plants.
> > Buy it Now

For a completely different approach, modern electric composters are a game-changer. These countertop gadgets use heat, aeration, and grinding to transform food scraps—even meat and dairy—into a dry, soil-like material in just a few hours. They're the ultimate fix for anyone who values convenience and zero odors, but they come with the highest price tag and need electricity to work.
Below is a quick comparison to help you weigh the options at a glance.
Home Composting Methods Compared
Choosing a composting method is a personal decision based on your space, budget, and how much time you want to spend. This table breaks down the most popular options to help you find the best fit for your home.

Ultimately, every method turns waste into a valuable resource for your garden or houseplants. The "best" one is simply the one you'll stick with.
This infographic is a great visual guide for what to add (and what to avoid) in most traditional compost systems.
The key takeaway here is to focus on plant-based materials and steer clear of animal products, oils, and grease. Sticking to this simple rule will help you avoid pests and unpleasant odors, no matter which method you choose.

Your Perfect Compost Recipe: What to Add and What to Avoid
Think of your compost pile less like a trash can and more like a carefully crafted recipe. Just like baking, success comes from using the right ingredients in the right amounts. The whole game boils down to balancing two key players: nitrogen-rich "greens" and carbon-rich "browns."
Getting this balance right is the secret to a fast, odor-free compost pile that doesn't just sit there. Greens are the fuel—they provide the essential proteins and moisture that get microbes multiplying and working their magic. Browns, on the other hand, are the structure. They provide the energy (carbon) and create crucial air pockets, making sure the pile can breathe.
A good rule of thumb is to aim for roughly two to three parts brown materials for every one part green material. But don't get hung up on measuring perfectly. This is more art than exact science. If your pile gets slimy or smells like ammonia, you need more browns. If it’s dry and nothing seems to be happening, add more greens and a splash of water.
The "Green" List: Your Compost Activators
Green materials are the fresh, vibrant ingredients that kickstart your compost pile. They’re typically moist and break down fast, releasing the nitrogen that fuels the whole operation.
Here are some of the best "greens" to toss in:
Fruit and Vegetable Scraps: Banana peels, apple cores, potato skins, and old salad greens are compost gold.
Coffee Grounds and Tea Bags: These are fantastic nitrogen sources. Just remember to pull any staples out of the tea bags.
Grass Clippings: Freshly cut grass is a powerful activator, but be careful. Add it in thin layers to keep it from matting down and turning into a slimy mess.
Eggshells: Crush them up before adding them. This helps them break down faster and adds a nice boost of calcium to your finished compost.
These greens get the party started, but without their carbon-rich buddies, your pile will quickly turn into a stinky, soggy disaster.
The "Brown" List: The Carbon Backbone
Brown materials are the sturdy foundation of your compost. They are the dry, woody things that provide carbon, soak up extra moisture, and create the structure that lets air flow through the pile.
You probably have plenty of "browns" just lying around:
Dry Leaves: The classic carbon source, especially plentiful in the fall. Stockpile them if you can.
Shredded Cardboard and Newspaper: Uncoated cardboard (like shipping boxes) and black-and-white newspaper work great. Shredding them first makes a huge difference in how quickly they decompose.
Wood Chips and Sawdust: Use these in moderation, as they can take a long time to break down completely.
Dryer Lint and Pet Fur: Yes, really! Natural fibers from your clothes and fur from your pets are excellent carbon additions.
This simple layering habit has a surprisingly big impact. If composting were widespread, we could divert approximately 80 million tons of organic waste from US landfills each year, which would slash methane emissions. You can read more in this in-depth analysis of composting's role in waste reduction.
A quick-reference chart can be a lifesaver when you're standing over your pile, wondering what to add next. Here’s a simple guide to keep your greens and browns in check.
Quick Guide to Green and Brown Materials

Balancing these two categories is the single most important skill in composting. If you get this right, everything else tends to fall into place.
The "Do Not Add" List: What to Keep Out of Your Pile
Knowing what not to compost is just as important as knowing what to add. Some materials attract pests, create nasty odors, or introduce pathogens you definitely don't want in your garden. The whole point is to create a rich soil amendment, and you can learn more about using the finished product as a natural fertilizer for your vegetable garden in our other guide.
To keep your pile healthy and your garden safe, you have to be strict about what you exclude.
Critical Compost Exclusions: Never add meat, fish, bones, dairy products (cheese, milk, yogurt), or oily and greasy foods to your home compost pile. These items are magnets for rodents and other pests and create seriously unpleasant smells as they rot.
Here’s a more detailed list of things to keep out:
Animal Products: This includes all meat, fish, bones, and dairy. No exceptions.
Oils and Greasy Foods: Cooking oil, fatty scraps, and oily salad dressings are a no-go.
Diseased Plants: Don't toss in plants with fungal diseases or insect infestations. You risk spreading those problems to your garden later.
Pet Waste: Waste from dogs and cats can contain harmful pathogens that have no place in garden soil.
Treated Wood: Sawdust or shavings from pressure-treated, painted, or stained wood can leach toxic chemicals into your compost.
Weeds Gone to Seed: Some tough perennial weeds can survive the composting process and will happily sprout in your garden beds.
By sticking to this simple recipe of greens, browns, and key exclusions, you'll be well on your way to making "black gold" for your garden.
How to Maintain a Healthy Compost Pile
Once you've layered your greens and browns, your compost pile isn't just a heap of scraps—it's a living, breathing ecosystem. And just like any healthy system, it needs a little attention to really thrive. This isn't a chore; it’s your chance to get hands-on with the decomposition process and guide it toward that beautiful, dark, earthy compost you're working for.
Your main job comes down to three things: turning it for air, managing moisture, and keeping an eye on the action. Get these simple tasks right, and you'll speed up decomposition, sidestep common issues like bad smells, and keep your microbial workforce happy and productive. Think of it as stoking a fire—a little air and the right conditions make all the difference.

Turning Your Compost for Air and Speed
Aeration is the secret ingredient for fast, odor-free composting. Every time you turn your pile, you're injecting a fresh dose of oxygen, which is exactly what the aerobic bacteria—the good guys doing the heavy lifting—need to breathe and work efficiently. Without enough air, anaerobic bacteria take over, slowing everything down and producing that unpleasant, sour smell nobody wants in their backyard.
How often you turn the pile depends on your setup and how quickly you want that finished compost.
For an open pile: Grab a pitchfork or a compost aerator and give it a good mix every week or two. The goal is to move the cooler materials from the outside of the pile into the hotter center.
For a compost tumbler: This is where tumblers shine. Just give it five to ten good spins every two or three days to keep everything mixed and oxygenated. It’s almost effortless.
Regular turning ensures every scrap of organic matter gets its turn in the pile's hot core, leading to much more consistent and rapid decomposition.
A well-aerated pile is a happy pile. The oxygen you introduce not only feeds the good microbes but also prevents the formation of smelly, slimy pockets that can bring your composting journey to a halt.
Keeping the Perfect Moisture Level
Your compost should feel like a wrung-out sponge. If you grab a handful and squeeze, it should be moist to the touch but not dripping wet. That’s the perfect moisture level for the microorganisms that are breaking down your scraps.
If your pile gets too dry, decomposition will grind to a halt. If you notice things aren't heating up or breaking down, a lack of water is a likely culprit. Just grab a watering can or garden hose and add some moisture, turning the pile as you go to distribute it evenly.
On the flip side, a pile that's too wet can turn slimy, smelly, and anaerobic. This usually happens after a heavy downpour or if you've added too many wet "green" materials at once. The fix is simple: mix in more dry "brown" materials like shredded cardboard, dried leaves, or sawdust. They'll soak up the excess moisture and restore balance.
Monitoring for Signs of Life
A healthy, active compost pile generates its own heat. In the first few days after you build or turn it, the core of the pile can reach incredible temperatures of 130-160°F (55-70°C). You don’t even need a thermometer to know it's working—just place your hand near the center, and you'll feel the warmth. This heat is the clearest sign that your microbes are hard at work.
This passion for composting is growing. The household composters market is seeing steady growth, with a forecasted annual growth rate of about 6.6% to 7% through 2033. It's all part of a larger consumer shift toward sustainable living. You can read more about the innovations in home composting technology and how the market is evolving.
As the compost matures, the pile will gradually cool down. When it's finally finished, it will be cool to the touch, dark brown or nearly black, and have a rich, earthy smell. That's the "black gold" you've been waiting for, ready to enrich your garden soil. If you're looking for the perfect place to put it to use, our guide on building a raised garden shows just how valuable this nutrient-rich material can be.
Troubleshooting Common Composting Issues

Even the most seasoned composters run into a stubborn pile now and then. A sudden bad smell or a heap that’s gone cold doesn’t mean you’ve failed—it’s just your compost’s way of telling you it needs something. Think of it as a conversation. When you learn to read the signs, you can quickly figure out what’s wrong and make a simple fix to get things cooking again.
Most problems come down to an imbalance in one of three things: the carbon-to-nitrogen ratio, moisture, or airflow. The good news is that just about every common issue has a straightforward solution. Let's walk through the challenges you're most likely to face and how to get your pile back on track.
Diagnosing and Fixing Bad Smells
One of the first signs of trouble is often a foul odor. Different smells point to different problems, but they're all fixable.
It smells like ammonia or a barnyard. This is probably the most common smell, and it has a simple cause: way too much nitrogen. You’ve likely tossed in too many "green" materials—like a big load of fresh grass clippings or a week's worth of kitchen scraps—without enough "browns" to balance them out.
The Fix: Your immediate job is to add carbon. Mix in a generous amount of shredded cardboard, torn-up newspaper, dry leaves, or sawdust. These "browns" will soak up the excess moisture and restore that crucial carbon-to-nitrogen balance. Give the pile a good turn to mix it all in and introduce some fresh air.
The pile has a rotten egg or sour smell. That sharp, pungent odor means your pile has gone anaerobic. It's too wet and completely starved for oxygen, causing the material to rot instead of properly decompose.
The Fix: You need to get air in there and dry things out, fast. Turn the pile thoroughly with a pitchfork or a compost aerator. As you turn it, work in bulky brown materials like wood chips or straw. This will create air pockets and absorb all that excess moisture.
Addressing an Inactive Pile
Sometimes the problem isn’t a bad smell, but a total lack of activity. If your pile isn't heating up, it's a clear sign the microbial party has stalled out.
Key Insight: A compost pile that isn't heating up is like an engine without fuel. The microorganisms responsible for decomposition have either run out of food (nitrogen), water, or air, or the pile is simply too small to generate its own heat.
Here’s how to jump-start a dormant pile:
Check the Moisture: Grab a handful of compost. If it feels dry and dusty, it's thirsty. Use a watering can to moisten the pile as you turn it. You're aiming for the consistency of a well-wrung-out sponge.
Add More "Greens": A lack of heat often means the mix is too heavy on carbon. Give your microbes a jolt of nitrogen by adding fresh grass clippings, kitchen scraps, or used coffee grounds.
Check the Pile Size: A pile needs a certain amount of mass to insulate itself and retain heat. If your pile is smaller than 3 feet by 3 feet by 3 feet, it might be too small to get hot. The solution is simple: add more material to bulk it up.
Dealing with Unwanted Pests
Your compost is a bustling ecosystem, but you only want to attract the right kinds of visitors. If you find rodents, raccoons, or an army of flies, it’s a clear signal you’ve added something you shouldn’t have.
Problem: Rodents or other large pests are showing up.
Pests like these are almost always drawn to meat, dairy, bones, and oily foods.
The Fix: The first step is to go through your pile and remove any of these forbidden items. To stop it from happening again, always bury fresh kitchen scraps deep in the center of the pile and cover them with a thick layer of brown material. If you're using a compost tumbler, make sure it's sealed up tight.

When and How to Use Your Finished Compost
After weeks or months of patient layering and turning, this is the moment you’ve been waiting for. The real reward for all your effort isn't just a lighter trash can—it's the rich, dark, earthy material now ready to supercharge your garden. But how do you know when your pile has officially transformed into "black gold"?
It’s all about using your senses. Finished compost will be dark brown or nearly black, with a fine, crumbly texture much like good garden soil. Most of the original materials you added, like vegetable peels and leaves, should be completely gone.
And then there's the smell. Give it a good sniff. It should have a pleasant, earthy scent, like a forest floor right after it rains. If it still smells sour or stings your nose with ammonia, it needs more time to cure.
Harvesting Your Black Gold
Once you've confirmed your compost is ready, it's time to get it out of the bin. For a tumbler or enclosed bin, this part is easy—just empty the finished contents into a wheelbarrow and you're good to go.
Open piles are a bit different. You’ll usually find that the bottom and center are perfectly finished, while the top and outer layers still have some decomposing to do. The simplest method here is to shovel that unfinished top layer off to one side. This becomes the base for your next pile. What’s left underneath is the dark, finished compost, ready to be dug out and used.
A lot of gardeners I know, myself included, find that sifting compost is a worthwhile extra step. A simple sifter, made from a wooden frame and ½-inch hardware cloth, separates the fine, finished material from any larger bits like twigs or avocado pits. This gives you a really uniform product that’s perfect for delicate seedlings.
Putting Your Finished Compost to Work
Finished compost is one of the most versatile things you can add to your garden. Its benefits go far beyond just feeding plants; it fundamentally improves your soil’s health and ability to hold water.
Here are some of the best ways I put my homemade compost to use:
Amend Garden Beds: This is the classic. I spread a 1- to 2-inch layer of compost over my vegetable and flower beds each year. There’s no need to till it in; a gentle rake over the surface is all it takes. The nutrients will work their way down into the soil naturally.
Top Dress Your Lawn: Sifted compost makes an incredible natural lawn fertilizer. In the spring or fall, I'll rake a thin layer (about ¼ to ½ inch) across the grass. It feeds the roots and improves the soil structure underneath, leading to a much healthier lawn without chemicals.
Boost Potted Plants: Container plants chew through the nutrients in their potting mix pretty fast. I revitalize mine by adding a one-inch layer of sifted compost to the top of the soil twice during the growing season.
Mulch Trees and Shrubs: Applying a ring of compost around the base of trees, shrubs, and perennials is a great two-for-one. It feeds them slowly while also helping the soil retain moisture and protecting the roots.
Enrich Potting Mix: Why buy expensive bags of potting soil when you can make your own? I create a supercharged mix by blending one part compost with two parts garden soil or a basic commercial potting mix. It’s perfect for starting seeds or potting up new houseplants.
Help New Transplants: When moving seedlings into the garden, give them a strong start by dropping a handful of compost into the bottom of each planting hole. This provides immediate nutrients right where the roots need them to establish quickly.
Common Composting Questions Answered
Even with the best plan, you’re bound to have questions once you get your hands dirty. It’s all part of the process. Here are some of the most common ones I hear, with straightforward answers to keep you on the right track.
How Long Does Composting Take?
This is the big one, and the honest answer is: it depends. How quickly your compost finishes is tied directly to your method and how much attention you give it.
An actively managed hot pile, with a good mix of greens and browns that gets turned regularly, can be ready in as little as one to three months. That heat is the engine of decomposition, and it works fast.
On the other hand, a cold or passive pile—where you mostly just add materials and let nature take its course—is a much slower journey. You’re looking at anywhere from six months to a full year before you have usable compost. It’s low-effort, but it requires patience.
Specialized systems can speed things up quite a bit:
Compost Tumblers: These enclosed bins are great at trapping heat and make turning a breeze. They can often finish a batch in 1-3 months.
Electric Composters: These countertop machines are the sprinters of the composting world. They use heat and grinding to turn scraps into a soil amendment in just a few hours.
Can I Still Compost in the Winter?
You absolutely can. While the microbes in your outdoor pile will slow down or even go dormant in freezing weather, you should keep adding your kitchen scraps all winter long.
Think of it as stockpiling. The pile might freeze solid, but as soon as things thaw out in the spring, all that stored-up carbon and nitrogen will kickstart decomposition with a vengeance. Your pile will roar back to life.
, cost (from $ to $$$), pest-proofing (no for pile, yes for others), space needs (high to low), and ease of turning (weekly pitchfork for pile, daily easy for tumbler, not applicable for worm or electric). Includes small leaf accents and The Grounded Homestead tree logo at the bottom.")
What if I Don’t Have a Yard?
No yard? No problem. A lack of outdoor space isn't the barrier it used to be. For folks in apartments or with just a small balcony, vermicomposting (worm composting) is a fantastic solution. A well-managed worm bin is compact, completely odor-free, and produces some of the most nutrient-rich compost you can get.
Another great indoor option is an electric composter. These are designed to sit right on your kitchen counter and can handle a wider range of food scraps without any smell.
A Quick Word on Critters: A healthy compost pile is a bustling ecosystem. Finding beneficial organisms like worms, sowbugs, centipedes, and all sorts of microbes means you're doing it right. They’re the essential workers breaking down your waste.
However, if you start attracting unwelcome guests like flies, rats, or raccoons, it’s a sure sign something is out of balance. This is almost always caused by adding things you shouldn’t—like meat, dairy, or oily foods—or by not burying your fresh kitchen scraps deep enough into the pile. A simple adjustment to what you add and how you add it will usually solve the pest problem.
Video Summaries of this issue:
As always, the tools and supplies I mention are the same ones I rely on here at The Grounded Homestead. Some are affiliate links, which means I may earn a small commission—at no extra cost to you—but every recommendation is based on real use and trust.
At The Grounded Homestead, we believe that growing your own food starts with creating healthy soil. Composting is one of the most powerful ways to achieve that, turning everyday waste into a precious resource for your garden. If you're inspired to continue your journey toward a more self-sufficient and healthier lifestyle, we invite you to explore more guides and tips on our website. Visit us at The Grounded Homestead to learn more.


Facebook
Instagram
X
Youtube