
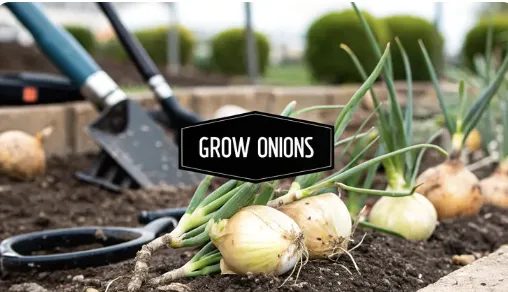
How to Grow Onions A Complete Harvest Guide
How to Grow Onions A Complete Harvest Guide
If you want to pull big, beautiful onions from your garden, the most important decision you'll make happens long before you ever break ground. It all comes down to choosing the right onion for your specific climate. Get this one thing right, and you’re halfway to a massive harvest, whether you start with easy-to-plant sets or go for the wider variety from seeds.
Choosing the Right Onions for Your Garden
Success with onions isn’t about some secret gardening magic—it's about understanding daylight. Onions are photoperiodic, which is just a fancy way of saying the amount of daily sunlight they get tells them when to stop growing leafy tops and start forming a bulb.
This is the number one reason gardeners get frustrated. They plant a beautiful onion, care for it perfectly, and end up with something the size of a golf ball. The problem wasn't their skill; it was planting an onion that was genetically programmed for a different part of the country.
Long-Day vs. Short-Day Onions Explained
Your latitude on the map is the single biggest factor here. You have to match your onion type to the length of your summer days.
Long-Day Onions: These workhorses need 14-16 hours of daylight to start bulbing. They're the go-to choice for northern gardeners (roughly USDA zones 6 and colder) where summer days stretch on forever. If you try to grow a classic long-day variety like 'Walla Walla' in a southern state like Florida, it will just keep making green tops, waiting for a light signal that never comes.
Short-Day Onions: These varieties are happy with just 10-12 hours of daylight. This makes them perfect for southern gardeners (zones 7 and warmer) who often plant in the fall or winter for a spring harvest. A 'Texas Early White' or 'Red Creole' will thrive in these milder climates.
Day-Neutral (Intermediate-Day) Onions: As the name suggests, these are the flexible ones. They’ll form bulbs with 12-14 hours of daylight, making them a reliable choice for gardeners in that middle slice of the country, from about zone 5 down to zone 7.
Gardener's Tip: Don't just guess your day-length needs. Do a quick search for your state's agricultural extension office. They'll have precise recommendations for which onion types perform best in your specific county, taking all the guesswork out of the equation.
Seeds, Sets, or Transplants?
Once you know which day-length type you need, you have to decide how you'll start your plants. Each method has its own pros and cons, and the best choice often depends on your goals and your timeline.
To help you decide, here's a quick breakdown of what each method offers.
Onion Planting Methods At a Glance

Ultimately, the decision comes down to balancing convenience against variety and cost. Onion sets are fantastic for beginners because they give you a big head start. Seeds, on the other hand, open up a whole world of interesting and delicious varieties you'll never find as sets.
For instance, a gardener in Maine with a short season would do well to use sets to guarantee a harvest. Someone in Georgia, however, has plenty of time to start unique heirlooms from seed for a fall planting.
No matter how you start them, onions thrive when growing season temperatures are between 13°C and 25°C (55°F to 77°F). They need loose, fertile soil with a pH between 6.0 and 7.0 for the best results. If you want to dive deeper into the data, you can explore more on optimal onion growing conditions from Market Report Analytics.
Preparing the Perfect Onion Bed
Onions aren't shy about what they need to thrive. They’re heavy feeders that demand a prime location to produce those big, flavorful bulbs every gardener dreams of. Simply sticking them in any old patch of dirt almost always leads to disappointment. The foundation of a great harvest is built long before you plant a single seed or set, and it starts with creating the perfect home for them in your garden.
First things first: sunlight is non-negotiable. Onions need an absolute minimum of 6-8 hours of direct sunlight every single day. They actually use daylight as an internal clock, signaling when it's time to stop growing green tops and start forming bulbs. A shady spot will give you nice-looking greens but disappointingly tiny onions underneath. Think of sunlight as the most critical nutrient you can provide.

Building the Ideal Soil Structure
Once you’ve scouted the sunniest spot in your yard, it’s all about the soil. Onions have pretty shallow, weak root systems and they absolutely despise compacted ground. They need loose, fluffy, and exceptionally well-drained soil that allows their bulbs to expand without a fight.
If you’re working with heavy clay soil—the kind that’s dense and holds way too much water—your main job is to lighten it up. Working in a generous 2-3 inches of finished compost or well-rotted manure does wonders. This simple addition improves drainage and creates little air pockets, giving roots room to breathe and bulbs the space to swell.
On the flip side, if you have very sandy soil that drains too quickly and loses nutrients in a flash, the solution is surprisingly the same. That same layer of compost helps the soil act more like a sponge, holding onto essential moisture and nutrients that would otherwise just wash away.
Getting the Soil pH Just Right
Beyond the soil’s texture, its chemistry plays a huge role in your success. Onions absorb nutrients most efficiently when the soil pH is slightly acidic to neutral, landing somewhere between 6.0 and 7.0. You can grab a simple soil test kit from any garden center to get a reading in minutes.
If your soil is too acidic (below 6.0): You’ll want to amend it with garden lime to raise the pH.
If your soil is too alkaline (above 7.0): Adding elemental sulfur or peat moss will help bring it down into the ideal range.
Making these adjustments is crucial because it ensures that any fertilizer you add later will actually be available for your plants to use.
A common mistake I see is gardeners overlooking soil pH. You can add all the fertilizer you want, but if the pH is off, the onion plants simply can't access those nutrients. This leads to stunted growth, no matter how well you care for them otherwise.
A Smart Pre-Planting Fertilization Strategy
Onions are hungry plants, especially in their early stages, so giving them a nutritional head start is vital. Before you even think about planting, work a balanced, slow-release organic fertilizer into the top few inches of your prepared bed.
This initial feeding is what powers all that early green top growth. That’s more important than you might think, because each one of those green leaves corresponds to one ring in the onion bulb. More leaves mean the potential for a bigger onion at harvest time.
While we focus on these fundamentals at home, it's interesting to see how commercial agriculture is boosting yields with new tech. For instance, the introduction of high-yielding, disease-resistant onion cultivars has improved productivity by 15-20% in some regions over the last decade. You can dig into global onion production trends over at ReportLinker. It just goes to show how starting with the right conditions—from the soil all the way to the seed—is the key to a great outcome.
Planting Your Onions for Maximum Growth
With a perfectly prepared bed waiting, it's time for the most exciting part: getting those onions in the ground. How you plant them directly impacts their final size and health. Getting the depth and spacing right from the start is the key to preventing competition and encouraging each bulb to reach its full potential.

Whether you’re working with seeds, tiny sets, or delicate transplants, the goal is the same. You have to give each onion enough room to breathe and expand without bumping into its neighbors. Overcrowding is a classic mistake, and it always leads to disappointingly small bulbs.
Perfecting Your Spacing and Depth
Think of each onion needing its own personal space to thrive. For most varieties, spacing them 4 to 6 inches apart within each row is the sweet spot. This gives bulbs plenty of room to swell and promotes the airflow needed to keep fungal diseases at bay.
Planting depth is just as critical, and it changes depending on what you're starting with. Each method requires a slightly different touch.
Onion Sets: These little dormant bulbs go in with the pointed end facing up. Gently press them into the loose soil until only the very tip is peeking out. If you plant them too deep, you'll hinder bulb development.
Transplants: These young seedlings, which look like tiny green scallions, should be planted about one inch deep. Make sure the roots and the white base are covered, but leave all the green tops exposed to the sun.
Seeds: If you’re sowing directly into the garden, plant your seeds about ¼ inch deep. Once they sprout and get a few inches tall, you’ll have to come back and thin them to that final 4-6 inch spacing.
A simple trick I use for perfectly straight rows is to tie a string between two stakes at either end of the bed. I use that line as a guide to create a shallow furrow, which makes planting evenly spaced onions incredibly fast and keeps the garden looking neat. Trust me, this small step makes future weeding and watering so much easier.
Timing Your Planting for Success
The ideal time to plant your onions depends heavily on your climate and the type of onion you’ve chosen. Getting this right allows the plant to sync its growth cycle with the changing daylight hours, which is what triggers bulbing.
In colder northern climates, we typically plant onions in early spring, as soon as the soil can be worked. This gives long-day varieties the entire summer to grow their tops before the long days signal them to start forming bulbs.
Conversely, in milder southern regions with scorching summers, fall planting is the way to go. Gardeners there will plant short-day onions from October to December. This lets them establish strong roots during the cool, mild winter so they can begin bulbing as spring arrives.
For more region-specific advice, our detailed onion planting guide for big bulbs breaks it down even further. Follow these guidelines, and you'll set the stage for a strong growing season and a fantastic harvest.
Your Onion Care and Feeding Schedule
Once your onions are in the ground, the real journey begins. Getting those tiny plants to swell into big, flavorful bulbs is all about consistent care. Think of this next phase as mastering three key tasks: watering, feeding, and keeping the weeds at bay.

This is the training regimen for your onions. If you provide the right inputs at the right time, you’ll encourage vigorous growth and help each plant reach its full potential.
Mastering Moisture for Bulb Development
Onions have shallow, inefficient root systems, which makes them incredibly sensitive to moisture swings. They just can't reach deep into the soil for water, so it's on you to provide it regularly.
Your goal should be about one inch of water per week, counting both rainfall and anything you add from the hose.
The most critical time for watering is when the bulbs start to swell. For these few weeks, consistent moisture is non-negotiable. If the soil dries out now, bulb growth can stall permanently, leaving you with disappointingly small onions. A drip irrigation system is perfect for this, as it delivers water right to the soil, keeping the leaves dry and preventing disease.
Strategic Fertilization for Growth Stages
Onions are heavy feeders, and what they need changes as they grow. Your job is to shift from feeding the leafy green tops to fueling the formation of the actual bulb underground.
Early Growth (First Month): Focus on nitrogen. This is what encourages lots of green tops, and you need to remember that every leaf corresponds to a ring in the onion bulb. A monthly dose of a nitrogen-rich liquid fertilizer, like fish emulsion, works wonders here.
Mid-Season (Bulbing Begins): As soon as you see the base of the plants starting to swell, it’s time to switch gears. Stop the high-nitrogen feeds and move to a fertilizer with more phosphorus (P) and potassium (K). These are the nutrients that fuel bulb development and improve storage quality down the road.
Your onions will tell you exactly when to stop feeding them. Once the tops start to yellow and fall over, the plant is done growing. Adding more fertilizer at this point won't help and can actually interfere with the curing process.
The Never-Ending Battle Against Weeds
If there’s one task that truly defines successful onion growing, it’s weeding. Onions absolutely hate competition. Their weak, shallow roots simply cannot compete with aggressive weeds for water and nutrients. A weedy onion patch will always lead to a disappointing harvest.
Because their roots are so close to the surface, you have to be gentle. Avoid deep digging with a hoe, which can easily slice right through your onion roots. The best method is frequent, shallow hand-weeding.
Get in the habit of pulling weeds when they're small, long before their root systems get established. This proactive approach not only protects your onions but also keeps pests from finding a convenient place to hide. For a deeper dive into keeping your patch clean, check out our guide on organic onion pest prevention.
The global demand for onions shows just how important they are in kitchens everywhere. In the first quarter of 2025 alone, roughly 472,000 metric tons were exported across the globe, a big jump from the previous year. You can dig into more insights on the rising global onion trade from TradeImex. By sticking to a consistent care schedule, you can make sure your homegrown supply is just as impressive.
Harvesting and Curing Onions for Long-Term Storage
After months of watering and weeding, the moment you’ve been waiting for is finally here. Knowing exactly when to pull your onions is the first critical step to making sure they’ll last all winter long.
Thankfully, your plants will give you some pretty obvious clues when they’re ready.
The most reliable sign is when the green tops start to yellow and literally fall over. This is the plant’s way of saying it’s done growing and is putting all its final energy into the bulb underground. Once you see about half of your onion tops have flopped over, stop watering completely. Let the soil dry out for a few days before you even think about pulling them.
The Gentle Art of Pulling Onions
When it’s time to actually harvest, your goal is to lift the bulbs from the ground without bruising or damaging them in the process. A bruised onion is an invitation for rot and will not store well.
For the best results, grab a garden fork or a small spade. Loosen the soil a few inches away from the bulbs, then gently lift them out of the ground. Resist the temptation to just yank them out by their green tops—this can easily break the neck and create a perfect entry point for bacteria.
Once they're out, you can lay the harvested onions—tops and all—right in the garden to start drying, as long as the weather is dry and sunny.
A common mistake is washing fresh onions with water. This introduces moisture that can lead to rot during the curing process. It's better to gently brush off any large clumps of soil and let the rest dry and flake off naturally.
Curing Is the Key to Longevity
Curing is without a doubt the most important step for long-term storage. This is simply the process of drying the onion’s neck and outer skin to create a protective, papery barrier against moisture and decay.
Without a proper cure, even the most beautiful onions will spoil in a matter of weeks.
Find a warm, dry, and well-ventilated spot that’s protected from direct sun and rain. A covered porch, a garage with the door cracked, or a well-aired shed are all perfect for this.
Spread Them Out: Lay the onions in a single layer on a wire rack, an old window screen, or even just on some newspaper. The key here is good airflow all the way around each bulb.
Be Patient: Let them cure for two to three weeks. You’ll know they are ready when the necks are completely dry and tight, and the outer skins feel papery and rustle when you handle them.
Prepare for Storage: Once they're fully cured, you can trim the dried roots off with scissors and cut the tops down to about one inch above the bulb.
Properly harvested and cured onions can last for months, providing you with homegrown flavor all winter. For a complete look at the entire process, from putting seeds in the ground to filling your pantry, explore our guide on how to grow onions from seed to storage.
Common Questions About Growing Onions
Even with a solid plan, a garden will always throw you a curveball. When it comes to onions, a few common problems seem to pop up year after year, tripping up even seasoned gardeners. Here are the questions I hear the most and the field-tested answers that work.
Why Are My Onion Bulbs Not Getting Big?
This is, without a doubt, the number one frustration. Nine times out of ten, the answer comes down to one of three things.
First, you might have planted the wrong type of onion for your region. If you're in the south and you planted a long-day variety, you’re setting yourself up for disappointment. It simply will never get the 14+ hours of daily sunlight it needs to trigger proper bulbing.
The other culprits are almost always competition and inconsistent care. If your onions are too crowded (planted closer than 4-6 inches apart) or fighting a losing battle against weeds, they won't have the resources to size up. Likewise, if you let them dry out, especially during that critical bulbing stage, their growth will stall for good.
Can I Grow Onions From a Store-Bought Onion?
You can absolutely get an onion from the grocery store to sprout, but it's not the path to growing big, new bulbs. It is, however, a fantastic trick for an endless supply of green onions (scallions) right in your kitchen. Just stick the root end in a jar of water or plant it in a small pot of soil.
But here’s the catch: that parent onion will almost always divide into several small, weak cloves instead of forming one big, robust bulb. If you're after a real harvest of full-sized onions, you're always better off starting from seeds, sets, or transplants bred for planting.
Key Takeaway: Think of a store-bought onion as a great shortcut for fresh greens, but stick to planting sets or seeds for your main bulb harvest. This ensures you get a variety suited to your climate and a plant focused on making one large onion.
What Causes an Onion Plant to Flower or Bolt?
Bolting—when an onion sends up a flower stalk—is a plant's emergency signal. It’s a response to stress, and the most common trigger is a sudden, unexpected cold snap after the plant has already started growing.
That shock of cold tricks the onion into thinking its first growing season is over and it's time to make seeds for the next generation.
Once an onion bolts, the bulb stops growing and pours all its energy into that flower. The resulting bulb will have a tough, woody core and won't store for more than a few days. If you spot a flower stalk shooting up, your best move is to pull that onion immediately and plan on using it for dinner that night.
At The Grounded Homestead, we're passionate about helping you grow your own food with confidence. For more tips, tricks, and weekly garden inspiration, check out our resources at https://thegroundedhomestead.com.


Facebook
Instagram
X
Youtube