
How to Harvest Herbs for Peak Flavor and Potency
How to Harvest Herbs for Peak Flavor and Potency
To get the most out of your herbs, you need to pay attention to three things: when you cut, how you cut, and what you cut with. A quick snip in the morning before the sun gets too hot traps the most flavor. Using the right technique—like the 'cut and come again' method for basil—is what tells your plants to keep producing all season long.
The Secrets to a Perfect Herb Harvest
Learning how to harvest your herbs is the bridge between simply growing plants and creating a garden that actually feeds you week after week. It’s a skill that turns all that watering and weeding into tangible, delicious results.
A good harvest isn’t just about grabbing what you need for dinner. It’s more like a conversation with the plant, encouraging it to grow bushier, stronger, and more abundantly. When you learn to make purposeful cuts, you’re not just taking from the plant—you’re helping it thrive. A strategic pinch back on a leafy herb like mint or basil is what keeps it from getting leggy and sparse.
Maximize Your Garden's Potential
A smart harvest plan is the heart of a productive garden. It’s how you get the very most out of every single plant you’ve nurtured from seed or transplant.
Think of it this way:
Continuous Production: For leafy annuals, frequent and correct harvesting is what stimulates new growth. Every snip is a signal for the plant to push out fresh, tender leaves.
Better Flavor: Harvesting at the right time—usually in the morning—captures the highest concentration of essential oils. That’s where all the aroma and taste comes from.
Healthier Plants: Using clean tools and proper techniques prevents damage and keeps diseases at bay, helping woody perennials like rosemary and thyme come back strong year after year.
Getting this right is a huge step in moving from a beginner to a more experienced gardener. If you're just getting started, thinking about your harvest from the very beginning can make all the difference. Our guide on garden planning for beginners will help you set up your herb garden for success from day one.
From Backyard Garden to Market Quality
It’s interesting to see how the principles that guide large-scale herb farming can be applied right in our own backyards. The demand for fresh, high-quality herbs has exploded, turning it into a major global market. In a recent year, the fresh herbs market was valued at around USD 3.75 billion, and it grew to USD 3.99 billion the very next year. Projections show it could reach an estimated USD 5.50 billion by 2030. You can learn more about this growth trend and what's driving it.
This commercial boom highlights something really important for home gardeners: the intense focus on quality and timing is what creates value. When you adopt that same professional mindset, you can get market-quality results right in your own garden, ensuring every leaf you pick is absolutely packed with flavor.
Here's a quick cheat sheet for some of the most common herbs you might be growing. It breaks down the best time to snip them for peak flavor and continuous growth.
Quick Harvest Guide for Common Herbs

Remember, this table is a general guide. The best teacher is your own garden—pay attention to how your plants respond, and you’ll quickly learn exactly what they need.
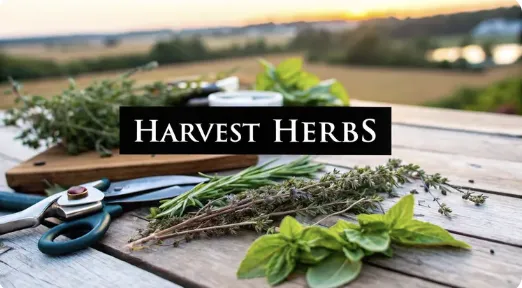
Choosing the Right Tools for a Clean Cut

When you're learning how to harvest herbs, it’s easy to focus on timing and technique, but the tools you use are just as important. A clean, precise cut does more than just gather your ingredients; it signals the plant to heal efficiently and push out vigorous new growth.
The right tool makes all the difference.
Imagine trying to snip delicate dill fronds with heavy-handed kitchen shears. You're likely to crush more than you cut. On the flip side, using tiny scissors on a thick, woody rosemary stem will just frustrate you and damage the plant. This is why matching the tool to the herb is a fundamental skill every gardener learns—often the hard way.
Match the Tool to the Herb
Your choice of tool has a direct impact on plant health. A dull or clunky blade crushes plant cells, leaving a ragged wound that’s slow to heal and an open invitation for disease. A sharp, precise cut is like clean surgery for your plant.
Here’s a simple breakdown of what to use and when:
Micro-Tip Snips: These are my go-to for delicate, soft-stemmed herbs. Think cilantro, parsley, dill, and chives. Their fine point allows you to get right to the base of the stem without disturbing the rest of the plant.
Bypass Pruners: For your woody herbs like rosemary, thyme, sage, and oregano, a pair of sharp bypass pruners is essential. They work like scissors, with one blade "bypassing" the other to make a clean slice right through those tough stems.
A critical, non-negotiable habit is to keep your tools clean. Simply wipe the blades with a cotton ball soaked in rubbing alcohol when moving from one plant to another. This small step takes seconds but is the best way to prevent the spread of unseen pests or diseases throughout your garden.
Prepare for the Harvest
Beyond the cutting tools, having your collection containers ready is a pro move. Keeping baskets, bowls, or a colander nearby means you can get your freshly cut herbs indoors quickly. This simple preparation helps preserve their fragile essential oils, which can begin to evaporate in the sun just moments after being cut.
This focus on efficiency and proper tooling isn't just for home gardeners, either. The commercial herb industry is booming—the global herb harvester market was valued at around USD 1.5 billion and is projected to keep growing. That growth is driven by the need for tools, from manual snips to automated systems, that harvest herbs efficiently without sacrificing quality.
You can explore more details on the herb harvester market's expansion and how it impacts cultivation practices. This commercial-level attention to detail just goes to show how much the right equipment matters for a quality harvest.
Mastering Harvest Techniques for Every Herb Type
Not all herbs are created equal, and they certainly don’t like to be harvested the same way. A delicate cilantro plant just can’t handle the same robust trimming as a tough, woody rosemary bush. Once you get a feel for their different growth habits, you’ll know exactly how to treat each one.
Learning these differences is what separates a good harvest from a truly great one. It’s the secret to keeping your plants healthy, productive, and pumping out flavor all season long.
Before you ever make a cut, a quick three-step check sets you up for success.

This little ritual—check the plant, clean your tools, have a bowl ready—is simple, but it ensures the harvest benefits both you and the plant.
The Cut-and-Come-Again Method for Leafy Herbs
For the soft-stemmed, leafy annuals like basil, cilantro, and mint, the goal is to encourage bushy, dense growth. This is where the cut-and-come-again method is your best friend. Instead of just plucking off individual leaves, you’ll want to snip the entire stem.
Take basil, for instance. Follow a main stem down to where you see a set of tiny side leaves forming at a node. Make your cut about a quarter-inch above this spot. This single snip does two brilliant things: it gives you a perfect stem for your kitchen and tells the plant to push its energy into those two little side shoots. Those shoots will then grow into two new main stems.
This is how you stop basil from flowering, or "bolting." Once a basil plant flowers, its energy shifts from making leaves to making seeds, and the flavor of the leaves can turn bitter. Harvesting from the top down keeps the plant in a constant state of leafy, delicious growth.
With parsley and cilantro, the approach is a bit different. You’ll want to harvest the outer, more mature stems first by cutting them right at the base of the plant. This opens up the center, allowing the younger, inner stems to get more sun and continue developing. It’s a simple rotation that guarantees a continuous supply.
The One-Third Rule for Woody Perennials
Woody perennials like rosemary, thyme, sage, and oregano play by a different set of rules. These plants are in it for the long haul, and your harvesting technique needs to support their strength and longevity.
The most important guideline here is the one-third rule: Never, ever remove more than one-third of the plant's total growth at any single time. Taking more than that can seriously stress the plant, making it difficult for it to recover, especially as it heads into winter dormancy. This is a common mistake that can weaken or even kill a perennial herb over the winter.
When you do harvest, go for the younger, tender new growth. That’s where the flavor is most concentrated. A clean snip on a woody stem also encourages the plant to branch out, creating a fuller, healthier shrub over time.
Special Cases and Unique Herbs
Of course, not every herb fits neatly into those two buckets. Some, like chives and dill, have their own quirks that unlock the best flavor and promote regrowth.
Chives: Always cut chives near the base, about one to two inches above the soil. Don't just give them a "haircut" across the top. Cutting at the base signals the bulb to send up fresh, tender green shoots.
Dill: You can harvest the feathery fronds as needed all season long. But if you're after dill seed, you'll need to be patient. Wait until the flower heads have formed and turned brown, then snip the entire head and hang it to dry.
Harvesting at the Peak of Flavor

Timing is the secret ingredient for an unforgettable harvest. The exact moment you decide to snip your herbs can be the difference between a burst of intense, garden-fresh aroma and something disappointingly bland. Learning to read the plants and recognize these peak moments is what separates a good gardener from a great one.
The most magical time to harvest is in the morning. Specifically, you want to head out just after the morning dew has dried from the leaves but before the sun gets high enough to bake them.
Why this specific window? During the cool, moist night, plants conserve their essential oils. By morning, these oils—the very source of all that incredible flavor and aroma—are at their highest concentration. Snipping your herbs then captures them at their absolute peak.
Harvest Before Flowers Appear
For most leafy herbs, the plant's life cycle is your roadmap. Your main goal is to harvest them just before they begin to flower.
When an herb like basil, cilantro, or oregano starts putting up flower buds, it undergoes a significant change. The plant shifts its energy away from producing flavorful leaves and toward creating flowers and seeds for reproduction. This process, known as bolting, often makes the leaves less potent or even taste bitter.
Basil: Snip the tops regularly to keep it from sending up flower stalks.
Oregano: Harvest entire stems before you see the tiny white or pink flowers appear.
Cilantro: This one bolts fast in the heat, so harvest it frequently and in succession to stay ahead of it.
By harvesting proactively, you keep the plant in a vegetative state, encouraging it to pump out more of the delicious leaves you're after.
When the Flower Is the Prize
Of course, some rules are made to be broken. For certain herbs, the flower is the part you want. In these cases, your timing shifts from preventing flowers to capturing them at their prime.
With flowering herbs like chamomile or lavender, the goal is to harvest them just as the blossoms are beginning to open. This is when their medicinal properties and aromatic compounds are most concentrated. If you wait too long, the flowers lose their potency as they start to fade and go to seed.
Think about these popular examples:
Chamomile: Pick the small, daisy-like flowers when the petals are flat or just starting to curl back slightly from the center cone.
Lavender: Harvest the entire flower spike when about half of the tiny buds on the stalk have opened.
Plan for a Big Finish
Seasonal timing is just as important as daily timing. As the growing season winds down, you’ll want to plan for one final, large harvest before the first frost is on the forecast. This is your last chance to gather a big supply for drying or freezing.
For perennial herbs like thyme and sage, this final trim also helps prepare them for winter. A light pruning before they go dormant cleans up the plant and encourages robust growth when spring returns, ensuring you’ve squeezed every last bit of flavor from the season.
You’ve spent weeks, maybe even months, nurturing your herbs. Now comes the moment that makes it all worthwhile: the harvest. But once you make that perfect cut, the work isn’t quite over. In fact, what you do in the next few minutes and hours will determine whether you enjoy that just-picked flavor for a few days or for months to come.
How you handle your herbs from here on out is crucial for preserving their delicate oils and vibrant taste. It all starts with a gentle wash.
Even if your garden looks pristine, a quick rinse removes any dust, dirt, or tiny unseen critters that might be hiding out. I like to submerge the herbs in a bowl of cool water and swish them around gently. Try to avoid putting them directly under a blasting faucet—that pressure can easily bruise tender leaves like basil or dill.
After washing, drying them completely is non-negotiable. You can carefully pat them dry between layers of paper towels or give them a gentle ride in a salad spinner on a low setting. This is a step you can't skip. Any lingering moisture will encourage mold and rot, quickly undoing all your hard work.
Smart Short-Term Storage
For herbs you plan on using within the next week, a few simple kitchen hacks can dramatically extend their life. Think of it as creating a little micro-climate that keeps them happy and hydrated.
Tender, leafy herbs like cilantro, parsley, and mint should be treated like a fresh bouquet of flowers. Just trim the very ends of the stems and place them upright in a jar with about an inch of water. Loosely cover the leaves with a plastic bag and pop them in the fridge. This simple trick can keep them crisp and ready to use for a week, sometimes even longer.
Woody herbs like rosemary, thyme, and sage need a different approach. They prefer to be kept just slightly humid, not wet. Wrap the unwashed sprigs in a lightly damp paper towel, then place the whole bundle inside a zip-top bag or an airtight container in the fridge. This keeps them from drying out in the cold, circulating air.
The goal of short-term storage is to provide just enough moisture to prevent wilting without creating a soggy environment that promotes decay. It's a delicate balance, but one that makes a huge difference.
Long-Term Preservation for Year-Round Flavor
To get that taste of summer in the dead of winter, you’ll need to turn to long-term preservation. The three main methods I rely on are air-drying, using a dehydrator, and freezing. Which one you choose really depends on the herb’s moisture content and oil structure.
Proper preservation is also a key part of keeping a clean garden, as leftover plant material can sometimes attract pests. If you're looking to keep your garden healthy from top to bottom, learning about natural pest control methods can be incredibly useful.
Air-Drying and Dehydrating
This method is perfect for herbs that are naturally low in moisture and have sturdy leaves. Think of things like:
Oregano
Rosemary
Thyme
Sage
Marjoram
Drying actually concentrates their essential oils, making them much more potent than their fresh counterparts. You can tie them into small bundles and hang them in a warm, dry, well-ventilated spot away from direct sun. If you have a dehydrator, it offers a faster, more controlled environment, usually getting the job done in just a few hours.
Freezing for Freshness
Freezing is the way to go for delicate herbs with a high moisture content. Their flavor and bright green color just don’t hold up well to drying.
Basil (Drying turns it black and nearly flavorless)
Cilantro
Parsley
Chives
Dill
One of my favorite techniques is to chop the herbs, place them in an ice cube tray, cover them with either water or olive oil, and freeze. These little flavor bombs are perfect for tossing directly into soups, stews, and sauces all winter long.
To help you decide which method to use, here’s a quick-glance table breaking down the best preservation techniques for common herbs.
Comparing Herb Preservation Methods

Choosing the right method ensures you get the most out of your harvest, locking in that incredible homegrown flavor for the months ahead. It turns a summer hobby into a year-round resource for your kitchen.
Common Herb Harvesting Questions Answered

Even with the best techniques, every gardener eventually runs into a few head-scratchers out in the herb patch. You’re not alone. I’ve put together some straightforward answers to the questions I hear most often from fellow growers.
Think of this as the advice you’d get leaning over a garden fence—practical, tested, and designed to solve those real-world problems that pop up when you least expect them.
What If My Herbs Start to Flower?
It’s a classic garden moment: you head out to snip some basil and find it’s sending up flower stalks. For most leafy herbs like basil, cilantro, and oregano, this is your cue to act fast.
When an herb flowers, it's a process called bolting. All the plant's energy shifts from making tasty leaves to producing seeds, and that usually means the leaves will turn bitter or lose their punch.
For basil, mint, and oregano: Pinch or snip off the flower buds the moment you spot them. This sends a signal to the plant to get back to the business of growing flavorful leaves.
For cilantro and dill: These herbs bolt incredibly fast in the heat. Your best bet is to harvest them aggressively as soon as you see flowers forming. Otherwise, you can just let them go and collect the coriander or dill seeds later on.
The bottom line is this: for leafy herbs, flowering means the peak flavor window is closing. Harvesting consistently from the top of the plant is your best defense against early bolting and keeps your supply going strong.
Can I Harvest Herbs from a First-Year Plant?
Yes, absolutely—but with a bit of restraint, especially when it comes to perennials. That first year is all about letting the plant build a strong, healthy root system that will carry it through for years to come.
With annuals like basil and cilantro, you can start harvesting as soon as the plant is a few inches tall and has a decent number of true leaves. In fact, light and frequent harvesting is what encourages them to get bushy and productive.
Perennials like rosemary, sage, and thyme are a different story.
Harvest lightly: Only take a few sprigs here and there during their first season. You’re just taking a little taste, not a full harvest.
Let them get established: The goal is to let the plant pour its energy into root development. This is what helps it survive the winter and come back with vigor next year.
The one-third rule is critical here: Never, ever take more than a small fraction of a first-year perennial's growth.
Thinking about which herbs grow well together can also give them a leg up on health and vitality. Many of the same ideas from strategic vegetable companion planting apply to herbs, too, and it’s well worth a read.
At The Grounded Homestead, we're passionate about helping you connect with your food from seed to harvest. Explore our resources to build the skills and confidence for a more self-sufficient lifestyle.
Visit us at: https://thegroundedhomestead.com


Facebook
Instagram
X
Youtube