
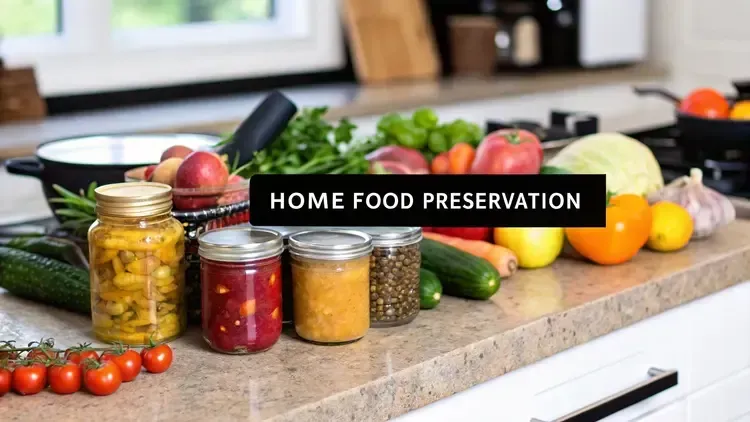
A Modern Guide to Preserving Food at Home
A Modern Guide to Preserving Food at Home
Preserving your own food is one of the most rewarding skills you can learn. It’s a direct way to take back control of your pantry, slash food waste, and give your family better nutrition. You're turning fresh produce into something that lasts, locking in peak-season flavor and saving money in the process.
This isn’t just about stocking shelves. It’s about turning your kitchen into a hub of self-sufficiency.
Why Start Preserving Food at Home?

Rediscovering the art of food preservation is about so much more than old-fashioned thriftiness. It’s a hands-on response to a modern problem: not knowing what’s in our food. By learning these skills, you gain incredible control over every meal that hits your family's table.
Think about it. You can take a huge haul of summer tomatoes—bought when they're bursting with flavor and at their lowest price—and transform them into jars of rich, beautiful sauce. You control the salt. You skip the hidden sugars. And you avoid all the unpronounceable preservatives you find on store shelves. It connects you to your food in a way that buying off a shelf never will.
Gain Control Over Your Ingredients
The single most compelling reason to start preserving your own food is transparency. When you’re the one filling the jar, you know exactly what’s inside. No questions, no doubts. This is a game-changer for anyone managing dietary restrictions, navigating food allergies, or simply aiming for cleaner eating.
And it’s a feeling shared by many. A recent survey found that 81% of U.S. consumers see ingredient quality as a top factor when buying food. The boom in home preservation directly reflects this desire for control. The global market for canning jars is even projected to grow substantially, proving just how much people value knowing what’s in their pantry.
Preserving food at home bridges the gap between your garden and your pantry. It’s a practical skill that provides peace of mind, knowing your shelves are stocked with high-quality, delicious food you created yourself.
Embrace a More Sustainable Lifestyle
Beyond your own health, preserving food is a powerful act of sustainability. It’s a direct strike against food waste, giving you a way to save produce that might otherwise end up in the compost bin.
Those slightly bruised apples from the orchard? They become jars of delicious applesauce. That bumper crop of zucchini from the garden? Dehydrated into crispy, snackable chips. Nothing goes to waste.
This practice fosters a more mindful approach to what we consume and is a cornerstone skill for anyone interested in self-sufficiency. If you're just starting down this path, our guide on homesteading for beginners offers foundational knowledge that pairs perfectly with food preservation.
The benefits are clear and compelling:
Save Money: Buy produce in bulk when it's in season and at its cheapest. You'll enjoy it year-round for a fraction of what you'd pay at the store in January.
Reduce Food Waste: You get to rescue and transform every last bit of your harvest, from ugly fruits to excess vegetables.
Better Flavor: Food that's preserved at its peak ripeness is just going to taste better. It's a simple fact.
Year-Round Access: Craving the taste of summer berries in the dead of winter? Or garden-fresh green beans long after the first frost? Your pantry makes it possible.
Your Guide to Canning with Confidence
Canning can feel like a big leap, but it’s a foundational skill for preserving your harvest. It's the method that lets you stock your pantry with everything from vibrant fruit jams to hearty meals-in-a-jar, all shelf-stable and ready to go. Let's demystify the two core canning methods so you can get started with assurance and, most importantly, safety.
The world of canning is split into two main camps, and knowing the difference isn't just a suggestion—it's non-negotiable for safety. It all comes down to one thing: the acidity of the food you're putting in the jar.
Water Bath Canning for High-Acid Foods
Water bath canning is the perfect entry point into this craft. It's designed specifically for high-acid foods, where the natural acidity (a pH of 4.6 or lower) works hand-in-hand with boiling water to keep spoilage at bay. The equipment is simpler, and the process is less intimidating for beginners.
Foods that are perfect for a water bath canner include:
Fruits: Peaches, pears, applesauce, and berries hold up beautifully.
Jams and Jellies: The combination of fruit, sugar, and acid makes these ideal candidates.
Pickled Vegetables: When you add vinegar, you dramatically lower the pH of vegetables like cucumbers, asparagus, and green beans, making them safe for this method.
Most Tomato Products: While they sit right on the edge of the pH scale, tomatoes are safely processed in a water bath as long as you add a little acid, like bottled lemon juice or citric acid.
The process is straightforward: you submerge sealed jars in a big pot of boiling water (212°F or 100°C) for a specific, recipe-tested amount of time. This intense heat forces air out of the jar, and as it cools, it creates a powerful vacuum seal.
Pressure Canning for Low-Acid Foods
For low-acid foods, a water bath canner simply doesn’t get hot enough to eliminate the dangerous risk of Clostridium botulinum, the bacteria that causes botulism. These foods demand a pressure canner—a specialized, heavy-duty pot with a locking lid and a pressure gauge.
A pressure canner creates a high-pressure environment that allows the temperature inside to reach 240°F (116°C) or higher. This intense heat is the only home method proven to safely destroy botulism spores in low-acid foods.
This is the required method for canning things like:
Plain vegetables (green beans, corn, carrots, potatoes)
All meats, poultry, and fish
Soups and stews that contain low-acid ingredients
While the equipment is more of an investment, it opens up a whole new world of preserving complete, ready-to-eat meals right on your shelf.
This simple infographic shows the basic steps for preparing produce to freeze, a much simpler preservation method. But the principle of careful preparation is universal, and it's even more critical in canning.

The flow from selection to blanching to packing shows how a few key actions are essential for a quality result. In canning, those steps are vital for a safe one, too.
Canning Gear You Actually Need
Getting started doesn't mean you need to buy every gadget on the shelf. Just focus on the essentials first, and you can build your kit over time.

These core items will see you through most projects. Things like funnels and bubble-remover tools are nice to have, but you can get by without them when you're just starting.
A Real-World Example: Canning Tomatoes
Let’s walk through a common scenario: you have a bumper crop of tomatoes from the garden. You can’t possibly eat them all fresh, so you decide to can them. This is a perfect beginner project.
Of course, having a bumper crop in the first place comes from smart planning. For tips on maximizing your harvest, check out our guide on garden planning for beginners.
First, you’d prepare your tomatoes by washing and peeling them (a quick dip in boiling water makes the skins slip right off). You'd pack them into sterilized jars, adding a splash of bottled lemon juice to each one. This is a crucial step to ensure the acidity is safely in the high-acid range.
After wiping the jar rims clean, you'd apply the lids and bands, then carefully lower the jars into your boiling water bath canner. You’d process them for the time specified in a tested recipe, making sure to adjust for your altitude.
Once the time is up, you lift them out and set them on a towel to cool. Soon enough, you'll hear that satisfying “ping” as each jar seals—a sound that signals success and promises a taste of summer for months to come.
Freezing and Drying for Easy Preservation

When you're looking for straightforward ways to preserve your harvest, freezing and drying are your best friends. They're some of the most approachable techniques out there, requiring less specialized gear than canning while still locking in incredible flavor and nutrients. From perfectly sweet frozen berries to intensely flavored dried herbs, these methods will earn a permanent spot in your kitchen routine.
Think of freezing as hitting the "pause" button on freshness. It works by dramatically slowing down the enzyme activity that makes food spoil, keeping things tasting almost as good as the day you picked them.
Master the Art of Freezing
The real secret to successful freezing isn't just tossing food into a bag—it's all about the prep work. For most vegetables, a quick blanching is a step you just can't skip. This involves a brief dip in boiling water followed by a plunge into an ice bath. It might sound fussy, but this simple process stops the enzymes that would otherwise ruin the food's texture, color, and flavor over time in the freezer.
Take green beans, for example. If you freeze them raw, they often turn tough and develop a grassy, off-putting taste after a few months. But if you blanch them for just 2-3 minutes, they’ll stay vibrant and delicious.
The key to preventing freezer burn is getting rid of as much air as possible. Air is the enemy here; it causes ice crystals to form and pulls moisture out, ruining both texture and flavor.
Your choice of packaging is a huge part of this battle. While good old zip-top freezer bags work, investing in a vacuum sealer is a total game-changer. By removing nearly all the air, a vacuum sealer can extend the freezer life of your food by 3 to 5 times compared to other methods. It’s the single best way to win the war against freezer burn.
Choosing Your Drying Method
Drying, also known as dehydration, is one of humanity's oldest preservation tricks. The logic is simple: remove enough moisture from food, and bacteria, yeast, and mold can't grow. At home, you really have two main paths: using a dedicated dehydrator or your everyday kitchen oven.
A food dehydrator is an appliance built specifically for this. It uses a low, steady temperature and a fan to circulate air, which makes for beautifully even and efficient drying. If you plan on drying a lot, this is the way to go for consistent, high-quality results.
If you're not ready to buy new gear, you can absolutely use your oven. You just need to make sure it can hold a very low temperature, somewhere around 140-150°F (or 60-65°C). To make it work, you'll probably need to prop the oven door open with a wooden spoon to let moisture escape and maybe even place a small fan nearby to help with air circulation. It’s not as efficient, but it’s a fantastic way to try your hand at drying before you commit.
Practical Drying Projects for Your Pantry
Once you have a method down, a whole world of pantry staples opens up. Dehydration can turn your fresh produce into shelf-stable ingredients that bring a burst of flavor to your cooking all year.
Here are a few ideas to get you started:
Fruit Leathers: Blend fruit like strawberries or use applesauce to make a smooth puree. Spread it in a thin layer on a parchment-lined tray and dry it until it's pliable but no longer sticky. It’s a healthy, homemade snack that kids (and adults) go wild for.
Dried Herbs: Lock in the potent flavor of fresh basil, oregano, or mint from your garden. Just lay the herbs in a single layer and dry them at a very low temperature—around 95°F or 35°C—until they are brittle and crumble easily between your fingers.
Vegetable Powders: This is my favorite trick for reducing waste. Take leftover veggie scraps—think carrot peels, onion skins, and celery ends—and dehydrate them until they are completely bone-dry. Then, blitz them into a fine powder in a spice grinder. You've just made a custom, nutrient-packed soup base. If you're looking for more ways to use garden scraps, learning https://thegroundedhomestead.com/post/how-to-compost-at-home is a great next step.
By embracing the simple but powerful techniques of freezing and drying, you gain a whole new level of control over your kitchen. You'll be able to savor the taste of summer sunshine in the dead of winter, all thanks to a little bit of prep and the simple magic of preservation.
Discovering Fermentation and Natural Preserving
Beyond the sealed jars of the canner and the icy bags in the freezer lies a living, breathing method of preservation: fermentation. This isn't just about making food last longer. Fermentation is an ancient craft that transforms ingredients, unlocking complex new flavors and packing them with beneficial probiotics.
At its core, fermentation is a beautifully simple process. You’re essentially inviting friendly microorganisms, like good bacteria and yeast, to a party. They break down the sugars in your food and, in return, create natural preservatives like lactic acid. The best part? You don't need a pantry full of special gear. A jar, some salt, and fresh vegetables are often all it takes to start making tangy sauerkraut, spicy kimchi, or crisp fermented pickles right on your kitchen counter. It’s a hands-on way to connect with your food, watching it bubble and change day by day.
Getting Started with Fermentation
The real secret to a good ferment is creating an environment where the good bacteria can win. You do this with a simple saltwater brine. Salt is the gatekeeper—it pulls water from the vegetables to create a brine that shields the food from oxygen, giving the good bacteria a head start while keeping the bad guys out.
A healthy ferment is active and alive. In the first few days, you should see bubbles rising to the surface. That’s a fantastic sign! It means the lactic acid bacteria are happily turning sugars into acid. The smell should be clean and pleasantly sour, not foul or moldy. Don't be alarmed if you see a white film (kahm yeast) on top; it's generally harmless and can be skimmed right off. But if you spot any fuzzy, colorful mold, that’s your cue to toss the batch and start again.
A successful ferment is all about observation. Pay attention to the sights, smells, and sounds. This active process rewards patience and a little bit of daily attention, turning simple cabbage into a probiotic powerhouse.
Quick Pickling for Instant Gratification
Sometimes you crave that tangy, pickled flavor but don't have the time for a full fermentation or canning project. That’s where quick pickling comes in. Also known as refrigerator pickles, this method is your shortcut to instant gratification.
All you do is pour a hot brine of vinegar, water, salt, and seasonings over fresh vegetables. Let them cool, pop them in the fridge, and they're ready to eat.
Quick pickles are perfect for:
Crisp Cucumbers: Get that classic deli-style pickle crunch in no time.
Tangy Red Onions: A game-changer for tacos, salads, and sandwiches.
Spicy Jalapeños: Liven up any dish with a bit of heat and acid.
While they don’t have the long shelf life of canned pickles or the probiotic punch of fermented ones, they deliver incredible flavor and are usually ready in 24 hours. They’re a fantastic way to preserve small batches from the garden for short-term enjoyment.
Harnessing Natural Preservatives
Fermentation is just one way nature helps us keep food on the shelf. In fact, many ingredients already in your pantry are powerful preservatives. When you understand how they work, you can use them with more confidence and creativity.

These traditional methods are seeing a huge comeback as more people look for clean-label foods. This isn’t just a feeling; the market reflects it. Projections show the global food preservatives market is set to grow from $3.4 billion in 2025 to $6.5 billion by 2035, a shift driven largely by the demand for natural options like vinegar and botanical extracts. You can read the full research on these market trends to learn more about this growing movement.
By mastering these simple techniques, you’re not just reviving old skills—you’re bringing your kitchen into alignment with a modern, health-conscious way of eating.
Troubleshooting Common Preservation Problems

Even after years of practice, every home preserver eventually has a moment of doubt. You pull a jar from the canner, and the lid just won't "ping." Or you open the pantry to find your once-vibrant pickles have gone soft. It's frustrating, I know.
But these aren't failures. They're valuable lessons that sharpen your skills and build real confidence in the kitchen. The trick is knowing what to look for and how to respond, turning a potential problem into a learning experience that ensures your pantry is filled with safe, delicious food.
Identifying Spoilage: The Non-Negotiables
Before you worry about cosmetic issues, your first priority is always safety. When you inspect a jar—whether it's the day after canning or months later—your senses are your most important tools.
You should never taste food to see if it’s safe. Instead, look for these tell-tale signs of spoilage:
A Failed Seal: A properly sealed lid is concave (curved inward) and won't budge when you press the center. If the lid is bulging or makes a popping sound, the seal has failed.
Visible Mold: Any fuzzy, discolored, or strange growth on the food's surface or under the lid is an immediate red flag. No exceptions.
Unnatural Colors: While some darkening over time is normal, food that has developed an unappetizing or unusual hue should be handled with extreme caution.
Spurting Liquid or Rising Bubbles: If liquid spurts out when you open the jar or you see a steady stream of bubbles rising to the top, it’s a clear sign of active spoilage.
Off-Smells: Trust your nose. If the food smells sour, fermented (when it shouldn't), or just plain "off," it's time to discard it.
If you spot any of these signs, the contents cannot be saved. The rule is simple and absolute: When in doubt, throw it out. The risk of foodborne illness is never worth it. Discard the food where pets and other animals can't get to it.
Solving Common Canning Issues
Once you've ruled out spoilage, you can tackle the more common (and less dangerous) issues that pop up. These problems usually affect quality, not safety, and knowing why they happen is the key to preventing them next time.
One of the most common frustrations is siphoning, which is when liquid gets drawn out of the jars during processing. This is often caused by cooling the canner down too fast or not leaving enough headspace. A little liquid loss is usually okay, but if more than half the liquid is gone, the food's quality and shelf life might be compromised.
Another frequent issue is a cloudy brine in your pickles or vegetables. This can happen if you used table salt (which contains anti-caking agents) instead of pure canning salt, or if your water is very hard. Sometimes, it just means your produce wasn't at peak freshness. While usually just a cosmetic problem, you should still check for other spoilage signs.
This kind of careful quality control is a big deal, even on a global scale. The worldwide food preservation market was valued at USD 90 billion and is expected to keep growing through 2030. Big companies and home canners alike are focused on balancing safety with natural ingredients. You can learn more about this growing market at Future Data Stats.
This growth just goes to show how vital reliable, time-tested methods are, whether you're in a factory or your own kitchen.
The Power of Tested Recipes
Honestly, the single best way to avoid problems is to use current, tested recipes from a trusted source. Organizations like the National Center for Home Food Preservation and local university extension programs have scientifically validated their recipes to ensure the acidity, processing times, and temperatures are correct for a safe final product.
It’s just as important to adjust for altitude. Because water boils at lower temperatures the higher you go, you have to increase your processing time in a water bath canner or bump up the pressure in a pressure canner to compensate. If you skip this critical step, you can end up with under-processed, unsafe food. Following a trusted guide is the surest way to make your home preservation efforts both successful and secure.
Tackling Your First Food Preservation Questions
As you get your hands dirty with home canning, you’re bound to run into a few head-scratchers. Everyone does. Whether you’re nervously watching your first batch of pickles in a boiling water bath or trying to figure out why last year’s jam didn’t set, these questions are part of the learning curve.
Let's walk through some of the most common sticking points I hear about. Think of this as having an experienced canner right there in the kitchen with you.
Can I Reuse Canning Lids to Save a Little Money?
I get this one all the time, and the answer is a hard and fast no. You absolutely cannot reuse the flat, single-use canning lids.
Think of that little rubberized ring on the underside of a new lid. It’s engineered for one perfect, heat-activated seal. When you process a jar, the heat softens that compound, and as the jar cools, it molds itself to the rim to create a strong, airtight vacuum.
Once it’s been used, it’s done. Trying to reuse it is asking for trouble. You might get a lid that fails to seal right away, which is frustrating but obvious. The real danger is a weak seal—one that seems fine at first but breaks on the shelf, allowing dangerous bacteria like Clostridium botulinum to grow unnoticed.
The metal screw bands, on the other hand? Wash them, dry them well, and reuse them until they get rusty or bent. But for the flat lids, always start fresh. It’s the cheapest food safety insurance you can buy.
What Exactly Is Headspace, and Why Does It Matter So Much?
You'll see "headspace" mentioned in every single tested canning recipe, and it's not a suggestion—it’s a critical instruction. Headspace is simply the empty space between the top of your food and the underside of the lid.
Getting it right is a balancing act.
Too little headspace is a classic beginner mistake. As food heats up during processing, it expands. Without enough room to bubble up, it can boil over and wedge itself between the jar rim and the sealing compound. The result? A sticky mess and a failed seal.
But too much headspace is also a problem. Leaving too much air in the jar can prevent a strong vacuum from forming. That leftover oxygen can cause the food at the top to discolor over time and, in some cases, can lead to a weak seal that pops loose later.
Think of headspace as the "breathing room" your food needs to create a perfect vacuum seal. Most recipes call for a specific amount, typically ranging from 1/4 inch for jams and jellies to 1 inch for meats and vegetables.
My Pickles Turned Out Soft and Mushy. What Went Wrong?
There’s nothing more disappointing than cracking open a jar of pickles you worked so hard on, only to find them limp and soggy. Mushy pickles are a common frustration, but the good news is they’re almost always preventable.
Here are the usual suspects:
The Wrong Cucumber: You need to use proper pickling cucumbers, like Kirbys. They have thinner skins and denser flesh that stands up to the brining and heat. Regular slicing cukes will turn to mush every time.
Freshness Is Key: For the absolute best crunch, your cucumbers should go from vine to jar within 24 hours. The fresher the cuke, the crisper the pickle.
Over-Processing: Follow the recipe's timing to the letter. Leaving jars in the hot water bath for even a few extra minutes will cook the cucumbers and soften them.
A Weak Brine: Your brine's salt and vinegar content isn't just for flavor; it's essential for texture and safety. Always stick to a tested recipe from a reliable source.
Here’s a great old-timer’s trick: add a natural source of tannins to each jar. A clean grape leaf, an oak leaf, or a tiny pinch of pickle crisp (calcium chloride) can work wonders to keep your pickles wonderfully crunchy.
Do I Really Need a Pressure Canner for Green Beans?
Yes. Unquestionably, yes. This is one of the most important safety rules in home canning, and it’s completely non-negotiable.
Green beans are a low-acid food. This means they don’t have enough natural acidity on their own to stop the growth of Clostridium botulinum spores—the source of botulism, a rare but deadly form of food poisoning.
A boiling water bath canner only heats up to 212°F (100°C) at sea level. That’s just not hot enough to kill those dangerous spores.
Only a pressure canner can reach the required temperature of 240°F (116°C). That intense heat is the only scientifically proven method for safely preserving low-acid foods like green beans, corn, carrots, and all meats at home. Please, never try to water bath these foods. The risk is just too high.
At The Grounded Homestead, our goal is to give you the knowledge and confidence to grow and preserve your own food. We believe these skills are essential for a healthier, more self-sufficient life. To continue your journey, explore more guides and tips at The Grounded Homestead.


Facebook
Instagram
X
Youtube