
Raising Bees in Your Backyard: A Practical Guide
Raising Bees in Your Backyard: A Practical Guide
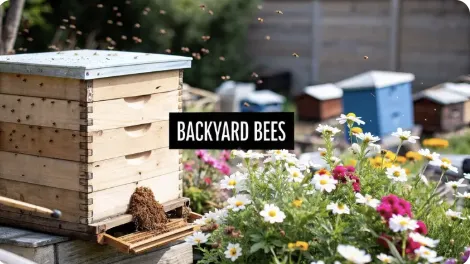
So you’re thinking about keeping bees. It’s a rewarding path, one that connects you directly to the seasons and the hum of the natural world. It’s about more than just harvesting honey; it’s about becoming a steward for a fascinating, living colony. But before you even think about buying a hive, let's get grounded in what this commitment really looks like.
What Backyard Beekeeping Really Involves
Diving into beekeeping is exciting, but it’s far more than setting a quaint wooden box in the garden. This isn't a "set it and forget it" hobby. You’re signing on to manage a living, breathing superorganism, and that means being an active partner to tens of thousands of tiny, hardworking insects.
The initial investment is real. You'll need to buy or build a hive, get yourself some decent protective gear (a veil and gloves are non-negotiable), and pick up essential tools like a hive tool and a smoker. Then, of course, you need the bees. A starter colony, called a "nuc" or a "package," is where it all begins, and that adds to the upfront cost.
But that initial outlay is just the start. The real investment? Your time and your willingness to keep learning.
The Commitment Beyond the Hive
Beekeeping runs on a seasonal clock that demands your attention. You’ll need to do regular hive inspections—usually every 7 to 14 days during the peak spring and summer months. These aren't optional.
These check-ups are how you monitor your queen’s health, watch for pests like the dreaded varroa mite, and make sure the colony has enough room to grow. If you skip these inspections, you risk losing the whole colony.
"A common misconception is that bees just take care of themselves. In reality, a beekeeper acts as a steward, actively managing hive health, preventing swarms, and protecting the colony from threats. Your intervention is often the difference between a thriving hive and a failed one."
Beyond the hands-on work, you need to do your homework on the legal and social side of things. Before you buy a single piece of equipment, check with your local municipality. Many have specific ordinances covering hive placement, how many hives you can have, and if you need to register them.
Your Neighbors and Your Local Ecosystem
Just as important is having a friendly chat with your neighbors. Let them know what you’re planning, answer their (very valid) questions about stings, and maybe even promise them a jar of honey down the road. It can turn a wary neighbor into your biggest supporter. A simple fence or a row of shrubs can also work wonders by directing the bees’ flight path up and over property lines.
Think bigger, too. Your bees are about to become a part of the local ecosystem. To make your backyard truly sustainable, consider how your own landscaping can support them and other pollinators. It's well worth your time learning about designing a native garden to provide the forage they need to thrive.
The interest in this practice is exploding, and for good reason. The global backyard beekeeping market was valued at around USD 1.5 billion in 2025 and is expected to hit USD 2.3 billion by 2030, all thanks to a growing interest in urban farming and environmental stewardship.
Beekeeping fits perfectly into a self-sufficient lifestyle. In fact, many of the skills you’ll learn—observation, seasonal planning, and hands-on problem-solving—are the same ones needed for other rewarding pursuits. You can explore more ideas in our guide to backyard homesteading and see how it all connects.
Before you jump in, it's wise to sit down and map out what you're truly signing up for. This isn't meant to scare you off, but to prepare you for success. A little planning now saves a lot of headaches later.
Initial Beekeeping Startup Checklist

Thinking through these points gives you a realistic picture. If you can confidently check these boxes, you’re well on your way to becoming a thoughtful and successful beekeeper.
Stocking Your Apiary: The Essential Gear You Actually Need

Stepping into the world of beekeeping equipment can feel like learning a new language. There are countless gadgets, variations, and tempting "must-haves." It's easy to get overwhelmed and spend a small fortune before your first bee even arrives.
Let's cut through the noise and focus on what truly matters. This is the absolute essential gear you'll need to get started, ensuring you invest wisely from day one.
First Things First: Your Protective Gear
Your number one priority is always safety—for you and your bees. That starts with good personal protective equipment (PPE). You might see seasoned beekeepers on YouTube working in shorts and a t-shirt, but that's a confidence that comes with years of experience. For a beginner, solid protection is non-negotiable.
Your first big decision is whether to get a full bee suit or a simpler jacket-and-veil combo. A full suit gives you head-to-toe protection, which is a massive confidence booster when you're just starting out. On the other hand, a high-quality jacket with a built-in veil is often more than enough for backyard beekeeping and can be a lot cooler in hot weather.
A few items, however, are must-haves. Don't skimp here; this is your primary defense against stings and will make your hive inspections much more pleasant.
Beekeeping Veil: This is the single most critical piece of PPE. It shields your face and neck, which are the most vulnerable spots. Modern suits and jackets almost always have one built right in, usually with a zipper for easy removal.
Sturdy Gloves: While some beekeepers eventually graduate to working gloveless to "feel" the hive better, starting with thick leather or supple goatskin gloves is a smart move. They protect your hands and let you move with confidence while you learn the ropes.
Closed-Toe Boots: You don't need anything fancy. A simple pair of boots that cover your ankles is perfect for preventing curious bees from crawling up your pant legs.
A Home for Your Bees: The Langstroth Hive
Once you're protected, your bees need a place to live. The most common choice for beginners, especially in North America, is the Langstroth hive. Its modular, vertically stacked design has been the standard for over 150 years for a reason—it’s practical, expandable, and easy to manage.
Think of it like a bee apartment building. A basic Langstroth setup has several key parts, and understanding what they do is fundamental to managing your hive.
The real beauty of the Langstroth system is its interchangeability. As your colony grows, you just add more boxes. It’s a design that expands right along with your bees, making it the perfect starting point for anyone new to this craft.
Anatomy of a Langstroth Hive
Let's break down a standard hive, starting from the ground up.
Hive Stand: This gets the hive off the damp ground, improving air circulation and discouraging pests. It can be a purpose-built stand or just a couple of cinder blocks.
Bottom Board: This is the floor of the hive. A traditional solid bottom board works fine, but a screened bottom board is fantastic for ventilation and helps you monitor for varroa mites.
Hive Body (or Brood Box): This is the big, deep box where the queen lays her eggs and the colony raises its young bees—the brood. A starter hive usually begins with one brood box, and you'll add a second one as the colony expands.
Frames and Foundation: Inside each box hang either 8 or 10 frames. These hold sheets of foundation—wax or plastic imprinted with a honeycomb pattern—that give the bees a guide for building straight, manageable comb.
Honey Super: These are the shallower boxes stacked on top of the brood box. This is where the bees will store their surplus honey, the stuff you'll eventually get to harvest. You only add these once the brood boxes are nearly full.
Inner Cover: This sits on top of the uppermost box, creating a dead air space for insulation and providing an upper entrance for the bees.
Outer Cover (or Telescoping Cover): This is the roof. It fits over the inner cover and the top edges of the hive, protecting the colony from rain, snow, and sun.
The Two Essential Hand Tools
Finally, you’ll need a couple of indispensable tools to work your hive. You really only need two to get started.
The hive tool is the beekeeper's crowbar. You'll use it for prying apart boxes and frames that the bees have sealed shut with propolis (a sticky resin they create).
The smoker is your key to calm inspections. You'll use it to puff cool, white smoke into the hive, which masks the bees' alarm pheromones. This simple act keeps them calm, making inspections safer and far less stressful for everyone involved.
Choosing the Perfect Spot for Your Hive

Alright, you’ve got your gear. Now comes the decision that will shape your entire beekeeping experience: where to put the hive. This isn’t just about finding an empty corner of the yard. Location impacts your bees' health, their honey production, and your relationship with your neighbors.
Think of it from the bees' point of view. They need a home base that’s safe, easy to defend, and gives them a clean launchpad for thousands of daily foraging flights. Getting this right from the start minimizes colony stress, which means healthier bees and a much smoother journey for you.
Sun, Shade, and Shelter
The perfect spot is a balancing act between sun and shade. Bees are cold-blooded, and they need the morning sun to get warmed up and out the door. A hive that catches that early morning light will have foragers heading out much sooner.
But letting a hive bake in the hot afternoon sun is a recipe for trouble, especially in warmer climates. The colony will have to haul water and fan like crazy just to keep the brood from overheating—energy that could have been spent making honey.
The sweet spot? A location that gets full morning sun but receives some dappled shade during the hottest part of the day, usually between 1 PM and 4 PM. A nearby deciduous tree is often perfect, offering shade in the summer but letting the sun through in the winter.
Wind is another big one. A hive exposed to harsh, prevailing winds struggles to maintain its internal temperature, burning through honey stores in the winter. A natural windbreak is your best friend.
Fences: A solid fence can work wonders.
Shrubs or Hedges: A thick row of bushes is a fantastic, natural buffer.
Buildings: The side of a shed or garage provides excellent protection.
If you don’t have a natural windbreak, no problem. A short section of privacy fence or even a few strategically placed straw bales will get them through that first winter.
Water Sources and Flight Paths
Bees need water. A lot of it. They use it to drink, cool the hive, and dilute honey for the larvae. If you don't have a creek or pond within a quarter-mile, you need to provide a consistent source.
A simple birdbath with some rocks or marbles for the bees to land on is perfect. This isn't just a nicety—if you don't give them a source, they’ll find their own. And that might just be your neighbor’s swimming pool or your dog's water bowl.
Next, think about their runway. You want the hive entrance facing away from high-traffic areas like your deck, the sidewalk, or where the kids play. Pointing the entrance toward a fence or hedge encourages the bees to fly up and over head-height right away. A good rule of thumb is to keep a clear flight path for at least 10-15 feet in front of the hive.
"A well-thought-out hive placement is a sign of a respectful beekeeper. It considers the needs of the bees, the safety of family and neighbors, and the harmony of the shared environment. Taking the time to get this right prevents nearly all common backyard beekeeping conflicts."
Forage and Food Availability
Finally, what’s on the menu? Bees can fly up to two miles for food, but having a buffet of nectar and pollen right nearby gives your colony a serious head start. You don’t need acres of wildflowers; a garden with a steady succession of blooming flowers, herbs, and trees makes a huge difference.
Small-scale beekeepers play a surprisingly big role in local ecosystems. In the U.S., beekeepers with fewer than 50 colonies make up roughly 94.5% of all beekeepers. While they manage a smaller portion of the country's total hives, their local pollination impact is massive. For a deeper look, the latest survey from Apiary Inspectors of America has some fascinating data.
Planting a bee-friendly garden is one of the best things you can do to support your hive. If you need some ideas on what to plant, our companion planting chart will help you create a landscape that feeds your bees all season long.
Your Year in Beekeeping: Seasonal Hive Care
Successfully raising bees in your backyard is all about tuning into the rhythm of the seasons. A beehive isn’t a set-it-and-forget-it project; it’s a living, breathing colony whose needs change dramatically from the first thaw of spring to the deep freeze of winter.
The secret is to start thinking like a bee—anticipating their needs before they become urgent. That’s the key to a healthy, productive apiary.
Your role as the beekeeper is really a partnership. You provide support when needed and step back when the colony has things under control. Each season brings a unique set of tasks and observations, so let's walk through the beekeeping year, one season at a time.
Spring: The Season of Explosive Growth
As the first flowers bloom, that sleepy winter cluster you’ve been watching suddenly explodes into a bustling metropolis. The queen gets to work, laying eggs at an astonishing rate—sometimes well over 1,500 per day. The colony's population can double in just a matter of weeks.
Your primary job in spring is to manage this incredible growth.
Regular inspections, about every 7 to 10 days, are non-negotiable right now. You’re looking for a solid brood pattern, signs of a healthy queen, and most importantly, space. If the bees run out of room for brood and honey, their natural instinct is to swarm. This is when the old queen leaves with half the colony to find a new home. While it's a natural process, it's something most backyard beekeepers want to prevent.
To avoid a swarm, you have to stay one step ahead of them.
Add a second brood box: Once the first brood box is about 70-80% full of bees, brood, and resources, it’s time to add another deep box right on top.
Provide honey supers: When you see nectar really starting to flow (we call this the "nectar flow"), add a honey super above the brood boxes. This gives them dedicated space for honey storage.
Look for queen cells: During your inspections, keep an eye on the bottom and edges of the frames for swarm cells, which look like little peanut shells. This is a dead giveaway that the hive is preparing to swarm.
Summer: Maintaining Health and Vigor
Summer is the peak of the beekeeping season. The hive is at its maximum population, and your foragers are working tirelessly to bring in nectar and pollen. Your focus now shifts from managing growth to maintaining the colony's health and just keeping a close watch on things.
The biggest threat during this time is the varroa mite, a parasitic pest that feeds on bees and can absolutely decimate a colony if left unchecked. Regular mite checks are non-negotiable for any responsible beekeeper. An alcohol wash or a powdered sugar roll are common methods to get an accurate mite count.
During your summer inspections, continue to make sure the queen is laying well and that the colony has enough space for all the incoming honey. This is also when you'll see the most activity at the hive entrance—a constant stream of bees coming and going is a great sign of a strong, healthy colony. If you notice signs of pests, it's crucial to act swiftly. For those interested in chemical-free solutions, there are many options. To explore this topic further, you can find valuable tips in our guide to natural pest control.
This simple infographic outlines the core focus for each part of the beekeeping year, from spring's rapid expansion to winter's crucial preparations.

This visual flow highlights that successful beekeeping is a cycle of proactive management, adapting your care strategy as the seasons change.
Fall and Winter: Preparing for the Cold
As the days get shorter and the temperatures drop, the colony's focus shifts from expansion to pure survival. The queen's laying rate decreases dramatically, and the male drones are kicked out of the hive. Your job is to help them button up for the long winter ahead.
The most critical task is making sure they have enough honey stored away. A colony needs a solid 60-80 pounds of honey to survive a cold winter. You must leave them with ample stores, only harvesting what is truly surplus. It's also a good idea to combine any weak hives and reduce the hive entrance to prevent mice from trying to move in.
Winter is a time of rest for both the bees and you. The bees form a tight cluster around the queen, vibrating their wing muscles to generate heat and keep the core of the cluster at a steady temperature. You should stop doing inspections entirely, as opening the hive would release all that precious warmth.
The winter cluster is a marvel of cooperation. By working together, honey bees can maintain a core temperature of around 95°F (35°C), even when it's freezing outside. Your job is to protect them from wind and moisture, and then trust them to do the rest.
Winter's harshness is a real threat. For example, in the winter of 2019, Utah saw nearly half (49.1%) of its honey bee colonies perish due to extreme cold, demonstrating just how vulnerable hives can be. You can discover more insights about these environmental challenges at World Animal Foundation. Your final autumn tasks are to make sure the hive is wrapped or insulated if you live in a very cold climate and that the outer cover is weighted down against winter storms.
Harvesting Honey Without Harming Your Bees

The honey harvest is the moment every backyard beekeeper dreams of—the sweet reward for a season of careful stewardship. But this exciting step comes with a huge responsibility. A successful harvest isn’t just about how much honey you get; it’s about how you take it, making sure the colony remains strong and healthy for the year ahead.
Responsible beekeeping always puts the bees first. You are their partner, not their boss. This means only taking what is truly surplus, leaving the colony with more than enough to thrive through the lean months. Let's walk through how to harvest ethically, keeping your bees' welfare as the top priority.
Knowing When the Honey Is Ready
The first rule of harvesting is patience. Bees are meticulous, and they know when their honey is perfect. They work tirelessly to reduce the water content in nectar from around 80% down to about 17-18%, transforming it into the thick, stable honey we know and love.
To preserve it, they cap each cell with a fresh layer of white beeswax. This "capping" is your signal. You're looking for frames that are at least 80% capped on both sides. Harvesting uncapped, or "wet," honey is a common rookie mistake that leads to fermented, spoiled jars.
A simple visual check is usually enough. Hold a frame horizontally over the hive. If any watery nectar drips out, it’s not ready yet. Just give the bees another week or two to finish their work.
Gently Removing the Frames
Once your honey is capped and ready, the next step is to get the frames out of the hive with as little disruption as possible. A calm, methodical approach is key here. It keeps stress levels down for both you and the bees.
Choose a warm, sunny day when most of the foragers are out working. You'll want your smoker, hive tool, and a covered box or container to place the frames in as you remove them.
My preferred process looks like this:
Use Smoke Wisely: A few gentle puffs of cool smoke at the entrance and under the inner cover is all you need. This encourages the bees to move down into the brood boxes and away from the honey supers you’re after.
Work Quickly but Calmly: Pry the honey super loose with your hive tool. Remove one frame at a time, brushing the bees off gently with a soft bee brush. Never flick or shake them aggressively.
Keep Everything Covered: Place the bee-free frames immediately into a sealed container. This simple step prevents bees from your hive (and others in the neighborhood) from starting a "robbing" frenzy, where they try to steal the exposed honey.
The golden rule of harvesting is simple: leave more than enough for the bees. A strong colony in a cold climate needs between 60 and 80 pounds of honey to survive the winter. Your harvest is only what they've stored beyond that essential amount.
Small-Scale Extraction Methods
You don't need a bunch of expensive equipment to extract honey when you're just starting out. For a beekeeper with one or two hives, a couple of simple, low-tech methods work beautifully.
The most straightforward technique is the crush-and-strain method. You simply scrape the honeycomb off the frame into a food-grade bucket, mash it up to break open the wax cells, and then pour the whole mixture through a double sieve or cheesecloth to separate the honey from the wax. It’s a bit messy, sure, but it’s effective and requires no special gear.
For those wanting a slightly cleaner process, a small, two-frame manual extractor is a great investment. These hand-cranked devices use centrifugal force to spin the honey out of the comb without destroying it. This is a huge advantage because you can return the empty "drawn" comb to the bees, giving them a massive head start on refilling it next season. Raising bees in your backyard is a journey, and investing in a small extractor is a milestone for many hobbyists.
A Few Questions You're Probably Asking
Starting out, you're going to have a million questions. That's a good sign—it means you're paying attention and thinking like a beekeeper. Let's tackle some of the big ones I hear from folks who are just getting their feet wet.
What About Bee Stings?
Let's just get this one out of the way. Yes, you will get stung. It’s an unavoidable part of working with thousands of tiny, defensive insects. The good news? It happens way less often than you think, especially once you learn the calm, deliberate rhythm of working with your hives.
Honey bees aren't aggressive; they're defensive. They only sting when they feel their home is threatened. With the right gear—a good veil and gloves are non-negotiable—and a respectful attitude, you can make stings a rare event. Move slowly, don't stand in front of the hive entrance, and use your smoker wisely to keep the colony calm.
Most beekeepers find that their reaction to stings lessens over time. But before you even buy a hive tool, you absolutely must know if you have a serious bee venom allergy. If there's any doubt, talk to an allergist. It's a critical first step.
How Much Honey Can I Expect?
This is the fun one, right? The honest answer is: it depends. Honey production is a moving target influenced by your climate, local nectar sources (what beekeepers call forage), the weather, and how strong your colony is.
A healthy, established hive in a good year can produce anywhere from 30 to 60 pounds of extra honey for you to harvest. That's roughly 2.5 to 5 gallons. In fantastic locations with perfect weather, some keepers pull in 100 pounds or more, but that's definitely not the norm for a beginner.
Your first year is not about harvesting honey. The bees' only job is to build up their numbers, draw out fresh wax comb, and store enough food to survive their first winter. Your job is to help them do that, not to take their resources. Patience now pays off later.
What Do I Do If My Queen Is Missing?
It’s a heart-stopping moment for every new beekeeper. You're inspecting a frame, then another, and another... and there’s no sign of the queen. Before you panic, take a deep breath. Finding one specific bee among 50,000 others is tough even for seasoned pros.
Instead of looking for her, look for evidence she's been there recently. The single most important sign is the presence of eggs. If you see tiny, rice-shaped specks standing upright in the bottom of the cells, you know a queen was alive and laying within the last three days. If you see eggs, she’s almost certainly in there, and you can close up the hive with confidence.
But what if you see no eggs and no young larvae, and the hive still looks that way a week later? Now you likely have a queenless hive. This is a colony on a deadline. Without a queen laying eggs, the population will shrink and eventually collapse. The bees know this and will try to make a new queen if they can.
Here’s your action plan:
Look for Emergency Queen Cells: The bees might have already started raising a new queen. Look for "emergency cells"—queen cells built out from the face of the comb, not hanging off the bottom like swarm cells. This is a good sign.
Wait and See: If you spot these cells, your best bet is to close the hive and leave it alone. It takes about 16 days for a new queen to emerge, plus another week or two for her to go on her mating flights and start laying. Be patient.
Requeen the Hive: If you see no eggs, no young larvae, and no emergency cells, the bees have no way to make a new queen. You’ll have to step in. This means ordering a mated queen from a bee supplier and carefully introducing her to the hive. This process, called requeening, can save a colony that would otherwise be doomed.
At The Grounded Homestead, we believe asking questions is the first step toward becoming a confident and capable steward of your own backyard ecosystem. For more tips and to follow along on a real homesteading journey, visit us at https://thegroundedhomestead.com.


Facebook
Instagram
X
Youtube