
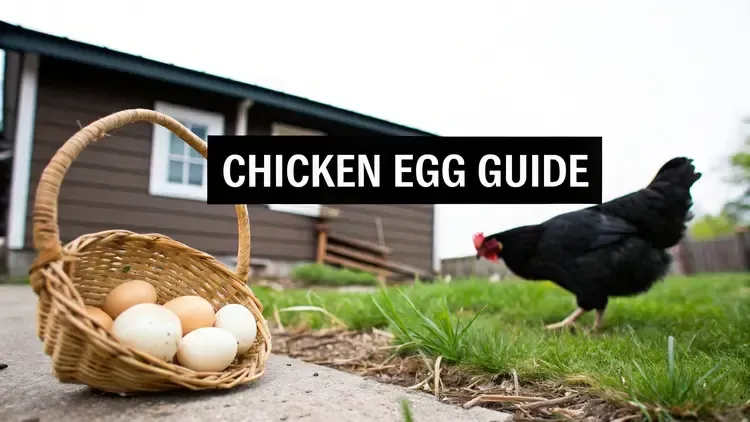
Raising Chickens for Eggs A Beginner's Guide
Raising Chickens for Eggs A Beginner's Guide
Raising chickens for eggs is one of the most rewarding things you can do. It’s a direct line to your food, a source of endless entertainment, and a way to get some of the freshest, most delicious eggs you’ll ever taste. With a little bit of planning and a small investment in time, you can have a steady supply of eggs right from your own backyard.
Why Start Raising Chickens for Eggs?
Bringing chickens into your life is about so much more than just a farm-fresh breakfast. For many folks, it starts with a simple desire for better-tasting, healthier eggs. But what they quickly find is the pure joy and quirky entertainment these birds bring. It’s a hands-on hobby that connects you to nature and grounds you in a more self-sufficient lifestyle.
Make no mistake, this is a commitment. It’s a mix of daily chores and long-term flock care, but it’s an experience that enriches your understanding of where food comes from. For anyone exploring a more grounded way of life, raising chickens is often the perfect first step. If you're just starting to dip your toes in, our complete guide to homesteading for beginners can show you how chickens fit into the bigger picture of self-sufficiency.

The Daily Realities of Chicken Keeping
Before you even think about bringing home a box of peeping chicks, you need to be real about the day-to-day responsibilities. Chickens are fairly low-maintenance, but they depend on you for their basic needs every single day, rain or shine.
Your daily routine will look something like this:
Morning Check-In: First thing, let the flock out of the coop. You'll need to refresh their food and water and give everyone a quick once-over to make sure they look healthy.
Egg Collection: This is the fun part! Gather eggs at least once a day. This keeps them clean and also discourages hens from getting "broody" and trying to hatch them.
Evening Lock-Up: As dusk settles, you’ll need to make sure every last chicken is safely tucked inside the coop to protect them from nighttime predators like raccoons, foxes, and owls.
A consistent routine is the secret to a happy and productive flock. Chickens are creatures of habit and thrive on predictability, which reduces stress and encourages steady egg-laying.
This daily rhythm is grounding. It connects you to the natural cycle of the day and offers a huge return in both food and fulfillment for just a small investment of your time.
The chart below gives you a clear idea of what one hen needs to thrive. It’s a simple visual that helps put the commitment into perspective.

While the daily feed amount for one bird is small, you can see how consistent space, water, and care are non-negotiable for a healthy flock.
Choosing Your First Egg-Laying Breeds
Your first big decision is what kind of chickens to get. This choice will shape your entire experience, from how many eggs you collect to how much you enjoy just being around your birds. You'll want to think about a few key things: temperament, climate hardiness, and, of course, egg production.
Some breeds are famously friendly and calm, making them fantastic choices for families with kids. Others are egg-laying machines but might be a bit more flighty or independent. You also need to consider your climate. Some chickens are built like tanks for cold winters, while others are much better suited to hot, humid summers.
To help you get started, here's a look at some of the most popular and dependable breeds for a beginner's flock.
Top Egg-Laying Chicken Breeds for Beginners
This table compares popular chicken breeds based on their egg production, temperament, and suitability for different climates to help you choose the best fit for your flock.

By taking a little time to match a breed's traits to your own backyard and lifestyle, you’re setting yourself up for a much more enjoyable and successful start to raising chickens.
Building a Safe and Healthy Chicken Coop

Your chicken coop is more than just a little house; it’s the heart of your flock’s world. It’s their fortress against predators, their shelter from a summer storm, and the cozy spot where they’ll lay you those beautiful daily eggs. A great coop isn't about being fancy—it's about getting the fundamentals right to keep your chickens healthy, happy, and stress-free.
The first thing to get right is space. Overcrowding is a fast track to problems like feather picking, bullying, and a sudden drop in egg production. As a solid rule of thumb, give each standard-sized hen at least 3-4 square feet of space inside the coop.
For the attached outdoor run, where they'll spend most of their days scratching and sunbathing, aim for a minimum of 8-10 square feet per bird. Honestly, more is always better. It gives them room to be chickens.
Essential Coop Features for a Thriving Flock
When you’re looking at coops—whether you're buying one or building it from scratch—there are a few non-negotiable features. Getting these right from the start will save you a world of headaches later.
A perfect example is the tug-of-war between insulation and ventilation. It's one of the most misunderstood parts of coop design. You want your flock to be warm, but a sealed-up, airtight coop is a recipe for disaster. Chickens release a surprising amount of moisture just by breathing and pooping. Without good airflow, that moisture builds up, leading to damp bedding, respiratory infections, and even frostbite in the winter.
The answer is high ventilation. You want vents placed up near the roofline, well above where your chickens roost at night. This setup lets the damp, ammonia-filled air escape without creating a cold draft right on your birds.
Your goal is ventilation without drafts. Think of it like cracking a window at the top of a steamy bathroom—it lets the humid air out without a cold breeze hitting you. That same idea keeps your chickens dry and healthy.
Roosting bars are another must-have. Chickens have a natural instinct to sleep high off the ground. Give them about 8-10 inches of roosting space per bird. A 2x4 board with the wider, 4-inch side facing up is perfect. It lets them hunker down and cover their feet with their feathers in the cold, which is their natural way of preventing frostbite. Always place the roosts higher than the nesting boxes; otherwise, they’ll start sleeping (and pooping) where they’re supposed to lay.
Predator Proofing Your Chicken Coop
There is nothing more heartbreaking than losing a chicken to a predator. Your flock is a tempting target for raccoons, hawks, foxes, and even the friendly neighborhood dog. Your coop needs to be a fortress.
Start with the obvious entry points. Raccoons have incredibly clever paws and can figure out simple latches in minutes. Use two-step locks on all doors and windows, like a hook-and-eye latch paired with a carabiner clip.
But most predators don't just use the front door. They’ll dig, climb, or squeeze through the smallest opening they can find.
Cover all windows and vents with 1/2-inch hardware cloth, not chicken wire. A determined raccoon can tear right through chicken wire or simply reach through the holes.
Bury a hardware cloth "skirt" around the entire base of your coop and run. Dig a trench about 12 inches deep and 12 inches wide, lay the hardware cloth in an "L" shape, and then bury it. This simple step will stop almost any predator that tries to dig its way in.
Inspect your setup regularly. At least once a week, walk the perimeter and look for any new gaps, weak spots, or loose boards that a predator could exploit.
Bedding and Nesting Boxes
The final touches on a perfect coop are the bedding on the floor and the nesting boxes for laying. The right bedding keeps the coop clean, dry, and smelling fresh, which is better for both you and your hens.
Pine shavings are my go-to. They’re absorbent, relatively inexpensive, and they compost beautifully. Straw can work, but it doesn't soak up moisture nearly as well and can become a breeding ground for mites if it isn't kept perfectly dry. Stay away from cedar shavings—their strong aromatic oils can irritate a chicken’s delicate respiratory system.
Nesting boxes should feel like a safe, private little cave. A good guideline is one nesting box for every 3-4 hens. Don't be surprised if they all decide to use the same one or two "favorite" boxes, but having enough options prevents squabbles.
Make the boxes roughly 12x12x12 inches for a standard hen, and line them with soft pine shavings or straw. Placing them in a darker, quieter corner of the coop encourages your hens to use them, which means your eggs will stay clean and safe until you come to collect them.
Caring for Your Chicks in the First Few Weeks

The first few weeks of a chick’s life are a flurry of fluff, cheeping, and surprisingly fast growth. This is their nursery stage, and it all happens inside a brooder. Getting this temporary home right is the single most important thing you can do to set the foundation for healthy, productive hens down the road.
Your new arrivals need a safe, warm, and draft-free space. This doesn't have to be fancy—a large cardboard box, a stock tank, or a purpose-built brooder all work perfectly. The main thing is giving them enough room to move between warmth, food, and water. A good starting point is about one-half square foot per chick, but you'll need to expand their space as they grow. And trust me, they grow fast.

Creating the Perfect Brooder Environment
Heat is, without a doubt, the most critical element. For their first few days, chicks can't regulate their own body temperature at all. They're completely dependent on you to provide the warmth they need to survive and thrive.
A classic 250-watt infrared heat lamp does the job, but the newer radiant heat plates are a fantastic, safer alternative. They mimic a mother hen, allowing chicks to huddle underneath for warmth and wander out to eat and explore.
The spot directly under the heat source needs to be a toasty 95°F (35°C) for the first week. After that, you'll reduce the temperature by 5°F (about 3°C) each week until the chicks are fully feathered and the brooder temperature matches the air outside.
You don't need to obsess over the thermometer, though. The best way to gauge their comfort is just by watching them.
Huddled together under the lamp? They're too cold.
Scattered to the far edges? They're too hot.
Spread out comfortably, some sleeping, some pecking? You've nailed it.
For bedding, you can't go wrong with pine shavings. They're absorbent, help control odor, and give the chicks something natural to scratch around in. Stay away from newspaper or other slick surfaces, which can cause a serious leg deformity called "splayed leg." A one-inch layer is a good start; just add fresh shavings on top as needed to keep things clean and dry.
Food and Water Essentials
From day one, chicks need constant access to fresh food and clean water. You’ll want to start them on a high-quality “chick starter” feed. This feed is formulated with the high protein content—around 18-20%—that their rapidly growing bodies demand. You'll also see medicated and unmedicated options. Medicated feed contains a low dose of amprolium, which helps prevent coccidiosis, a common and often deadly intestinal parasite in young birds.
Water is just as vital. Chicks are clumsy and can easily get into trouble with open water dishes. Always use a chick-specific waterer with a narrow trough to prevent them from getting soaked and chilled, or even drowning.
A simple but effective trick I swear by is placing a few clean marbles or small, smooth stones in the water trough for the first week. This keeps clumsy chicks from falling in while still giving them plenty of space to drink.
This tiny step can be a literal lifesaver and is a core part of successfully raising chickens for eggs right from the start. As they grow, you'll need to raise both the feeder and waterer on blocks of wood or bricks to keep them clean from bedding and droppings.
For an easy, all-in-one starter setup, I like this chick feeder and drinker kit—it keeps food and water clean, prevents spills, and is just the right size for your brooder."
Handling Common Chick Problems
Even with the best setup, you might run into a few issues. The most common is "pasty butt," where droppings stick to a chick's vent, harden, and create a blockage. If you don't catch it, this condition can be fatal.
To treat it, gently hold the chick and use a warm, damp paper towel to soften and carefully wipe away the blockage. Their skin is incredibly delicate, so be patient and gentle. A tiny dab of coconut oil or petroleum jelly on the clean area can help prevent it from happening again.
Daily health checks also give you a great excuse to handle your chicks. Spending just a few minutes each day holding them gently builds a foundation of trust that pays off for years. Chicks that are used to people grow into calmer, friendlier hens, making future health checks and general flock management so much easier and more enjoyable for everyone.
Your Daily Guide to Feeding and Flock Health

When it comes to raising chickens for eggs, consistency is everything. A predictable routine for feeding and health checks does more than just give you strong eggshells—it keeps your birds happy and stress-free. If you build simple daily, weekly, and monthly habits, you’ll stay ahead of problems before they start.
This kind of backyard stability is also a nice buffer against the chaos of the wider market. When something like avian influenza hits large-scale farms, national egg production can take a nosedive—we saw a 2% year-over-year dip not long ago. That instability drives up prices, with some experts predicting an average cost around $1.75 per dozen in the near future. Suddenly, a healthy backyard flock isn't just a hobby; it's a smart investment. You can see the full poultry and egg market predictions for 2025 for more details.
Understanding Your Flock's Nutritional Needs
Chicken feed isn't a one-size-fits-all deal. A hen's dietary needs change dramatically from the day she hatches to the moment she lays her first egg. Giving them the wrong feed at the wrong time can stunt their growth or mess with egg production down the line.
You’ll really only need to worry about three main types of feed:
Starter Feed: This is for your new chicks, from hatch day up to about 6-8 weeks old. It’s packed with protein (18-20%) to fuel their explosive growth.
We always start our chicks on a medicated feed like this one—it gives them the nutrients they need and helps prevent coccidiosis, one of the most common threats during those fragile first weeks.
Grower Feed: Once they hit 8 weeks, you'll switch to a grower feed until they start laying (usually around 18-20 weeks). The protein is a bit lower (16-18%), which supports steady development without rushing them into laying before their bodies are ready.
Layer Feed: The moment you spot that first egg, it's time to switch to layer feed. This formula has about 16% protein but comes fortified with the extra calcium they desperately need to form strong eggshells.
A critical mistake I see new owners make is giving layer feed to young pullets that aren't laying yet. The high calcium content can cause serious kidney damage in birds that have no way to use it.
When you do switch feeds, don't do it cold turkey. Mix the old and new feeds together for about a week, gradually increasing the amount of the new stuff each day. It’s much easier on their digestive systems.
The Importance of Supplemental Calcium
Even the best layer feed sometimes isn't enough, especially for your most productive hens. If you start finding thin, weak, or even rubbery eggshells in the nesting box, that's a blaring alarm bell: they need more calcium.
This is where offering a separate source of calcium is non-negotiable.
Crushed oyster shell is the go-to for a reason. Just put it out "free choice" in a separate dish or container—don't mix it into their main feed. Your hens are smarter than you think; they will instinctively take only what they need, when they need it. It’s one of the easiest and most effective things you can do for consistently strong eggs.
Your Preventative Health Checklist
Trust me, it's far easier to keep a chicken healthy than to treat a sick one. A few minutes of observation each day is your best tool for catching issues before they spiral.
Your Daily Check-In (5 minutes):
Watch Them Move: As you let the flock out in the morning, just watch. Is anyone hanging back? Seem lethargic or hiding? A healthy chicken is a busy chicken.
Check the Droppings: Take a quick look at the droppings board or the coop floor. You're looking for anything unusual, especially blood or severe diarrhea.
Look at the Water: Their waterer should have clean, fresh water. If it's full of poop and bedding, it's time for a scrub and refill.
Your Weekly Deep Dive (15 minutes):
Bedding Refresh: Scoop out the worst of the soiled bedding and top it off with fresh material. This keeps harmful ammonia fumes from building up.
Feeder and Waterer Scrub: Take their food and water containers and give them a good cleaning with soap and water. This prevents nasty bacteria from taking hold.
Pest Patrol: Do a quick check for mites or lice. You'll often spot these tiny black or red specks near the vent or under the wings. Tackling pests early is a must, and there are plenty of great methods for natural pest control that are safe for your flock.
By making these small tasks part of your routine, you build a powerful system for raising chickens for eggs that's built on prevention. A clean coop and the right food are your best defense, ensuring your flock stays healthy and the egg basket stays full.
Harvesting and Handling Your Fresh Eggs
There's nothing quite like walking out to the coop and finding that very first egg. It’s the moment all your planning and care finally pays off. For anyone new to keeping chickens, the anticipation can be almost palpable. You spend weeks watching your young hens, or pullets, mature, looking for any sign that the big day is coming.
You'll notice the changes happen gradually, then all at once. The most classic giveaway is what we call the "submissive squat." As you get close, a pullet that's about to start laying will often hunker down with her wings slightly out. It’s a totally natural, instinctual posture. Another dead giveaway is seeing her comb and wattles transform from a pale, light pink to a deep, vibrant red. That’s your signal her body is getting ready for production.
Building Your Collection Routine
Once the eggs start showing up, it's time to get into a simple but consistent collection rhythm. I recommend gathering eggs at least once a day, but twice is even better if you can swing it—once in the mid-morning and again before you tuck them in for the night. This daily habit is more important than you might think.
For one, it keeps your eggs as clean as possible. The less time they sit in the nesting box, the lower the chance they’ll get pooped on or cracked by another hen trying to muscle her way in. Daily collection also helps head off broodiness. A broody hen is one who decides to stop laying and sit on a clutch of eggs (even if they aren't fertilized) to try and hatch them. Taking the eggs away promptly usually snaps her out of it.
Remember, the cleanliness of your coop and nesting boxes directly impacts how clean your eggs are. Keeping fresh, deep bedding in the boxes is your best defense against dirty eggs and bacteria.
The reward for your efforts is a steady supply of fresh eggs, but this depends on a healthy flock and, on a larger scale, stable hen populations. It's a good reminder of how connected our food systems are. For instance, in a recent one-year period, the average U.S. laying hen population fell from 382.6 million to about 372.6 million. That dip directly led to lower egg production nationwide, showing just how sensitive the supply chain can be. You can dig into the data on U.S. laying hen populations and see how backyard flocks like ours really do contribute to a more resilient food supply.
To Wash or Not to Wash: The Great Egg Debate
This is one of those topics that can really stir up a debate in the chicken community, but the science behind it is actually pretty straightforward. When a hen lays an egg, it comes out with a nearly invisible protective coating called the "bloom" or cuticle. This amazing natural seal covers the tiny pores in the eggshell, keeping bacteria out and moisture in.
Washing an egg with water strips that protective bloom right off.
So, what’s the right answer? It all boils down to how and where you plan on storing them.
Unwashed Eggs: If an egg is clean and its bloom is intact, you can safely keep it on your kitchen counter at room temperature for a few weeks.
Washed Eggs: The moment you wash an egg, that bloom is gone. It must be refrigerated immediately to stop bacteria from wiggling its way through the now-porous shell.
Because of this, my rule of thumb is to avoid washing eggs unless they’re caked in mud or manure. If an egg really needs a good cleaning, use warm water—never cold, as that can create a vacuum effect that pulls bacteria into the egg—and gently wipe it with a soft cloth. Dry it off completely and pop it straight into the fridge.
Storing Your Harvest for Peak Freshness
Proper storage is the final step to ensuring your homegrown eggs are as delicious as possible. When you put your eggs in a carton, always place them with the pointy end down. This simple trick keeps the air sac at the blunt end of the egg upright, which helps the yolk stay centered and preserves freshness longer.
Here’s a quick guide to how long you can expect your eggs to last:

No matter how you store them, you’ll find that your farm-fresh eggs have a richer flavor and a more beautiful, vibrant yolk than anything you'll find at the supermarket. Enjoy every last bite—you've earned it
Common Questions About Raising Chickens
Even after you’ve got the coop set up and the feeders full, a whole new wave of questions always seems to pop up. It’s just part of the process—and a sign you're paying attention.
Here, we'll get into some of the most common things new chicken keepers wonder about once they've settled into the rhythm of raising a flock for eggs.
One of the first and most frequent questions is a simple one: do you really need a rooster for a steady supply of eggs? The answer is a clear and simple no. Hens will lay eggs based on their own biological clock, and a rooster has nothing to do with it.
A rooster is only necessary if you want fertilized eggs to hatch your own chicks. If your goal is just fresh eggs for the kitchen, a rooster is an optional—and often very noisy—addition to the flock.
Longevity and Legal Considerations
So, how long can you expect a hen to keep laying? Most modern breeds and hybrids will be at their most productive for the first 2-3 years of their lives. After that peak, you’ll see their egg production naturally and gradually slow down each year.
Many hens will still give you a few eggs a week for several more years, but that initial burst is when they're at their best. This is something to keep in mind when you're planning for the future of your flock.
Before you even think about buying your first chick, you absolutely must check your local laws. This is a step you just can't skip.
Rules on backyard chickens can vary dramatically from one town to the next. Ordinances often cover the maximum number of hens allowed, whether roosters are permitted at all, and specific requirements for how far a coop must be from property lines.
A quick search for "[Your City] backyard chicken ordinance" online or a phone call to your local planning department will give you the clear answers you need. It’s the best way to start your journey on the right foot and avoid any trouble with your neighbors or the town.
Flock Health and Financial Sense
What happens when a chicken gets sick? While watching your flock every day helps you catch things early, you're bound to face a health challenge sooner or later. A great way to support their immune systems is by adding natural supplements to their routine.
For example, tossing in some fresh herbs or leftover produce from your garden gives them a fantastic nutritional boost. If you're already planning a garden, it’s a great two-for-one strategy to think about what your chickens can safely eat. You can get some ideas from our guide on garden planning for beginners.
Finally, the big question: does raising your own chickens for eggs actually save you money? With how wild store prices have gotten, the answer is often yes. The commercial egg market is sensitive to large-scale problems. For instance, the USDA recently predicted a potential 41.1% price increase for eggs, driven largely by outbreaks of avian influenza. When retail prices can jump by 13.8% in a single month, having a steady, reliable source right in your backyard brings both financial relief and some much-needed peace of mind. You can find more details on the factors driving up U.S. egg prices on thepoultrysite.com.
At The Grounded Homestead, we believe that connecting with your food source is one of the most powerful steps toward a healthier, more self-sufficient life. Whether you're starting a garden or raising your first flock, we're here to provide the knowledge and support you need for your journey. Explore more guides and tips at https://thegroundedhomestead.com.


Facebook
Instagram
X
Youtube