
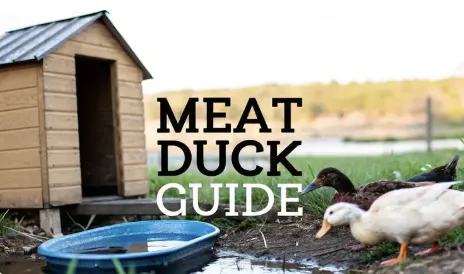
Raising Ducks for Meat: Your Complete Guide
Raising Ducks for Meat: Your Complete Guide
Raising ducks for meat is one of the most rewarding things we do on our homestead. It gives us rich, flavorful meat and incredibly valuable cooking fat, all from a bird that's surprisingly easy to manage. The process is pretty straightforward: you pick a fast-growing breed like Pekin or Muscovy, give them secure housing and the right feed, and they’re ready for processing in just 7-12 weeks.
What I love most is how tough they are. Ducks are noticeably hardier and more disease-resistant than chickens, which makes them a fantastic choice if you're just getting started with poultry.
Why You Should Raise Ducks for Meat
Many folks who've been homesteading for a while, myself included, often end up preferring ducks over chickens. The reasons go way beyond just a different taste on the dinner table. It’s a decision rooted in pure efficiency, resilience, and frankly, better results in the kitchen.
Ducks bring a unique set of advantages that make them a seriously valuable part of a self-sufficient food system. This isn't just about swapping one bird for another; it’s about embracing a system that feels more sustainable and is often a whole lot easier to manage day-to-day.
The Homesteading Advantages of Ducks
Once you start raising ducks for meat, the first thing you'll notice is how incredibly tough they are. Ducklings have a much lower mortality rate than chicks and seem to shrug off the stress of shipping. They feather out fast and can usually be weaned off a heat lamp in just a couple of weeks, even when the spring weather is still a bit cool.
Their natural instincts really work in your favor, too.
Superior Foraging: Ducks are master foragers. They'll spend their days hunting down slugs, insects, and weeds, which can put a real dent in your feed bill compared to chickens.
Hardiness and Resilience: These birds are built for the elements. They handle cold, wet weather without all the fuss chickens make and are far less prone to common poultry illnesses.
Gentle on the Land: Chickens will scratch a garden bed to oblivion. Ducks, on the other hand, are gentle gardeners. They dabble for pests without tearing up your soil, making them perfect for managed agricultural spaces.
Raising ducks provides a different kind of reward. Their rapid growth, combined with their ability to thrive on forage, makes them an incredibly efficient source of high-quality protein for the modern homesteader.
This infographic really puts some numbers to the efficiency metrics when you compare ducks and chickens head-to-head.

The data makes it clear: while your initial costs might look similar, the quick growth and foraging skills of ducks mean a faster turnaround and real potential for long-term savings. You can get into the nitty-gritty of it in our guide on raising ducks vs. chickens.
A Growing Trend Beyond the Homestead
This buzz around duck isn't just happening on homesteads. The global duck meat market is seeing some powerful, sustained growth as more people discover its nutritional perks and rich flavor. The market was recently valued at $3.20 billion and is expected to climb past $5.89 billion by 2034, with a compound annual growth rate of 6.3%.
That trend points to a bigger shift in what consumers are looking for—a shift you can tap into right from your own backyard. You can read more about this growing market and what's driving it.
Choosing the Right Duck Breed for Your Homestead

Picking the right duck breed is the first, and maybe most important, decision you'll make. This isn't just about what they look like; it's about matching a bird to your property, your goals, and your timeline.
The difference between a fast-growing Pekin and a self-sufficient Muscovy will shape your entire experience, from the feed bill to the flavor on your dinner plate. So, let's skip the generic lists and get practical. Are you after the fastest possible turnaround, or do you want a thrifty forager that keeps costs down? Your answer will point you straight to the perfect duck for your setup.
The Commercial Powerhouse: Pekin Ducks
When you picture a classic white farm duck, you're thinking of a Pekin. They are the undisputed champions of meat production for a reason: they grow incredibly fast. A Pekin duckling can rocket to a processing weight of 7-8 pounds in just 7 to 8 weeks. That kind of efficiency is a huge win for any homesteader.
Their meat is mild and tender, with a thick, beautiful layer of fat that renders down into liquid gold for cooking. But that speed comes at a price. Pekins aren't exactly resourceful foragers. They depend almost entirely on commercial feed to hit those impressive growth rates, so you can expect a higher feed bill.
On the plus side, their calm, docile temperament makes them a breeze to manage, even in a small backyard. They're also relatively quiet, which your neighbors will appreciate. If you're raising meat ducks for the first time, the Pekin is a fantastic, no-fuss choice.
The Unique and Thrifty: Muscovy Ducks
Muscovy ducks are in a league of their own—literally. They're a different species from all other domestic ducks. You'll recognize them by the bumpy, red "caruncles" on their faces, but what really sets them apart is their meat. It's much leaner than other duck and has a rich, deep flavor that people often compare to good veal or roast beef.
What I love about Muscovies is their work ethic. They are exceptional foragers who will patrol your property for insects, slugs, and weeds, which drastically cuts down on their need for store-bought feed. This makes them a more economical and sustainable choice for a pasture-based setup.
They also have a few other standout traits:
Quiet Nature: Forget the loud quacking. Muscovies make a soft hissing sound, making them the stealth bombers of backyard poultry.
Slower Growth: You’ll need a bit of patience here. Muscovy drakes take longer to mature, hitting their processing weight of 10-12 pounds in 12 to 16 weeks.
Excellent Mothers: If you want to hatch your own ducklings down the line, Muscovy hens are famously broody and are amazing, protective mothers.
The real beauty of the Muscovy is its self-sufficiency. For the homesteader prioritizing low inputs and a rich, gourmet flavor over speed, this breed is an unbeatable option.
This push for self-sufficiency and efficiency is part of a larger trend. Globally, the combined market for duck and goose meat has hit 12 million tons, valued at an incredible $29.7 billion. Modern breeds now yield an average of 2.4 kg per duck—a figure that keeps climbing. It's a powerful reminder of how choosing the right genetics can impact your bottom line, even on a small scale. You can explore more about these global market trends and production efficiencies.
Comparison of Top Meat Duck Breeds
Choosing between the top breeds can be tough. Pekins offer speed, while Muscovies bring a unique flavor and foraging ability. This table breaks down the key differences to help you decide which one best fits your homestead's needs.

Ultimately, the right duck for you depends on what you value most. Each of these breeds can produce fantastic meat, but they get there in very different ways.
Other Notable Meat Duck Breeds
While Pekins and Muscovies get most of the attention, a couple of other heritage breeds are worth a look.
Rouen: These ducks look like oversized versions of their wild Mallard cousins. They're known for having a rich, flavorful meat, but they take their time getting there, needing about 4-5 months to reach a good size.
Aylesbury: A critically endangered breed from England, the Aylesbury is prized for its delicate, white-skinned meat. They grow nearly as fast as Pekins but can be harder to find and more expensive to purchase.
So, how do you choose? If you want reliable, mild-tasting meat on the table as quickly as possible, the Pekin is your bird. If you'd rather have a self-reliant forager that produces lean, gourmet-quality meat, the Muscovy is the clear winner. By matching the breed's traits to your resources and timeline, you're setting yourself up for a successful and delicious harvest.
Building a Safe and Healthy Duck Environment

A healthy, fast-growing meat duck starts with a safe environment. From the moment they show up as day-old ducklings to their last weeks on pasture, their living space directly shapes their well-being and growth rate. This isn’t about building a picturesque barn; it's about creating a functional, low-stress space that meets their unique—and often messy—needs.
Your goals are simple: keep them warm and dry when they're little, safe from predators as they grow, and always give them access to the essentials. A well-designed setup minimizes health issues and ensures you're raising the best quality meat possible.
The Brooder: The First Three Weeks
Ducklings arrive fragile and need a controlled environment to thrive. This first home, called a brooder, is where they’ll spend their first two to three weeks until they're fully feathered and can handle fluctuating temperatures on their own.
Think of the brooder as a duckling nursery. A big plastic tote, a galvanized stock tank, or even a section of a garage cornered off with plywood works just fine. The absolute key is that it must be draft-free.
Bedding is your first line of defense against moisture. I always use large-flake pine shavings spread about 2-3 inches deep. Steer clear of cedar shavings, as their aromatic oils can cause respiratory issues. And never use newspaper—it becomes a slippery, dangerous mess the second it gets wet.
Temperature management in the brooder is non-negotiable for the first week. Ducklings can't regulate their own body heat and can easily get chilled, which is a leading cause of early mortality.
A heat lamp is the most common way to provide warmth. Hang it securely over one side of the brooder, not the center. This creates a temperature gradient, letting the ducklings move closer to the heat when they're cold and farther away when they get too warm.
Week 1: Aim for a temperature of 90-95°F directly under the lamp.
Week 2: Raise the lamp a bit to bring the temperature down to around 85°F.
Week 3: Lower it again to 75-80°F.
Honestly, the ducklings' behavior is a better guide than any thermometer. If they're huddled directly under the lamp, they're too cold. If they're scattered to the far edges, panting, they're too hot. Happy, content ducklings will be spread out and chirping away.
Designing a Functional Duck Coop
Once your ducks are fully feathered (around 3-4 weeks old), they can move out to their adult housing. The perfect coop for meat ducks prioritizes safety and moisture control over aesthetics.
Predator-proofing is everything. Raccoons, hawks, and even neighborhood dogs can wipe out an entire flock in minutes. Your coop needs a solid roof and walls, with all windows and ventilation openings covered with 1/2-inch hardware cloth. Don't use chicken wire; raccoons can rip right through it.
A secure latch on the door is just as important. Raccoons have surprisingly nimble paws and can figure out simple slide bolts. A two-step latch or a sturdy carabiner clip is a smart, simple upgrade.
Ducks need about 4-5 square feet of indoor space per bird. Since meat ducks grow incredibly fast, it's best to plan for their full-grown size right from the start. Overcrowding leads to stress, filth, and a whole host of health problems you don't want to deal with.
Inside the coop, the focus stays on managing moisture. Ducks are absolute slobs with water. A dirt floor covered with a thick layer of deep bedding (pine shavings or straw) works wonders. This method allows moisture to filter down while the top layer stays relatively dry. You just add fresh bedding on top as needed and clean it all out between batches of ducks. It’s a far better system than wood or concrete floors, which get slick and hold dampness.
Water and Ventilation: The Keys to Duck Health
Ducks need water not just for drinking, but for clearing their nostrils and eyes. This is absolutely essential for their respiratory health. You don't need a pond—a simple kiddie pool or a large rubber tub works perfectly. Just be sure to clean it and refill it daily to keep bacteria from building up.
Here's the single most important tip to keep your coop from turning into a swamp: place all waterers outside in their run. This one change will dramatically improve the dryness of your bedding and the overall health of your flock.
Good ventilation is the other critical piece of the puzzle. Moisture buildup creates ammonia, which can damage a duck's respiratory system. Vents should be placed high up in the coop, well above where the ducks sleep, to let damp air escape without creating a draft. A few simple, covered vents near the roofline are all you need to keep the air fresh and the environment healthy.
A Practical Feeding Guide for Meat Ducks

Feeding meat ducks is a science, but it’s a simple one. Unlike laying ducks or chickens, meat breeds are sprinters, not marathon runners. The goal is to build a healthy, robust frame in an incredibly short amount of time—usually just 7 to 8 weeks for breeds like the Pekin.
The whole strategy is a two-phase approach. You start them on a high-protein diet to kickstart development, then shift to a finisher feed to put on quality weight. Getting this right is the key to an efficient and successful harvest.
Duckling Starter Feed: The First Three Weeks
For their first three weeks, ducklings need a high-protein starter feed to fuel that explosive growth. You’re looking for an unmedicated waterfowl or chick starter crumble with 20-22% protein. Crumble texture is a must, as pellets are just too big for their tiny bills to handle.
But there’s one crucial nutrient that standard chick starters almost always lack for waterfowl: niacin. Ducks need much more of this B vitamin than chickens, and a deficiency can lead to serious, often irreversible, leg and joint problems.
You can easily fix this by adding brewer's yeast to their feed. I use a ratio of about 1.5 tablespoons of brewer's yeast per cup of starter feed, mixing it in thoroughly. Trust me, this small step is non-negotiable for raising strong, healthy meat ducks.
Providing constant access to fresh, clean water is just as important as the feed itself. Ducklings need water to wash down their food and keep their sinuses clear, so place a shallow waterer right next to their feeder.
Transitioning to Grower or Finisher Feed
Around week three, it's time to switch your ducks over to a grower or finisher feed. This feed has a lower protein content, usually around 16-18%, which is perfect for encouraging steady weight gain without pushing growth so fast that it causes leg issues.
This is also the point where you can start letting their natural foraging instincts work for you. Giving them access to a secure pasture or run lets them supplement their diet with insects, slugs, and tender greens. It’s a great way to cut down on your feed bill and, in my experience, it really enhances the flavor of the final meat. While some homesteaders mix their own rations, you can learn the basic principles from resources about how to make chicken feed and adapt them for ducks with the right nutritional knowledge.
For a more in-depth look at duck nutrition and how to sidestep common feeding mistakes, this ultimate duck feeding guide is a fantastic resource. It does a great job of breaking down their dietary needs at every stage.
Safe Treats and Toxic Foods
Adding treats to your ducks' diet is a great way to provide variety and extra nutrients, but you have to know what's safe and what’s a definite no-go.
Safe and Healthy Treats for Ducks:
Leafy Greens: Chopped lettuce (not iceberg), kale, and Swiss chard are always a hit.
Garden Veggies: Ducks love peas, corn, cucumber, and cooked pumpkin.
Fruits: Berries, melon, and chopped apples (with the seeds removed) are good in moderation.
Protein Snacks: Mealworms, scrambled eggs, and earthworms are high-value treats they'll go crazy for.
It's just as important to know what to avoid. A few common foods can be toxic to ducks and should never, ever be offered.
Foods to AVOID:
Bread: It offers zero nutritional value and can cause serious digestive problems.
Avocado: Every single part of the avocado is toxic to ducks.
Onions: These can cause anemia and respiratory issues.
Citrus Fruits: They can interfere with calcium absorption.
Raw, Dried Beans: They contain a toxin that is fatal to birds.
Spinach: It can interfere with calcium absorption, so if you offer it, do so very sparingly.
By following this feeding plan and providing safe, nutritious supplements, you’ll set your flock up for optimal growth, ensuring you end up with healthy ducks and a high-quality harvest.
A Respectful Guide to Butchering and Processing
This is the part of the journey that gives many new homesteaders pause. Butchering is the final, most hands-on step, and approaching it with a clear head, a solid plan, and respect for the animal makes all the difference.
Our goal is simple: to be efficient, humane, and clean. This honors the life of the duck and ensures the meat you've worked so hard to raise is handled with the care it deserves.
You don't need a fancy setup, but you do need an organized one. A dedicated outdoor space with a sturdy table, a few razor-sharp knives, a large pot for scalding water, and a garden hose is really all it takes to create a functional processing station.
The Critical Timing to Avoid Pin Feathers
Timing is absolutely everything when butchering ducks. Get it wrong, and you'll spend hours fighting with pin feathers—those stubborn, waxy new feathers that refuse to pluck cleanly. It’s a frustrating lesson many of us have learned the hard way.
For fast-growing meat breeds like the Pekin, the sweet spot is right between 7 and 8 weeks old. They've hit a perfect market weight but haven't started their first big molt. If you wait until they're 9 to 11 weeks old, you run straight into that molt, and the plucking process becomes a nightmare.
The difference is stark: processing at the right time can cut your plucking and cleaning time by more than half. It’s the single most important factor for a clean, professional-looking carcass.
The Step-by-Step Processing Method
Once your station is ready and you've timed it right, the process breaks down into a few manageable stages. The method is very similar to other poultry. If you've ever processed a Thanksgiving bird, our guide on how to butcher a turkey will feel familiar.
Here’s the general flow:
Humane Dispatch: This needs to be done quickly and confidently. Using a killing cone is the most common and effective method. It restrains the bird calmly and allows for a clean cut to the jugular veins, ensuring a quick and peaceful passing.
Scalding: After the duck has bled out completely, it’s submerged in hot water to loosen the feathers. The ideal water temperature is 145-150°F. If the water is too hot, the skin can tear; too cool, and the feathers just won't release. A good 60-90 second dip while gently moving the bird around usually does the trick.
Plucking: After a proper scald, the feathers should pull out with little effort. While a mechanical plucker makes this job incredibly fast, hand-plucking is completely doable for a small number of birds. I always start with the big wing and tail feathers first, then move on to the body.
Achieving a Perfect Finish with Waxing
Even with the most thorough plucking job, you’ll probably be left with fine, downy fluff and a few of those annoying pin feathers. This is where waxing comes in. It’s the old-timer’s secret to getting a perfectly clean, store-quality finish.
The technique involves melting a special poultry wax in a dedicated pot, then dipping the plucked, dry carcass right into the hot wax. A quick dunk in cold water hardens the wax into a shell, which you then just peel off. The wax pulls every last bit of down and any remaining pins with it, leaving the skin flawlessly smooth. It’s an extra step, but the results speak for themselves.
Evisceration and Chilling
With the outside of the duck clean, the last step is evisceration—removing the internal organs. Work methodically to remove the windpipe and crop from the neck area, then open the body cavity to carefully take out the rest of the organs. The key is to avoid rupturing the intestines or gallbladder.
Don’t throw everything out! The heart and liver are excellent for cooking, and the abundant duck fat can be rendered down into one of the best cooking fats you'll ever use.
Finally, the carcass needs to be chilled immediately in an ice water bath for several hours. This is a non-negotiable step. It drops the meat’s temperature rapidly, which stops bacterial growth and ensures the final product is both safe and tender. For a deeper understanding of food safety, it's worth getting familiar with systems like the HACCP food safety principles.
By following these steps with care and intention, you can complete the process respectfully and fill your freezer with high-quality, homegrown meat.
Common Questions About Raising Meat Ducks
When you're knee-deep in raising meat ducks, the real, practical questions always seem to pop up. Below are some of the most common ones we get from fellow homesteaders, answered straight—no fluff. Think of it as a quick guide to keep in your back pocket.
How Much Does It Cost to Raise a Duck for Meat?
The final number on your receipt can swing a bit depending on your feed costs and which breed you choose. But as a general rule, you can plan on spending somewhere between $15 and $30 per duck, from hatchling to processing day.
That cost breaks down into a few main buckets:
The Duckling: The initial purchase price will probably land between $5 and $12.
Feed Costs: A fast-growing Pekin will chow down on roughly 20-25 pounds of feed in its short life.
Other Supplies: This covers things like pine shavings for bedding and any processing equipment you might need to buy.
A great way to keep your feed bill down is to pick a breed that loves to forage. Muscovy ducks are fantastic at this—they can find a surprising amount of their own food right on your property, which means less feed you have to buy.
Can I Raise Meat Ducks with My Chickens?
You absolutely can, but it takes a little smart management. Ducks and chickens can get along just fine in a shared run during the day. The trouble starts when you try to house them in the same indoor coop.
Ducks are just plain messy with water. They need it to keep their bills and eyes clean, and they splash it everywhere. This creates a wet, muddy mess that's a nightmare for chickens, who need a dry environment to stay healthy.
The best setup? Give the ducks a separate, well-drained spot for their water—even a simple kiddie pool in their part of the run works wonders.
What Is the Best Age to Process Meat Ducks?
Timing this right is the secret to an easy plucking job, and the ideal age really depends on the breed.
For a fast-growing breed like the Pekin, you're looking for that perfect window between 7 and 8 weeks of age. They've hit a great size by then but haven't started their first big molt. If you push it to 9-11 weeks old, you'll find yourself wrestling with a frustrating amount of stubborn pin feathers.
Slower-growing breeds are on a different schedule. A Muscovy drake, for example, isn't usually ready until he's about 12 to 16 weeks old.
Do I Need a Pond to Raise Meat Ducks?
Nope, you can breathe easy on this one. A big, scenic pond isn't necessary to raise healthy, happy meat ducks. They'd certainly have a blast with it, but it's not a requirement.
What is absolutely non-negotiable, though, is a water source deep enough for them to dunk their entire heads. They have to do this to clean their eyes and nostrils, which prevents some nasty respiratory and eye infections.
A simple kiddie pool or a large rubber tub that you can dump and refill daily will get the job done perfectly.
At The Grounded Homestead, we believe that growing your own food is one of the most empowering steps you can take. Explore more of our guides and join our community of modern homesteaders at https://thegroundedhomestead.com.


Facebook
Instagram
X
Youtube