
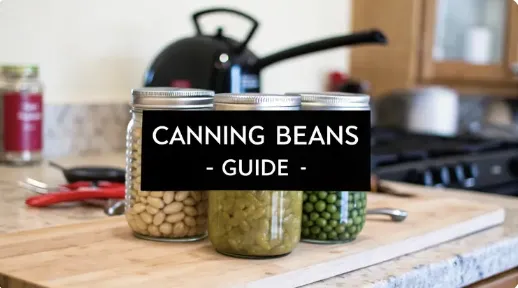
How Do You Can Beans? The Ultimate Guide for Your Pantry
How Do You Can Beans? The Ultimate Guide for Your Pantry
If you’ve ever wondered how people get started with canning, beans are a fantastic place to begin. The process is straightforward: you prepare dried beans, pack them into clean jars, and process them in a pressure canner for a set amount of time.
Let me be crystal clear on one thing right from the start: this is not a job for a water bath canner. The intense heat from a pressure canner is non-negotiable for keeping your beans safe to eat.
Why You Should Start Canning Your Own Beans

Jumping into home canning might feel like a big undertaking, but the rewards go far beyond just stocking a pantry. It's about taking back control over what you and your family eat. When you can your own beans, you get to decide exactly what goes into every single jar.
Complete Control Over Ingredients
The biggest win for me has always been cutting out all the junk. Store-bought canned beans are often loaded with sodium and preservatives to make them last longer on a shelf.
When you do it yourself, you get to:
Control the salt to fit your family's health needs, or just leave it out completely.
Avoid preservatives and other chemical additives you can't even pronounce.
Guarantee your food is gluten-free and safe from cross-contamination if that’s a concern in your kitchen.
There’s something truly empowering about it. You know precisely what's on the table—just beans, water, and maybe a little salt if you choose.
Superior Flavor and Texture
Honestly, there is no contest between a home-canned bean and one from the store. The beans you can yourself have a richer, more authentic flavor and a firm, satisfying bite. They haven't spent months or even years sitting in a tin can in some warehouse.
I’ll never forget the first time I made a simple weeknight chili with my own canned black beans. The difference was stunning. The beans held their shape perfectly, adding a creamy, robust texture that the mushy store-bought kind never could. That one meal completely changed my perspective on canning—it went from a chore to a secret weapon in the kitchen.
Key Takeaway: The satisfaction of seeing your pantry lined with beautiful jars of wholesome food you made yourself is immense. It's a tangible reward for your effort and a real step toward a more self-reliant lifestyle.
This practice just connects you to your food on a deeper level. And while convenience is still king, the global demand for canned beans is booming. The market was valued at over USD 762 million and is projected to hit USD 1.35 billion by 2037. This surge is largely thanks to busy urban lifestyles that demand ready-to-eat meals. You can find more details on these consumer trends in the canned beans market.
By canning your own, you really get the best of both worlds: the grab-and-go convenience you need and the unmatched quality of real, homemade food.
Before you even think about soaking your first bean, let’s talk gear. Getting your setup right isn’t just about making things go smoothly—it's the very foundation of safe, successful canning. Trying to cut corners here is a recipe for failed seals, spoiled food, and serious safety risks.
This isn’t the time to improvise. Let’s walk through exactly what you need to have on hand before you start.
The Non-Negotiable Pressure Canner
If you take only one thing away from this guide, let it be this: you must use a pressure canner to can beans. Beans are a low-acid food, and that’s a big deal in the canning world. A standard boiling water bath canner, which only reaches 212°F (100°C), simply cannot get hot enough to destroy the dangerous Clostridium botulinum spores.
A pressure canner is the only tool for the home kitchen that can hit the required temperature of 240°F (116°C) or higher. This heat is what makes your canned beans safe for long-term storage on the shelf.
You'll generally find two types of canners:
Dial-Gauge Canners: These have a gauge that gives you a precise pressure reading. They’re great for accuracy, but you do need to get them tested each year to make sure they're still calibrated correctly.
Weighted-Gauge Canners: These use a simple weight that jiggles or rocks to let you know you've reached the right pressure. They are incredibly reliable and don't need annual testing, which is why they’re a favorite for so many homesteaders.
I started with a weighted-gauge canner, and I still love its no-fuss reliability. You can hear it working from across the kitchen, which gives you a fantastic sense of peace of mind.
Expert Tip: When you're picking out a canner, think about size. A taller model that lets you stack two layers of pint jars (double-stacking) is a game-changer. It will seriously cut down your processing time when you're working with big batches of beans.
Jars, Lids, and Bands
Your jars are much more than just glass containers; they're an integral part of the preservation system.
You absolutely need proper canning jars, often called Mason jars. Please, do not try to reuse jars from store-bought pasta sauce, pickles, or mayonnaise. Commercial jars aren't built to handle the repeated high heat and pressure cycles of a canner. They can easily crack or, worse, fail to seal properly.
Before you use any jar, run your finger carefully around the rim. The tiniest chip or nick—one you can barely even see—is all it takes to ruin a seal.
You'll also need a supply of two-piece lids. These have two parts:
A flat lid: This is the piece with the reddish sealing compound around the edge. This part is strictly single-use. The compound creates that all-important airtight seal, and once it's been heated and sealed, its job is done.
A screw band: This is the reusable metal ring that holds the flat lid in place while the jar is processing in the canner. After the jars have cooled and sealed for a full 24 hours, you should remove the bands for storage.
Essential vs Optional Canning Supplies
Beyond the canner and jars, a few specific tools make the whole process safer, cleaner, and a lot less frustrating. These tools are inexpensive, but I consider them indispensable. Here’s a look at what you really need versus what’s just nice to have.

A perfectly clean jar rim is non-negotiable for a good seal. Even a tiny speck of food or grease can cause a seal to fail. The canning funnel is your best friend for preventing that. Likewise, those trapped air bubbles can cause liquid to siphon out of the jar during processing, so using a bubble remover is a must. These small investments make a huge difference in your final product.
With the right gear and process, you can stock your pantry with food that has a long shelf life, often lasting 2 to 5 years under good storage conditions. This incredible longevity is a major reason the canned legumes market, valued at USD 3.18 billion, keeps growing. You can dive deeper into the booming canned beans market and see how our home canning practices align with broader consumer trends.
A Practical Walkthrough of the Canning Process
With your gear laid out and your counters clear, you're ready for the best part. This is where a simple bag of dried beans transforms into pantry gold—shelf-stable jars of wholesome food, ready whenever you need them. We’ll go through it stage by stage, focusing on the small details that make a huge difference in safety and quality.
Prepping Your Beans for Canning
It all starts with the beans. Pour your dried beans out onto a big baking sheet or a clean spot on your counter. Spreading them out like this makes it easy to spot and pick out any little stones, bits of debris, or beans that are shriveled or broken. Once they’re sorted, give them a good rinse under cool, running water in a colander.
From here, you have two approved paths for getting your beans ready for the jars: the hot-pack and the raw-pack method.
Hot-Pack Method: This is the one I swear by, and it's highly recommended for beans. After soaking, you’ll cover the beans with fresh water and boil them for a solid 30 minutes. This pre-cooking step is huge—it gets some of the air out of the beans, which means less floating and a better chance they stay covered in liquid after processing. The final product is just plain better.
Raw-Pack Method: With this method, you put the soaked (but not boiled) beans right into the jars and then pour boiling water over them. It saves a few minutes upfront, but I’ve found it often leads to more siphoning (liquid loss during canning) and the beans don't always cook as evenly. For anyone new to this, the hot-pack method is far more reliable.
Trust me on this one: for the best texture and most consistent results, always use the hot-pack method. It's an extra step that pays for itself in the quality of the final jar.
Preparing Jars and Lids
While your beans are boiling away, it's the perfect time to get your jars ready. Wash them in hot, soapy water and rinse them well. Here's a critical tip: you have to keep the jars hot until you fill them. Putting hot food into a cool jar can cause thermal shock, which is just a fancy way of saying your jar might crack.
An easy way to keep them hot is to put them on the rack inside your pressure canner with a few inches of simmering water. This does double duty by keeping the jars warm and pre-heating your canner at the same time. Wash your lids, too, but modern canning guidelines say they no longer need to be pre-warmed.
Filling and Sealing the Jars
This is where your canning funnel becomes your best friend. With a steady hand, use a ladle to fill your hot jars with the pre-cooked beans and their cooking liquid. If you opted for the raw-pack, add the soaked beans first, then top them off with boiling water or broth.
The most important measurement here is headspace—the empty space between the top of the food and the rim of the jar. For beans, you need to leave exactly one inch of headspace. This gap is non-negotiable. It gives the food room to expand during processing and is essential for creating that all-important vacuum seal.
This is a great visual for how the jar-packing process flows.

As you can see, getting the headspace right and making sure the rim is perfectly clean are the two most important steps before a jar ever sees the inside of a canner.
After filling, grab your bubble remover tool (a thin plastic spatula works, too) and slide it down the inside of the jar. Press gently inward to release any trapped air pockets. Those little bubbles can interfere with a good seal and cause liquid to boil out.
Next, take a clean, damp cloth and wipe the rim of every single jar. Any little speck of food or grease left on the rim will prevent a proper seal. Place the flat lid on top and then screw on the band until it's just fingertip tight. You don't want to crank it down; air has to be able to escape during processing for the vacuum to form.
Processing Beans in the Pressure Canner
Now for the main event. Place your filled and sealed jars on the rack inside your canner, making sure they aren't bumping up against each other. Lock the canner lid in place according to your model’s instructions.
Crank the heat to high, leaving the vent pipe open. Before long, you'll see a strong, steady funnel of steam shooting out. This is called venting, and it's a critical safety step. Let the canner vent like this for a full 10 minutes to push all the air out. If air gets trapped inside, your pressure gauge won't be accurate, which can lead to dangerously under-processed food.
After the 10-minute vent, place the weight on the vent pipe (or close the petcock). The pressure will start to climb. You only start your processing timer when the dial gauge hits your target pressure or when the weighted gauge starts jiggling or rocking at its correct rhythm.
For a complete overview of the foundational techniques used for all low-acid foods, our guide on canning vegetables for beginners is an excellent resource to build your confidence.
Before you begin, you need to know the correct pressure and time for your altitude and jar size. This isn't something to guess at. Always consult a reliable, up-to-date canning chart.
Pressure Canning Times and Pressures for Beans
This table provides the USDA-recommended processing times and pressures for beans. Remember, the pressure you use depends on both your canner type (weighted or dial gauge) and your altitude. Using the wrong pressure for your elevation can result in unsafe food.

Always adjust for your specific altitude by consulting a full canning guide if you live above 1,000 feet for weighted gauges or 2,000 feet for dial gauges. Safety first, always.
Cooling Down and Checking Seals
When the timer goes off, turn off the heat. Now comes the hard part: waiting. Do not, under any circumstances, try to speed up the cooling process. Just let the canner depressurize on its own until the gauge reads zero or the air vent/cover lock drops. This can take anywhere from 30 to 60 minutes.
Once it's safe, open the lid away from your face to avoid a blast of hot steam. Let the jars sit in the hot water for another 10 minutes to acclimate, then use a jar lifter to move them to a towel-lined counter. Soon, you should start to hear the deeply satisfying "ping" of the lids sealing.
Let the jars cool, undisturbed, for 12 to 24 hours. When they're completely cool, check the seals by pressing on the center of each lid. If it doesn't move or flex, you've got a successful seal.
Troubleshooting Common Canning Mistakes
Even when you follow every instruction to the letter, canning can sometimes throw you a curveball. Don’t get discouraged. Most issues are common, easy to diagnose, and even easier to prevent the next time you fire up the pressure canner.
Think of your first few batches as hands-on learning. Each little imperfection is just teaching you something new about how to successfully can beans in your own kitchen. Let's walk through some of the most frequent hiccups and how to fix them.
Why Did So Much Liquid Disappear From My Jars?
This is easily the question I hear the most. You pull your beautiful jars from the canner only to see the water level has dropped dramatically, leaving the top layer of beans high and dry. This is called siphoning, and it usually happens for a few key reasons.
Sudden Temperature Changes: Letting the canner cool down too quickly is the main culprit. Whatever you do, don't try to rush the cooling process by moving the canner or running cold water over it. Just let it be and allow it to depressurize naturally.
Improper Headspace: That one-inch sweet spot is critical. Leaving too little or even too much headspace can cause liquid to boil out as the pressure inside the jar fluctuates during processing.
Forgetting to Debubble: Those little trapped air pockets expand a lot under heat and pressure. As they escape, they push liquid right out of the jar with them. Always run a bubble remover tool around the inside of your packed jars before sealing them up.
If you’ve experienced siphoning, don't worry—the beans are still safe to eat as long as the jar sealed properly. I'd just recommend using that jar first, since the exposed beans at the top might discolor over time.
When in Doubt, Throw it Out. This is the golden rule of home canning. If a jar looks cloudy, has a bulging lid, or just smells off when you open it, do not taste it. Your safety is always more important than one jar of beans.
What Causes Mushy Beans?
There’s nothing more disappointing than opening a jar you worked so hard on, only to find the contents have turned to mush. This is almost always a result of over-processing.
First, check that you used the hot-pack method. Pre-cooking the beans for 30 minutes before they even see a jar is essential. If you skip this and try a raw pack, the beans will absorb way more liquid and cook far more intensely in the canner, often leading to a soft, unappealing texture. If you want a deeper look at this, our guide on pressure canning green beans is a helpful resource, as they can also turn soft if not handled right.
Also, be a stickler for your timing. Start your timer only when the canner hits the correct pressure for your altitude, and turn off the heat the second the time is up. Every extra minute counts.
How Can I Spot a False Seal?
A false seal is a sneaky one because the lid might seem sealed right after canning but isn't truly airtight. This can happen if the jar rim had a tiny bit of food on it or if a screw band was cranked on too tight, which prevents air from venting properly.
Here’s your 24-hour post-canning checklist:
Check the Lid: After the jars are completely cool, press down on the center of the lid. It should be firm, concave, and make no popping or flexing sound at all.
Remove the Band: Carefully take off the screw band. You should be able to pick up the jar by holding only the edges of the lid. If that lid pops right off, it was never truly sealed.
Inspect Before Storing: Look at the jar at eye level. The lid should be curved slightly inward, a good sign of a strong vacuum seal.
If you find a jar with a false seal, don't panic. You can either reprocess it within 24 hours (using a brand new lid) or just pop it in the refrigerator and plan to use the beans within a few days.
Storing and Using Your Home-Canned Beans

Once those satisfying “pings” have echoed through your kitchen and the jars are cool, your canning day is nearly done. But don't put everything away just yet. The steps you take now are what guarantee your hard work pays off with safe, delicious food months down the line. Proper storage isn’t just about finding shelf space; it’s the final, critical stage of the whole preservation process.
After the jars have cooled for a full 12 to 24 hours and you've double-checked every seal, the first thing you need to do is remove the screw bands. This always feels a little strange to newcomers, but it’s an essential safety measure. Leaving the bands on can trap moisture, causing rust that can compromise the lid over time.
More importantly, a band can hide a failed seal. If a lid has come unsealed, you need to know immediately. A screw band can hold a faulty lid in place, masking the dangerous spoilage happening inside.
Labeling and Storing for Success
With the bands off, give each jar a quick wipe with a damp cloth to clean up any hard water spots or residue. Now, grab a permanent marker and label every single lid. Trust me, you won't remember what's what six months from now.
Your label needs just two things:
The contents of the jar (e.g., "Black Beans")
The month and year it was canned (e.g., "Oct 2024")
This simple habit prevents pantry mysteries and helps you follow the "first in, first out" rule, ensuring you always use your oldest jars first when they're at their best quality.
Find a home for your jars somewhere cool, dark, and dry. A basement cellar, a dark pantry, or an interior closet are all great choices. Just keep them away from the stove, dishwasher, or sunny windows. Light degrades the food's quality and color, while heat fluctuations can cause perfectly good seals to fail. Stored correctly, your home-canned beans will easily maintain their quality for at least a year, and often much longer. This is just one piece of a bigger food preservation strategy, and if you're curious for a wider view, our modern guide to preserving food at home is a great place to start.
Putting Your Canned Beans to Delicious Use
This is the fun part—enjoying the payoff. Having jars of ready-to-use beans is a weeknight dinner game-changer. Just pop a jar, give the beans a quick rinse to remove excess starch and salt, and they're ready for anything. The possibilities are endless.
I always make a big batch of pinto beans specifically for refried beans. I just mash them in a hot skillet with a little bacon fat, cumin, and garlic powder. The texture is so much creamier and more flavorful than anything you can buy.
Here are a few ideas to get you started:
Quick Weeknight Chili: Sauté some ground meat and onions, then dump in your canned kidney beans, a can of tomatoes, and chili spices.
Creamy Homemade Hummus: A jar of your own canned chickpeas makes the absolute best hummus. Just blend with tahini, lemon juice, and garlic.
Hearty Soups and Stews: Add a jar of cannellini beans to a vegetable soup or Great Northern beans to a chicken stew for an instant boost of protein and fiber.
Vibrant Bean Salads: Toss black beans and corn with red onion, cilantro, and a lime vinaigrette for a perfect potluck side dish.
This is the ultimate reward. All the careful work of figuring out how do you can beans culminates in these simple, wholesome, and delicious meals shared right at your own table.
Your Top Bean Canning Questions, Answered

Once you get a few batches under your belt, the questions always start to bubble up. It's a natural part of the learning curve, whether you're just starting out or simply need a quick refresher on the details.
Let's walk through some of the most common questions I hear from fellow canners. Getting these fundamentals right is the key to canning beans with complete confidence.
Can I Use a Water Bath Canner for Beans Instead?
This is a hard no, and it’s the single most important safety rule in home canning. Beans are a low-acid food, meaning they don’t have the natural acidity to stop the growth of Clostridium botulinum spores—the culprit behind botulism.
A boiling water bath canner only gets up to 212°F (100°C). That’s just not hot enough to kill those dangerous spores. Only a pressure canner can hit the required temperature of 240°F (116°C) or higher, making it the only safe method for canning beans. Trying to use a water bath is a risk you should never, ever take.
Is Soaking the Beans Overnight Really Necessary?
Technically, you can skip the long soak, but I’d strongly advise against it if you care about the final product. Soaking your beans for at least 12 hours does a few really important things:
It fully rehydrates them, which is key for even cooking inside the jar.
It dramatically improves the texture, so you get creamy beans instead of hard or mushy ones.
It helps break down the complex sugars that can lead to digestive issues later.
If you’re short on time, the "quick soak" method is a great backup plan. Just cover the beans with water, bring them to a hard boil for two minutes, kill the heat, and let them sit for an hour. It’s far better than starting with bone-dry beans.
My Personal Take: I've tried canning beans both ways, and the texture difference is night and day. The beans from an overnight soak are consistently creamier and more uniform. It's a simple, hands-off step that pays off big time in the final jar.
Why Does My Altitude Matter for Canning?
This one comes down to simple physics. As you go up in elevation, the air pressure around you drops. This causes water to boil at a lower temperature. For example, water boils at a full 212°F at sea level, but at 5,000 feet, it boils at just 203°F.
Since we need to hit at least 240°F to kill botulism spores, you have to increase your canner’s pressure to make up for that lower boiling point. If you live at a higher altitude and don't adjust the pressure accordingly, your canner will never get hot enough to process the food safely. Always, always check an altitude adjustment chart from a trusted source to find the right pounds of pressure for where you live.
Is It Safe to Add Onions or Garlic to My Beans?
When you're new to canning beans, it’s so tempting to start improvising with flavors. But when it comes to safety, you have to stick to recipes that have been tested and approved by official sources like the National Center for Home Food Preservation (NCHFP).
Tossing in other low-acid vegetables like onions, garlic, or peppers completely changes the equation. These additions alter the density of what’s in the jar, which affects how heat gets to the center. The processing time for plain beans might not be long enough to make that new mixture safe.
If you want to can something like a bean soup or a vegetable mix, you absolutely must find a specific, tested recipe for that exact combination and follow its instructions to the letter. Don’t freelance on this one.
At The Grounded Homestead, we believe that knowing where your food comes from is one of the most rewarding parts of a self-sufficient life. Our goal is to provide you with the knowledge and confidence to grow, cook, and preserve your own food. For more tips, guides, and stories from our homesteading journey, visit us at https://thegroundedhomestead.com.


Facebook
Instagram
X
Youtube