
How to Water Seedlings for Perfect Plant Growth
How to Water Seedlings for Perfect Plant Growth
If there's one skill that separates struggling new gardeners from successful ones, it's learning how to water seedlings. It’s a delicate dance. Too much water, and you’re inviting root rot and fungal diseases like damping-off. Too little, and you’ll stall growth before it even begins.
The real secret isn’t a complicated formula or a rigid calendar. It's learning to aim for soil that feels like a well-wrung sponge—consistently moist, but never, ever soggy. Once you get a feel for this, you’ve mastered the hardest part of starting seeds.
The Secret to Strong Seedlings: Proper Watering
Think of watering not as a chore you do on a schedule, but as a response to what your tiny plants need. This approach encourages strong, deep root development without turning your seed trays into a swampy mess.
This simple visual breaks down the cycle of checking and watering. It’s less about a single task and more about building an intuitive habit.

At first, it might feel like a lot to remember, but you’ll quickly get the hang of it. Your goal is to give your seedlings just enough moisture to thrive, which brings us to the two best ways to get the job done.
Choosing Your Watering Method
You can either water your seedlings from the top or from the bottom. I’ve used both methods with great success, and neither one is universally "better." The right choice really just depends on your setup and how much time you have.
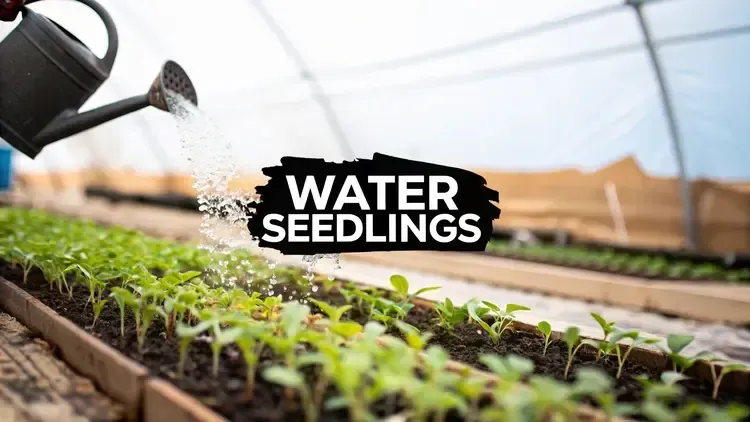
Top-Watering: This is just what it sounds like—gently applying water to the soil surface. A simple spray bottle or a small watering can with a fine rose works perfectly. It’s fast and direct, but you need a soft touch to avoid washing away tiny seeds or compacting the soil around delicate stems.
Bottom-Watering: This has become my go-to method for most of my seed starts. You place your seed trays or pots into a larger, shallow tray of water and let them soak up moisture through their drainage holes. This is fantastic for encouraging roots to grow deep as they stretch down toward the water source.
To help you decide, here’s a quick comparison of the two main approaches.
Quick Guide to Seedling Watering Methods

Ultimately, the best method is the one you'll do consistently. Experiment with both and see what fits your gardening rhythm.
The most common mistake I see new gardeners make is watering too often but too lightly. This creates shallow, weak roots and leaves the deeper soil bone-dry, setting your plants up for stress later on. A thorough, less frequent watering is always more effective.
You might be surprised by how little water a seedling actually needs. One study found that the optimal volume is a minuscule 1.45 to 3.05 mL per seed. Now, nobody expects you to measure that with an eyedropper, but it drives home a critical point: too much water can literally drown a seed by blocking the oxygen its roots need.
If you want to dig deeper into watering techniques for more mature plants, you might find our guide on the best way to water plants in your garden helpful.
Choosing Your Tools for Gentle Watering
Having the right gear makes all the difference when you’re learning how to water seedlings. The goal here is simple: deliver moisture gently, without washing away tiny seeds or battering fragile new stems. Your standard garden hose or a big, open-spout watering can? Far too aggressive for this delicate job.
Instead, think small and soft. The tools you choose should feel more like a gentle spring rain, not a monsoon. This careful approach stops the soil from getting compacted and keeps your delicate sprouts safe from harm.

Gentle Top-Watering Tools
For watering from above, it's all about precision. A heavy stream of water can instantly uproot a seedling that just broke ground yesterday.
Spray Bottle: Set to its finest mist, a simple spray bottle is perfect for moistening the soil surface without disturbing a thing. This is my go-to tool for the initial germination phase when seeds are just getting started.
Small Watering Can: Look for one that comes with a detachable "rose"—that perforated spout cover. This little attachment is brilliant; it breaks a single stream of water into dozens of gentle droplets, providing a soft shower instead of a flood.
My Preferred Method: Bottom-Watering
While top-watering has its place, my favorite technique by far is bottom-watering. This method lets the soil wick moisture up naturally from below, which has a huge benefit: it encourages roots to grow deep and strong as they actively search for that water source.
The process couldn't be more straightforward. Just place your seed trays or pots (they must have drainage holes) into a larger, shallow reservoir of water. A baking sheet or a purpose-built nursery tray works perfectly for this.
Crucial Tip: Always use room-temperature water. Cold water can shock the delicate root systems of young plants, stunting their growth right when they need it most. After about 20-30 minutes, the soil surface should look dark and moist.
Once the soil is saturated, it’s vital to pull the trays out of the reservoir and let any excess water drain away completely. Letting them sit in standing water is one of the quickest ways to cause root rot, a fungal disease that can wipe out an entire tray of seedlings before you know what hit you.
Learning to Read Your Seedlings' Water Needs
Instead of guessing or sticking to a rigid calendar, the real secret to watering seedlings is learning how to listen. Your plants will tell you exactly what they need if you learn their language. Developing this gardener's intuition is what separates struggling seedlings from strong, healthy plants right from the start.
The best way to get started is with a few simple, hands-on checks that take just a few seconds each day. I rely on three easy tests that have never steered me wrong.
The Lift Test: Gently lift one of your seed trays. Does it feel surprisingly light? That's a sure sign the soil has dried out and it's time for a drink. A well-watered tray will always have a noticeable heft to it.
The Color Check: Look closely at the surface of your soil. Dark brown or nearly black soil is moist and happy. If it’s turned a light tan or pale brown, your seedlings are definitely getting thirsty.
The Finger Test: This one is a classic for a reason. Gently press your finger about a half-inch into the soil. If it feels cool and damp, you can hold off. If it's dry to the touch, it’s time to water.
When and How Often to Water
The best time of day to water your seedlings is almost always in the morning. This gives your little plants the entire day to absorb what they need and allows any moisture on the leaves to evaporate completely before nightfall.
Wet foliage overnight is an open invitation for fungal diseases like damping-off, which can wipe out a tray of seedlings in a hurry.
How often you'll need to water depends entirely on your specific environment—there's no one-size-fits-all answer. Seedlings growing under warm grow lights or in a dry, heated room will need water far more frequently than those in a cooler, more humid basement. For a deeper dive into figuring out a routine, check out our guide on how often you should water your plants.
Tailoring how you water to the specific needs of your plants isn't just about preventing waste—it's about boosting their health and productivity. It's a principle that holds true from the garden to large-scale farming. In fact, research into crop irrigation shows that the value of water used for thirsty crops like maize and rice is significantly higher than for wheat, based entirely on how efficiently that water is applied.
Avoiding Common Seedling Watering Mistakes
Every gardener, whether you're on your first tray of seeds or your fiftieth, has made a watering mistake. We've all been there. The good news is that seedlings are surprisingly good at telling you what they need, and most missteps are fixable if you catch them early enough.
Honestly, learning how to water seedlings properly is often about learning what not to do first.
The two biggest culprits are overwatering and underwatering, and each has its own tell-tale signs. Paying close attention to your plants is far more effective than sticking to a rigid, once-a-day watering schedule that ignores what's actually happening in the soil.

Recognizing and Fixing Overwatering
Overwatering is almost always an act of love—we worry our tiny plants are thirsty! But constantly soggy soil is a fast track to disaster. It essentially suffocates the roots, preventing them from taking up oxygen and inviting serious problems like root rot and damping-off disease.
You'll know you've been too generous with the watering can if you see these signs:
Yellowing leaves, especially the lower ones, that feel soft and limp, not crispy.
Weak, floppy stems that just don’t seem to have any strength.
Soggy or waterlogged soil that never really seems to dry out between waterings.
A film of green algae or even mold growing on the soil surface.
The fix is pretty straightforward. First, and most obviously, stop watering! Let the soil dry out more than you normally would. You can also gently poke a few extra holes in the soil with a toothpick or skewer to help introduce some air. If you have a small fan, placing it nearby to increase air circulation around your trays can also work wonders to speed up evaporation.
A common but flawed piece of advice is to water on a strict schedule. Your seedlings' needs change daily based on light, temperature, and growth. Water when the soil is dry, not when the clock says so.
Rescuing Underwatered Seedlings
On the flip side, you have underwatering. This happens to all of us when life gets busy or we underestimate just how quickly those little seed cells can dry out, especially under warm grow lights.
Here’s how to spot a thirsty seedling:
Obvious wilting where the entire plant looks limp and genuinely sad.
Crispy or dry leaf edges.
Soil that is pulling away from the sides of its container.
A pot that feels feather-light when you pick it up.
For a plant that's this thirsty, the best remedy is a deep, thorough drink. I've found that a 20-minute bottom-watering session is the perfect fix. This allows the dry, compacted soil to rehydrate slowly and completely from the bottom up, which also encourages roots to grow downward toward the moisture source.
Whatever you do, avoid a quick top-watering in this situation. The water will likely just run down the sides of the dry soil without ever soaking the actual root ball.
Adapting Your Watering to Different Seedlings
A one-size-fits-all watering schedule just doesn’t cut it in the garden. It’s a lesson every grower learns, often the hard way. A thirsty tomato seedling has completely different needs than a delicate lavender sprout, and learning how to water effectively means you’re responding to the plant, not just a calendar.
Fast-growing vegetables like cucumbers, squash, and tomatoes are notoriously thirsty. Their rapid growth and large leaves demand consistent moisture. If their soil dries out, they’ll let you know by wilting almost immediately. You have to stay on top of them.
On the other hand, slow-growing herbs or drought-tolerant plants like succulents are incredibly susceptible to root rot. For these, it’s always better to err on the side of underwatering. Let the soil dry out more between drinks—they can handle it.

Container Size Matters, A Lot
The type of container you start your seeds in plays a huge role in how often you’ll need to water. Those small, individual seed-starting cells have very little soil volume and can dry out incredibly fast—sometimes in less than a day, especially under warm grow lights.
Larger pots hold more soil, which means they hold more moisture. This gives you a much wider margin for error. If you’re growing in those tiny cells, you absolutely have to be more vigilant with your daily checks.
Key Takeaway: Pay attention to both the plant and its pot. A thirsty tomato in a tiny cell will need water far more often than a slow-growing rosemary plant in a four-inch pot. It’s all connected.
This idea of smart water use is vital on a larger scale, too. Globally, irrigated agriculture uses 20% of cultivated land but is responsible for producing 40% of the world's food. Mastering water management, starting with your very first seedlings, is a skill that scales.
As your seedlings grow and eventually move outdoors, automating this process can be a game-changer for consistency and your sanity. If you're ready to take that next step, check out our guide on building a DIY drip irrigation system for a super-efficient solution.
Got Questions About Watering Seedlings?
Even with the best game plan, questions always seem to pop up when you're staring down a tray of tiny green sprouts. It’s normal! Getting a handle on these common uncertainties is how you build real gardening confidence. Here are a few of the most frequent ones I get asked.
Should I Water Seeds Right After Planting?
Yes, you absolutely should. As soon as your seeds are in the soil, they need a gentle but thorough drink to get things moving. This first watering settles the soil snugly around the seeds—ensuring good contact—and sends a clear signal that it's time to wake up and grow. A fine mist from a spray bottle is perfect for this job.
Is It Okay to Use Tap Water for Seedlings?
For most gardeners, tap water is perfectly fine. But if you know you have very hard water (loaded with minerals) or if it smells strongly of chlorine, it's a good idea to let it sit out for 24 hours. This little bit of patience allows the chlorine to evaporate and brings the water to room temperature, which helps avoid shocking those delicate little plants.
If you really want to give your seedlings the five-star treatment, rainwater or filtered water is the gold standard. They're free of the extra stuff sometimes found in municipal water, but don't feel like this is a requirement for success. Good 'ol tap water works for most of us.
How Do I Know When Bottom-Watered Trays Are Done Soaking?
This is a great question because you definitely don't want to leave your trays sitting in water for too long. The best visual cue is the soil surface: you’ll know the tray is done when the top of the soil turns a dark, uniform color. It should look and feel noticeably moist to the touch.
Most seed starting trays will soak up all the water they need within 20 to 30 minutes. If the top still looks dry after that, you can give it a quick splash from the top to finish the job. The crucial final step? Remove the tray from the water reservoir immediately so any excess can drain away. This is key to preventing waterlogged soil and the dreaded root rot.


Facebook
Instagram
X
Youtube