
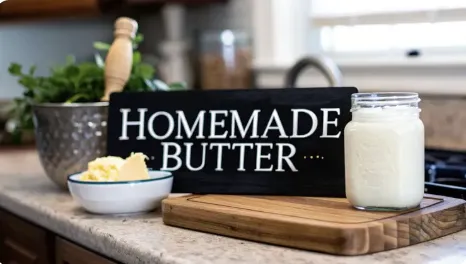
Making Butter From Whole Milk: A Simple Guide
How to Make Butter from Whole Milk (Step-by-Step Guide)
Yes—you can make butter from whole milk. But one step determines success: separating the cream first. Butter is pure, concentrated milk fat. Therefore, your success in making butter from whole milk hinges entirely on isolating that rich, fatty layer before you even think about churning.
The Simple Transformation: Turning Cream into Homemade Butter
Making homemade butter isn't a complicated, industrial process. It's a deeply satisfying kitchen project that connects you right back to the source of your food. Forget complex recipes; this is about a simple, fascinating transformation you can manage right on your countertop.
The entire process boils down to one core idea: agitating the cream until the fat globules finally clump together and separate from the liquid buttermilk. This process is a fantastic first step into building real self-sufficiency skills.
If you’re looking for more ways to ground your home in these practices, you’ll find plenty of inspiration in our guide to homesteading for beginners.
Understanding the Transformation: Why Separation is Key
The journey from a jug of raw milk or whole milk to a dish of golden butter is simpler than you might think, but the key is understanding the fat concentration.
Whole Milk: Contains a relatively small amount of fat—typically around 3.5% to 4.5%.
Butter: Must contain at least 80% milk fat (by U.S. standard), with high-quality butter often slightly above that.
That huge difference is exactly why you can't just pour milk into a churner and expect butter.
To appreciate just how dramatic this transformation is, you can read the official U.S. standards on butter's chemical and physical properties, which mandate a minimum of 80% milkfat.
The real work isn’t in churning—it’s in concentrating the fat. Cream, which contains 30–40% milk fat, must first be separated and collected before butter becomes possible.
Once you’ve collected enough cream, the churning can begin. This is a surprisingly physical process that brings basic food science to life right on your countertop. Keep in mind that the volume of milk required is significant. It can take about 21 liters of milk just to produce one kilogram of butter. This highlights why being strategic with your dairy resources is so important. You can read more about how commercial dairies approach the strategic allocation of milk for dairy production.
Quick Step-by-Step Overview:
1. Let milk sit (12–24 hours) to separate cream
2. Skim cream from the top
3. Churn cream until butter separates
4. Strain off buttermilk
5. Wash butter in ice water until clear
6. Salt and shape
Your Three Stages to Homemade Butter
This guide walks you through the essential stages of turning cream into butter. Mastering these steps ensures a high-quality product every time:
Separating the Cream: This is the crucial first step to isolate the dense butterfat.
Churning the Butter: The active, hands-on process of converting the cream into solid butter clumps.
Washing and Flavoring: The final touches, adding salt and removing residual liquid for amazing taste and a longer shelf life.
Before you dive in, here is a quick look at the timeline you can expect on your butter-making journey:
Your Butter Making Journey At a Glance
This table outlines the key stages, time commitment, and what to expect as you make butter from whole milk.
, churning (15–30 minutes), and washing and seasoning (10–15 minutes), each with brief step-by-step descriptions.")
This process is less about exact measurements and more about observation and feel. With a little patience, you'll be well on your way to delicious, homemade butter.
Choosing the Right Milk for Homemade Butter

The secret to incredible homemade butter isn't a complicated process—it’s the quality of the milk you start with. Everything hinges on that one ingredient.
Selecting the Best Whole Milk for High Yield
For the easiest time making butter from whole milk and the best yield, you should find non-homogenized milk. This is often sold as "cream-top."
Non-Homogenized Milk: This is the good stuff. The cream naturally floats to the top, forming a thick layer that is simple to skim off. More cream means more butter.
Standard Store Milk (Homogenized): Don't worry, you can still make butter! Just know that the cream won't separate nearly as well, resulting in very low yields—often too little to justify the effort unless you process multiple gallons.
If you can get your hands on fresh raw milk from a local dairy farm, you will taste the difference immediately. Cream from small-scale operations is often richer and carries the character of the pasture, directly impacting your butter's flavor.
For those of us on the self-sufficiency path, learning to care for dairy animals is a game-changer. Our guide on how to raise goats is a great place to start if you're curious about small-scale dairy. https://thegroundedhomestead.com/post/how-to-raise-goats
Key Takeaway: The less processed your milk is, the easier it will be to make butter. Always look for non-homogenized milk with a clear cream line for the best and biggest yield.
Essential Tools for Churning Homemade Butter
Here's the best part: you don't need any fancy, expensive gadgets. The beauty of making butter from whole milk is in its simplicity, and your kitchen is likely already equipped.
You will need four essential items:
A Wide-Mouth Jar with a Lid: Nothing beats a classic mason jar for shaking cream by hand.
A Stand Mixer or Hand Mixer: If you’re short on time or arm strength, the whisk attachment will turn cream into butter faster. This is great for larger batches.
If you plan on making butter from whole milk regularly, upgrading to a reliable, high-capacity stand mixer is a game-changer that turns 45 minutes of shaking into a 15-minute hands-off job.

A Fine-Mesh Strainer: You will need this to cleanly separate the butter solids from the liquid buttermilk once the churning is done.
A Bowl of Ice Water: This is non-negotiable for "washing" the butter. Rinsing away residual liquid is what gives your butter a clean flavor and a long shelf life.
Just pick the tool that fits your mood and your schedule, and you're ready to get started.
Separating the Cream: The Critical First Step

This is where the real butter-making magic happens. The whole process hinges on one simple but critical task: getting that rich, fatty cream away from the leaner milk. If you don't get a clean separation, you won't have enough butterfat to churn, and you'll just end up with frothy milk.
How you tackle this depends entirely on the kind of milk you're working with. If you were lucky enough to find non-homogenized, cream-top milk, gravity is your best friend. For the rest of us using standard store-bought homogenized milk, it's a bit more of a challenge—but not impossible.
Method 1: The Gravity Skim (For Non-Homogenized or Raw Milk)
If you found non-homogenized or raw milk, gravity is your best friend. The larger fat globules float to the surface all on their own when the milk is left to sit.
Refrigerate Undisturbed: Pop your milk in the fridge and leave it completely undisturbed for at least 12 to 24 hours.
Locate the Cream Line: You’ll soon see a thick, yellowish-white layer forming at the very top. That’s your liquid gold.
Gently Skim: Once the cream line is clear, grab a ladle or a large spoon and gently skim the cream off. The key is to be delicate. If you jostle the jar, the cream will start mixing right back into the milk.
Pro Tip: For an even cleaner separation, use a container with a spigot at the bottom. Once the cream has risen, you can just drain the skim milk out from underneath, leaving behind a perfect layer of thick, pure cream.
Method 2: Coaxing Cream from Homogenized Dairy
Homogenization blasts fat globules into tiny particles, forcing them to stay suspended. This makes separating the cream much tougher when making butter from whole milk, but it's not impossible.
The Wait Game: Your best shot is to let the milk sit, completely still, in the back of your fridge for two to three days.
The Thin Layer: A very thin, higher-fat layer will eventually rise to the top. It won’t be nearly as thick or obvious as the cream from raw milk, but it is there. Skim it off as carefully as you can.
To get a deeper understanding of this challenge, the U.S. Dairy industry provides a detailed explanation of the science behind milk homogenization and why the process prevents cream separation.
A little patience at this foundational stage truly pays off and sets you up for a successful churn into homemade butter.
Churning the Butter: From Cream to Solid Gold

This is the part that feels like magic—watching liquid cream transform into solid, golden homemade butter right before your eyes. It’s a beautifully simple process, driven entirely by agitation.
\": Shows a beaker filled with a light blue liquid representing cream, containing numerous distinct, small yellow circles labeled as fat globules. Text below reads: \"Fat globules are suspended individually in the cream, each encased in a protective membrane.\" Panel 2, \"AGITATION (ACTION)\": Shows the same beaker with motion lines and arrows indicating movement. The yellow fat globules are colliding, and some of their outer membranes are shown breaking apart. Text below reads: \"Churning breaks down the fat globule membranes, freeing the butterfat and causing collisions.\" Panel 3, \"CLUMPING (PROCESS)\": Shows the globules in the beaker fusing together into larger, irregular yellow masses, with fewer individual globules remaining. Text below reads: \"Freed fat particles begin to cling and clump together, growing into larger butterfat masses.\" Panel 4, \"BUTTER & BUTTERMILK (END)\": Shows the beaker containing a single large, solid, irregular yellow block representing butter, separated from a clear, light blue liquid representing buttermilk. Text below reads: \"The butterfat solidifies into a distinct mass, leaving behind traditional buttermilk.\"")
The Science Behind the Break
When you churn butter, you are intentionally breaking down the delicate membranes that surround the fat globules in the cream. Freed from their protective shells, these fat solids start smashing into each other and clumping together.
As this mass of butterfat grows, it squeezes out the remaining liquid. This liquid byproduct is traditional buttermilk.
The Four Stages of Churning Cream
Your cream will go through a few distinct phases on its way to becoming butter. Knowing what to look for will tell you exactly when you’ve hit the jackpot:
Thick Liquid: The cream begins to feel slightly heavier and thicker.
Whipped Cream: Next, it will fluff up and reach a soft peak stage, just as if you were making a dessert topping.
Grainy Texture: The whipped cream will suddenly look curdled or grainy. Don't worry, this is a great sign—it means the butter is about to “break.”
The Break: All at once, you’ll see solid yellow clumps separate dramatically from a thin, watery liquid. That’s it! You’ve successfully separated your homemade butter from the buttermilk.
Temperature and Space: Key Churning Secrets
For the smoothest churn, temperature control is essential for making butter from whole milk:
Ideal Temperature: Always aim for a cream temperature around 60°F (15°C).
Too Cold: The fat gets too hard and won't clump properly, no matter how long you churn.
Too Warm: The fat becomes too soft and turns into a greasy mess instead of a firm solid.
Key Insight: Don't overfill your container! Whether you're using a mason jar or a stand mixer, only fill it about halfway. The cream needs plenty of room to slosh around and build momentum. Not enough space means not enough agitation.
Once you see a distinct lump of butter floating happily in the buttermilk, stop churning immediately. If you keep going, you can actually start breaking the butter back down into the liquid, undoing all that hard work.
Washing and Flavoring Your Homemade Butter
You’ve successfully churned your cream and have a beautiful lump of golden butter. But hold on—the most important part for quality and preservation is next. Washing your butter isn't just a suggestion; it's the step that makes all the difference in flavor and shelf life.
The Art of the Wash: Removing Buttermilk
This crucial process squeezes out every last bit of buttermilk clinging to the butterfat. Why does that matter? Residual buttermilk spoils fast, and leaving it in will make your butter taste sour and go rancid in just a few days.
The spoilage is due to the milk sugars and proteins left behind; you can read more about the complex chemistry of hydrolytic and oxidative rancidity and why water content accelerates spoilage in butter.
Your goal is simple: knead the homemade butter under ice-cold water until the water runs completely clear.
The Rinsing and Pressing Method:
Prepare Ice Bath: Get a big bowl of ice water and drop your butter solids in.
Knead and Press: Use a stiff spatula or your clean hands to press and fold the butter against the side of the bowl. This action squeezes the liquid out.
Repeat: Dump out the cloudy, milky water, add fresh ice water, and repeat the process. You'll likely do this three or four times.
Confirm Clarity: When the water stays clear after a good squeeze, you’re finally done.
This patient step is what separates good homemade butter from truly great dairy products.
Key Takeaway: Don't skip the wash! Removing all the buttermilk is the single most important thing you can do to prevent your butter from tasting sour and going rancid, ensuring your efforts at making butter from whole milk last.
To achieve that perfectly clean flavor, you can finish the wash by firmly pressing the butter in a dedicated, fine-weave butter muslin or cheesecloth to squeeze out every drop of liquid.
Seasoning and Customizing with Salt
Once your butter is thoroughly washed and you've squeezed out as much water as possible, it’s time for the fun part: adding salt and flavor.
For a classic salted butter, a good starting point is about 1/4 teaspoon of fine sea salt per half cup of butter. Knead it in, give it a taste, and adjust until it’s perfect for you.
Why stop at just salt? This is your chance to get creative:
Herbed Butter: Finely chopped fresh herbs like chives, rosemary, or thyme are fantastic.
Garlic Butter: A clove of roasted, mashed garlic turns it into a savory powerhouse.
Sweet Butter: Try a drizzle of honey or a sprinkle of cinnamon for a delicious spread on toast or scones.
Once seasoned, give your homemade butter a professional, traditional look by forming it with traditional butter paddles.
Common Questions When Making Butter at Home
Even with a solid recipe, the hands-on process of churning butter can leave you with a few snags. Let's walk through the most common issues that new butter makers run into.
Q: How Much Butter Will I Get?
A: The final amount of homemade butter is tied directly to the quality of your milk.
Non-Homogenized/Raw Milk: You can expect to skim about 1 to 1.5 cups of cream from one gallon. That cream will churn down into roughly ½ cup (about 1 stick) of finished butter, depending on fat content and separation quality..
Standard Store Milk (Homogenized): The separation is far less efficient, and you might only end up with a few tablespoons of butter for your efforts.
: Features a thermometer icon; explains that if cream won't clump, it is likely too cold and should be warmed to 60°F. Panel 2 (Greasy Sludge): Features a melting butter icon; notes that greasy texture is caused by cream being too warm and suggests chilling the cream and bowl. Panel 3 (Low Yield): Features a milk jug icon; identifies homogenized milk as the cause for low butter output and recommends using non-homogenized or raw cream. Panel 4 (Sour/Off-Flavor): Features a spoiled butter icon; explains that off-flavors come from residual buttermilk and stresses washing the butter with ice-cold water until it runs perfectly clear.")
Q: Why Isn't My Cream Turning Into Butter?
A: This is, without a doubt, the most frequent roadblock. The culprit is almost always temperature.
Cream is Too Cold: The fat globules are too firm and rigid to stick together, no matter how much you mix. The Fix: Let the cream sit on the counter for 15–20 minutes to warm up toward the ideal 60°F (15°C).
Cream is Too Warm: The fat becomes too soft and won't solidify properly. Instead of clumps, you'll get a greasy, soupy mess. The Fix: Try chilling the cream down slightly and ensure the bowl you are using is cool.
Patience is also key here; sometimes it just takes a few more minutes of agitation than you expect. Don't give up too soon!
Q: Can you make butter directly from whole milk?
No. You must first separate the cream, since butter is made from concentrated milk fat.
Q: How long does it take to make butter from whole milk?
Total time ranges from 12–24 hours (for cream separation) plus 15–30 minutes of churning.
Q: How long does homemade butter last?
Properly washed butter lasts 1–2 weeks refrigerated, longer if salted.
Q: Is raw milk better for making butter?
Yes. Raw or non-homogenized milk produces higher yields and better flavor.
A Valuable Byproduct: Don't Throw Away the Buttermilk!
That thin, watery liquid left over after your butter clumps form? That is real, traditional buttermilk.
Buttermilk Use: It’s a baker's secret weapon, perfect for making incredibly tender pancakes, biscuits, and scones. Just store it in a sealed jar in the fridge for up to a week. Learning how to store your homemade dairy products is a key homesteading skill.
Learning how to store your homemade goods is a key homesteading skill. For more ideas, our guide on preserving food at home can help you make the most of your kitchen creations.
Homemade butter is a fantastic, high-fat food that fits beautifully into certain ways of eating. If you're exploring how to incorporate it, you might find some great ideas in resources like these keto meal plans, which often feature high-quality fats. This helps you get the most out of every delicious pat you churn.
Ready to dive deeper into homesteading and sustainable living? Join the The Grounded Homestead community for more guides, tips, and inspiration on your journey to a more self-sufficient life. Visit us at https://thegroundedhomestead.com.


Facebook
Instagram
X
Youtube