
Your Guide to Patio Container Gardening Success
Your Guide to Patio Container Gardening Success
Ready to turn that empty patio, balcony, or tiny backyard into your own personal green oasis? Welcome to the world of patio container gardening. It’s one of the most rewarding ways to grow everything from fresh kitchen herbs to jaw-dropping flower displays, all within arm's reach. This isn’t about complicated techniques; it's about making gardening simple, accessible, and a genuine joy for everyone.
Your Patio Garden: A World of Possibilities

The appeal of growing in pots is undeniable, especially if you’re short on space or just don't want a high-maintenance hobby. It’s not just about putting plants in dirt; it's about creating a little retreat that’s uniquely yours. Imagine stepping outside to snip fresh basil for dinner or sipping your morning coffee surrounded by blooms you grew yourself. This isn't some far-off dream—it’s completely achievable.
From my own experience, one of the biggest wins is the control it gives you. Weeding becomes a five-minute task, not a back-breaking chore. Pest management is far simpler when your plants are neatly contained. This makes container gardening the perfect entry point for beginners and a fun, creative project for seasoned green thumbs.
Setting the Stage for Success
To get from an empty patio to a thriving garden, we need to focus on a few core principles. These are the non-negotiables—the fundamentals that make the difference between plants that flourish and plants that flop. Get these right, and you're halfway there.
Before we dive deep, let's get a bird's-eye view of what truly matters. I've broken down the four pillars of patio gardening success into a quick table. Think of this as your cheat sheet for getting started on the right foot.
Key Elements for a Thriving Patio Garden

This foundation is what we'll build on throughout this guide. Getting these four things right from the beginning saves you so much time and frustration down the road.
This way of gardening is more than just a trend; it’s a movement. The global market for gardening pots hit around USD 18.33 billion in 2023 and is on track to soar past $25 billion by 2030. This boom is driven by a huge interest in gardening (especially among millennials) and the simple fact that more of us are living in cities where a patio is our main patch of green. You can dig into more of these gardening market trends on Grandviewresearch.com.
A thriving patio garden begins long before you buy a single plant. Success is rooted in thoughtful planning and understanding the four key pillars: the container, the soil, the plant choice, and the care routine.
Picking the Right Pots and Soil
If you want a thriving patio garden, the first thing to get right isn't the plants—it's their home. Choosing the right container and the right soil mix is probably the most important decision you'll make. It’s the foundation for everything that follows.
The pot you choose has a huge say in how often you water, how healthy the roots are, and even how long the container itself will last. What works for one plant might be a total disaster for another. Let’s break down your best options.
Match the Pot to the Plant's Needs
Every container material handles moisture and temperature differently. If you understand these quirks, you can build a garden that works with you, not against you.
Terracotta (Unglazed Clay): These classic pots are porous, meaning they breathe. This is fantastic for plants that hate "wet feet," like succulents, cacti, and Mediterranean herbs like rosemary or lavender. The clay wicks moisture away from the soil, helping it dry out evenly and preventing root rot. The downside? That same feature means you'll be watering a lot more in hot, sunny spots. They’re a poor choice for thirsty plants like ferns or impatiens.
Glazed Ceramic: These pots come in gorgeous, decorative finishes and are non-porous. That means they hold onto moisture incredibly well, cutting down on your watering chores. They are an excellent pick for thirsty annuals and vegetables that need consistent hydration to really produce. Their main drawbacks are their weight—they get heavy fast—and they can crack in a hard freeze if left outside.
Plastic & Resin: Lightweight, durable, and generally affordable, plastic pots are a practical workhorse for many gardeners. They retain moisture well and come in an endless variety of shapes and colors. My advice is to look for higher-quality, UV-resistant plastics. The cheap stuff will get brittle and fade to a sad, chalky color after just one season in the sun.
Fabric Grow Bags: Honestly, these are a game-changer for root health. The breathable fabric stops roots from circling around the pot and becoming "root-bound." Instead, when a root reaches the edge, it gets "air-pruned," which encourages the plant to send out a dense, fibrous network of healthy feeder roots. They offer incredible drainage and aeration, making it almost impossible to overwater.
The single most critical feature of any container is drainage. If your pot doesn't have holes in the bottom, you have two choices: drill some yourself, or find a different pot. Without a way for excess water to escape, roots will sit in a puddle and rot. That’s a death sentence for almost any plant.
Why You Can’t Just Use Garden Soil
Now for what goes inside the pot. It’s so tempting to just walk over to your garden bed and scoop some dirt into your container. Please don’t. This is one of the most common and critical mistakes new container gardeners make.
Garden soil is heavy. In the open ground, it has a whole ecosystem to keep it aerated. But inside a pot, it compacts into a dense, concrete-like brick that suffocates roots and drains poorly.
Instead, you need to use a potting mix. A good potting mix is a soil-less blend of ingredients specifically designed for container life. It’s lightweight, sterile (so no weed seeds or diseases), and provides the perfect balance of aeration, moisture retention, and structure for healthy roots.
You'll see a few key ingredients in quality potting mixes:
Peat Moss or Coco Coir: This is the base of the mix. It’s light and fluffy, and it does a great job of holding onto both water and nutrients for the plant.
Perlite or Vermiculite: These are the little white specks. They're lightweight volcanic materials that create air pockets in the mix, ensuring great drainage and preventing compaction.
Compost or Worm Castings: This is the good stuff. It adds vital organic matter and a slow-release source of natural nutrients to feed your plants over time.
The boom in patio gardening has brought some incredible products to the market. In fact, the global gardening pots market is projected to hit USD 70.89 billion by 2030, which just shows how many people are growing this way. This growth is driven by gardeners demanding better, smarter containers that improve plant health.
For most flowers, herbs, and vegetables, a good-quality, all-purpose potting mix will do the trick perfectly. If you get the itch to expand beyond pots on the patio, many of these same soil principles apply, and you can see how we handle it when building a raised garden bed in our detailed guide.
By starting with the right pot and the right mix, you’re setting the stage for a lush, productive patio garden from day one.

Selecting Plants That Flourish on Your Patio
This is where the real fun begins—the part where your patio’s personality starts to come alive. Choosing the right plants isn’t about following some rigid, one-size-fits-all list. It's about understanding what will truly thrive in your specific little corner of the world. Forget generic advice; let's get personal.
The very first thing you need to do is become a bit of a sun detective. Seriously. Spend a day just watching your patio. Where does the sun land? And just as important, for how long? This honest assessment is the single most critical step in picking plants that won't just survive, but will actually look amazing. A plant that craves 6+ hours of direct sun is going to sulk in a shady corner, and a delicate fern will get absolutely scorched in a spot that bakes all day.
Match Plants to Your Patio's Light
Once you’ve got a handle on your sun exposure, a whole world of possibilities opens up. You’re not just limited to one type of plant, either. This is your chance to mix vibrant flowers, fresh edibles, and stunning foliage all in the same space.
For Full-Sun Patios (6+ hours of direct sun): This is prime real estate for sun-worshippers. Think about those tough-as-nails Mediterranean herbs like rosemary, thyme, and oregano. For a blast of color that won’t quit, petunias, verbena, and lantana are absolute workhorses. And if you want to grow your own food, cherry tomatoes, peppers, and strawberries will be incredibly happy and productive.
For Partial Shade Patios (3-6 hours of sun): You have so many great options here. Begonias, impatiens, and fuchsias provide brilliant, lush color without needing the stress of intense sun. For fantastic foliage, you can't go wrong with the deep purples, oranges, and greens of coral bells (Heuchera) and coleus—they give you season-long interest. Many leafy greens like lettuce and spinach actually prefer this gentler light.
For Mostly Shade Patios (less than 3 hours of sun): Don't even think for a second that shade is a limitation! A shade garden can be incredibly lush and serene. Ferns, hostas, and caladiums create a beautiful tapestry of textures and shades of green. For a pop of color, try astilbe with its feathery plumes.
To help you visualize the possibilities, here is a breakdown of plants that work well in different sun conditions on a patio.
Patio Plant Selector by Sun Exposure
This table offers a quick comparison of suitable plants for different light conditions, helping you choose the right varieties for your patio.

Remember, these are just starting points. A quick chat with someone at your local nursery can open up even more ideas tailored to your specific area.
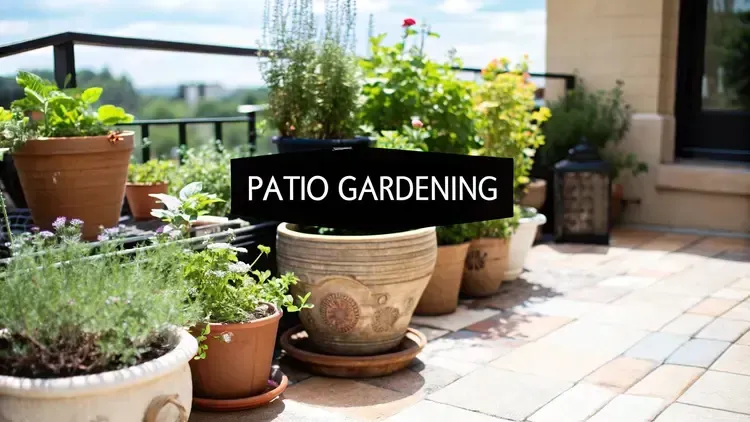
And here’s a little visual inspiration for how you can combine different types of plants to create a vibrant patio garden.As you can see, mixing herbs, flowers, and even a few veggies can make even the smallest space feel abundant and full of life. It’s all about picking the right plant for the right spot.
Designing with Thrillers, Fillers, and Spillers
There's a simple but incredibly effective design trick that pros use to create those stunning, full-looking containers you see at garden centers. It’s the "thriller, filler, spiller" method. Think of it as a foolproof recipe for creating balanced, eye-catching arrangements.
The Thriller, Filler, Spiller concept is a design principle, not a rigid rule. It’s a guide to help you think about height, volume, and trailing elements to create a visually complete and satisfying container garden.
Here’s how it breaks down:
The Thriller: This is your showstopper. It's the tall, upright plant that adds vertical drama and acts as the focal point. Think of things like ornamental grasses, a spiky dracaena, canna lilies, or even an upright rosemary topiary. It’s the first thing you notice.
The Filler: These are the mounding plants that nestle in around the thriller, filling out the middle of the pot. They add mass, color, and texture. Good fillers include coleus, basil, geraniums, or bushy petunias. They make the container look full and lush.
The Spiller: These are the plants that cascade gracefully over the edge of the pot. They soften the container's hard lines and draw the eye downward, connecting the pot to its surroundings. Calibrachoa (also called Million Bells), sweet potato vine, or trailing verbena are perfect spillers.
Imagine a single large pot on your sunny deck. You could start with a 'thriller' like a dramatic purple fountain grass. Then, surround it with a 'filler' of bright orange marigolds. Finally, let a lime-green sweet potato vine 'spill' over the side. That combination of height, color, and form is what makes a container arrangement really pop.
The key, of course, is to make sure all the plants in your combo enjoy the same amount of sun and have similar watering needs. Get that right, and you're well on your way to creating something beautiful.
Mastering How You Water and Feed Your Plants
Getting your watering and feeding routine right is where a lot of new gardeners stumble. It makes sense—in a pot, that plant is completely at your mercy for every drop of water and speck of food it needs. But once you learn to read what your plants are telling you, it’s one of the most straightforward parts of successful patio container gardening.
The soil in containers dries out so much faster than in a garden bed. It’s blasted by air from all sides, and certain pots, like porous terracotta, will actively pull moisture right out of the soil. This is why a rigid watering schedule—like clockwork, every other day—is almost guaranteed to fail you. A sudden heatwave, a windy afternoon, or a big growth spurt can change a plant's thirst overnight.
The only real solution is to ditch the calendar and get your hands dirty.
The Simple Finger Test for Watering
The most reliable tool you have for checking if a plant is thirsty is your own index finger. It’s low-tech, but it’s never wrong. Just stick your finger about two inches deep into the potting mix.
If it feels dry at your fingertip, it’s time to water. If you feel any moisture at all, hold off and check again tomorrow. That's it. This simple habit keeps you from both underwatering and the far more common problem of overwatering, which is a fast track to root rot.
When you do water, do it thoroughly. Don't just splash the top. Pour water slowly over the entire soil surface until you see it running freely from the drainage holes at the bottom. This ensures the entire root ball gets a good, deep drink. For a more detailed look at this, check out our guide on how often you should water your plants.
Decoding Plant Food and Fertilizer
The nutrients packed into fresh potting mix get used up surprisingly fast, especially by hungry plants like annual flowers and most vegetables. To keep them going strong all season, you’ll need to give them a little something extra. This is where fertilizer comes in.
On any bag or bottle of fertilizer, you’ll see three numbers. This is the NPK ratio:
N (Nitrogen): This is for lush, green, leafy growth.
P (Phosphorus): This supports strong roots and, importantly, flower and fruit production.
K (Potassium): This is for all-around plant health, vigor, and disease resistance.
A balanced fertilizer like 10-10-10 is a great all-purpose choice for many plants. For something like petunias or tomatoes, you might want a fertilizer with a higher middle number (P) to really encourage a lot of blooms.
Expert Tip: Think of fertilizer as a vitamin supplement, not the main meal. Consistent watering and good sunlight are far more important. It's easy to overdo it, and too much fertilizer can "burn" plant roots, causing more harm than good.
You'll generally run into two types of fertilizers: liquid and granular. Liquid feeds get mixed with water and are usually applied every 2-4 weeks, giving your plants a quick, direct boost of nutrients. Granular, or slow-release, fertilizers are little pellets you mix into the soil when you plant. They dissolve slowly, feeding your plants over several months.
I often use both. I’ll mix a granular fertilizer into the soil at planting time and then supplement with liquid feeds during the peak growing season for the really heavy feeders like tomatoes. Learning to spot the signs—like yellowing leaves that might signal a need for nitrogen—will help you create a patio garden that’s not just surviving, but truly thriving.
Garden Care and Troubleshooting Common Problems

A thriving patio container garden isn’t just about putting plants in pots; it’s about starting an ongoing conversation with them. When you learn to read their signals and keep up with a few simple routines, you’ll be rewarded with a beautiful, productive space all season long.
A little maintenance goes a long way. For flowering plants, the simple act of deadheading—pinching or snipping off spent blooms—is a game-changer. This tiny bit of effort stops the plant from wasting energy on seed production and pushes it to create more flowers instead.
It's the same idea with culinary herbs like basil or mint. Don't be shy about snipping stems for your kitchen! Regular pruning encourages bushier, fuller growth, giving you a bigger harvest and keeping the plants from getting leggy and weak.
Identifying and Managing Garden Pests
No matter how well you care for your garden, pests can sometimes find their way to your patio. The secret is to spot them early, long before they can turn into a real headache. In container gardens, the two most common culprits are usually aphids and spider mites.
Aphids: These are tiny, pear-shaped insects that love to cluster on new growth and the undersides of leaves, sucking the life right out of the plant.
Spider Mites: Even smaller than aphids, these guys are tough to see with the naked eye. Your first clue is often the fine, silky webbing they leave behind, along with yellowing, stippled leaves.
The good news? You don't need harsh chemicals to fight back. A simple spray bottle filled with water and a few drops of dish soap is surprisingly effective. A good spray will knock off and suffocate most of these soft-bodied pests. For more stubborn issues, we cover more options in our complete guide to natural pest control for your garden.
Keeping a close eye on your plants daily is the best defense. A small pest problem is easy to manage; a full-blown infestation is a much bigger battle. Make a habit of checking under leaves as part of your watering routine.
Responding to Seasonal Changes
Your patio is its own little microclimate, and it shifts with the seasons. A summer heatwave can scorch your plants in minutes, while an unexpected spring frost can be just as devastating. Being ready for these shifts is what separates a good gardener from a great one.
During intense summer heat, your containers will dry out incredibly fast. This is when you might need to water once or even twice a day. Grouping your pots closer together can create a more humid micro-environment, and moving sensitive plants to a spot with afternoon shade offers some much-needed relief from the blistering sun.
We've seen just how adaptable this hobby is, especially with the recent surge in home gardening. The pandemic saw a massive boom in container gardening as people made better use of their outdoor spaces. A 2022 survey found that 82% of respondents planned to further improve their outdoor living areas, and container gardening has stuck around because it's so beginner-friendly and makes efficient use of any space. You can dig into more insights about the rise of container gardening on Greenhousegrower.com.
Your Patio Container Gardening Questions Answered
Even with a solid plan, the garden always has a way of throwing you a curveball. Questions pop up mid-season, and sometimes you just need a straight answer from someone who’s been there. Here are my go-to solutions for the most common hurdles I see fellow gardeners face with their patio containers.
How Often Should I Really Water My Patio Plants?
Forget the rigid watering schedule. The best tool you have is your own finger. I check my pots by sticking a finger about two inches into the soil. If it feels dry at the tip, it's time to water. If there’s even a hint of moisture, I’ll hold off and check again tomorrow. This simple habit is the single best way to avoid both under-watering and the far more common (and deadly) problem of root rot from overwatering.
When you do water, do it deeply. Give the pot a good, long drink until you see water flowing freely from the drainage holes at the bottom. This ensures the entire root ball gets saturated, not just the top layer. Keep in mind that every pot is its own little ecosystem—my terracotta pots dry out in a flash, while the big glazed ones hold moisture longer. During a real summer heatwave, I might water my smaller containers every single day, while the larger ones can go two or three days between drinks.
What Is the Biggest Mistake Beginners Make?
Having watched countless friends start their own patio gardens—and having made this mistake myself—I can tell you the number one pitfall is choosing a container that’s just too small for the plant. It’s such an easy trap to fall into at the garden center, but a tiny pot sets a plant up for a season of struggle. It chokes the roots, dries out in what feels like five minutes on a hot afternoon, and can’t hold enough nutrients to support a healthy, thriving plant.
The result is a stressed-out plant that demands constant attention just to survive. Always think about the plant's mature size when you choose its home. As a general rule, a 12-inch diameter pot is a great starting point for most annuals and common vegetables. Going bigger with your pots is the easiest shortcut I know to a happier, more forgiving garden.
Do I Need to Replace the Soil in My Pots Every Year?
This is a fantastic question, and my answer is: it depends on what you're growing.
For annuals and vegetables, yes, I absolutely recommend starting with a fresh bag of high-quality potting mix each spring. These plants are incredibly hungry feeders. They pull a huge amount of nutrients from the soil in just one season, and they also break down its structure.
For the long-term residents in your collection—like perennials, small shrubs, or dwarf trees in large containers—you don’t have to do a full soil replacement every year. Instead, I just "top dress" them. Each spring, I scrape off the top two or three inches of the old, depleted soil and replace it with a fresh, compost-rich potting mix. This little boost replenishes nutrients without the stress of a full repot. For these bigger plants, I plan on a complete repot with all-new soil every 2-4 years.
How Do I Stop My Pots from Getting Waterlogged?
Excellent drainage isn't just a suggestion; it's completely non-negotiable for container success. If a plant’s roots sit in soggy, waterlogged soil, they will rot. It’s that simple. Here are the three things I do to make sure that never happens:
Check for Holes: First and foremost, every single pot must have drainage holes. No exceptions. If a decorative pot doesn't have them, I either drill some myself or use it as a cachepot (a decorative outer pot) with a functional plastic pot inside.
Skip the Gravel Layer: Please, forget the persistent myth about adding a layer of gravel to the bottom of your pots. It’s an old wives’ tale that actually makes drainage worse. It creates what’s called a "perched water table," which essentially forces the lower layer of soil to stay saturated. Just use a quality, well-draining potting mix from top to bottom.
Give Them a Lift: I use "pot feet" or little blocks to lift all my containers an inch or so off the patio. It’s a simple trick, but it’s a game-changer. It guarantees the drainage holes can’t get blocked and allows air to circulate underneath the pot, which is fantastic for overall root health.
At The Grounded Homestead, we believe growing your own food should be accessible and rewarding. For more tips, personal stories, and weekly inspiration delivered straight to your inbox, sign up for our "Garden Notes" newsletter. Find your path to a healthier, homegrown lifestyle at https://thegroundedhomestead.com.


Facebook
Instagram
X
Youtube