
When to Transplant Seedlings A Gardener's Guide
When to Transplant Seedlings A Gardener's Guide
Knowing when to move your seedlings from their cozy starter tray to the big wide world of the garden (or a bigger pot) is one of those skills that feels like a sixth sense once you get the hang of it. The most reliable sign I've learned to watch for is the appearance of the first set of true leaves. This usually happens around 10 to 14 days after the seeds first sprout and tells you the plant is officially off to the races.
Reading the Signs Your Seedlings Are Ready

Perfecting your transplant timing has less to do with the calendar and more to do with really looking at your plants. If you move them too soon, their delicate systems can go into shock. Wait too long, and they become root-bound, stressed, and struggle to adapt to their new home.
The secret is learning to spot a few key visual cues. Once you know what to look for, you'll feel confident that you’re giving your seedlings the best possible start.
True Leaves Are the Green Light
The most important signal your seedlings will give you is the growth of their "true leaves." When a seed first pops up, it opens a pair of initial leaves called cotyledons. Think of these as the plant's packed lunch—they're part of the seed's embryo and provide that first burst of energy.
Soon after, the seedling will produce its next set of leaves. These will look like miniature versions of the adult plant's foliage. These are the true leaves, and they’re your green light.
A seedling is generally ready for transplanting once it has developed at least two to three sets of true leaves. This is a clear sign the plant has established a solid root system and is ready to start photosynthesizing in earnest.
Check the Root System
What’s happening below the soil is just as important as what’s happening above it. The roots should be well-developed but not a tangled, crowded mess.
To check, gently slide the seedling out of its container. A seedling that’s ready to go will have roots holding the soil together in a nice, cohesive plug. If you see a dense web of roots circling the bottom, that seedling is root-bound and needs to be transplanted immediately.
On the flip side, if the soil just crumbles and falls apart, the roots haven't developed enough. Give it a bit more time. If you're new to this whole process, our guide on how to start seeds indoors is a great place to build a foundation for growing strong, healthy seedlings from day one.
Choosing the right moment is crucial for helping your plants get established. Transplanting too early can reduce survival rates by up to 30%, while waiting too long causes root crowding and stunted growth.
Here’s a quick-glance table to help you recognize the signs of a ready seedling.
Quick Guide to Seedling Transplant Readiness
Use this table as a quick reference to determine if your seedlings are strong enough for their new home.

By keeping an eye on these indicators, you'll be able to move your seedlings at the perfect time, setting them up for a strong and productive season.
Acclimating Seedlings with Hardening Off
Moving a seedling from your cozy, controlled grow room to the wild outdoors is a huge shock to its system. I've seen it countless times: beautiful, healthy seedlings get fried, flattened, or stunned into submission the moment they're planted out. This is where hardening off comes in, and skipping it is probably the single biggest mistake new gardeners make.
Think of it as a training program for your plants. The goal is to gradually introduce them to the real world—direct sun, wind, and fluctuating temperatures. This process toughens up the plant's cell structure and thickens its protective waxy coating, preparing it for life outside the nursery. A sudden move can cause sun-scald, windburn, and severe transplant shock that can stunt growth or kill the plant outright.
The Seven-Day Acclimation Schedule
There's no need to overcomplicate it. A simple seven-day schedule is my go-to method for getting plants ready without overwhelming them. The key here is slow and steady.
Days 1-2: Start by placing your seedlings in a sheltered, shady spot for just one to two hours. A covered porch or the deep shade under a large tree is perfect. Then, bring them back inside.
Days 3-4: It's time to increase their outdoor stay to three to four hours. Let them catch a little bit of gentle morning sun, but get them out of there before the intense afternoon rays hit. Their tender leaves can't handle it yet.
Days 5-6: Now you can leave them out for most of the day—about five to six hours—in a spot that gets dappled sunlight. You should notice them getting stronger and more resilient to a light breeze.
Day 7: Let them have a full day outside. If nighttime temperatures are staying mild (above 50°F or 10°C), you can even let them stay out overnight. By this point, they should be tough enough for their new home in the garden.
Watching the weather and soil temperature is the whole point of hardening off. It ensures you're not pushing your seedlings into conditions that are too extreme too quickly.
A crucial tip I've learned the hard way: check the moisture levels in your seedling pots every single day during this process. The combination of sun and wind dries out those small containers much faster than you'd expect indoors. Don't let your plants get thirsty while they're working so hard to adapt.
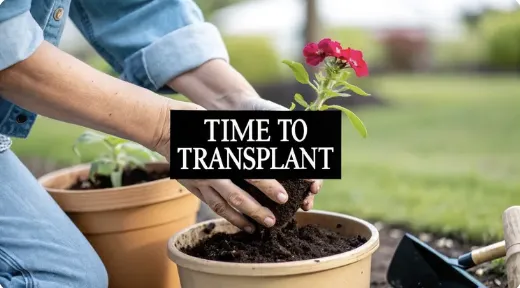
The Right Way to Transplant Your Seedlings

Your seedlings have been hardened off and are finally ready for the main event—the move into the garden. Getting this part right isn't about speed; it’s about finesse. The real goal is to make the transition so seamless that your plants barely notice they’ve moved homes.
Success starts with the soil. Your garden bed should be loose, well-amended with compost, and clear of any weeds. I always make a point to work the soil with a broadfork a day or two before planting. This ensures it's aerated and ready to welcome new roots. Tight, compacted soil is like a brick wall for a young plant, stopping its delicate roots from spreading out to find water and nutrients.
Easing Seedlings Into Their New Home
One of my most important tips is all about timing. If you can, choose a calm, overcast day. The cloud cover dials down the sun's intensity, giving your seedlings a much gentler introduction to the great outdoors. If you’re staring down a week of bright sunshine, no problem—just wait until late afternoon. This gives the plants the cool overnight hours to settle in before facing a full day of sun.
When you're ready to plant, the key is to handle the seedlings with care. Minimizing root disturbance is the best way to prevent transplant shock.
Water First: Give your seedlings a good drink in their trays about an hour before you plan to move them. This helps the entire root ball slide out of the container cleanly.
Gently Unpot: Turn the pot upside down while supporting the plant, and give the bottom a gentle tap. Always hold the seedling by its leaves or root ball—never by the delicate stem.
Handle with Care: If the roots are a bit tangled at the bottom (what we call root-bound), gently tease them apart with your fingers. This encourages them to grow outward into the new soil instead of continuing to circle.
Proper planting depth is crucial. For most vegetables, you'll want to plant them at the exact same depth they were in their pot. The big exception here is tomatoes—they can be planted much deeper, as they have the unique ability to grow new roots all along the buried portion of their stem.
Setting Your Plants Up For Success
Once the seedling is nestled in its new hole, gently backfill the soil around it. You're aiming to eliminate any large air pockets without compacting the soil too tightly. The final, non-negotiable step is to water them in thoroughly. This isn't just for hydration; it settles the soil snugly around the roots, ensuring immediate contact for water and nutrient uptake.
Temperature also plays a huge role here. Make sure the soil temperature is consistently above 50°F (10°C) for warm-season crops like tomatoes and peppers. Research has shown that transplanting at the two to four true leaf stage into soil that's warm enough can lead to survival rates exceeding 90%. This simple check helps you avoid that dreaded transplant shock. You can explore more data on transplanting success factors to really dial in your technique.
By following these simple but critical steps, you’re not just planting; you’re giving your seedlings the best possible welcome to their new home.
Post-Transplant Care to Prevent Shock
Getting your seedlings into the ground is a huge milestone, but the work isn't quite over. The first 48 to 72 hours are the most critical. This is when your tiny plants are recovering from the stress of the move and deciding whether they like their new home. Your main job is to manage moisture, provide a little shelter, and watch for signs of distress.
Proper watering is priority number one right now. You're aiming for soil that's consistently moist but never a soggy mess. Too much water will suffocate those fragile, developing roots just as easily as too little will dry them out. I make a habit of checking the soil with my finger every morning; if it feels dry about an inch down, it's time for a gentle, thorough soak.
For a deeper dive, check out our complete guide on how to water seedlings for best results.
Even with perfect watering, you'll probably see some wilting. This is the classic sign of transplant shock, and a little bit is totally normal. But if your plants are still drooping when the soil is moist, that’s their way of telling you they need a break from the intense sun.
Shielding and Supporting New Transplants
Your newly planted seedlings are tender and vulnerable. A little temporary shelter can make all the difference in their recovery, and it doesn't need to be fancy.
Provide Temporary Shade: If you transplanted on a bright, sunny day, give your seedlings some relief. Use a bit of shade cloth, an upside-down bucket, or even a piece of cardboard propped up to shield them from the harshest afternoon sun for a few days.
Protect from Pests: Young plants are a five-star meal for pests like cutworms. A simple collar made from a cardboard toilet paper tube pressed an inch into the soil around the stem is a surprisingly effective deterrent.
Hold Off on Fertilizer: It’s tempting to give your plants a nutrient boost to help them along, but you have to resist. Fertilizing right now can burn the delicate new roots that are working so hard to get established. Wait at least two to three weeks before you even think about applying a mild, liquid fertilizer.
By focusing on these simple aftercare steps, you give your plants the best possible chance to not just survive the move but to establish a strong root system that will support vigorous growth all season long. Think of it as a gentle recovery period before they get to work.
Transplanting Timelines for Common Vegetables
Knowing the general rules for when to move seedlings out is a great start, but every vegetable plays by its own clock. What works for a tomato plant could easily stress a head of lettuce, so timing your transplants to match each crop's needs makes a huge difference.
Warm-weather crops like tomatoes, peppers, and eggplants are the marathoners. They need a longer head start inside, usually about 6 to 8 weeks before your last frost date. They’re ready for the garden only after they have several sets of true leaves and, just as importantly, the soil has thoroughly warmed up.
Cool-weather crops, on the other hand, are sprinters with a much shorter and more flexible timeline.
Lettuce and Kale: These guys are eager to get outside. You can transplant them as early as 3 to 4 weeks after sowing. They’re quite hardy and actually appreciate the cooler spring soil.
Broccoli and Cabbage: Give these about 4 to 6 weeks indoors. This timing helps them get established and mature before the summer heat really kicks in.
It’s interesting to note that in the U.S. vegetable industry, commercial growers transplant cabbage and broccoli seedlings when they are 4 to 6 inches tall with 4–6 true leaves. This professional timing lines up perfectly with what works best for home gardeners, too. You can dig into more seedling agricultural standards if you're curious.
However, some vegetables just plain hate being moved. Root crops like carrots, beets, and radishes should almost always be sown directly into the garden. Disturbing their main taproot during transplanting is a recipe for stunted or forked growth.
Understanding these individual needs is a cornerstone of good garden planning for beginners. A well-timed transplant doesn't just get a plant in the ground—it sets each one up for a healthy, productive season.
A Few Common Questions About Transplanting
Even with years of experience, transplanting can throw a curveball now and then. Here are a few things I've learned to watch out for, based on questions I get all the time.
Can I Transplant on a Hot, Sunny Day?
It's tempting, I know. The weather is beautiful and you're ready to get your hands in the dirt. But transplanting in the heat of a sunny day is one of the fastest ways to stress a young plant. The combination of root shock and intense sun can lead to serious wilting or even kill the seedling.
My rule of thumb: Always transplant on a calm, overcast day or wait until the late afternoon. This gives your seedlings the entire cool evening and night to settle in before they have to face the sun.
What if My Seedlings Have Yellow Leaves?
Don't panic. Yellowing leaves are often just a sign that your seedling has eaten up all the nutrients in its little starter cell and is getting hungry. It’s basically telling you it's time to move.
As long as the plant looks sturdy otherwise, this is actually a perfect indicator of when to transplant seedlings. That move into a garden bed with rich, amended soil will give it the food it needs to green right back up.
What Happens if I Wait Too Long to Transplant?
Procrastination in the garden rarely pays off. If you wait too long, your seedlings will likely become root-bound. This is when the roots have nowhere else to go and start circling the inside of the pot in a tight, tangled mass.
A root-bound plant will struggle to establish itself in the garden and its growth can be permanently stunted. While you can sometimes salvage them by gently teasing the roots apart before planting, it's far better to get them in the ground on schedule. They’ll thank you for it.


Facebook
Instagram
X
Youtube