
How to Harvest Kale the Right Way (So It Keeps on Giving)

How to Harvest Kale the Right Way (So It Keeps on Giving)
How to Harvest Kale the Right Way (So It Keeps on Giving)
Cut-and-Come-Again: The Right Way to Harvest Kale
Which Leaves to Take and Which to Leave: The Bottom-Up Approach
How to Keep Kale Going for Months
Seasonal Timing: When to Plant and Harvest Kale by USDA Zone
Succession Planting: A Row That Lasts All Season
When It’s Time to Pull Your Kale
Post-Harvest Tips: Washing, Storing & Freezing Kale
Companion Plants That Help Kale Thrive
A Little Care Means a Lot More Kale
Frequently Asked Questions About Harvesting Kale
Looking for more professional guidance & homesteading resources?
The Gift That Keeps on Giving
I still remember the first time I tried to figure out how to harvest kale without killing the plant. I was about ten, out in Grandma’s kitchen garden, gripping a leafy stalk of curly kale with both hands like I was about to uproot a weed. One good yank—and I was left holding the whole vegetable, roots and all.
Grandma didn’t even look up. She just muttered, “Well, that’s one way to end your salad season early.”
Turns out, kale isn’t like pulling carrots or digging potatoes. This leafy brassicaceae, a cousin of broccoli and collard greens, is a biennial plant that can feed you for months—if you know the right way to prune.
With a simple cut and come again kale method, you can harvest this vegetable week after week, keep your plants lush, and pile your kitchen counter with fresh greens long into the growing season. It’s one of the simplest ways to boost your kitchen garden’s output without constantly sowing new seeds.
Cut-and-Come-Again: The Right Way to Harvest Kale
The biggest mistake folks make when they harvest kale is treating it like a head of lettuce—chopping it off at the base and ending the season in one go. But kale’s a biennial leafy brassica, built to give again and again if you work with it.
That’s where the cut and come again kale method shines. It’s the simplest, most productive way to keep your plants pumping out fresh leaves for weeks or even months.
Michigan State University Extension provides a detailed explanation of the cut and come again kale method, emphasizing why harvesting from the outer leaves keeps the plant producing.

Why it Works
Kale grows from the center bud (or crown). As long as you protect that leafy heart, the plant keeps pushing out new leaves. Clip off the right leaves, and you encourage it to keep producing instead of forcing it into survival mode.
This is the secret to how to harvest kale without killing the plant—you’re basically sending it the message: “Keep growing, I’m just taking a little.”
When to Start Picking Kale Leaves
Once your kale is about 8 to 10 inches tall and the outer leaves are roughly hand-sized, it’s ready for harvest.
This typically happens 30 to 40 days after transplanting, depending on your soil, water, and local temperatures.
Early harvests keep the plant young and leafy. Don’t wait until you’ve got giant, tough leaves the size of dinner plates—by then, you’re robbing yourself of tender greens for salads, smoothies, and quick sautés.
Quick Tip:
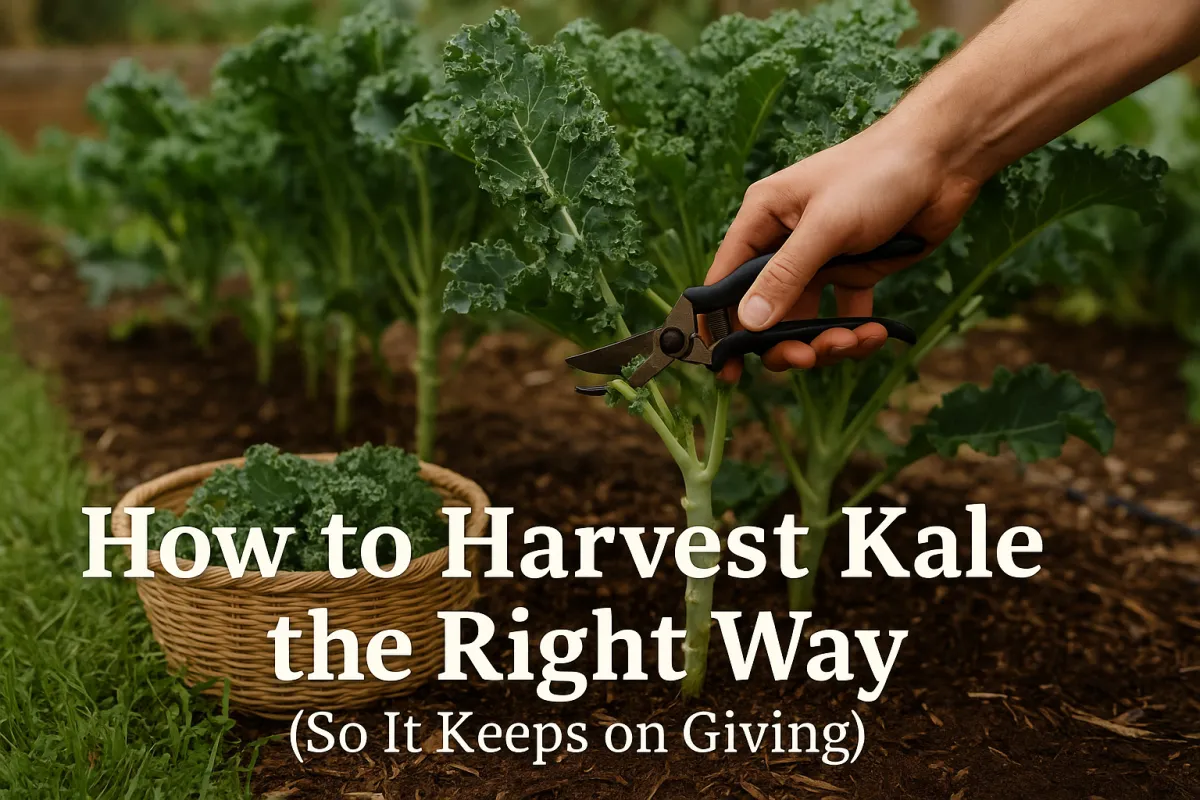
Use sharp pruning shears to make clean cuts. Tearing can damage the stem and invite pests or disease into your kale patch.
I’ve found that investing in a sturdy pair of sharp pruning shears like these makes all the difference. They give a clean cut that protects the kale’s main stem and keeps your leafy harvests coming.

Which Leaves to Take and Which to Leave: The Bottom-Up Approach
If you want your kale to keep sending out new leaves, you’ve got to be selective. This is the real heart of the cut and come again kale method, and it’s what keeps your plant thriving instead of stalling.
Harvest From the Bottom Up
Take the outermost leaves first. These mature, lower leaves have done their job supporting the plant’s growth. They’re ready for your kitchen—perfect for a raw salad, a hearty soup, or tossing into a morning smoothie.
Leave the center bud alone. That’s the kale’s growth engine. If you cut into it, you’ll stunt the plant or even kill it.
Think of your kale like a tiny leafy tree. You’re pruning away older “branches” to keep energy flowing to new growth.
How Many Leaves to Harvest at Once?
Stick to 3 to 5 leaves per plant per harvest. This balance keeps your kale vigorous and leafy.
Over-harvesting stresses the plant, slows regrowth, and invites problems like aphids or fungal issues.
Watch for Warning Signs
If your kale starts sending up skinny stalks or the new leaves get small and tough, it’s telling you it needs a breather. Ease off harvesting, give it a shot of compost tea or a mild fertilizer, and keep the soil consistently moist.

How to Keep Kale Going for Months
Done right, kale is one of the longest-producing vegetables you can tuck into your kitchen garden. With steady harvesting and a little extra care, your plants can crank out fresh leaves for weeks or even months, stretching your harvest well beyond what most folks expect.
Harvest Regularly
Pick every 3 to 5 days once plants hit stride.
Frequent harvesting keeps kale in its leafy, vegetative state, instead of rushing to flower.
Think of it like a workout — taking off those older leaves pushes energy into new growth.
Feed and Mulch
Give your kale a monthly drink of compost tea or diluted fish emulsion to keep soil nutrients balanced.
Lay down a light mulch of straw or shredded leaves to lock in moisture and moderate heat.
Healthy, well-fed plants resist pests like aphids, cabbage worms, and even flea beetles. You’re not just feeding the kale — you’re building a resilient patch.
Prevent Bolting in Heat
In the hottest stretches of the growing season, kale can bolt (send up a flower stalk) and turn bitter.
Keep the soil consistently moist and consider a shade cloth or row cover in the afternoon if you’re in a zone that pushes 90°F.
Grandma’s trick? An old sheet over the row at the hottest part of the day. Crude, but it works.
Quick Checks
Look under leaves for tiny white or green pests.
To avoid most pest headaches altogether, I’ll sometimes throw a lightweight row cover like this over my kale. It keeps bugs off while still letting water and sunlight through.
Crush aphids by hand or spray with soapy water if needed.
Prune off any yellowing or damaged leaves to keep airflow clean.
Want to tackle bigger issues? Check out my full guide on the top kale pests and diseases—and how to beat them naturally. It covers everything from cabbage loopers to fungal blight, so you can keep your kale patch thriving.
Seasonal Timing: When to Plant and Harvest Kale by USDA Zone
Kale is one of those leafy brassicas that thrives in cooler weather. That’s why knowing when to sow, transplant, and harvest makes all the difference in stretching your season.
Most folks think kale’s a spring vegetable, but if you time it right, you can enjoy it nearly year-round—even pick it sweet after a frost.

In cooler zones, kale pushes hard in spring and fall, slowing or bolting under summer heat.
In warmer zones, you can treat kale almost like a winter crop, picking tender leaves for salads, smoothies, and soups all the way through the mild months.
The Spruce offers a seasonal breakdown of when to pick kale leaves for regrowth, highlighting the ideal leaf size and timing across different varieties.
Frost and Flavor
A touch of frost actually improves kale’s taste, converting starches into sugars. That’s why so many old-timers wait until after the first frost to pick for their kitchen.
In my garden, lacinato kale and curly kale both get a bit sweeter and lose some of their bitter edge once they’ve been nipped by cold.

Succession Planting: A Row That Lasts All Season
Most folks drop a single row of kale seeds, harvest it until it bolts, then pull it up. That’s fine—if you want a short kale season. But if you want leafy greens on your table for months, the secret is succession planting.
Why Succession Matters
Kale’s a biennial, but heat, drought, or a hard push into flowering (bolting) can end a plant’s productive run early.
By sowing a few new seeds or setting out fresh seedlings every 2 to 3 weeks, you always have kale in different stages of maturity—some just hitting peak leaf production, others ready for heavy picking.
Knowing when and how to harvest matters, but choosing the right variety is the first step. Here’s our breakdown of Which Kale to Grow (and Why It Matters)
How to Stagger Your Plantings
Start your first row in early spring (or fall in warm zones), then drop another small row every few weeks.
Use compost-rich soil, keep it moist, and mulch lightly to hold down weeds and regulate heat.
Mix varieties like lacinato kale and curly kale for different flavors and textures in your kitchen.
This means while your older plants are getting tough or showing signs of bolting, your younger kale is lush, tender, and perfect for that morning smoothie or hearty sauté.
Extra Benefit: Pest & Soil Breaks
Different ages of plants confuse pests like cabbage worms and aphids.
Rotating small rows also makes it easier to manage soil nutrition—you can amend or add worm castings, compost, or mild fertilizer between waves.
When It’s Time to Pull Your Kale
Even the best-kept kale patch has its limits. This is a biennial brassica, after all—programmed by nature to grow leafy the first season, flower and seed the next. And sometimes, heat or stress will push it to finish early.
Knowing when to stop harvesting kale and start pulling plants means you make room for the next round of crops while keeping your soil healthy.
How to Spot Kale That’s Done
Leaves turn small, tough, or overly bitter.
The center sends up a thick flowering stalk (bolting) that stretches taller by the day.
No matter how much water or compost you give, it stalls on new leaf production.
This is the plant telling you it’s shifting from growing food for you to making seed for itself.
What to Do With Spent Kale
Chop and drop: Cut the plant at the base, leave the leaves and stalk to break down into the soil. Great organic matter right where your next seeds will go.
Compost: Add the tops to your compost pile, unless they’re loaded with pests like aphids or fungal spots.
Let one or two bolt fully: Collect your own kale seeds for the next growing season, or simply let them self-sow if you’re okay with volunteer seedlings popping up.

Post-Harvest Tips: Washing, Storing & Freezing Kale
You’ve done all that careful cut and come again kale harvesting, so don’t ruin it at the kitchen counter. Proper post-harvest handling is what keeps your kale tasting sweet and crisp instead of limp and slimy.
How to Wash Fresh Kale
Fill a basin or sink with cool water and a splash of vinegar to help dislodge any hidden aphids or soil.
Swish the leaves gently. Dirt and little pests will sink to the bottom.
Rinse under running water to finish.
If your kale is a bit wilted from the sun, soak it for 10–15 minutes—it’ll perk right back up.
Dry it Thoroughly
A salad spinner is your best friend here.
Or lay the leaves on a clean towel and gently pat them dry.
Water left on kale leads straight to rot once you bag it. The drier, the better.
How to Store Kale in the Fridge
Wrap kale loosely in a plastic bag or produce bag with a paper towel tucked inside to absorb excess moisture.
Store it in the crisper drawer.
Use within 5 to 7 days for the best flavor and texture.
For expert extension advice on how many leaves to harvest at a time and optimal storage methods, check out the University of Georgia’s Kale Harvest Guide from UGA Extension.
Grandma’s Freezer Trick for Kale
“Wash it, chop it, spread it on a baking sheet, freeze it flat. Then bag it up. It don’t clump, and it’s ready for a pot of soup or a green smoothie whenever you want.”
Flash freezing kale like this preserves the leaves individually—perfect for pulling out a handful at a time.

Companion Plants That Help Kale Thrive
If you want your kale patch to stay healthy, leafy, and practically pest-free, look to companion planting. Some neighbors do wonders for kale’s vigor—and others you’ll want to keep far away.
Best Companions for Kale
Onions & garlic: Their strong scent confuses pests like cabbage worms and aphids.
Nasturtiums & calendula: Trap crops that lure aphids away, plus they draw in pollinators.
Carrots & beets: Grow well alongside kale without competing for the same root space.
Mixing your brassicaceae crops with herbs and flowers keeps your kitchen garden balanced, draws in beneficial insects, and naturally reduces the need for heavy pest control.
What to Avoid Near Kale
Tomatoes & potatoes: These heavy feeders can hog nutrients your kale needs.
Other brassicas like broccoli or cauliflower: They share similar pest pressures—grouping them all together is like setting a buffet for cabbage worms.
Soil & Rotation Tip
Rotate kale beds yearly. Don’t plant kale (or its cousins like collards and chard) in the same spot two seasons in a row. This breaks up disease and pest cycles that can overwinter in the soil.
A Little Care Means a Lot More Kale
At the end of the day, knowing how to harvest kale without killing the plant is about more than technique. It’s a relationship. You feed it, prune it, keep the pests off its leaves—and it fills your kitchen with bowls of leafy greens, pot after pot of soup, and handfuls for your morning smoothie.
Use the cut and come again kale method, harvest from the bottom up, and keep that center bud growing strong. You’ll be amazed at how long a simple row of kale can keep giving.
Frequently Asked Questions About Harvesting Kale
How do I know when to pick kale leaves for regrowth?
Start picking when the plant is about 8 to 10 inches tall and outer leaves are the size of your hand. Always harvest the bottom, mature leaves, and leave the top center bud alone. This keeps kale regrowing for weeks.
Will kale grow back after cutting?
Yes! As long as you use the cut and come again kale method—taking just a few of the oldest outer leaves each time—your kale will keep sending up new growth. That’s what makes it a kitchen garden staple.
Can I harvest kale in summer heat?
You can, but watch for signs of stress or bolting (like a central flower stalk starting to rise). Provide light shade in hot afternoons and keep the soil moist. A little mulch goes a long way.
How do I keep pests off my kale?
Mix in onions, nasturtiums, or calendula as companions to repel aphids and cabbage worms. Check under leaves regularly. A quick blast of soapy water or a sprinkle of neem oil tackles most small infestations.
What’s the best way to store kale after harvesting?
Wash with cool water and a splash of vinegar, dry thoroughly, then store in a plastic bag or produce bag with a paper towel inside. Keep it in your fridge’s crisper drawer for up to 7 days, or flash freeze for long-term use.
Video Summaries of this issue:
As always, the tools and supplies I mention are the same ones I rely on here at The Grounded Homestead. Some are affiliate links, which means I may earn a small commission—at no extra cost to you—but every recommendation is based on real use and trust.
Looking for more professional guidance & homesteading resources?
Explore our trusted guides to learn more about growing healthy food, managing your land, and building lasting systems for your homestead. Whether you're looking for planting tips, seasonal checklists, or natural solutions that actually work—we’ve got you covered.
Start with these helpful reads:
Everything to know about Strawberries:
Start with Strawberries: Ground Your Garden with Fruit that Grows Back
6 Common Strawberry Plant Diseases and How to Treat Them Naturally
The 6 Pests That Wreck Strawberry Crops—and How to Beat Them Naturally
Beyond Straw: Choosing the Right Mulch for Every Strawberry Bed
Runner Management 101: Multiply Your Strawberry Patch with Purpose
Frost, Flood, and Fungus: Protecting Strawberries in Extreme Weather
The Best Strawberry Varieties for Continuous Summer Harvests
Top 14 Practical Uses for Fresh Strawberries (Beyond Jam)
Start a U-Pick Strawberry Business (Even on 1 Acre)
How to Fertilize Strawberries for Yield, Flavor, and Runner Control
Strawberries in Small Spaces: Balcony, Border, and Vertical Growing Techniques
Wild Strawberries vs. Cultivated: Should You Grow Fragaria vesca?
The Complete Guide to Propagating Strawberries: Growing Strawberries from Seed
How to Integrate Strawberries Into a Permaculture Garden
How to build a low-maintenance 4-bed strawberry system’
Everything to know about Raspberries:
Start with Canes: How to Plant Raspberries for a Lifetime of Fruit
Raspberry Care 101: From Cane to Crop Without the Fuss
Build a Raspberry Trellis That Lasts: Sturdy DIY Designs for Any Backyard
When and How to Cut Back Raspberries: The Right Way to Prune Summer and Fall Types
Raspberry Troubleshooting Guide: Yellow Leaves, No Fruit, and Cane Dieback
Raspberry Pest Guide: What’s Bugging Your Patch (and What to Do About It)
Everything to know about Lettuce:
Lettuce 101: How to Grow Crisp, Clean Greens Anywhere
The Lettuce Succession Plan: How to Get a Salad Every Week from Spring to Fall
Top 5 Lettuce Diseases—and What to Do When They Show Up
Top 5 Lettuce Mistakes New Gardeners Make
Top 5 Lettuce Pests—And How to Keep Them Out Naturally
Everything to know about Tomatoes:
Tomatoes 101: How to Grow Strong, Productive Plants from Seed to Sauce
Tomato Feeding Guide: What to Add, When to Add It, & How to Avoid Overdoing It
The Top 5 Tomato Problems—And How to Fix Them Before They Ruin Your Harvest
Pruning Tomatoes: When, Why, and How to Do It Without Hurting Your Plants
The Top 5 Mistakes First-Time Tomato Growers Make (And How to Avoid Them)
Everything to know about Kale:
The Top 5 Kale Pests — How to Protect Kale from Bugs Organically
Kale 101: A No-Fuss Guide to Growing Tough, Nutritious Greens
What to Do When Kale Looks Rough: Yellowing, Holes, or Curling Leaves
Kale Varieties Demystified: What to Grow and Why It Matters
How to Keep Kale from Getting Bitter (Even in Warmer Months)
Other Offerings:
The Summer Garden Reset: What to Do After Your First Harvest
How to Keep a Backyard Garden Alive in 90° Heat (Without Daily Watering)


Facebook
Instagram
X
Youtube