
How to Raise Meat Chickens: A Practical Guide
How to Raise Meat Chickens: A Practical Guide
Raising your own meat chickens is one of the most direct paths to self-sufficiency. It boils down to a few key stages: picking the right breed for your goals, setting up a safe brooder and coop, sticking to a feed plan built for rapid growth, and getting ready for processing day. If you can master these steps, you’ll be filling your freezer with high-quality, homegrown poultry in just a matter of weeks.

Your First Flock of Meat Chickens
Welcome to the incredibly rewarding journey of raising your own meat chickens. This guide is designed to give you a clear, no-nonsense roadmap of what to expect, focusing on the real-world experience of bringing your food source a little closer to home. There's a deep satisfaction that comes from knowing exactly how your food was raised, and this is your starting line.
Now, this process is a different ballgame than keeping a flock for eggs. While there are some overlaps in basic care, the goals, timelines, and breeds are fundamentally different. If you're also after fresh eggs, it's crucial to understand the nuances between the two. You can learn more about that in our guide to raising chickens for eggs. With meat birds, the entire focus is on efficient, healthy growth over a much shorter period.
Understanding the Lifecycle
Raising meat chickens, often called broilers, is a carefully staged process built around rapid growth and feed efficiency. Commercial breeds like the Cornish Cross can hit a market weight of 5 to 6 pounds in as little as six to eight weeks. That incredible growth comes from generations of selective breeding and a diet packed with nutrients.
A key metric you'll hear about is the feed conversion ratio (FCR)—basically, how much feed it takes to produce one pound of body weight. Modern broilers are impressively efficient, often achieving an FCR around 1.5 to 1.8. This means it takes less than two pounds of feed to get one pound of chicken. You can find more insights on this from industry sources like this article about chicken meat production on avinews.com.
This accelerated timeline is exactly what makes raising meat birds so accessible for homesteaders. It’s a short-term commitment with a big payoff.
The primary goal is simple: provide a safe, low-stress environment with unlimited access to high-protein food and clean water. When you get those basics right, the birds thrive, grow quickly, and stay healthy, which makes the whole process—from brooder to freezer—so much easier.
Before we dive into the details, here's a quick overview of the key phases you'll be managing.
: chicks reach 1–1.5 lbs, need warmth, starter feed, clean water. Grow-Out Stage (Weeks 4–8+): chickens reach 5–6 lbs, require finisher feed, predator protection, clean coop. Processing Day (Weeks 6–12): chickens weigh 6–8 lbs live, dressed weight 3.5–5.5 lbs, processed humanely. Feed Conversion Ratio: 1.5–1.8 pounds feed per pound of growth.")
Meat Chicken Raising Lifecycle at a Glance
This table breaks down the entire process into manageable stages, giving you a clear picture of what to focus on and when.
, Grow-Out Stage (weeks 4–8+), Processing Prep (final week), and Processing Day (weeks 6–12), with primary care focus for each stage.")
Each phase has its own rhythm and set of tasks, but they all flow logically into the next.
What to Expect on Your Journey
Your journey will be divided into these distinct phases, each with its own set of tasks and observations.
The Brooder Stage (Weeks 1-3): This is the most delicate and hands-on phase. You'll be managing a warm, draft-free space for your day-old chicks, constantly checking that they have the right temperature, fresh starter feed, and clean water.
The Grow-Out Stage (Weeks 4-8+): Once the chicks feather out, they move to a larger coop or a mobile chicken tractor. Your focus shifts to providing finisher feed, keeping them safe from predators, and maintaining a clean environment to prevent health issues.
Processing Day (Week 6-12): This is the final step in the process. Whether you decide to do it yourself or hire a professional, preparation is everything. A smooth, humane experience is the goal.

Choosing the Right Meat Chicken Breed
Your first big decision is staring you down from the pages of the hatchery catalog: which breed to choose? This goes way beyond just picking a name you like. The breed you select will dictate your timeline, your feed bill, and even what the final product tastes like. It’s a choice that shapes the whole experience, so let’s get it right.
Broadly speaking, meat birds fall into two camps. You've got the fast-growing hybrids bred for speed and efficiency, and then you have the slower-growing heritage or "ranger" types that offer a whole different set of perks. Neither one is better than the other—it just comes down to what you’re trying to accomplish on your homestead.
The Commercial Powerhouse: The Cornish Cross
If you’ve ever bought a chicken from the grocery store, you’ve eaten a Cornish Cross. These birds are the undisputed kings of efficiency. They’re hybrids, bred specifically for one thing: turning feed into muscle at an incredible rate.
A Cornish Cross can be ready for butcher day in as little as six to nine weeks. That quick turnaround is their main selling point, making them perfect if your goal is to fill the freezer fast and cheap. But that explosive growth comes with a few strings attached.
Potential Health Issues: Their bodies grow so quickly that their legs and organs sometimes can't keep up. This can lead to leg problems or even heart failure, especially if you let them eat around the clock.
Not Big on Foraging: These birds are couch potatoes. They’re happy to hang out by the feeder all day, which makes them simple to manage but a poor fit for a true pasture-raised setup where you expect your birds to hustle for some of their own food.
For a first-timer who wants a predictable, fast result, the Cornish Cross is usually the way to go.
The Homesteader's Favorite: Ranger Breeds
On the other side, you have the slower-growing birds, often called "Rangers." You’ll see names like Freedom Ranger or Red Ranger. These chickens were developed to be hardier, more active, and better suited for life out on pasture.
The biggest difference you'll notice is the timeline. A Ranger breed usually takes nine to twelve weeks to reach a good processing weight. Yes, that means a longer commitment and a bit more feed over their lifetime, but the trade-off is worth it for a lot of homesteaders.
Rangers are just more robust, active birds. They actually enjoy hunting for bugs and greens, which not only supplements their diet but also gives the meat a richer, more complex flavor. Their slower growth puts way less stress on their bodies, meaning you’ll see far fewer health problems.
Choosing between these two popular options really comes down to what you prioritize: speed and efficiency, or hardiness and flavor. This table breaks it down.
Cornish Cross vs. Ranger Breeds: A Practical Comparison
This comparison should help you see the trade-offs at a glance. Think about your goals, your space, and your timeline as you review the key differences.

Ultimately, the "best" breed is the one that fits your system. The Cornish Cross is a production machine, while the Ranger is a well-rounded homesteader's bird.
Making the Right Choice for Your Homestead
So, how do you actually decide? Let's run through a couple of common scenarios.
Scenario A: The Time-Crunched Homesteader You've got a busy schedule and a small window—maybe two months in the summer—to raise chickens. The main goal is to get as much meat in the freezer as possible with minimal time invested. For you, the Cornish Cross is the clear winner. Their rapid growth fits perfectly into that tight schedule.
Scenario B: The Pasture-Focused Homesteader Now, let’s imagine a homesteader with a bit of land who wants to raise birds in a chicken tractor, moving them across the pasture. Flavor and hardiness are more important than speed. In this case, a Freedom Ranger or Red Ranger is the perfect choice. These birds will thrive out on grass, actively forage, and produce that delicious, nutrient-dense meat you’re looking for.
Choosing your breed really boils down to your personal goals and practical limits. Think hard about your time, your space, and what you value most—speed, flavor, or animal welfare. Your answer will point you straight to the right birds for your first flock.
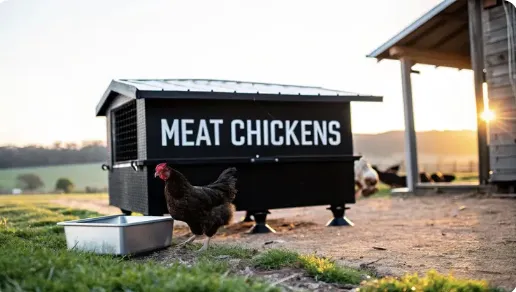
Building a Safe Brooder and Coop

A thriving flock starts with a secure, comfortable home. It's non-negotiable. Your meat chickens will need two completely different setups during their short lives: a cozy, warm brooder for the first few weeks, and then a larger, predator-proof coop or tractor for their grow-out phase.
Getting these two environments right from the very beginning will save you a massive amount of stress and prevent potential losses down the road.
The first home your chicks will ever know is the brooder. Think of it less like a box and more like a mechanical mother hen. Your goal is to create a draft-free space that provides consistent warmth, fresh food, and clean water. You don't need anything fancy here—a large stock tank, a galvanized steel tub, or even a sturdy cardboard box can work perfectly for a small batch of chicks.
The All-Important Brooder Setup
The most critical piece of equipment in your brooder is the heat source, which is almost always a heat lamp. Day-old chicks can't regulate their own body temperature, so they are completely dependent on you for warmth.
A solid rule of thumb is to start the temperature directly under the lamp at 95°F for the first week. From there, you'll drop the heat by about five degrees each week until the chicks are fully feathered and the brooder temperature matches the ambient air.
A reliable heat lamp like this one makes all the difference—keeping your chicks at the perfect temperature without constant fuss.
Don't have a thermometer? Just watch the chicks. They'll tell you everything you need to know. If they're all huddled directly under the lamp in a tight ball, they're too cold. If they're pushed out to the far edges of the brooder, they're too hot. A happy, comfortable flock will be spread out evenly, chirping contentedly and moving about.

For bedding, you can't go wrong with pine shavings. They’re super absorbent, do a great job controlling odor, and give the chicks something to scratch around in. Just be sure to avoid cedar shavings—their aromatic oils can cause serious respiratory issues in young birds. Also, steer clear of newspaper or other slippery surfaces, which can cause a permanent leg deformity called "splayed leg."
Key Takeaway: A proper brooder is a safe zone. Get rid of any sharp 90-degree corners by piling up bedding there. This one simple step prevents a chick from getting trapped and trampled by its flockmates, which is a common cause of mysterious losses in the first few days.
Transitioning to a Grow-Out Coop
After about three to four weeks, your little fluffballs will start looking more like actual chickens. Once they have most of their feathers, they’re ready to move out of the brooder and into their "forever home." This is where you have a big decision to make between two popular housing styles: a stationary coop or a mobile chicken tractor.
A stationary coop is a permanent structure, usually with an attached, fenced-in run. This can be a great choice if you have a dedicated spot for your birds, but it demands diligent cleaning to prevent manure from building up and creating a hotspot for disease.
On the other hand, a mobile chicken tractor is a bottomless pen that you move to a fresh patch of pasture every single day. This is the method many homesteaders swear by. It gives the birds constant access to fresh grass, weeds, and bugs while naturally fertilizing your land. It also just about eliminates the need for cleaning. If that sounds like your style, we have a detailed guide on how to build a chicken tractor that walks you through the entire process.
Designing for Safety and Health
No matter which style you choose, a few design principles are absolutely essential for keeping your flock safe and healthy. Predators are a constant threat, and your coop is their main line of defense.
Predator Proofing: Use 1/2-inch hardware cloth—not chicken wire—to cover any openings, including ventilation gaps. A raccoon can tear through chicken wire like it’s not even there. Make sure all your latches are secure and can't be easily flipped open by clever paws.
Proper Ventilation: Good airflow is critical for preventing respiratory illnesses, which can spread like wildfire in a flock. Ventilation should be placed high up in the coop, well above the birds' heads. This allows ammonia and moisture to escape without creating a cold, direct draft on your chickens.
Adequate Space: Overcrowding is a recipe for stress, filth, and disease. A good baseline is to plan for at least 2 square feet per bird in their coop or tractor. Giving them enough room to move around ensures they stay healthier and cleaner all the way to processing day.
The sheer efficiency of modern poultry production is a testament to getting the environment right. Global broiler meat output has climbed steadily, reaching an estimated 103.7 million metric tons in 2024. That success is built on the same fundamental principles of biosecurity and proper housing that are just as critical on a small homestead. You can dig into more data about global poultry production trends on Statista.com.
By focusing on these core elements—warmth in the brooder, security from predators, and a clean, well-ventilated coop—you’re creating an environment where your meat chickens can truly thrive.
A Practical Feeding and Watering Strategy

Get ready, because feed is going to be your single biggest expense. How you manage it will make or break your budget and directly impact your birds’ health. A smart feeding program gives your flock exactly what they need at each stage of their ridiculously fast growth, without pouring money onto the ground.
And don't forget the other half of the equation: water. It's easy to overlook, but constant access to clean, fresh water is absolutely non-negotiable. A dehydrated chicken is a stressed chicken, and stress is the first step toward a whole host of problems.
Building a Phased Feeding Plan
Meat chickens are like tiny athletes in training—their nutritional needs change as they bulk up. This is mostly about protein. Their diet is usually broken into a couple of distinct phases, each with a specific feed designed to fuel their development.
Chick Starter (Weeks 1-3): This is their high-octane fuel. You're looking for a feed with 22-24% protein. That initial protein blast is vital for building a strong frame and getting those chicks off to a roaring start.
For first-time flocks, starting with a quality medicated chick starter feed is inexpensive insurance—it helps your chicks build natural immunity while you’re learning the ropes.
Grower/Finisher (Week 4 to Processing): Once they move out of the brooder, it's time to switch to a finisher feed. This blend has a slightly lower protein content, typically 18-20%, and is geared toward packing on muscle and healthy weight in those final weeks.
Some commercial feed lines have a middle "grower" phase, but for most of us on a smaller scale, a simple two-stage plan works just fine. While grabbing pre-made feed is the easiest route, you can also mix your own. If you're curious, we have a whole guide on how to make chicken feed with recipes and tips.
Breed-Specific Feeding Tactics
How you feed is just as important as what you feed, especially with the different breeds out there. The super-fast-growing Cornish Cross needs a different approach than the more active Ranger types to keep them from literally growing too fast for their own good.
Cornish Cross are genetically programmed to eat. And eat. And eat. This can lead to serious leg problems and even heart failure as their bodies outgrow their own support systems. To prevent this, most homesteaders restrict their feed. A common and effective schedule is 12 hours on, 12 hours off. You put the feed out in the morning and take it away at night. This gives their bodies a much-needed break to catch up.
Rangers, on the other hand, are better at self-regulating. They're more active foragers and can typically be "free-fed," meaning they have access to their food 24/7 without the same health risks.
A smart feeding strategy is a cornerstone of raising healthy meat chickens. As global demand for poultry grows, with projections showing a 15 million tonne increase from Asia alone by 2034, efficient and sustainable feeding practices become even more critical for homesteaders and large-scale producers alike. Read more about these global meat production trends from the OECD.
, 22–24% protein. Step 2: Finisher Feed (Weeks 4–Processing), 18–20% protein. Cornish Cross: limit feed to 12 hours. Rangers: free-fed. Watering section: elevate waterer to back height, clean and refill daily, consider nipple drinkers to reduce contamination.")
Keeping Water Clean and Accessible
Your birds should never have to look for water. The real challenge isn’t just providing it; it's keeping it clean. Chickens are masters at kicking bedding, dirt, and droppings into their waterers within minutes.
Here are a few tricks that actually work:
Elevate Your Waterer: Put the waterer up on a couple of bricks or a small wooden block. If you raise it to about the height of the chickens' backs, it's much harder for them to scratch gunk into it.
Choose the Right Type: Simple gravity-fed waterers are fine for chicks. As they get bigger, consider upgrading to a larger system or trying out poultry nipple drinkers. Nipples are mounted on a bucket or PVC pipe and are almost impossible for the birds to contaminate.
Switching to a simple nipple drinker system is one of the easiest upgrades you can make—it keeps the water clean and saves you time on daily chores.
Clean and Refill Daily: Make this a non-negotiable part of your daily chores. Scrubbing and refilling the waterer every single day prevents nasty bacteria from building up and ensures your flock is always drinking fresh, clean water.
Nailing your feeding and watering strategy is one of the most impactful things you can do for a successful flock. It's the foundation of their growth rate, the quality of the meat, and your final costs.
An ounce of prevention is worth a pound of cure, and nowhere is that truer than in the chicken coop. The real secret to a successful flock isn't complicated veterinary science—it's proactive health management and a few smart biosecurity habits. If you learn to spot trouble when it’s small, you can keep it from ever getting big.
Your goal is to create a low-stress environment where your birds can just… be chickens. That makes daily observation your most important chore. A few minutes watching them scratch and peck each morning and evening teaches you what’s normal. Before you know it, you'll be able to spot a bird that's "off" from a mile away.
Tackling Common Chick Ailments
In that first week, one of the most common hiccups you might run into is pasty butt. It’s exactly what it sounds like: droppings get stuck to a chick's vent and seal it shut, which can be fatal if you don’t intervene. This is usually caused by the stress of shipping or slight temperature swings in the brooder.
Fixing it is straightforward. Gently hold the chick and use a warm, damp paper towel to soften and wipe the blockage away. The key is to be extremely gentle and avoid pulling, as their skin is paper-thin. A tiny dab of coconut oil or petroleum jelly on the clean area can help keep it from happening again.
Another big one to watch out for is coccidiosis, a nasty intestinal parasite that absolutely loves damp, dirty conditions. It can spread like wildfire and cause serious losses in a young flock.
You have two main battle plans for prevention:
Medicated Feed: Using a starter feed with a built-in coccidiostat is a popular and effective way to help chicks build up their natural immunity.
Immaculate Conditions: If you’d rather use non-medicated feed, you have to be relentless about keeping the brooder bone-dry and spotless.
Plenty of homesteaders raise birds on non-medicated feed by being obsessive about cleanliness, but for your first few flocks, that medicated starter is some mighty cheap insurance.
Daily Health Checks and Biosecurity
Your daily health check doesn't need to be a formal inspection. Just pay attention while you're filling their feed and water. Healthy chickens are busy, bright-eyed, and curious. A bird in trouble will often stand apart from the others, look lethargic, or have ruffled, messy-looking feathers.
Simple biosecurity isn't about creating a sterile hospital room; it's about breaking the chain of disease. Small, consistent habits make all the difference in protecting your flock from illnesses they have no defense against.
Putting some basic biosecurity into practice is one of the smartest things a chicken keeper can do. You don’t need any fancy equipment—just good habits.
A great place to start is creating a "coop zone." This just means having a dedicated pair of boots or shoes that you only wear when you're in the chicken area. This simple act stops you from tracking in nasty bacteria, viruses, or parasites from the outside world on the bottom of your shoes.
You also need to protect your feeders and waterers from wild birds. Sparrows and starlings can be carriers for all sorts of things, like Avian Influenza and mites. Using covered feeders or keeping them inside the coop or tractor, where wild birds can't get to them, is a critical step. A little bit of forethought here goes a long way in keeping your birds safe and on track for a healthy harvest.
Navigating Processing Day with Confidence

Processing day is the final step in this whole journey, and let’s be honest, it can be an intimidating one. But with the right mindset and good preparation, it becomes a respectful, manageable conclusion to all your hard work. You can handle it yourself or hire a professional—either way, the goal is to make the process humane, clean, and efficient.
The first thing to figure out is when your birds are actually ready. For the fast-growing Cornish Cross, this day arrives surprisingly quickly, usually between 6 to 9 weeks. You’re aiming for a live weight of around 5 to 7 pounds, which should give you a dressed bird between 3.5 and 5 pounds. If you went with a slower-growing breed like the Rangers, you’ll need more patience; they often take 11 to 16 weeks to hit a similar size.
The DIY Homestead Approach
For those of us committed to seeing the process through from start to finish, having the right gear is non-negotiable. It’s what turns a daunting task into a streamlined, repeatable workflow. A well-prepared setup is really the key to a calm and successful day.
Here's the essential equipment that makes all the difference:
Killing Cones: These hold the bird securely and humanely, making for a clean and quick dispatch.
A Sharp Knife: A dedicated, razor-sharp knife is absolutely crucial for a swift, humane cut. Don't skimp here.
Scalder: This is just a large pot or a dedicated unit for holding hot water—right around 145-150°F—to loosen the feathers before plucking.
Plucker: You can definitely pluck by hand, but a tub-style plucker or even a drill attachment will save you an incredible amount of time and effort.
Evisceration Station: A clean, non-porous table (stainless steel or plastic works great) is what you'll need for gutting and cleaning the birds.
The process itself has a few distinct stages: dispatching, scalding, plucking, and eviscerating. Each part requires your full attention and a deep respect for the animal. Taking the time to learn these skills is a huge step toward real food independence.
Finding a Professional Processor
If the DIY route just isn't for you, there's no shame in that. Hiring a professional is an excellent alternative. The best way to find a local poultry processor is often by asking around at your local feed store or connecting with other homesteaders in your area.
When you hire a professional, you're paying for their expertise and their specialized equipment. It ensures a consistent, clean result and frees you from the most challenging part of the process. This lets you focus on what you do best: raising healthy birds.
Before you book, make sure to ask a few key questions. Inquire about their humane handling practices, what they charge per bird, and whether that price includes packaging. Crucially, ask how far in advance you need to schedule an appointment. Good small processors often book up months ahead, especially during the busy season.
Even with the best-laid plans, questions always come up, especially when you’re doing something for the first time. We get a lot of the same ones from homesteaders just starting their meat bird journey.
Let's clear up a few of the big ones. Getting these answers straight from the get-go can save you a ton of headache and help you move forward with confidence.
How Much Does It Cost to Raise 25 Meat Chickens?
This is the million-dollar question, isn't it? The final number will shift a bit depending on where you live and what feed costs, but a solid ballpark estimate to raise 25 meat chickens is somewhere between $400 and $600.
That budget covers the chicks themselves (which usually run $3-$4 a pop), all the feed they’ll tear through, fresh bedding, and any gear you might need to buy upfront, like feeders and waterers.
Your biggest line item, by a long shot, will be feed. Each one of those birds is going to pack away about 15-20 pounds of feed before processing day. This is where buying in bulk really pays off; it's one of the best ways to bring down your cost per bird.
Can I Raise Meat Chickens and Egg Layers Together?
It’s tempting to combine flocks to save space, but their needs are so different that housing them together almost always leads to trouble for both sides.
Here’s why it’s a bad mix:
Totally Different Diets: Meat birds are athletes in training, and their high-protein feed is like rocket fuel. That same feed is way too rich for laying hens and can cause serious kidney damage over time.
Size and Safety Mismatch: Broilers get big, and they get big fast. A clumsy, heavy Cornish Cross can easily trample or injure a smaller, slower-moving hen, especially when everyone crowds the feeder.
For the health and well-being of your entire flock, keep them in separate coops and runs. No exceptions.
The most successful homesteading ventures come from understanding the specific needs of each animal. Separating meat birds from layers isn't just a suggestion; it's a critical management practice that prevents stress, injury, and illness.
What Is the Ideal Processing Weight for a Broiler?
For a Cornish Cross, you’re aiming for a live weight of 5 to 7 pounds. They usually hit that sweet spot in just 6 to 9 weeks. After processing, that’ll give you a beautiful dressed bird weighing somewhere between 3.5 and 5 pounds—perfect for the dinner table.
If you’re raising a slower-growing heritage breed like the Freedom Ranger, you'll need a bit more patience. They often take 11 to 16 weeks to reach a similar weight. But for many folks, their richer flavor and firmer meat are absolutely worth the extra time.
At The Grounded Homestead, we believe that knowing where your food comes from is one of the most powerful steps toward a healthier life. We're here to share our journey and provide the practical knowledge you need to start growing your own. Explore more guides and tips at https://thegroundedhomestead.com.


Facebook
Instagram
X
Youtube