
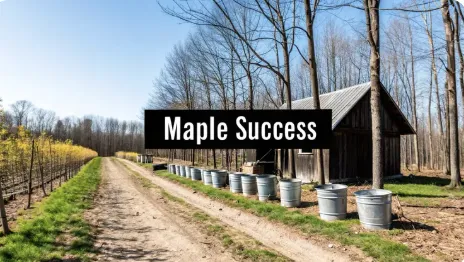
Your Guide to Maple Tree Farming Success
Your Guide to Maple Tree Farming Success
Maple tree farming isn't just about planting trees; it's the long-term practice of stewarding a forest to produce maple syrup. This is a game of patience, one that relies on very specific climate conditions and a deep understanding of tree biology to turn watery sap into one of nature's best sweeteners.
The Foundations of a Thriving Sugarbush
Getting into maple syrup production is less about planting seeds and more about managing an existing forest, or "sugarbush." It's a true partnership with nature, where success hinges on the one thing you can't control: the weather.
The magic ingredient is the freeze-thaw cycle that happens in late winter and early spring. When nighttime temperatures dip below freezing (below 32°F) and the days warm up (above 40°F), it creates a natural pressure pump inside the tree. This pressure change forces the sugary sap to flow up from the roots, making it possible for us to collect it.
Without this specific cycle, the sap stays put, which is exactly why commercial maple syrup production is so geographically locked-in.
Identifying Your Most Valuable Trees
Not all maple trees are created equal when it comes to making syrup. The very first thing you need to do is walk your property and identify the right species. While you can tap almost any maple, only a few are prized for their high sugar content, which saves you a tremendous amount of time and fuel during the boiling process later.
Learning to tell these trees apart by their bark, leaf shape, and branching patterns will be one of your most important skills. For example, sugar maples have thick, deeply grooved bark that looks like rugged plates, while young red maples have much smoother, lighter gray bark that gets shaggy with age.
Here's a quick look at the top species you'll want to find.
Key Maple Species For Syrup Production
The type of maple tree you tap directly impacts your final product. Some species offer higher sugar content, while others have unique flow characteristics. This table breaks down the big three.

As you can see, the Sugar Maple is the undisputed champion. Its sweet, clear sap is what most commercial operations are built on, but Red and Black maples are fantastic assets to any sugarbush.
The Long Game of Maple Farming
Patience isn't just a virtue in this field; it's a requirement. A maple tree isn't ready for its first tap until it reaches a minimum diameter of 10 inches. From a sapling, that can take 30 to 40 years. This timeline is a constant reminder that you're managing a forest, not just a crop.
The health of your sugarbush is the health of your business. Every decision, from tapping to clearing underbrush, should prioritize the long-term vitality of your trees. This ensures a productive harvest year after year for generations to come.
Thinking about forest health also means managing the surrounding growth to make sure your maples get enough sunlight to thrive. While the goals are different from managing an orchard, the core principles of tree care are just as vital. You can learn more about general tree care in our guide on the best time to prune fruit trees.
This long-term perspective is what makes maple farming so unique. The practice is heavily concentrated in North America precisely because of these demanding climate conditions. In the United States, Vermont leads the charge, producing nearly 900,000 gallons annually, with New York following at around 312,000 gallons a year. No other regions in the world produce maple syrup commercially because that critical freeze-thaw cycle just doesn't happen anywhere else.
Choosing and Preparing Your Maple Farmland
Your land is the very foundation of your maple syrup operation. Whether you're sizing up a woodlot you already own or scouting for the perfect piece of ground, the character of your sugarbush—that’s the term for a stand of maples you tap—will make or break your season. Think of it less like a neat and tidy farm field and more like a managed wild ecosystem.
Success starts with picking the right spot and prepping it with intention. This might even involve professional tree installation and site cleanup if you're establishing a sugarbush from scratch. A prime location isn't just about having a bunch of trees; it's about having the right trees in the right environment. I've found that land with a gentle, north-facing slope is ideal. It helps protect the trees from budding too early on those weirdly warm winter days, which can sometimes squeeze a few extra days out of your sap season.

Conducting a Tree Inventory
First things first: you need to know what you’re working with. A tree inventory sounds formal, but it's a simple and absolutely essential first step. Your mission is to count every single tappable maple on your property. A tappable tree is any healthy maple with a diameter of at least 10 inches at chest height.
Grab some flagging tape and a flexible measuring tape and take a walk. For each maple you find, wrap the tape around it about four and a half feet off the ground to get its circumference. To find the diameter, just divide that number by pi (3.14).
Here’s the rule of thumb I always follow:
10-18 inch diameter: Can safely support one tap.
18-24 inch diameter: Can handle two taps.
Over 25 inch diameter: A maximum of three taps.
And I can't stress this enough: never tap a tree smaller than 10 inches in diameter. Tapping too early will stress the tree, stunt its growth, and damage its long-term health. Be honest with your count. One tap on a healthy, vigorous tree is far more valuable than trying to push a smaller one too hard.
Assessing Soil Health and Forest Composition
Maple trees are happiest in well-drained soils that are slightly acidic to neutral. They're pretty adaptable, but poor soil often leads to slower growth and sap with lower sugar content—which means more boiling for you. You can get a decent feel for your soil just by observing the forest. Do the trees look strong? Is there a good, thick layer of decomposing leaves and organic matter on the ground?
Healthy soil is the engine of a productive sugarbush. Investing time to understand your soil composition will pay dividends for decades, ensuring your maple trees have the nutrients they need to produce high-quality sap year after year.
For a more accurate picture, a soil test is a smart move. It'll give you a detailed report on pH levels and key nutrients. If you're looking to manage your land right, you can learn more about soil testing at home to get started. It’s an easy way to make informed decisions for your sugarbush.
Beyond just maples, take a look at the other trees in your woods. A forest with a healthy mix of species like birch, beech, and hemlock is a great sign of a resilient ecosystem. This diversity helps keep pests in check and makes the whole forest stronger.
Preparing Your Sugarbush for Harvest
Once you've flagged your tappable trees, it's time to get the land ready for an efficient harvest. This isn't about clear-cutting; it's about smart, strategic management to help your maples thrive and make your life easier.
Here are the key tasks to focus on:
Clear Your Pathways: Blaze some clear, walkable paths to your tappable trees. This will save you an incredible amount of sweat and frustration, especially when you're hauling buckets or running tubing lines through a foot of snow.
Remove Underbrush: Thin out the dense brush and any invasive plants crowding the base of your maples. This cuts down on the competition for water and nutrients.
Manage Competing Trees: Look up. Identify non-maple trees whose crowns are directly shading your best sugar maples. Selectively removing a few of these will open up the canopy, letting more sunlight hit the maple leaves. More sun means more photosynthesis, which means more sugar in the sap.
Think ahead, especially if you're planning a modern tubing system. You'll want to clear paths along the contours of your land to run your mainlines. Your collection point—whether it's a simple tank or a full-blown sugar shack—should always be at the lowest point. Let gravity do the heavy lifting for you. Planning this layout before you ever drill a tap hole is one of the most important steps to running an efficient maple operation.
Investing in the Right Tapping and Collection Gear
Once you've walked your sugarbush and know which trees you'll be tapping, it's time to talk hardware. The gear you choose is a serious investment, and it will absolutely define your workflow, your efficiency, and even the final quality of your sap.
This is where the scale of your operation really comes into play. It’s not just about what you can afford upfront; it's about committing to a certain style of sugaring. Are you chasing a nostalgic, hands-on experience, or are you building a streamlined setup designed for growth? Be honest with yourself here, because that answer will guide every purchase you make.
The Great Debate: Buckets Versus Tubing
At the heart of every maple operation is a fundamental choice between two collection methods: the classic bucket and spile, or a modern tubing network. Both have their die-hard fans, and the right answer for you depends entirely on your goals and how many taps you plan to manage.
For the homesteader with a small stand of 20 to 50 trees, buckets are a fantastic starting point. The initial investment is lower, and there's a deeply satisfying, hands-on connection to the whole process. Honestly, there's nothing quite like hearing the plink, plink, plink of sap dripping into a metal bucket on a crisp spring morning.
But let's be real—that traditional method is labor-intensive. You'll be making daily rounds to every single tree, emptying buckets into a larger collection pail, often while trekking through deep, slushy snow.
A modern tubing system, on the other hand, is built for efficiency and scale. It uses a network of plastic tubes connecting each tap directly to a central collection tank. This setup is a total game-changer for anyone managing 100 taps or more. It saves countless hours of labor and keeps your sap clean from rain, snow, and falling debris. While the upfront cost is higher, the long-term payoff in time saved and sap quality is massive.
A Tale of Two Sugarbushes
Let’s paint a picture of how these choices play out in the real world.
Scenario 1: The Hobbyist Homesteader (20 Taps)
Gear List: A homesteader with 20 taps is probably going to start with a kit. This will include 20 food-grade buckets, 20 spiles (the actual taps), and maybe a few lids to keep bark and bugs out. They'll also need a good cordless drill and the correct size drill bit.
Collection: Their daily routine involves a walk through the woods with a couple of clean, five-gallon pails, gathering sap from each tree and hauling it back to their boiling station.
Why it Works: The cost is manageable, the process is simple, and at this small scale, the daily collection walk is an enjoyable chore, not an overwhelming burden.
Scenario 2: The Small-Scale Farmer (200 Taps)
Gear List: At 200 taps, buckets are completely impractical. This farmer is investing in a tubing system. They’ll need 200 spiles, 200 droplines (the small tubes running from the spile), and several large rolls of mainline tubing to connect everything. A large collection tank—at least 100 gallons—is placed at the lowest point of their sugarbush.
Collection: Sap flows by gravity through the network of tubes directly into the central tank. The farmer’s main job is walking the lines to check for leaks or squirrel damage and emptying the main tank when it fills up.
Why it Works: This system makes managing 200 taps possible for just one or two people. It automates the single most time-consuming part of the harvest, freeing them up to focus on boiling and processing.
Your choice of collection system is the single most important gear decision you'll make. Buckets are for the experience; tubing is for efficiency. Choose the one that aligns with your available time and long-term ambitions for your maple tree farming operation.
Essential Tools of the Trade
No matter if you choose buckets or tubing, a few pieces of equipment are non-negotiable for protecting tree health and making a quality product.
The Right Drill Bit: This is critical. For most modern spiles, you'll need a 5/16-inch drill bit. Using a bit that’s too large creates a wound the tree struggles to heal, which opens the door to infection and long-term damage. Always, always match your drill bit to your spile size—no exceptions.
Collection Tanks: Whether you're pouring buckets into it or it's hooked up to your tubing, you need a food-grade storage tank. Stainless steel is the gold standard, but food-grade plastic tanks are a much more affordable and popular option. Never, ever use old barrels or containers that held anything other than food or water.
Pre-Boiling Filters: You must filter your sap before you boil a single drop. Simple sap filters, which look like oversized coffee filters, are designed to catch bits of bark, insects, and other debris that inevitably find their way in. This easy step dramatically improves the clarity and quality of your final syrup. Filter now, and you’ll save yourself a major headache later.
Mastering The Tapping And Sap Harvesting Process
When spring teases us with warm afternoons after frosty nights, you know tapping season has arrived. It’s not a date on the calendar but a dance with the weather. Nighttime lows in the 20s °F and daytime highs climbing into the 40s °F trigger that magical sap “run.”
Keep an eye on the 10-day forecast. It’s your best ally for predicting when the trees will sing.
The Art And Science Of Drilling A Taphole
Before you pick up the drill, get a solid grasp of the understanding the sapwood. That thin, living layer is where your liquid gold gathers. Drill too shallow, and you choke the flow. Go too deep, and you risk the tree’s health.
Here’s how I approach it:
Select a smooth patch of bark, free from old holes or scarring
Use a sharp bit sized for 5/16-inch spiles
Angle the hole slightly upward, about 1.5 to 2 inches deep
Clear out wood shavings gently, then tap the spile until you hear a solid thwack
Over-driving the spile can split the wood and slow healing. A snug fit is all you need.
Successful tapping balances efficiency with tree welfare. Drill smart, and your sugarbush will thrive year after year.
This process flow chart simplifies the key steps for tapping your trees.

The visualization highlights that successful sap collection is a repeatable daily cycle of identifying, tapping, and harvesting.
Sustainable Harvesting For A Healthy Forest
Tapping responsibly means thinking decades ahead. Trees that are overstressed yield less and heal poorly. I always rotate my taphole locations each year, following these distance rules:
6 inches horizontally from last year’s hole
12 inches vertically to encourage fresh wood growth
That spacing gives the tree time to knit new sapwood around the old wound.
Treat your sugarbush like family. Generational stewardship pays off in richer sap and sturdier trees.
Handling And Storing Sap Safely
Once the sap starts flowing, spoilage sets in fast. You want to treat raw sap like fresh milk—keep it cold, clean, and moving.
Non-negotiable handling tips:
Keep It Cold: Store sap below 38 °F (3 °C). A bed of snow around food-grade containers works wonders.
Collect Daily: Warm buckets harbor bacteria. Empty them each morning.
Boil It Quickly: Aim to process sap into syrup within 2–3 days of collection.
When you scale up, logistics become epic. Take Quebec’s latest harvest:
Metric Value Taps Installed 55.5 million Syrup Produced 224.9 million pounds New Taps Added 7 million
Efficient operations and rigorous hygiene keep quality high, even on a massive scale. Whether you’re running a hobby sugarbush or a commercial operation, these practices form the backbone of a dependable maple syrup season.
Turning Raw Sap into Liquid Gold

This is where the real magic happens. You’ve done the hard work of tapping trees and hauling buckets, and now you get to transform that clear, watery sap into the rich, amber syrup everyone knows and loves. The process is simple in theory—just boil off the water—but it's a serious commitment of time and fuel.
Whether you're boiling over an open fire in the backyard or firing up a professional-grade evaporator, the goal is the same: concentrate the natural sugars until you have pure maple syrup. The reward is one of the most incredible natural sweeteners on the planet.
The Famous 40:1 Ratio
You'll hear the ratio 40:1 thrown around a lot in maple sugaring circles. It's the classic rule of thumb, meaning it takes roughly 40 gallons of raw sap to produce just one gallon of finished syrup. This isn't just trivia; it’s a critical piece of information for planning your entire operation.
That ratio is why sap from Sugar Maples is so prized. If your sap only has 1.5% sugar content, you might be looking at a ratio closer to 60:1. On the flip side, an exceptionally sweet run at 3% could get you down to a more manageable 30:1. Knowing this helps you estimate how much firewood you'll need and how many hours you'll be tending the boil.
Even for global leaders, it's a process of massive scale. For perspective, Canadian maple syrup production recently hit a high of 19.9 million gallons. That massive output, valued at around $1.54 billion, is largely driven by Quebec, where roughly 7,300 producers manage the industry. Canada's dominance, producing about 75% of the world's supply, is a testament to perfecting this evaporation process. You can discover more insights about Canada's impressive maple production on mapleterroir.com.
Hitting the Perfect Finishing Point
The most crucial moment in the entire process is knowing exactly when to stop boiling. Pull the syrup off the heat too soon, and it'll be thin and watery. Let it go just a minute too long, and it will crystallize into hard sugar candy in the jar.
There are two main tools for getting this right:
A Thermometer: Finished maple syrup boils at a temperature 7.1°F (or about 4°C) higher than the boiling point of water. Since water’s boiling point changes with elevation and daily barometric pressure, you have to calibrate your thermometer first. Just boil plain water on the day you plan to finish your syrup. If water boils at 211°F at your location that day, your target syrup temperature is precisely 218.1°F.
A Syrup Hydrometer: This is the tool the pros swear by. A hydrometer measures the density—or sugar content—of the liquid. You float it in a tall, heat-proof cup filled with hot syrup. If it floats to the designated red line, your syrup has reached the perfect density of 66-67 Brix (the official measurement for sugar content).
Using both tools together is your best bet for accuracy. The thermometer tells you when you're getting close, and the hydrometer confirms you’ve nailed it.
The moment your syrup is finished is a point of no return. Trust your instruments, not your eyes. What looks 'close enough' can quickly become a crystallized mess or a watery disappointment.
The Crucial Filtering and Bottling Steps
As soon as your syrup hits the correct density, you have to filter it while it's still piping hot. This step is non-negotiable. It removes "sugar sand," or niter, which is a natural mineral deposit that forms in the sap during the long boil. If you skip this, your syrup will be cloudy and have a gritty texture at the bottom of the bottle.
For small batches, a simple cone-shaped felt filter, often paired with a pre-filter, works perfectly. For larger operations, a filter press is used to get that crystal-clear, professional-grade finish.
After filtering, the syrup must be bottled at a temperature of at least 180°F (82°C). This high temperature sterilizes the container, making your syrup shelf-stable for long-term storage. Once you've sealed the jars, lay them on their side for a few minutes. This simple trick ensures the hot syrup also sterilizes the inside of the cap. It's a key principle in many home food preservation methods. If you're interested in making your harvest last, check out our guide on preserving food at home.
Finally, you can grade your syrup by its color and flavor, which change throughout the season. Early-season syrup is typically a delicate Golden color, while late-season runs produce a very strong Dark syrup. Store your liquid gold in a cool, dark place, and it will last for years—a sweet reward for all your hard work.
Common Questions About Maple Tree Farming
Every beginner has questions, and when it comes to sugaring, it’s smart to ask them before you drill your first taphole. Getting the right answers upfront can save you a ton of time, protect your trees for the long haul, and help you make much better syrup.
The questions that come up most often revolve around tree health, timing, and the logistics of turning sap into something you can actually sell. Let's dig into them.
How Many Taps Can I Safely Place in a Single Tree?
The single most important rule in sugaring is to protect the long-term health of your trees. The number of taps you can safely put in a single maple is determined entirely by its diameter at chest height (about 4.5 feet from the ground). Over-tapping is one of the fastest ways to permanently damage or even kill a good sugar maple.
Here’s a simple, sustainable guideline to live by:
10 to 18 inches in diameter: This tree can safely support one tap. Never, ever tap a tree smaller than 10 inches.
18 to 24 inches in diameter: A healthy, mature tree of this size can handle two taps.
Over 25 inches in diameter: You can place a maximum of three taps on a large, old-growth tree.
Think of it as a partnership. A healthy tree will give you strong sap flow for decades, but only if you respect its limits. Pushing a tree too hard for a small short-term gain is a losing strategy every time.
What Is the Ideal Time of Year to Start Tapping?
Timing is everything in maple sugaring, but it has absolutely nothing to do with a specific date on the calendar. The sap "run" is entirely weather-dependent, triggered by a very specific freeze-thaw cycle. You’re watching the forecast, not the calendar.
The perfect conditions for a strong sap flow are nighttime temperatures that drop below freezing (around 25°F / -4°C) followed by daytime temperatures that climb above freezing (around 40°F / 4°C).
This cycle of freezing and thawing is what creates pressure inside the tree, forcing the sap to move. This sweet spot usually hits in late winter and early spring, but the exact timing can shift by weeks from one year to the next. Your best friend here isn't an almanac—it's a reliable 10-day weather forecast. Start watching it closely as winter starts to lose its grip.
Do I Need a License to Sell Maple Syrup?
This is where things get a little more complicated, because the answer depends entirely on where you live and how you plan to sell your product. The rules for selling food products vary quite a bit from one state or province to another.
For your own personal use, you almost never need a license. But the moment you decide to sell that first bottle to the public, you’ve stepped into a regulated world.
In most places, you'll need to follow local food safety laws. This might include things like:
Using a certified or commercial kitchen for bottling your syrup.
Proper product labeling, which often requires ingredients, net weight, and your contact info.
Getting a business license or permit from your local health department.
Before you sell anything, your first call should be to your state's Department of Agriculture or local food safety authority. They’ll give you the exact requirements for your area, making sure your small business starts off on the right foot.
At The Grounded Homestead, we believe that understanding these details is key to a rewarding homesteading journey. Whether you're tapping two trees or two hundred, we're here to help you grow your skills and knowledge. Discover more guides and tips for your homestead at https://thegroundedhomestead.com.


Facebook
Instagram
X
Youtube