
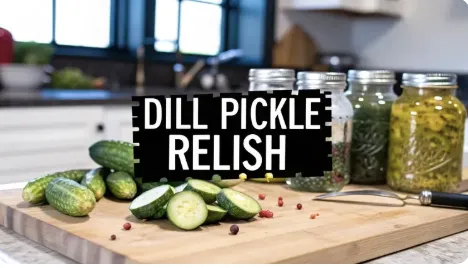
The Best Dill Pickle Relish Recipe for Canning
The Best Dill Pickle Relish Recipe for Canning
This simple dill pickle relish recipe for canning turns out a crisp, tangy condiment that will absolutely ruin store-bought versions for you. Forever. When you make it yourself, you get to call the shots on crunch, sweetness, and freshness, building a pantry staple you'll be genuinely proud to share. It's the best way I know to bottle up a cucumber harvest for the rest of the year.
Why Homemade Relish Beats Store-Bought Every Time
Let’s be honest. That squeezy bottle from the grocery store is convenient, but it just can’t touch the vibrant flavor and satisfying texture of the real deal. This guide will walk you through creating a dill pickle relish so packed with fresh, tangy flavor you’ll wonder why you ever bought it off a shelf.
Total Control Over Ingredients
When you make your own, you're in charge of everything. You get to pick the freshest pickling cucumbers, which guarantees the best possible crunch. You can dial back the sugar—or skip it entirely—unlike the commercial brands that often lean way too sweet. There are no mystery ingredients or weird preservatives, just good, wholesome results. That control is what makes the final product so much better.
The real magic of a homemade dill pickle relish recipe for canning is tasting the difference fresh ingredients make. You can capture the peak flavor of summer in a jar, something mass-produced products simply can't replicate.
Superior Flavor and Texture
Store-bought relish usually has a soft, sometimes mushy texture and a pretty one-dimensional flavor. Homemade, on the other hand, gives you a distinct, satisfying crunch and a complex taste that perfectly balances tangy, sweet, and savory notes. The fresh dill, garlic, and onions create layers of flavor that elevate everything from backyard burgers and hot dogs to your go-to potato salad.
The benefits go beyond taste, too; making your own staples is a great way to streamline your kitchen. To get your cooking organized and integrate homemade elements like this, try using a simple weekly meal planner.
This classic condiment isn't just a kitchen staple; it's big business. The global canned pickles market, which includes dill pickle relish, was valued at around USD 12.37 billion in 2023. That number alone shows just how much people love it.
Your Essential Canning Ingredients and Equipment

Great relish starts with a solid foundation. If you get your ingredients and tools lined up before you start, the whole process feels less like a chore and more like a satisfying kitchen project. No frantic searching for a funnel mid-boil.
The secret to an unforgettable dill pickle relish isn't some fancy, complicated technique. It’s about choosing quality components, from the cucumbers you pick to the type of salt in your brine. Every little detail adds up.
Choosing Your Core Ingredients
The star of the show is, without a doubt, the cucumber. For that signature crispness everyone loves, you absolutely have to use small, firm pickling cucumbers like Kirbys. Their low water content and dense flesh are non-negotiable if you want that perfect, snappy crunch that holds up during canning.
For those who dream of a truly garden-to-jar experience, growing your own ingredients is the ultimate goal. Exploring some helpful general gardening tips is a fantastic place to start.
Next up are the preservation powerhouses: salt and vinegar.
Pickling Salt: Stick with canning or pickling salt. It's pure sodium chloride, and that’s what you want. Regular table salt often has anti-caking agents and iodine that can turn your brine cloudy and make the relish look dull.
Vinegar Acidity: This is a crucial safety point, so pay attention. Your vinegar must have at least 5% acidity to properly preserve the relish and stop harmful bacteria from growing. White distilled vinegar gives a classic, sharp flavor, while apple cider vinegar (also at 5% acidity) can add a slightly fruity, mellow note.
Gathering Your Canning Gear
Having the right equipment ready to go ensures a safe and efficient canning day. While you can get by with a big stockpot for water bath canning, dedicated tools make the job much easier—and a lot safer.
If you're new to preserving, our comprehensive guide on canning vegetables for beginners is a great resource to check out for a deeper dive.
Before you chop a single cucumber, take a minute to gather your gear. Having everything clean and within arm's reach is the key to a stress-free canning session. Here's what you'll need.
Essential Equipment Checklist for Canning Relish

Once you have these tools laid out, you're ready to tackle the recipe with confidence. It's all about setting yourself up for success from the very beginning.
Crafting the Perfect Dill Pickle Relish
Alright, this is where the magic happens. Making a truly fantastic dill pickle relish isn't about following a rigid, soulless recipe. It's about transforming a few simple vegetables into something with snap, tang, and character. Think of this as having a seasoned canner right there in the kitchen with you, pointing out the little moments that make all the difference.
We'll start with the most important part—prepping the vegetables—before moving on to building a perfectly balanced brine. Then, we'll bring it all home in a quick, simmering finale.
Prepping and Salting Your Vegetables for Maximum Crunch
If you take away only one thing, let it be this: drawing the excess water out of your cucumbers and onions is the secret to a crisp, never-soggy relish. This isn’t just a friendly suggestion; it’s the non-negotiable step that separates crunchy, high-quality relish from the sad, mushy stuff. Rushing this is the number one mistake people make.
First things first, get your pickling cucumbers and onions finely chopped. A food processor makes this job a breeze, but you can absolutely get the same result by dicing carefully by hand. The goal is a consistent, small dice, around ¼-inch pieces, which gives the final relish a great, uniform texture.
Once everything is chopped, toss the vegetables into a large, non-reactive bowl—glass or stainless steel is perfect. Sprinkle them generously with pickling salt and turmeric, then pour in just enough water to cover the whole mix. Give it a good stir to get everything acquainted.
Now, for the patient part. Let it sit for at least 2 hours.
This salting process, known as osmosis, is just simple kitchen science doing its thing. The salt coaxes water out of the vegetable cells, which concentrates their flavor and firms up their structure. This is how you guarantee that snappy, crunchy bite in the finished product.
After a couple of hours, you'll be shocked at how much liquid has collected in the bowl. Drain the vegetables really well in a colander. For the best results, line it with cheesecloth or a clean dish towel. Then, gather up the corners of the cloth and squeeze—and I mean really squeeze—until you’ve gotten every last possible drop of water out. You want the vegetable mixture to feel surprisingly dry to the touch.
Simmering the Perfect Pickling Brine
While your vegetables are doing their salty soak, you can get the brine going. This aromatic liquid is the heart and soul of your dill pickle relish recipe for canning, and a great one is all about balancing that sharp acidity with a touch of sweetness and layers of spice.
In a large stockpot or a trusty Dutch oven, combine your vinegars (I like a mix of white and apple cider, but either works), a little bit of sugar, dill weed, and minced garlic. Crank the heat to medium-high and bring the whole concoction to a rolling boil.
As soon as it's boiling, knock the heat back to a gentle simmer. Let it bubble away for about 10 minutes. This short simmer is critical for two reasons:
It makes sure the sugar is completely dissolved, so you don’t end up with a gritty relish.
It gives the spices a chance to "bloom," releasing their essential oils and creating a much deeper, more complex flavor profile.
Don't cut this step short. Letting those flavors meld in the pot before you add the vegetables makes a world of difference. It's what turns a simple vinegar solution into a truly exceptional pickling liquid.
Bringing It All Together
With your bone-dry vegetables prepped and your brine simmering away, it's time to unite them. This final stage moves fast. The goal here is just to heat everything through and let the flavors combine without cooking your crisp veggies into mush.
Tip your thoroughly drained cucumber and onion mixture directly into the pot with the simmering brine. Stir it all together, making sure every last bit of vegetable gets coated in that hot, flavorful liquid.
Bring the whole mixture back to a boil. Since the brine is already hot, this shouldn’t take long at all. The very moment it reaches a steady boil, your relish is done cooking and is ready to be packed into jars. A long, slow cook time here is the enemy. Overcooking is the second-fastest way to ruin a crunchy relish, right after skipping the salting step.
The instant it boils, you're ready to move on to canning. The vegetables have soaked up that delicious brine and hit the perfect temperature for safe packing, all while holding onto that wonderful, firm texture you worked so hard to get.
A Simple Guide to Water Bath Canning Your Relish
With your relish simmering away, it’s time to get to the most rewarding part: locking in all that flavor for the months ahead. If you're new to preserving, canning can feel a little intimidating, but the water bath method is a time-tested and straightforward way to make your relish shelf-stable. It’s the perfect technique for high-acid foods like this dill pickle relish.
The whole process really just boils down to a few key moves: getting your jars prepped, packing them the right way, and processing them in boiling water for a set amount of time. This creates a strong vacuum seal that keeps your relish fresh and safe to eat for up to a year.
Preparing Your Jars and Lids
Before you even think about filling a single jar, your equipment needs to be ready to go. Clean, hot jars are non-negotiable for safe canning. You’ll want to wash your jars, lids, and rings in hot, soapy water and give them a good rinse just before you start.
To keep the jars hot—and to stop them from cracking when that boiling relish hits the glass—place them on the rack inside your water bath canner. Fill the canner and jars with hot water until the jars are covered, then bring it all to a simmer (180°F / 82°C). Just let them hang out in that hot water until you’re ready to fill them one by one.
Packing and Processing the Relish
This is where you get your little assembly line going. Working with one jar at a time, use a jar lifter to carefully pull a hot jar from the canner. Pop a canning funnel in the top and ladle the hot relish in, but be sure to watch your headspace.
Leave a ½-inch headspace. This is the critical gap between the top of the relish and the rim of the jar. Getting this right is key to creating a strong vacuum seal later on.
Remove air bubbles. A bubble remover tool or even just a wooden skewer works great. Slide it around the inside of the jar to release any trapped air, which can mess with your seal and the quality of the relish.
Wipe the rims. Grab a clean, damp cloth and wipe every last bit of food off the jar rims. Any stray residue can prevent a good seal.
Secure the lids. Center a new lid on the jar and screw the ring on until it’s just fingertip-tight. You don't want to crank it down; air needs a way to escape during the processing stage.
Once a jar is filled and capped, place it back into the canner. Just keep repeating this process until all your relish is jarred up. If you've never used this method before, our detailed guide on how to can without a pressure canner breaks it down even further.
Final Steps and Checking the Seals
Make sure the water in the canner covers your jars by at least an inch. Crank up the heat and bring the water to a full, rolling boil, then—and only then—start your timer. Process the jars for 15 minutes. It’s super important to adjust this time if you live above 1,000 feet in elevation.
Altitude Adjustments for Water Bath Canning For every 1,000 feet you are above sea level, you need to add more time to the processing.
1,001 - 3,000 ft: Add 5 minutes
3,001 - 6,000 ft: Add 10 minutes
When the timer goes off, kill the heat and let the jars sit in the hot water for another 5 minutes before you pull them out. This little rest helps prevent thermal shock. Place the hot jars on a towel-lined counter, leaving some space between them, and let them cool down, totally undisturbed, for 12-24 hours.
Before long, you’ll start to hear that satisfying "ping" as each jar seals. The next day, check your seals by pressing down on the center of each lid. If it doesn’t flex or pop back up, the seal is good. Your delicious homemade dill pickle relish is now officially ready for the pantry.
Storing and Customizing Your Homemade Relish
That final, satisfying "ping" from your cooling jars is the sound of success. You’ve officially locked a taste of summer into a jar, but the job isn't quite done. Proper storage is what keeps that dill pickle relish crisp and flavorful for months to come.
Your jars need a cool, dark, and dry home—think pantry, basement, or a quiet cupboard. The two biggest enemies of canned goods are temperature swings and direct sunlight. Both will slowly degrade the quality and color of your relish, so a stable environment is key. Get this right, and the jar you open next year will taste just as good as the one you crack open next week.
Making It Your Own
Once you get a feel for this classic dill pickle relish, the real fun starts. Think of this recipe as your baseline—a canvas you can tweak and build upon. A few simple additions can completely change the flavor, letting you create custom batches for specific meals or family preferences.
Here are a few of my go-to variations:
For a Spicy Kick: Stir in ½ teaspoon of red pepper flakes with the brine. This adds a gentle, warming heat that’s absolutely perfect on brats or mixed into a creamy dip.
For Extra Color and Sweetness: Add one finely diced red bell pepper to the mix along with your cucumbers and onions. It looks beautiful—like confetti—and adds a subtle sweetness that balances the vinegar.
For a Deeper Herbal Note: Tossing in other fresh herbs can bring a wonderful complexity. To get the most flavor out of them, check out our guide on how to harvest herbs for the best techniques.
Always label your jars. Seriously. Write the contents and the date you canned it right on the lid. This simple step saves you from the "mystery jar" guessing game and helps you rotate your stock, ensuring you always use the oldest jars first.
Don't be afraid to experiment with other spices. A pinch of celery seed can add a classic savory note, while a teaspoon of mustard seed will give it that tangier, deli-style flavor. These are the little tweaks that make homemade canning so rewarding.
Common Questions About Canning Dill Pickle Relish

Even with a trusted dill pickle relish recipe in hand, questions are bound to come up. It happens to all of us, especially when we're fine-tuning a new canning skill.
Let’s go through some of the most common issues I hear about. A few simple adjustments are usually all it takes to build up that canning confidence and make sure every jar is a success.
Why Did My Relish Turn Out Soggy?
Soggy relish is almost always a water problem. If you want a crisp, snappy finish, the single most important step is salting and draining your diced cucumbers and onions before you even think about cooking them.
That salting process draws out a surprising amount of water—it’s the old-timer's secret to getting that perfect texture. You also want to avoid overcooking the relish. It only needs a quick simmer to let the flavors marry, not a long, hard boil that will turn everything to mush.
One of the biggest mistakes I see is not getting the salted veggies dry enough. After you drain them, wrap them up in cheesecloth or a clean kitchen towel and wring out every last drop. You'll be amazed at how much liquid comes out!
Can I Use a Different Type of Vinegar?
For safe canning, you have to use a vinegar with at least 5% acidity. This isn't just for flavor; that acid level is what stops nasty bacteria from growing and makes your relish shelf-stable.
White distilled vinegar and apple cider vinegar are your two most reliable choices that meet this safety requirement. You can absolutely use either one, but just know that apple cider vinegar will lend a slightly fruitier flavor and a darker, more golden hue to your relish. Never, ever use homemade vinegars or fancy decorative ones where the acidity is a mystery.
What if a Jar Does Not Seal?
Don't panic! If you check your jars after 24 hours and find one where the lid still flexes when you press it, the relish inside is still perfectly good to eat.
You've got two easy options:
Reprocess it: You can empty the jar, gently reheat the relish, and process it again in a clean jar with a brand-new lid. Just be sure to do this within 24 hours.
Refrigerate it: The simplest solution is to just pop that unsealed jar in the fridge. Plan to use it up within a few weeks. It just can't be stored in the pantry with its sealed friends.
At The Grounded Homestead, we believe in the satisfaction of creating food from scratch. For more tips on gardening, preserving, and homesteading, visit us at https://thegroundedhomestead.com.


Facebook
Instagram
X
Youtube