
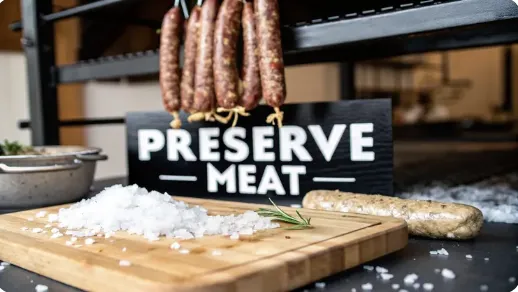
How to Safely Preserve Meat Without Refrigeration: Easy Tips
How to Safely Preserve Meat Without Refrigeration: Easy Tips
For generations, long before refrigerators became a fixture in every kitchen, preserving meat was an essential skill. It wasn't just a hobby for homesteaders; it was a matter of survival. Methods like salting, smoking, drying, and pressure canning were perfected to stop spoilage in its tracks, making meat safe for months and, with the right methods, even years. This guide breaks down the simple science behind these timeless skills.
, oxygen (O₂ symbol), favorable pH (lab flask), and temperature (thermometer). Arrows point to the meat, with small microbes scattered around, showing how preservation methods disrupt growth.")
How to Safely Preserve Meat Without Refrigeration: Easy Tips
How to Safely Preserve Meat Without Refrigeration: Easy Tips
The Science Behind Timeless Meat Preservation
The Primary Enemies of Preservation
How Different Preservation Methods Work
Meat Preservation Methods At a Glance
Curing Meat the Right Way: Salt, Sugar & Precision
Real-World Example: Curing Bacon from Scratch
Drying & Smoking Meat: Turning Fresh Cuts into Safe, Shelf-Stable Protein
The Art of Cold Smoking for Preservation
Understanding Moisture vs Water Activity (aₓ)
Pros and Cons of Drying & Smoking
Pressure Canning Meat: High-Heat Preservation Done Right
Raw-Pack Versus Hot-Pack What Is the Difference?
The Critical Steps of Pressure Canning Meat
Processing Times and Verifying the Seal
Pros and Cons of Pressure Canning
Confit & Fat Packing: Old-World Flavor, Modern Safety
Rendering Fat for Preservation
A Walkthrough of Traditional Pork Confit
Pros and Cons of Confit / Fat Packing
Home Meat Preservation Safety Checklist
Further Reading & Trusted Resources
Common Questions on Preserving Meat
What Is the Safest Preservation Method for a Beginner?
Can I Use Regular Table Salt for Curing Meat?
The Science Behind Timeless Meat Preservation
To master meat preservation, you first have to understand why these age-old techniques work. At its core, this whole process is a battle against the invisible world of microorganisms—the bacteria, yeasts, and molds that cause meat to spoil.
These tiny organisms need a very specific set of conditions to survive and multiply. Every single preservation method we use is designed to disrupt those conditions, creating an environment where they simply can't live.
The Primary Enemies of Preservation
The culprits behind spoilage are surprisingly needy. They require a few key things to do their dirty work. By taking away one or more of these elements, you can halt the decay process.
Moisture: Like all living things, bacteria need water. Methods like drying and salting are all about pulling water directly out of the meat's cells through a process called osmosis. No water, no life.
Oxygen: Many spoilage organisms need oxygen to breathe. When you see techniques like packing meat in fat (confit), you're seeing an airtight barrier being created to suffocate those aerobic bacteria.
Favorable pH Level: Microbes love a neutral pH. Preservation methods like pickling introduce acid, which makes the environment completely hostile to their growth.
Temperature: Bacteria thrive in the "danger zone" between 40°F and 140°F. While we're avoiding refrigeration here, techniques like smoking can manipulate temperature just enough to slow down or stop bacterial growth. Foodborne bacteria multiply fastest between 40–140°F, so any room-temperature method must compensate with salt, drying, acid, or validated heat steps.
, oxygen (O₂ symbol), favorable pH (flask), and temperature (thermometer), each with a short note. Right side lists solutions: drying & salting (hanging meat illustration), fat packing (jar illustration), pickling (acid flask), and smoking (meat with smoke), each with one-line explanations.")
How Different Preservation Methods Work
Each traditional technique takes aim at these microbial needs in a slightly different way. Salting, for instance, is a powerful desiccant. It not only draws moisture out of the meat but also creates a super-salty environment that is toxic to most bacteria. This method was so reliable that it became the foundation of food security for entire civilizations.
Salt preservation can successfully extend the shelf life of meat for several months at ambient temperatures, often reducing moisture content by 20-30%. These salted meats could remain edible for 6 months or more, depending on storage conditions and a salt concentration upwards of 5-8% by weight. You can discover more historical insights about food preservation on nchfp.uga.edu.
Smoking works hand-in-hand with salting. The wood smoke deposits antimicrobial compounds onto the surface of the meat, adding another layer of protection while also contributing to that classic flavor.
Drying, like when you make jerky, is almost entirely focused on removing moisture until the meat is too arid to support any microbial life. And finally, pressure canning reaches ~240–250°F (10–15 psi) to deliver the validated lethality needed for low-acid foods (including C. botulinum spores) when you follow tested times and pressures, then creates a vacuum seal to make sure nothing can ever get back in.
Once you grasp these simple scientific principles, meat preservation stops being a mystery. It becomes a reliable, practical skill you can count on.
Meat Preservation Methods At a Glance
Feeling a bit overwhelmed by the options? It helps to see them side-by-side. Each method has its own strengths and is best suited for different types of meat and different end goals.
This table breaks down the most common non-refrigerated techniques to give you a quick snapshot of what to expect.

Think of this as your starting point. The best method for you will depend on your climate, your equipment, and what you're trying to achieve—whether that's smoky bacon for breakfast or a hard salami that will last you through the winter.
Curing Meat the Right Way: Salt, Sugar & Precision

Salt is the original preservation powerhouse. It's a mineral so valuable it was once used as currency, and for good reason—it’s the foundation of countless timeless preservation methods. Its magic lies in its ability to pull moisture out of meat, creating an environment where spoilage bacteria simply can't survive. Curing is the art of using salt to transform fresh meat into a shelf-stable product with deep, concentrated flavor. Always cure meat in a refrigerated or sub-40 °F environment until fully salted; curing at room temperature risks bacterial growth before salt penetration completes.
You can approach this in a couple of ways.
The old-school method is the salt box, where you literally bury a cut of meat in a box of salt. Pack it firmly in salt for several days, until it feels dense and slightly firm to the touch. It's a straightforward technique and fantastic for big, dense cuts like a country-style ham, as it guarantees a thorough cure. The downside? It can make the final product intensely salty, often needing a good soak in water before you can eat it.
Then there's the more precise, modern approach: Equilibrium (EQ) Curing. This method is all about the math. You use a calculated percentage of salt and other cures based on the meat's exact weight. This gives you total control over the final saltiness and ensures a perfectly cured, consistent product every single time. I lean on this method for almost everything I cure these days.
: short-term cures, 0.25% dosage, best for bacon, smoked sausage, and corned beef, prevents botulism and adds cured color. The second details Prague Powder #2 (sodium nitrite + nitrate): long-term cures, 0.25% dosage, best for salami, prosciutto, country hams, with nitrate converting slowly to nitrite for protection. Includes small drawings of bacon and salamis.")
Why You Need Curing Salts
When we're talking about long-term meat preservation without a fridge, we have to talk about curing salts. This isn't your regular table salt. Measure precisely with a digital kitchen scale, not spoons. Too much nitrite can be toxic; too little leaves the meat unsafe.
Use Prague Powder #1 (sodium nitrite) for short-term cures like bacon or corned beef, and Prague Powder #2 (nitrite + nitrate) for long-aged meats such as prosciutto or salami. The nitrate in #2 slowly converts to nitrite during extended drying, maintaining botulism protection.
Prague Powder #1 (Sodium Nitrite): This is your go-to for anything that will be cooked after curing, like bacon or smoked sausage. Its main job is to prevent the growth of Clostridium botulinum, the nasty bacteria that causes botulism. As a bonus, it also gives cured meats their characteristic pinkish color and tangy flavor.
Prague Powder #2 (Sodium Nitrate): This one is for the long game—think dry-cured salami, prosciutto, or country hams that hang for weeks or even months. The nitrate acts like a time-release protector, slowly converting into nitrite over the long curing period to provide extended safety.
For longer-lasting, shelf-stable cures, Prague Powder #2 is the time-tested standard that adds safety, flavor, and that signature cured color.
Using these curing salts isn't optional; it's a critical safety step. While you might see recipes using natural sources like celery powder, commercially prepared curing salts offer tested, reliable protection against some truly deadly pathogens. Don't skip them.
A comprehensive review by the National Center for Home Food Preservation outlines how combinations of salt, nitrites, and smoking work together in meat curing.
Real-World Example: Curing Bacon from Scratch
Let's walk through a real-world EQ cure using a five-pound pork belly to make bacon. The process is dead simple once you get the math down.
First, you need an accurate weight of your meat. A kitchen scale is your best friend here. Let’s say our pork belly weighs exactly 2,268 grams (which is 5 lbs).
The standard percentages I use for a basic bacon EQ cure are:
Salt: 2.5% of the meat's weight
Sugar: 1% of the meat's weight (this is optional but balances the saltiness)
Prague Powder #1: 0.25% of the meat's weight (this is a non-negotiable, industry-standard ratio for safety)
Now, let's do the calculations:
Salt: 2268g x 0.025 = 56.7g
Sugar: 2268g x 0.01 = 22.7g
Prague Powder #1: 2268g x 0.0025 = 5.7g
Mix these three ingredients together really well. You want that pink curing salt distributed evenly throughout the salt and sugar. Rub the mixture over every single surface of the pork belly—get it into all the nooks and crannies.
Pro Tip: Use plain sea salt or kosher salt, never iodized or anti-caking salts, which can leave off-flavors and cloud the brine.
Seal the belly in a vacuum bag or a zip-top bag with all the air squeezed out. It then cures for about 7-10 days in a cool place. A modern fridge set below 40°F is perfect, but traditionally, a cool root cellar would do the job. During this time, the salt and cure work their way to the center of the meat.
Once it's cured, you'll rinse it off, pat it dry, and let it sit uncovered for a bit to form a sticky surface called a pellicle. From there, it's ready for its next preservation step, like smoking. If you're interested in exploring other methods, you can find a modern guide to preserving food at home that covers various styles.
Key Takeaway: A properly cured piece of meat will feel firm and dense all the way through, not soft or mushy in the center. Its color will be a consistent, deep pinkish-red. If you notice any gray spots, a slimy texture, or an off smell, discard it immediately. Your senses are your best defense against spoilage.
Pros and Cons of Salt Curing
Pros of Salt Curing
• Simple ingredients and time-tested technique.
• Enhances flavor and texture for later smoking.
• Long shelf life when combined with cool storage.
Cons of Salt Curing
• Requires precise weighing for safety.
• Can be overly salty if not rinsed or balanced.
• Not safe for room-temperature curing without refrigeration.
• Still needs an added preservation step (drying, smoking, or canning) for long-term storage.
Drying & Smoking Meat: Turning Fresh Cuts into Safe, Shelf-Stable Protein
Drying meat is one of the oldest and most straightforward ways our ancestors kept food on hand without a refrigerator. It’s the method behind jerky—a lightweight, protein-dense food that can last for months if you do it right. When you bring smoking into the mix, you’re not just extending its shelf life; you’re adding an incredible layer of flavor.
The entire process boils down to one simple goal: pull enough water out of the meat so bacteria can’t get a foothold. For jerky, this usually means getting the moisture content below 10%. Let's walk through how to hit that mark safely and end up with something delicious.
Preparing the Meat for Drying
The success of your jerky is decided long before it ever feels the heat. Your choice of cut and how you slice it are everything. You need the leanest cuts you can find—fat is the enemy of preservation. It doesn't dry properly and eventually goes rancid, spoiling your whole batch.
Beef eye of round, top round, or flank steak are all great choices. If you’re working with venison or other game, any big muscle from the hindquarters will do perfectly. Trim away every visible strip of fat before slicing. A little diligence here makes the difference between jerky that keeps for months and one that spoils in weeks.
Once you’ve got your cut, stick it in the freezer for an hour or two. This firms up the meat, making it a thousand times easier to slice into thin, even strips. Your target is a thickness of about 1/4 inch.
The direction you slice in makes a huge difference in the final texture:
With the grain: This creates a tougher, chewier jerky that you really have to work at. It’s that classic, rugged texture lots of people are after.
Against the grain: Slicing this way severs the muscle fibers, giving you a more tender and brittle piece of jerky that’s easier to chew.
Neither way is wrong; it’s just a matter of what you like. I usually slice against the grain because I prefer a more snackable texture.
After slicing, it’s time for a marinade. A good one does two things at once. It obviously adds flavor, but a high-salt marinade also starts drawing moisture out of the meat through osmosis, giving the preservation process a head start. Let the meat marinate for a solid 8 to 12 hours so the salt and flavors can work their way deep into the strips. Keep the marinating meat under refrigeration (≤40 °F) the entire time. Room-temperature marination invites bacterial growth before the salt and acid can take effect.

The Art of Cold Smoking for Preservation
This is where a lot of folks get tripped up. We’re talking about cold smoking here, not hot smoking.
Cold Smoking: This is purely for preservation. The temperatures stay low—ideally below 90°F. You aren’t trying to cook the meat; you’re slowly dehydrating it while bathing it in smoke full of antimicrobial compounds. Warning: above ~120°F you risk cooking (hot smoke) rather than drying. A safe upper bound is ≤100–110°F.
Hot Smoking: Think of this as cooking. You're using temperatures above 200°F to cook the meat all the way through. It's delicious, but it won’t preserve the meat for pantry storage unless you take other steps, like canning.
Cold smoking adds a powerful layer of protection. The chemical compounds in wood smoke, like phenols and aldehydes, are natural preservatives that stop bacteria and mold from growing on the meat's surface. It also helps form a "pellicle," a thin, dry outer layer that acts like a protective skin.
You don’t need some fancy, thousand-dollar smoker, either. A simple cold smoke setup can be built with a small firebox connected to an enclosed chamber (an old grill, a wooden box) by a length of stovepipe. That distance is key—it allows the smoke to cool way down before it ever reaches your meat.
Achieving the Perfect Dryness
Whether you use a dehydrator, your oven on its lowest setting, or a cold smoker, the goal is the same. You're looking for a very specific texture that tells you the meat is properly preserved and ready for storage.
For foolproof results, a reliable dehydrator gives you steady heat and airflow, making jerky simple and safe for first-timers.
The Ohio State University Extension notes that jerky must undergo a heat step before drying, as conventional dehydrator temps alone may not reliably destroy pathogens.

Your jerky is done when it’s leathery and tough. When you bend a piece, it should crack but not snap in half. If it breaks cleanly with a snap, you’ve over-dried it, and it'll be brittle. If it just bends without cracking at all, it's still holding too much moisture and needs more time.
That perfect texture is your best signal of shelf stability. Properly dried and smoked jerky, tucked away in an airtight container in a cool, dark place, can last for several months. If you want to go for even longer storage, vacuum sealing is your best friend—it prevents any leftover fat from oxidizing and turning rancid over time.
According to the USDA, safely preparing jerky involves heating meat first to 160°F before drying to ensure harmful bacteria are destroyed.
Understanding Moisture vs Water Activity (aₓ)
Water content and water activity (aₓ) aren’t the same thing — and knowing the difference keeps preserved meat safe.
Moisture content → how much total water a food contains.
Water activity (aₓ) → how much of that water is available for microbes to grow.
Even foods that feel moist can be safe if their aₓ ≤ 0.85, the threshold below which most pathogens —including C. botulinum—can’t grow.
Takeaway: Drying and curing work because they lower aₓ, not just by removing water but by binding it with salt, sugar, or acid.
Pros and Cons of Drying & Smoking
Pros of Drying & Smoking
• Concentrates flavor while preserving meat naturally.
• Lightweight and portable—ideal for long storage or travel.
• Requires minimal equipment (oven, dehydrator, or smoker).
Cons of Drying & Smoking
• Must monitor heat and humidity closely to avoid spoilage.
• Not shelf-stable indefinitely without proper dryness or sealing.
• Cold smoking alone does not make meat safe—must combine with curing or heat treatment.
• Flavor can vary widely depending on wood type and smoke density.

Pressure Canning Meat: High-Heat Preservation Done Right
When you need meat to last for years on the shelf, not just months in the freezer, pressure canning is the undisputed champion. Unlike salting or drying, which just keep microbes in check, pressure canning completely obliterates them. Pressure canning is the only proven way to make meat shelf-stable at home. It reaches 240–250 °F (10–15 psi)—the temperature needed to destroy Clostridium botulinum spores in low-acid foods.
Don't confuse this with water bath canning pickles or jams. Meat is a low-acid food, which means boiling water temperatures simply aren't hot enough to make it safe for long-term food storage strategies without a fridge. A pressure canner isn't optional for this job; it's a non-negotiable piece of equipment. Think of it as your own personal autoclave, ensuring every single jar is sterile and secure. Regular boiling-water canners never get that hot, even at a rolling boil. That’s why all meats, soups, and stocks must be processed under pressure to be safe for room-temperature storage.
Raw-Pack Versus Hot-Pack: What Is the Difference?
Before you even think about filling jars, you’ve got a big decision to make: raw-pack or hot-pack. Each method has its purpose, and the choice usually boils down to the type of meat you’re working with and the texture you want in the end.
Raw-Packing: It's exactly what it sounds like. You take your raw, cubed, or ground meat and pack it directly into the canning jars. Then you top it off with boiling broth, water, or tomato juice, leaving the right amount of headspace. It's a faster process upfront, but the meat tends to shrink more during canning, and the final look can be less uniform.
Hot-Packing: With this method, you give the meat a head start by partially cooking it before it goes into the jars. You might brown some ground beef, sear your stew cubes, or lightly roast chicken pieces. The pre-cooked meat is then packed into hot jars and covered with boiling liquid. Hot packing pushes some of the air out of the meat tissue, which means less shrinkage in the jar and often a better color and texture when you open it up.
For fattier meats like ground beef or pork, I always go with the hot-pack method. Browning the meat first lets you drain off a ton of excess fat. This is a critical step because too much fat can get between the jar rim and the lid, preventing a proper seal and compromising the safety of your food. For leaner cuts like venison or chicken breast, raw packing works just fine.
When you’re ready to go beyond jerky, a pressure canner is the essential tool for putting jars of meat on your pantry shelf that last for years.
The Critical Steps of Pressure Canning Meat
Following the right procedure isn't just a friendly suggestion—it's a matter of safety. Every step is there for a reason, designed to stamp out risk and give you a shelf full of safe, delicious food. Always, always start with clean, sterilized jars and brand-new lids.
First, get your meat ready using whichever method you chose, raw or hot pack. Pack it into the hot jars firmly, but don't cram it in so tight that heat can't get to the center. Top it off with boiling liquid, leaving a solid one inch of headspace at the top. That empty space is vital for creating the vacuum seal that preserves the food.
Next, grab a clean spatula or bubble remover tool and run it around the inside of the jar. This releases any trapped air pockets. Then, wipe the rim of the jar with a clean cloth dipped in a little vinegar to cut through any grease or food bits that could mess up the seal. Place a new lid on top and screw the band on until it’s just fingertip-tight. If you crank it down too hard, the lid can buckle during processing, and you'll lose your seal.
Safety First: Never, ever deviate from tested, science-backed recipes and processing times, like the ones from the National Center for Home Food Preservation. Guesswork has no place in pressure canning meat.
Processing Times and Verifying the Seal
Set your filled jars on the rack inside your pressure canner, which should have a couple of inches of simmering water in the bottom (always double-check your canner's manual). Lock the lid into place and turn up the heat. You need to let a steady, strong stream of steam vent from the canner for a full 10 minutes before you put the weight on or close the petcock. This step is non-negotiable; it purges all the air out so the canner can reach the correct temperature.
Once it's vented, bring the canner up to the right pressure for your altitude. The processing timer doesn't start until that gauge hits the target pressure and stays there. According to NCHFP’s meat strips/cubes protocol, pints require 75 minutes at 10 psi, quarts 90 minutes.
At higher elevations, air pressure drops, so water boils at lower temperatures. Increase the canning pressure to 15 psi above 1,000 ft (weighted gauge) or follow your extension’s dial-gauge chart to maintain a safe 240 °F internal temperature.
When the time is up, turn off the heat and let the canner depressurize all by itself. Do not rush this step. Trying to open a canner that's still under pressure is incredibly dangerous, and it will cause liquid to siphon out of your jars, ruining the seal.
Once the pressure gauge reads zero, wait another few minutes, then carefully remove the lid, tilting it away from your face to avoid a blast of hot steam. Let the jars sit in the canner for another 10 minutes to acclimate before you move them to a towel-lined counter. Leave them completely undisturbed for 12-24 hours to cool.
As they cool, you'll start to hear the deeply satisfying "ping" of the lids sealing shut. The next day, check every single jar. The lid should be sucked down in the middle (concave) and shouldn't move or flex when you press on it. Any jars that didn't seal properly have to go straight into the refrigerator to be eaten right away, or be reprocessed with a new lid.
Properly canned meat is a cornerstone of food security, ready to go for years to come. Store jars in a cool, dark place (50–70 °F). Avoid temperature swings; fluctuating heat weakens seals and shortens shelf life. Before opening, always check that the lid is concave and vacuum-tight. Discard immediately if you notice bulging, spurting, or off odors when unsealing—the risk of botulism is not worth testing.
Pros and Cons of Pressure Canning
Pros of Pressure Canning
• Longest shelf life of any home-preservation method (1–2 years).
• Safely stores low-acid foods that no other method can.
• Preserves full-flavored, ready-to-eat meals.
Cons of Pressure Canning
• Requires specialized equipment and strict attention to procedure.
• Slight learning curve and noise factor for new users.
• Mistakes in pressure or time can lead to serious safety risks.
• Glass jars are breakable and take storage space.
Confit & Fat Packing: Old-World Flavor, Modern Safety
Long before vacuum sealers and deep freezers came along, our ancestors had an elegant way to preserve meat using the one thing they always had on hand: animal fat. This classic European technique, known as confit or potting, wraps cooked meat in a protective, oxygen-free barrier of rendered lard or tallow.
By sealing the meat away from air, you essentially suffocate the spoilage bacteria that need oxygen to survive. It's a brilliant and time-tested solution for how to preserve meat without refrigeration. This method doesn't just preserve; it transforms tougher, richer cuts of meat into something unbelievably tender and flavorful that stays safe to eat for months.
Today’s confit should always begin with fully cooked meat (at least 160 °F internal temperature). The method is not a substitute for canning; treat it as short-term cool storage, not shelf-stable preservation.
Rendering Fat for Preservation
The foundation of this entire method is perfectly clean, rendered fat. You can’t just scoop leftover bacon grease out of a pan and call it a day. The fat—whether it's pork lard, beef tallow, or duck fat—must be “rendered.” This is a slow melting and purifying process that removes any water, meat scraps, or impurities. Render the fat slowly over low heat until clear and free of water bubbles. Strain through fine cloth to remove solids—any trapped moisture can cause spoilage or mold later.
Why does this matter? Those contaminants are exactly what would go rancid and spoil your preserved meat.
To get started, you'll need high-quality leaf lard or suet, chopped into small pieces. Place it in a heavy-bottomed pot with a tiny splash of water to keep it from scorching as it begins to melt.
Heat Gently: Keep the heat low and let the fat melt slowly. You’re not trying to fry it; think more like a gentle coaxing.
Stir Occasionally: Give it a stir every now and then to prevent anything from sticking to the bottom.
Strain Meticulously: Once the solid pieces (cracklings) have browned and sunk to the bottom, carefully strain the liquid fat through several layers of cheesecloth into a clean, sterilized jar.
The goal is to end up with a pure, creamy white solid once it cools, with no brown bits or watery residue in sight. This clean fat is your golden ticket to preservation.
A Walkthrough of Traditional Pork Confit
Let's put this into practice with a classic pork confit. While this method is famous for duck, it works absolute wonders on pork shoulder or belly. The process breaks down into three key stages: salting, cooking, and packing.
First up, salting. Take about three pounds of pork shoulder and cut it into large, uniform cubes. Rub them generously with a mix of kosher salt, cracked black pepper, and herbs like thyme and bay leaves. This isn't a hard cure like you'd use for bacon; it's a light salting that seasons the meat and pulls out some initial moisture. Let it sit, covered, in a cool place for 24 hours.
After salting, rinse the pork thoroughly to remove all the surface salt and pat it completely dry. This is a critical step. Any excess salt will make the final dish inedible, and any leftover moisture can compromise the preservation.
Next, the cooking. Place the dried pork pieces into a deep, oven-safe pot and pour over enough rendered lard or tallow to completely submerge them. The key here is low and slow. Cook it in an oven set to around 225°F (107°C) for about three to four hours. The meat is done when it's fork-tender and succulent, but not falling apart into shreds.
Finally, the packing. Using sterilized tongs, carefully transfer the cooked pork pieces into clean, sterilized canning jars or a traditional stoneware crock. Pour the warm (not boiling) rendered fat from the pot over the meat, making sure every piece is completely covered by at least an inch of fat. To finish, gently tap the jars on the counter to release any trapped air bubbles.
Let the jars cool to room temperature. Store your confit submerged fully in fat, in a cool environment that stays below about 55 °F (e.g. a root cellar, cold cellar, or dedicated meat-storage fridge). Do not store it at typical pantry temperatures, which are too warm to reliably prevent spoilage. Properly prepared, your potted meat can last for several months.
To use it, simply scoop out a few pieces along with some of the fat and pan-fry them until crispy and golden. Confit deepens flavor over time as the meat reabsorbs its own seasoned fat, producing a buttery texture that modern chefs still swear by.
Pro Tip: Label the top of each jar with the date and meat type. Once opened, use within one week and always re-cover with melted fat before returning to storage.
The combination of slow-cooked meat and its protective fat barrier is a far more forgiving process than some other methods. For those curious about other shelf-stable options, you can learn more about canning without a pressure canner for high-acid foods.
Pros and Cons of Confit / Fat Packing
Pros of Confit & Fat Packing
• Rich, deep flavor and tender texture.
• Requires no special equipment beyond a thermometer and heavy pot.
• Perfect for using leftover rendered fat (pork lard, duck fat, tallow).
Cons of Confit & Fat Packing
• Shorter shelf life than pressure-canned meats.
• Requires cool, consistent storage (≤55 °F).
• Any moisture trapped in fat can cause spoilage.
• Not safe for room-temperature pantry storage.
: duck, pork, poultry submerged in fat.")
Home Meat Preservation Safety Checklist
✅ Start with fresh, high-quality meat kept below 40 °F.
✅ Measure precisely — salt 2–5 % by weight; use Prague Powder #1 or #2 as tested recipes specify.
✅ Keep all curing and marinating meat under refrigeration.
✅ When drying, ensure internal heat ≥ 160 °F (beef/game) or 165 °F (poultry) before dehydrating.
✅ Use only tested canning recipes from the NCHFP or your local extension service.
✅ Store finished products in a cool, dark, dry place (50–70 °F).
✅ When in doubt — throw it out.
Common Mistakes to Avoid
• Using iodized salt or “eyeballing” measurements.
• Curing or drying meat at room temperature.
• Skipping the pre-heat step before drying jerky.
• Treating confit or fat-packed meat as pantry-stable.
• Ignoring altitude adjustments for pressure canning.
• Re-using old lids that don’t seal properly.
Video Summaries of this issue:
As always, the tools and supplies I mention are the same ones I rely on here at The Grounded Homestead. Some are affiliate links, which means I may earn a small commission—at no extra cost to you—but every recommendation is based on real use and trust.
Further Reading & Trusted Resources
• National Center for Home Food Preservation — Meat, Poultry & Seafood
• Ohio State University Extension — Canning Meat, Poultry & Game (HYG-5330)
• Oregon State University Extension — Preserving Meat and Poultry
• USDA Complete Guide to Home Canning (2015 Revision)
Common Questions on Preserving Meat
As you get your hands dirty with traditional meat preservation, questions are bound to pop up. It’s a craft with a bit of a learning curve, and getting clear, practical answers is the key to building confidence—and making sure your food is both delicious and safe. This section tackles some of the most common things people ask when they're learning to preserve meat without a fridge.
What Is the Safest Preservation Method for a Beginner?
For someone just starting out, making jerky through drying is hands-down the most forgiving and safest entry point. The process is simple, you don't need much equipment, and the signs of a properly finished product are easy to spot. You're looking for that leathery, crack-but-don't-snap texture.
Salt curing is another great place to start, but it demands a bit more precision. You have to be diligent about weighing your salt and, if you're using them, your curing salts like Prague Powder.
Pressure canning, while incredibly effective for long-term storage, has the steepest learning curve. The risks tied to getting it wrong, like botulism, are serious. It's best to get a good feel for drying or salting before you ever tackle the complexities of a pressure canner.
Can I Use Regular Table Salt for Curing Meat?
You technically can, but I’d strongly advise against it if you want good, reliable results. Most table salt contains additives like iodine and anti-caking agents that can mess with the curing process.
These extras can leave a faint metallic taste in your finished meat and might even affect the final texture. For a clean flavor and consistent cure, always reach for non-iodized salts.
These are your best bets for curing:
Kosher Salt: Its coarse grains stick well to the surface of the meat.
Sea Salt: Gives you a pure salt flavor with no additives.
Curing or Pickling Salt: Made specifically for preservation, this fine-grained salt dissolves easily and is completely pure.
Using one of these ensures that the only flavors you get are the meat and any spices you’ve added, not some unwanted chemicals.
How Do I Know if My Preserved Meat Has Gone Bad?
Your own senses are your most reliable tools. Before you even think about tasting preserved meat, give it a thorough inspection. Trust your eyes, nose, and hands to tell you everything you need to know.
Look for any obvious signs of spoilage. That means fuzzy or colorful spots of mold, a slimy or sticky surface, and any off-putting smells. A sour, rancid, or ammonia-like odor is a clear warning sign to stay away.
For pressure-canned meat, the inspection starts the moment you pick up the jar.
Check the Lid: A properly sealed lid will be concave—sucked down in the middle. If the lid is bulging, flat, or you can press it up and down, the seal has failed.
Listen When Opening: When you open a good jar, you should hear a faint hiss as the vacuum releases. An aggressive hiss or spraying liquid is a very bad sign.
Inspect the Contents: Look for cloudiness, bubbling, or anything inside that just seems off.
When it comes to your health, there's a simple, non-negotiable rule: "When in doubt, throw it out." The risk of serious foodborne illness is never worth it.
Are Nitrates and Nitrites Necessary for Curing?
For any long-term meat cures—especially those that won't be cooked to high temperatures after curing, like salami or country ham—using curing salts with sodium nitrite and/or sodium nitrate is a critical safety step. These ingredients are your single best defense against the growth of Clostridium botulinum, the bacteria that causes botulism.
Products like Prague Powder #1 (for bacon and cooked sausages) and Prague Powder #2 (for long-term, dry-aged products) are the industry standard for a reason. While some recipes call for "natural" sources like celery powder, commercially prepared curing salts offer tested, reliable, and predictable protection.
For quick methods like making jerky, which is fully dried and often cooked with heat, they are less critical. That said, they still add an extra layer of safety and contribute that classic cured flavor and reddish-pink color many of us expect in preserved meats.
At The Grounded Homestead, we believe in empowering you with the knowledge to grow your own food and live a healthier, more self-sufficient life. Explore our resources to continue your journey into traditional skills and homesteading. Learn more at https://thegroundedhomestead.com.


Facebook
Instagram
X
Youtube