Pressure Canning Green Beans: Easy & Safe Guide
Pressure Canning Green Beans: Easy & Safe Guide
Let's get straight to it: when it comes to canning green beans, pressure canning is the only scientifically proven safe method. This isn't a suggestion or a "best practice"—it's a non-negotiable rule that stands between a well-stocked pantry and a serious health risk. Trying to preserve low-acid foods like green beans any other way, especially with a water bath canner, is a gamble you should never, ever take.
Why Pressure Canning Is Not Optional
To really get comfortable with canning, you first have to understand the science behind it. With green beans, the problem is their low acidity. This neutral pH creates the perfect breeding ground for Clostridium botulinum spores—the source of the deadly botulism toxin.
These spores are incredibly tough. They can easily survive a rolling boil at 212°F (100°C), which is the absolute hottest a water bath canner can get. That's why water bath canning is strictly for high-acid foods like jams, most fruits, and pickles, where the acid itself acts as a preservative and keeps bacteria from growing.
The Power of High-Pressure Heat
A pressure canner is built specifically to solve this problem. By trapping steam and building pressure, it forces the internal temperature well past boiling, reaching 240°F (116°C) or even higher. That intense heat is the only way to reliably destroy botulism spores, making your home-canned green beans completely safe for your pantry shelf.
Think of it as the difference between just boiling something and truly sterilizing it. The pressure creates an environment where those dangerous microbes simply can’t survive. It’s a critical distinction that protects your family. For a deeper look at this foundational concept, our guide on canning vegetables for beginners is a great place to start.
The rule is simple and absolute: Low-acid foods like green beans, corn, and meats must be processed in a pressure canner. There are no safe shortcuts or alternative methods.
Water Bath vs. Pressure Canning for Green Beans
It’s easy to get confused with different canning methods, but for low-acid foods, the choice is clear. Here’s a breakdown of why a water bath canner just doesn't cut it for green beans.

The science is settled. The high heat achieved only under pressure is what ensures your food is safe to eat months or even years later.
Debunking Common Canning Myths
You've probably heard them—stories about "open-kettle" canning or from well-meaning relatives who have "always used a water bath for green beans" without any problems. These methods are dangerous and rely on pure luck. A single jar contaminated with botulism spores can have devastating consequences, especially since the toxin is invisible, odorless, and tasteless.
Let's clear a few things up:
Myth: "My grandma always did it this way." We all cherish family traditions, but modern food science has given us a much clearer understanding of foodborne illnesses. We have to follow updated, tested guidelines to keep our families safe.
Myth: "I'll just boil the beans for 10 minutes before eating them." While boiling can destroy the active botulism toxin, it does not kill the spores. If a jar was improperly canned, new toxin could have formed during storage. Relying on a last-minute boil is a risky and unnecessary gamble.
Safe food preservation isn't just a homesteading practice; it's a massive global industry. The canned beans market was valued at around USD 4.2 billion in 2020 and is on track to grow significantly. This entire industry is built on the foundation of commercial pressure processing—a testament to its importance for both safety and quality on a global scale.
Alright, let's get your gear in order. Before a single bean hits a jar, a successful canning day starts with having all your equipment clean, organized, and ready to go. Think of this as setting up your workshop. Knowing your tools and why you need them makes all the difference between a smooth, satisfying process and a frantic, stressful one.
The star of the show, of course, is the pressure canner. And let’s be clear: this is not your everyday pressure cooker or Instant Pot. You need a dedicated canner designed to hold at least four quart-sized jars, which is the minimum size validated by safety guidelines. You'll run into two main styles, and your choice can really shape your canning experience.
Dial Gauge vs. Weighted Gauge Canners
A dial gauge canner has a sensitive, clock-like face that gives you a precise pressure reading. This is great for keeping a close eye on things, but there's a catch—the gauge can lose its accuracy over time. For this reason, dial gauges must be tested every single year. Many local cooperative extension offices will do this for free or a small fee. If you use a dial gauge, this annual check-up isn't just a suggestion; it's a critical safety step.
On the other hand, a weighted gauge canner is beautifully simple. It uses a small, machined weight that sits on the canner's vent pipe. When the canner hits the right pressure (10 or 15 PSI), the weight starts to jiggle, rock, or spin. It's an old-school, reliable system that doesn't need annual testing, which is why many home canners swear by it. If you're buying your first canner, a weighted gauge model offers incredible peace of mind.
My personal take? While both get the job done, I almost always recommend a weighted gauge canner for beginners. There’s an unmistakable sound—that gentle, rhythmic rocking—that tells you everything is chugging along just as it should be. It’s incredibly reassuring when you're starting out.
The Supporting Cast of Canning Tools
Beyond the canner itself, a handful of other tools will make your day safer, cleaner, and a whole lot easier. Trying to make do without them is a classic rookie mistake that often leads to frustration, messes, and even burns.
These are the absolute must-haves:
Canning Jars: You'll need standard Mason jars made specifically for canning. Before you use them, run your finger around the rim of each one. Even a tiny, invisible nick or crack can ruin the seal.
New Lids and Rings: This is non-negotiable. Lids are a one-time-use item. The sealing compound is designed to create a perfect vacuum seal exactly once. Reusing them is a major food safety gamble. The rings (or bands) are fine to reuse as long as they aren’t rusted or bent out of shape.
Jar Lifter: This tool is your best friend for safely moving hot jars. It’s built to grip wet, heavy jars securely, letting you lift them from boiling water without a single splash or burn. Please don't try to use kitchen tongs; they’re a recipe for disaster.
Canning Funnel: A wide-mouthed funnel that sits snugly in the jar opening is a game-changer. It keeps beans and hot liquid from splashing all over your jar rims, which is essential for getting a clean, strong seal.
Bubble Popper/Headspace Tool: This simple plastic wand does two critical jobs. One end is for sliding down the inside of the jar to release trapped air bubbles. The other end usually has little steps on it for measuring headspace—the gap between the beans and the lid. Getting that space right is vital for a successful seal.
Having all this gear laid out and ready before you start transforms canning from a chaotic scramble into a calm, methodical kitchen ritual.
Choosing and Preparing Your Green Beans
The secret to perfectly canned green beans—crisp, flavorful, and vibrant—begins long before a jar ever enters the canner. What you put in the jar is just as important as how you process it. This is where the real work starts.
Start by sourcing the very best beans you can find. You're looking for pods that are firm, bright green, and give you a satisfying "snap" when bent. Pass on any beans that are limp, bruised, or have tough, stringy sides. Young, tender beans will always give you the best texture and flavor. For peak quality, try to get them processed within a day or two of picking.
If you have a garden, you’ve got a serious head start. Harvesting your own crop ensures you're working with beans at their absolute freshest. For those just getting their hands dirty, our guide on how to grow green beans has some great tips for a harvest that’s perfect for canning.
Getting Your Beans Jar-Ready
Once you’ve got your beans, the prep work is straightforward but non-negotiable for a safe, high-quality result. These steps are the same whether you decide to raw pack or hot pack.
First, give your beans a thorough wash. Place them in a colander and rinse them well under cool, running water to get rid of any dirt or garden debris.
Next, it's time to "top and tail" them. Using a sharp knife, trim off both the stem and tail ends from each pod. This is a perfect task for listening to a podcast or some music.
Finally, cut or snap the beans into uniform pieces, usually around 1- to 2-inch lengths. Keeping the pieces a consistent size is key, as it ensures everything cooks evenly inside the jar during processing.
Pro Tip: As you trim and cut, be ruthless. Toss any beans that feel overly tough or look discolored. A few sub-par beans can ruin the texture of an entire jar. Being selective now pays dividends when you open that jar mid-winter.
With your beans washed, trimmed, and cut, you're ready for the next big decision: your packing method.
Raw Pack vs. Hot Pack
There are two approved methods for packing green beans for pressure canning: raw packing and hot packing. Neither is wrong, but they offer different trade-offs in terms of effort and the final product.
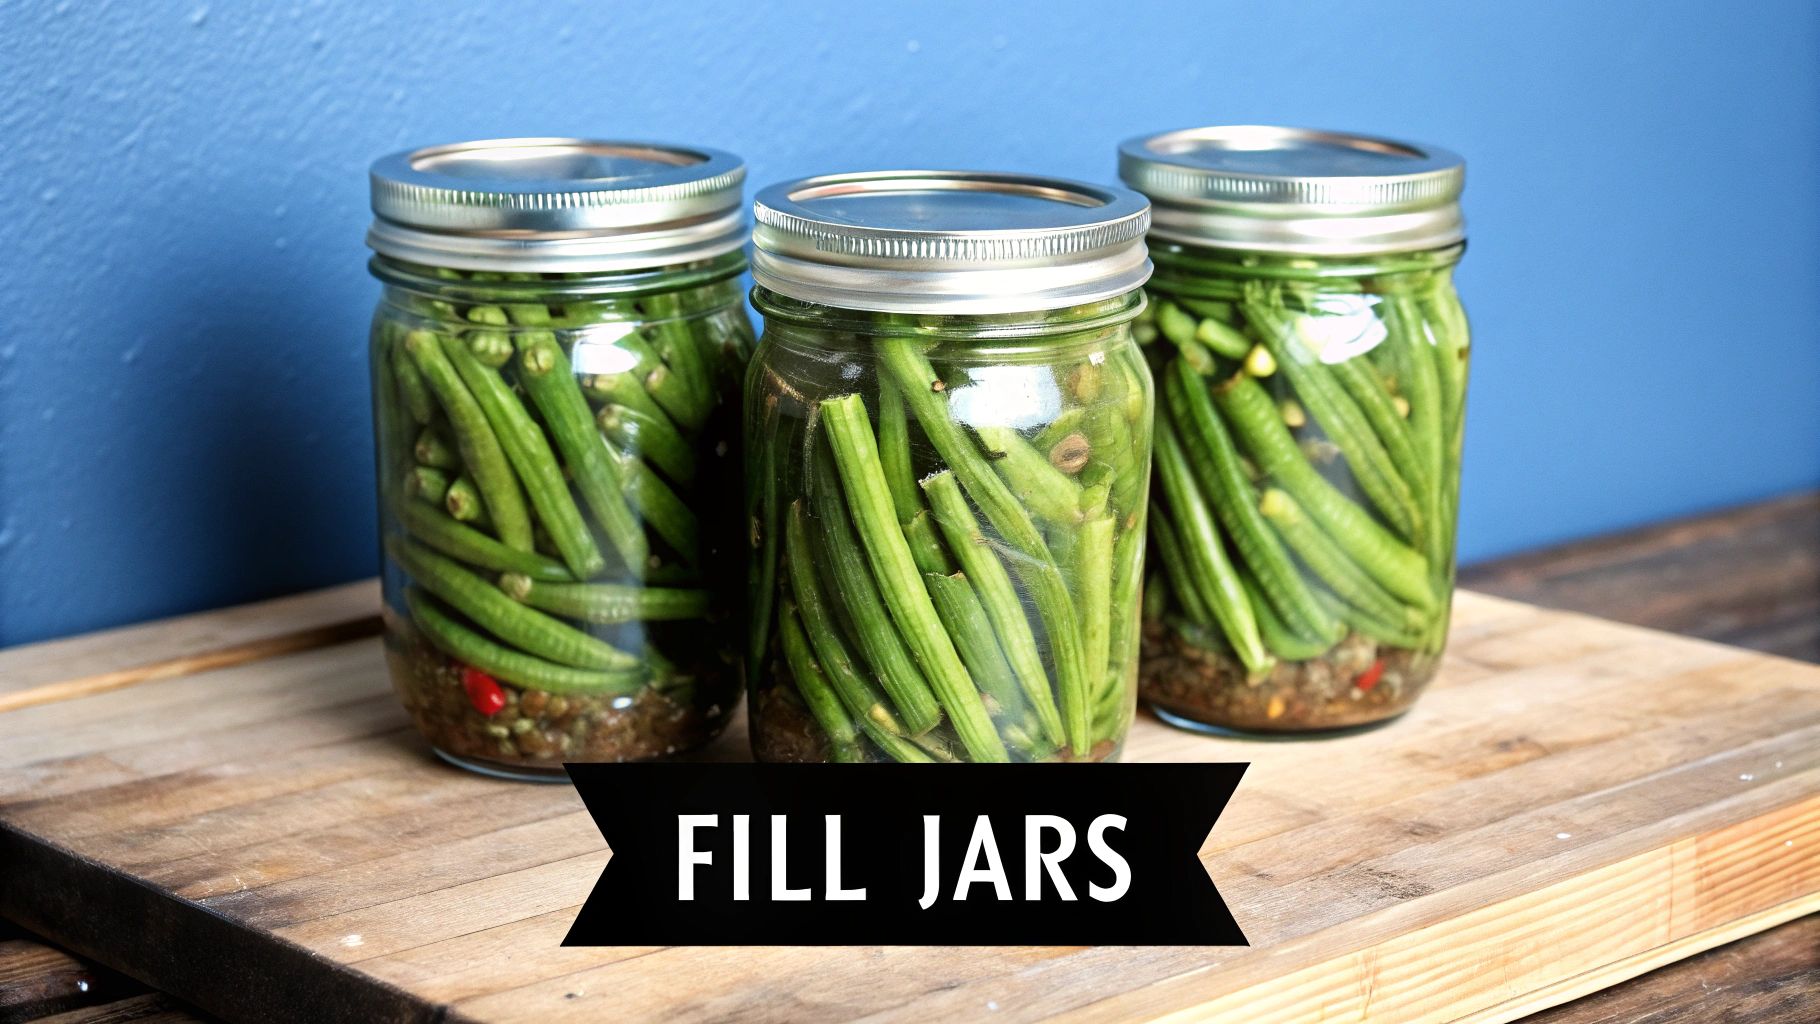
Raw Packing: This is just what it sounds like. You pack the raw, prepared beans tightly into your jars, then pour boiling water over them, leaving the correct headspace before sealing. It’s faster and skips the pre-cooking step.
Hot Packing: For this method, you first blanch the beans by boiling them for about 5 minutes. Then, you pack the hot beans into your jars and cover them with the hot cooking liquid. It takes a bit more time, but many experienced canners swear by it.
So, which one should you choose?
While raw packing is a time-saver, hot packing helps shrink the beans before they go into the jar. This is a bigger deal than it sounds. It lets you fit more into each jar and dramatically reduces the chance of beans floating, which can leave you with too much liquid at the top after processing.
For the best quality, appearance, and a fuller jar, hot packing is the way to go.
Alright, with your jars packed and lids on tight, it's time for the main event. This is where a little bit of patience and attention to detail will lock in that garden-fresh flavor for months to come. If you're new to this, pressure canning can feel a bit intimidating, but I promise it quickly becomes a familiar kitchen rhythm.
First things first, get your canner ready. Always place the rack in the bottom—this is non-negotiable. It keeps your jars off the scorching hot base of the canner, preventing thermal shock and dreaded cracks. Add about 2 to 3 inches of simmering water, but double-check your canner’s manual for the exact amount it recommends.
Using your jar lifter, gently lower the filled jars onto the rack. Give them a little space so they aren’t clanking against each other; good steam circulation is key for even processing. Once they're all in, lock the canner lid into place. Now comes the most important safety step of the entire day.
The Critical Venting Period
Before you even think about building pressure, you have to get all the air out of that canner. This is called venting, and its purpose is to create an environment of 100% pure steam. If you trap air inside, the temperature won't reach the required 240°F to kill botulism spores, even if your gauge is reading the right pressure. This is a recipe for under-processed, unsafe food.
Crank the stove burner to high heat. You'll see steam start to sputter from the open vent pipe or petcock. Don't start your timer yet. Wait until you see a strong, steady, and forceful plume of steam jetting out. Once you have that powerful, visible stream, set a timer for 10 full minutes.
Only after that 10-minute venting period is over can you put the weighted gauge on the vent pipe or close the petcock. This is the moment your canner will finally start building pressure.
Take a look at this chart—it breaks down the key stages of the process, from adding water all the way to the final cool-down.
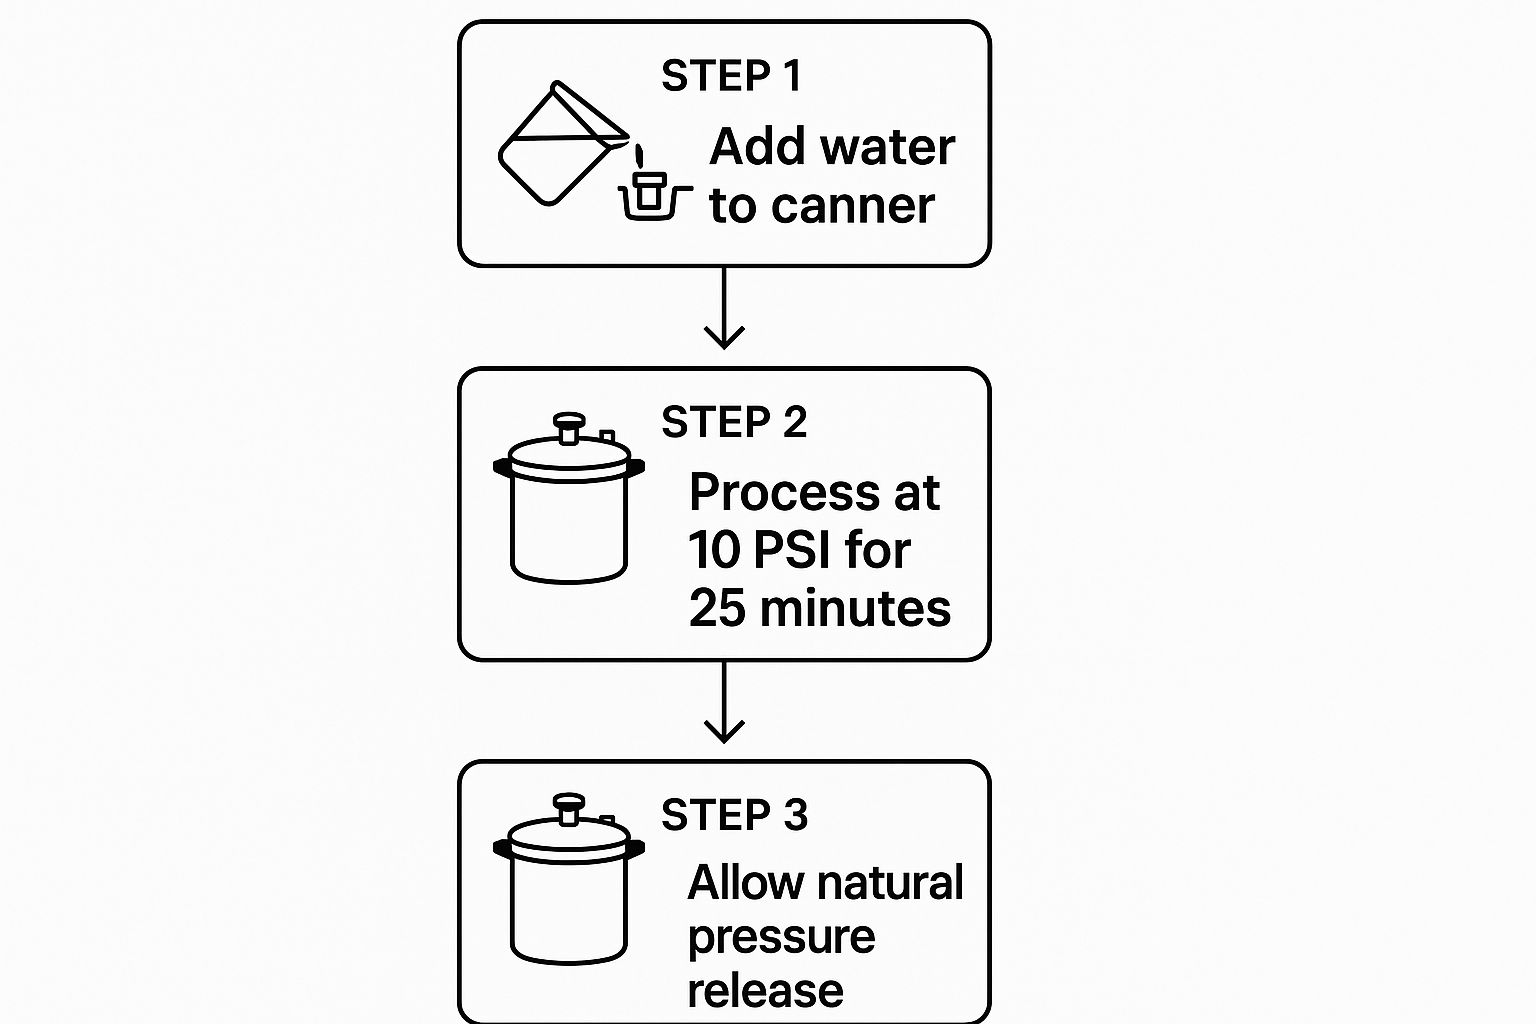
It really drives home how crucial each step is, especially the natural release of pressure at the end, which is just as important as the time spent processing.
Achieving and Holding the Right Pressure
Once your canner is sealed and vented, you'll see the pressure start to climb. Keep a close watch on your dial gauge or listen for the first jiggles of your weighted gauge. As it gets close to your target pressure (remember to adjust for your altitude!), start backing off the heat on your stove. The goal is to find that sweet spot where the pressure holds perfectly steady.
This is where the real art of canning comes into play, because every stove is different. A glass cooktop behaves differently than a gas flame or an old electric coil. You'll learn to make small, gentle adjustments to the heat to keep things stable.
My experience: When I first started, I was constantly fiddling with the burner knob, making the pressure jump up and down. I quickly learned to make one small adjustment and then wait a minute or two to see what happened. The most common mistake is over-correcting. For a weighted gauge, you’re listening for a gentle, rhythmic rocking, not a frantic, sputtering dance.
If the pressure ever dips below your target, you have to bring it back up and restart your timer from the very beginning. For the sake of safety, this rule is absolute.
Processing Times at a Glance
The time you need to process your green beans depends on two things: your altitude and the size of your jars. At higher altitudes, water boils at a lower temperature, so you need more pressure to reach that magic 240°F. Always follow a tested recipe and chart.
For folks using a weighted gauge canner (which I highly recommend for their reliability), this table is a great quick reference.
Processing Times for Pressure Canning Green Beans (Weighted Gauge Canner)

Remember, your timer only starts after the canner has reached the correct pressure and stabilized there. Don't jump the gun on this.
Handling Pressure Fluctuations
Even after you've been canning for years, pressure can fluctuate. A draft from an open window or an inconsistent burner can make the gauge dip or spike. The key is not to panic.
If the Pressure Spikes: Don't turn the heat off dramatically. Just reduce the heat on the stove bit by bit. A sudden drop in pressure can cause siphoning, which is when liquid gets sucked out of your jars, so a gradual reduction is best.
If the Pressure Dips: If the pressure drops below your required PSI, you'll need to turn the heat up slightly to get it back on target. And this is critical: you must restart your processing time from zero. Any time your jars spent below the required pressure simply doesn't count toward a safe processing time.
When your timer finally dings, your work isn't quite done. Turn off the heat completely. If you’re on an electric stove, I recommend carefully sliding the canner off the hot burner. Now comes the hard part: you have to let it be. Let the canner cool down and depressurize all on its own. We call this a natural release, and it's an absolutely essential part of the process.
Bringing It Home: Safe Storage and Handling
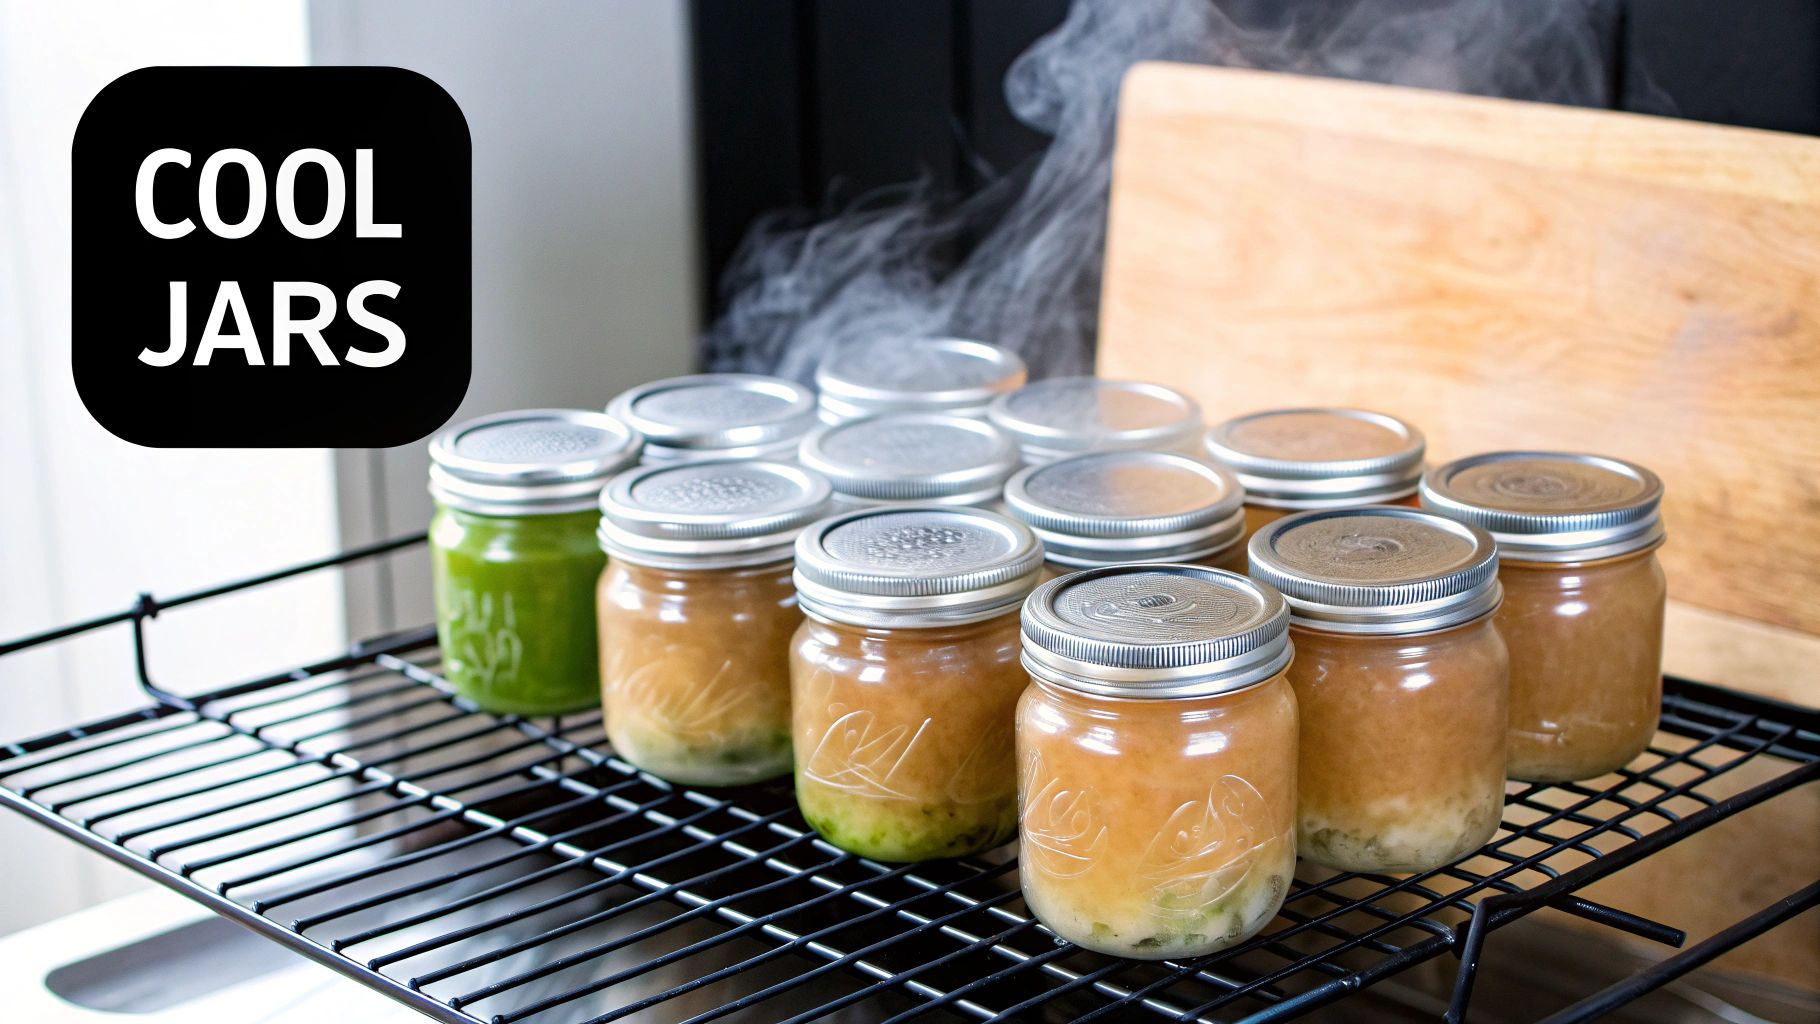
When the timer finally dings, it’s tempting to think you’re done. But some of the most critical steps in pressure canning are still ahead. Once you turn off the heat, the number one rule is patience. You have to let the canner cool down and depressurize all on its own. This is what seasoned canners call a "natural release."
Don't rush it. Seriously. Forcing a cool-down by running water over the lid or opening the vent too soon can cause siphoning—where the liquid gets violently sucked right out of your jars. Even worse, the sudden temperature shock can shatter glass. Just let the canner sit until the lid lock drops and the pressure gauge reads a solid zero.
The 24-Hour Cool Down
Once the canner is fully depressurized, you can carefully open the lid. Always tilt it away from your face to avoid a blast of steam. Using a jar lifter, gently move your hot jars to a draft-free spot, like a towel-lined countertop. Give them some breathing room—at least an inch or two apart—so air can circulate evenly.
Now comes another test of patience. Leave the jars completely alone for 12 to 24 hours. Don't poke the lids, tighten the rings, or even think about moving them. During this time, you’ll start to hear that satisfying ping of the lids sealing as a vacuum forms inside. It’s the sound of success.
After the resting period, it's time to check for a proper seal. The lid should be firm, concave, and make no "popping" sound when you press the center. That solid seal is your guarantee that the contents are airtight and safe for the pantry.
What to Do With Unsealed Jars
Sooner or later, it happens to every canner: a jar just doesn't seal. This isn't a failure, it just means that jar can't join its friends on the shelf. You’ve got a couple of options.
First, you can stick it straight in the refrigerator and plan to eat those beans within a few days. They're perfectly cooked and delicious.
Your other option is to re-process the jar. To do this, you’ll need to check the jar rim for any nicks, grab a new lid, and run it through the canner again for the full processing time. Honestly, for a single jar, most of us just find it easier to eat the beans.
Labeling and Storing for the Long Haul
Once you’ve confirmed a good seal on your jars, the next step is to remove the screw bands. This is a crucial step that many beginners miss. Leaving the rings on can trap moisture, which leads to rust. It can also hide a false seal, where a lid seems secure but actually isn't.
Wipe the jars down with a damp cloth to get rid of any sticky residue, then let them dry completely. Label each lid with what’s inside and the date it was canned. Something simple like "Green Beans - Aug 2024" works perfectly.
Store your beautiful jars in a cool, dark, and dry place—a pantry or a basement is ideal. You’re aiming for a stable temperature between 50°F and 70°F. Steer clear of places with big temperature swings, like a cabinet over the stove, as this can weaken the seals over time. This approach to safe storage is a key part of many techniques for preserving food at home.
When you're ready to enjoy the fruits of your labor, always give the jar a quick inspection before you open it. Look for any red flags:
A bulging or unsealed lid
Spurting liquid when you open it
Murky or cloudy liquid
Any signs of mold, inside the jar or on the lid
An "off" or sour smell
If you spot any of these signs, don't risk it. Discard the entire jar. By following these final steps, you can be confident that every jar of green beans you pull from the pantry will be as safe and tasty as the day you canned it.
Common Questions About Canning Green Beans
Even when you follow every step perfectly, you're bound to run into a few surprises during the pressure canning process. It’s all part of the learning curve. Think of these as moments to build your confidence, not reasons to worry.
Here are some of the most common questions I get from fellow canners, along with straightforward, practical answers to help you troubleshoot on the fly.
Why Are My Canned Green Beans Soft and Mushy?
This is easily the most common complaint, and it almost always comes down to one of three things.
First, check the quality of your beans. If you start with older, limp pods, you’ll end with mushy beans. There's no way around it. For the best texture, always start with crisp, firm beans, ideally picked just a day or two before you plan to can.
Over-processing is another big one. It’s tempting to add a few extra minutes "just to be safe," but that extra time will only overcook your beans. Follow the processing times for your jar size and altitude exactly. A slow, extended cool-down can also contribute to overcooking, so don't leave the canner sealed for hours after it has fully depressurized.
Finally, if you used the hot pack method, be honest about how long you pre-cooked them. Boiling the beans for too long before they even see the inside of a jar will give them a head start on turning soft.
What Causes Liquid Loss in My Jars?
Seeing a jar with a low water level after processing, a frustrating issue called siphoning, is almost always caused by sudden changes in pressure or temperature.
Pressure Fluctuations: If the pressure in your canner is bouncing up and down, it can literally force liquid out of your jars. The goal is a steady, consistent pressure. You achieve this by making small, gradual adjustments to your stove's heat—not big, sudden ones.
Improper Cooling: This is the big one. Cooling the canner too quickly creates a huge pressure difference between the inside of the jar and the canner, which sucks the liquid right out. Always, always let your canner depressurize naturally. No shortcuts.
Incorrect Headspace: That 1-inch headspace isn't just a suggestion; it's vital. Too little space means the expanding food has nowhere to go but out, pushing liquid with it.
Can I Add Other Vegetables or Seasonings?
While it’s tempting to get creative, when it comes to canning, safety trumps creativity every time. You should only follow tested recipes from reliable sources like the National Center for Home Food Preservation (NCHFP).
Adding low-acid vegetables like onions or carrots changes the density and pH inside the jar. This makes standard processing times unsafe because the heat might not get to the center of the jar effectively.
The safest approach is to can your green beans plain. You can always add things when you heat them up to serve. However, it is considered safe to add small amounts of dried seasonings like garlic powder, onion powder, or other dried herbs. Just be sure to avoid adding any fats like butter or oil.
Which Should I Trust: My Dial Gauge or My Weighted Gauge?
This one’s easy: always trust the weighted gauge.
A dial gauge is a sensitive piece of equipment that can fall out of calibration without you even knowing it. To be considered reliable, it needs to be tested every single year.
A weighted gauge, on the other hand, is just a simple piece of metal. It’s designed to jiggle, rock, or spin only when the canner has reached a specific pressure, like 10 or 15 PSI. It doesn't need testing. If your dial gauge and your weighted gauge are telling you two different things, it's almost certain your dial gauge is the one that’s wrong. Always process based on what your weighted gauge is doing.
At The Grounded Homestead, our goal is to give you the confidence and knowledge to grow and preserve your own food. Find more expert guides and join a community of fellow homesteaders on our website. https://thegroundedhomestead.com


Facebook
Instagram
X
Youtube