
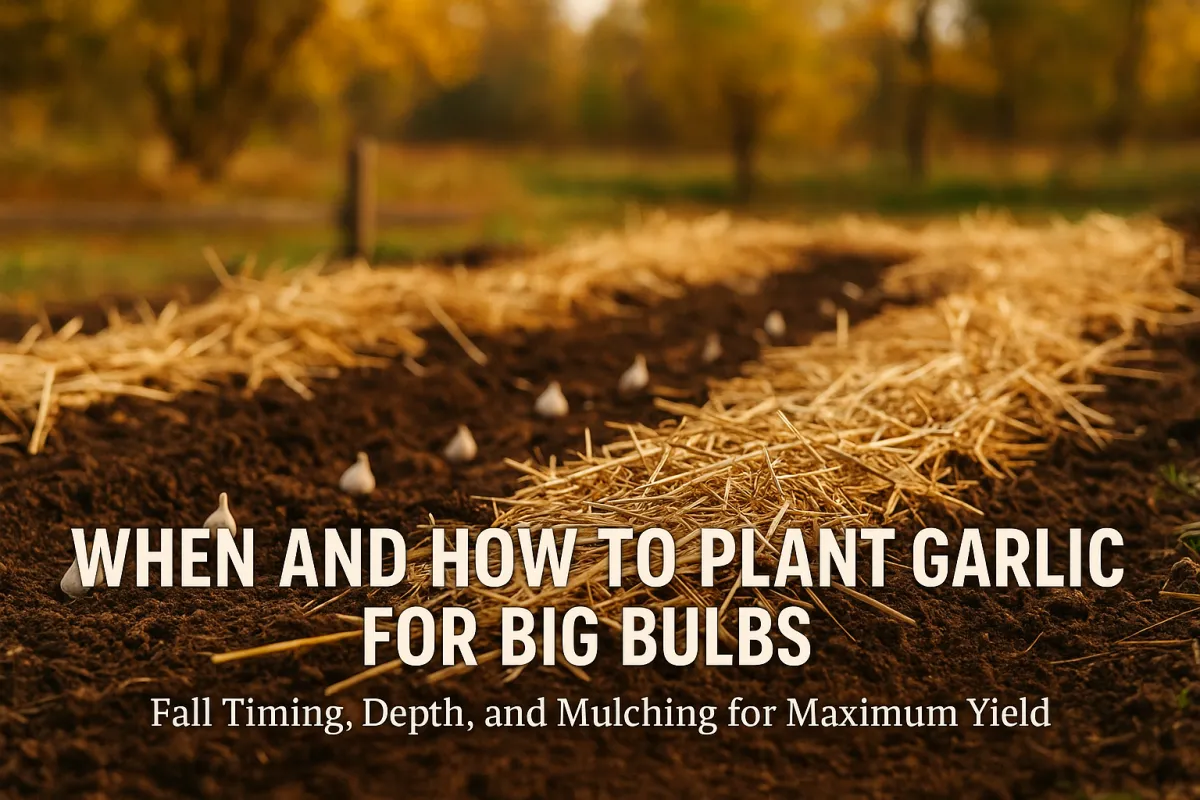
When and How to Plant Garlic for Big Bulbs
When and How to Plant Garlic for Big Bulbs
When and How to Plant Garlic for Big Bulbs
A Lesson Learned in Garlic Timing — Why Planting Depth and Timing Matter
When to Plant Garlic by USDA Zone
Hardneck vs. Softneck Garlic — Planting Depth, Spacing, and Regional Tips for Big Bulbs
How to Prepare Soil for Garlic — Fertility, Compost, and pH Tips for Big Bulbs
Garlic Row Layout — Airflow, Drainage, and Weed Control for Bigger Bulbs
How to Mulch Garlic for Winter — Protecting Bulbs and Boosting Spring Growth
Pro Garlic Planting Tips for Big Bulbs — Rotation, Watering, and Companion Planting
1. Rotate Your Garlic Beds Every Year
2. Use Companion Planting for Healthier Garlic
3. Save Only the Best Cloves for Planting
Your Garlic Planting Checklist — Step-by-Step Guide for Fall Planting
Get Your Hands Dirty and Trust the Process
FAQ: When and How to Plant Garlic for Big Bulbs
Looking for more professional guidance & homesteading resources?
A Lesson Learned in Garlic Timing — Why Planting Depth and Timing Matter
The first time I planted garlic, I pushed the season too far. I waited until the first snowflake hit the ground and told myself, “It’ll be fine—it’s still fall.”
By spring, those cloves had barely rooted. The bulbs were small and weak, proof that garlic rewards preparation and punishes delay.
If you want big, healthy bulbs, timing and soil temperature matter as much as fertilizer or watering. Garlic needs cool soil for root growth but not frozen ground. Learning how deep to plant garlic cloves and when to tuck them in determines how well they’ll take off once the growing season begins.
Think of garlic like any good crop: it needs time to settle its roots before the cold sets in. Get it right, and you’ll harvest firm, full bulbs that cure beautifully for storage. Miss the window, and you’ll end up peeling tiny marbles instead of hearty cloves come harvest time.
Key Takeaway: Start early, plant deep enough, and trust the soil to do its work through winter.

When to Plant Garlic by USDA Zone
Garlic isn’t a crop you can rush. It needs just the right balance of cool soil and time to root before the freeze sets in. If you’re wondering when to plant garlic cloves, the answer depends on your USDA growing zone and how early your ground hardens each year.
The goal is simple: get those roots started while soil temperatures still hover between 40°F and 50°F, roughly 4–6 weeks before the ground freezes solid. That short window allows strong root growth without premature leaf sprouting.
Use a reliable soil thermometer to check that your bed is truly in the 40-50°F sweet spot before you plant garlic cloves.
Zone-by-Zone Fall Garlic Planting Guide
Zones 3–4: Late September to early October
Zones 5–6: Mid to late October
Zone 7: Late October to early November
Zone 8: Early to mid-November
Zones 9–10: Late November to early December
If you garden in a warmer region, aim for cooler soil temperatures, even if that means planting later. In colder climates, getting garlic in early prevents frost-heave and root damage.
For a clear, research-backed overview of fall timing, soil pH, and mulch practices, see the University of Minnesota Extension’s studies on growing garlic.
Why Fall Planting Grows Bigger Bulbs
Fall planting gives garlic what it craves: time to develop roots before dormancy. Those roots store energy all winter, ready to push tall green shoots come spring.
It’s the same reason spring-planted garlic, especially in northern zones, often underperforms — the bulbs never get the slow, steady start they need.
Pro Tip: The earlier you plant within your safe fall window, the better the root establishment, moisture uptake, and bulb size you’ll see at harvest.

Hardneck vs. Softneck Garlic — Planting Depth, Spacing, and Regional Tips for Big Bulbs
Choosing the right garlic type—and knowing how deep to plant garlic cloves—makes the difference between scrawny bulbs and a full harvest. Both hardneck and softneck garlic have their strengths, but each demands its own planting depth, spacing, and climate match.
Hardneck Garlic (Best for Cold Climates)
Zones: 3–7
Flavor: Bold and complex
Traits: Produces a flower stalk called a scape in spring
Best Depth: 2–3 inches deep
Spacing: 4–6 inches between cloves, 10–12 inches between rows
Hardneck varieties root deeply and handle cold soil well. They store plenty of nutrients in their thick cloves and grow stronger when soil moisture is consistent but not soggy. Their scapes are edible, a bonus crop before the bulbs mature.
Softneck Garlic (Best for Mild Winters)
Zones: 8–10
Flavor: Mild and smooth
Traits: No scape, longer storage life
Best Depth: 1–2 inches deep
Spacing: 3–4 inches between cloves, 8–10 inches between rows
Softnecks prefer loose, well-drained soil rich in organic matter. Their shallow planting makes them sensitive to drought, so steady irrigation during dry spells helps maintain leaf health and bulb size.
Penn State Extension details practical planting depths, spacing, and straw mulching recommendations that align with cold-weather fall planting.
Planting Tips That Boost Bulb Size
Always plant pointy side up, root side down—roots form first.
Choose large, firm cloves for seed; smaller ones produce weaker bulbs.
Avoid planting near onions or leeks year after year—rotate crops to prevent disease.
Maintain balanced soil pH around 6.5–7.0 for strong growth.
Pro Tip: Treat garlic like any perennial crop—good spacing and crop rotation improve soil fertility and reduce pest pressure over time.
How to Prepare Soil for Garlic — Fertility, Compost, and pH Tips for Big Bulbs
Garlic thrives in loose, nutrient-rich soil with steady moisture and strong drainage. Getting the ground right before planting is half the battle. If you want big, healthy bulbs, give the roots a head start with a soil that breathes, drains, and feeds well.
Step-by-Step Garlic Soil Prep
Test Your Soil pH
Aim for a pH between 6.5 and 7.0—that’s the sweet spot for garlic. Acidic soil stunts root growth and reduces nutrient uptake. If it’s too low, amend with lime a few weeks before planting.Before I plant my cloves I always grab a Rapitest Soil Test Kit strip so I can verify the soil pH and nutrient levels. No guesswork, just proper prep.

Add Organic Matter
Spread 2–3 inches of well-aged compost or manure across your bed. Compost improves soil texture, adds nutrients, and helps hold the right level of moisture through winter.Boost Phosphorus for Strong Roots
Mix in a phosphorus-rich amendment like bone meal or rock phosphate. Garlic’s early growth focuses on roots, not leaves, and phosphorus drives that development.After testing the soil I work in a handful of Espoma Organic Bone Meal Fertilizer 4-12-0 — it gives garlic roots the phosphorus they need to build fat, healthy bulbs.
Loosen the Bed Deeply
Garlic hates compacted soil. Use a garden fork to loosen 8–10 inches deep without flipping the layers. This keeps beneficial microbes and organic matter near the surface where they belong.Balance Nitrogen Carefully
Avoid overloading nitrogen early—it pushes leafy growth at the expense of bulb size. Save nitrogen-rich compost or fertilizer for light top-dressing in spring.
Pro Tip: A soil rich in organic matter and balanced nutrients prevents disease and improves long-term fertility. Treat it like an investment—once the structure is right, every crop that follows benefits.

Garlic Row Layout — Airflow, Drainage, and Weed Control for Bigger Bulbs
The way you lay out your garlic rows plays a major role in preventing disease, pests, and poor soil moisture. Garlic needs space for airflow, root expansion, and sunlight on every leaf. Tight spacing traps humidity and invites rot; open rows dry faster, strengthen stems, and keep weeds from stealing nutrients.
Smart Garlic Bed Design for Healthy Growth
Keep rows straight and evenly spaced. This makes weeding, watering, and mulching simpler—and prevents competition between plants.
Prioritize airflow. Allow 10–12 inches between rows for good circulation. Leaves that stay dry are less prone to fungal disease.
Use raised beds if possible. They improve drainage, especially in heavy clay or compacted soils, protecting garlic roots from sitting in cold, wet conditions.
Plan for weed suppression early. Garlic doesn’t compete well with weeds. After planting, cover beds with straw mulch to block light and retain soil moisture through winter.
Pro Tip: Avoid planting garlic in low spots or areas with standing water. Excess moisture suffocates roots, leading to smaller bulbs and potential rot.
Good airflow keeps leaves dry and helps prevent disease—but even the best layout can’t stop every problem. If you want to recognize and stop common garlic issues before they spread, read The Top 5 Garlic Diseases (and How to Prevent Them Naturally) next.

How to Mulch Garlic for Winter — Protecting Bulbs and Boosting Spring Growth
Once your garlic bed is planted, mulching is the final, crucial step. Think of it as tucking your garlic in for winter. A good mulch layer keeps the soil temperature stable, prevents frost-heave, suppresses weeds, and holds in moisture for steady root development. Done right, it also jump-starts spring growth once the thaw comes.
Best Mulch Materials for Garlic Beds
Clean straw: The classic choice—light, breathable, and excellent for moisture balance.
Shredded leaves: Abundant in fall and easy to work with; just avoid thick mats that block airflow.
Pine needles: Great in southern regions where winters are mild and soil needs light insulation.
Mulch Thickness by USDA Zone
Zones 3–5: 6 inches of straw or leaf mulch
Zones 6–7: 4 inches
Zones 8–10: 2–3 inches
After spreading the mulch, water lightly to settle it against the soil surface. This keeps air pockets from forming around the cloves and maintains even soil moisture through winter.
In spring, when the soil begins to warm and green shoots emerge, pull mulch back gradually—too early and a late frost can nip tender growth, too late and it can trap excess moisture.
Pro Tip: Check mulch after heavy winter rains or snowmelt. Add a light top-up if bare patches appear to keep your bulbs insulated and protected.
Grandma’s Tip
"Don’t rush the mulch off in spring. Garlic grows best when the soil’s had a good chance to warm. If your hands are still cold pulling weeds, the garlic’s roots are cold too."
That old wisdom holds up. Garlic roots stay active long before the leaves catch up, and yanking mulch too early can shock the plant and stall growth.
When you start to see green shoots, resist the urge to uncover everything. Instead, pull mulch back slowly over a week or two, letting the soil warm naturally.
This balance of patience and timing is one of the most overlooked garlic planting tips for big bulbs. Healthy soil warmth equals better nutrient flow, stronger roots, and a faster spring jump once temperatures rise.

Pro Garlic Planting Tips for Big Bulbs — Rotation, Watering, and Companion Planting
Even with the right timing, depth, and mulch, a few insider practices separate average garlic from show-stopping bulbs. These are the methods seasoned growers use year after year to keep their harvests consistent, pest-free, and disease-resistant.
1. Rotate Your Garlic Beds Every Year
Never plant garlic, onions, or leeks in the same soil two seasons in a row. This simple crop rotation keeps fungal diseases like white rot and nematodes from building up. Rotate with nitrogen-fixing crops—beans or peas—to refresh the soil naturally.
For why yearly rotation matters—especially to avoid devastating white rot—Cornell Cooperative Extension’s fact sheet is the gold-standard reference.
2. Use Companion Planting for Healthier Garlic
Garlic is one of the best natural pest deterrents in the garden. Its strong scent repels aphids, spider mites, and even rabbits. Plant garlic near tomatoes, carrots, and fruit trees to keep insects in check and strengthen neighboring crops.
Avoid planting it beside beans or peas, which can struggle with the sulfur compounds garlic releases into the soil.
Companion Planting Tip: Mix a few garlic cloves among lettuce, cabbage, or roses to cut down on pest pressure without sprays—it’s one of the oldest organic tricks in the book.
3. Save Only the Best Cloves for Planting
Your garlic’s genetics matter. The largest, firmest cloves produce the biggest bulbs. Small or damaged seed cloves waste space and nutrients. Each fall, set aside the best heads from your previous harvest specifically for replanting.
4. Manage Water Wisely
Garlic roots crave steady moisture through early spring, but not soggy soil. Water deeply once a week if rainfall is scarce, and reduce watering as the bulbs mature. Two to three weeks before harvest, stop watering completely—this toughens skins and extends storage life.
5. Feed and Weed Smart
A quick top-dress of compost or diluted organic fertilizer mid-spring supports leaf growth before bulbs swell. Keep weeds pulled—each one competes for the same nutrients your garlic needs for size and strength.
Pro Tip: Combine crop rotation, steady irrigation, and strategic companion planting for a garlic bed that almost takes care of itself—stronger bulbs, fewer pests, and healthier soil every year.
Your Garlic Planting Checklist — Step-by-Step Guide for Fall Planting
Before you grab your garden fork, keep this simple, printable garlic planting checklist close at hand. It breaks down everything you need for a strong fall start and big bulbs at harvest.
Fall Garlic Planting Steps
1. Check Your USDA Zone and Timing
Use your zone to determine when to plant—roughly 4–6 weeks before the ground freezes. Cooler soil encourages strong root growth.
2. Choose the Right Garlic Type
Select hardneck varieties for cold climates (Zones 3–7) or softneck varieties for mild regions (Zones 8–10).
3. Prepare Your Soil
Test soil pH and adjust to 6.5–7.0.
Add 2–3 inches of compost or organic matter.
Mix in bone meal or rock phosphate for root strength.
4. Plant Each Clove Correctly
Depth: Hardneck 2–3 inches, Softneck 1–2 inches.
Spacing: 4–6 inches between cloves, 10–12 inches between rows.
Always plant pointy side up, root side down.
5. Mulch for Winter Protection
Add straw, shredded leaves, or pine needles based on your zone (6 inches in cold zones, 2–4 inches in warmer areas).
Water lightly after mulching to settle the soil.
6. Mark and Record Your Bed
Label your rows by variety and date planted. Keep notes on moisture, weather, and soil condition—they’ll guide next season’s adjustments.
Get Your Hands Dirty and Trust the Process
Planting garlic in fall is a test of faith and discipline. You press each clove into cool soil, cover it with straw, and walk away knowing you won’t see growth for months. But underneath, roots are forming, nutrients are flowing, and life is quietly taking hold.
This season of waiting mirrors everything good about homesteading—and life itself. You do your part, then you trust what’s unseen. Ecclesiastes 3:1 says, “To everything there is a season, a time for every purpose under heaven.” Garlic doesn’t hurry, and neither should we. Growth takes time, patience, and steady hands.
When spring comes and those green shoots break through the mulch, it’s not luck—it’s proof of what happens when preparation meets faith. You worked the soil, planted with purpose, and trusted the process.
Now it’s your turn to get your hands dirty. Check your USDA Zone, prep your beds with compost and organic matter, and follow the garlic planting tips for big bulbs laid out here. Once those cloves are tucked in, step back and let nature and faith take over.
FAQ: When and How to Plant Garlic for Big Bulbs
How deep should I plant garlic cloves?
Plant hardneck garlic 2–3 inches deep and softneck garlic 1–2 inches deep. Always plant with the pointy side up and the root side down. This depth keeps cloves insulated through winter and encourages stronger root development before frost.
When is the best time to plant garlic in my zone?
Plant 4–6 weeks before the ground freezes solid.
Zones 3–4: Late September to early October
Zones 5–6: Mid to late October
Zone 7: Late October to early November
Zones 8–10: Early to mid-November
This gives roots time to anchor before winter and ensures a strong spring start.
What’s the difference between hardneck and softneck garlic?
Hardneck garlic grows best in colder climates and produces a flower stalk (scape). It has fewer but larger cloves and a stronger flavor.
Softneck garlic thrives in warmer climates, stores longer, and produces more cloves per bulb without scapes.
What kind of soil does garlic need to grow big bulbs?
Garlic prefers loose, fertile soil with a pH between 6.5 and 7.0. Mix in 2–3 inches of compost and a phosphorus-rich amendment like bone meal. Avoid heavy clay or compacted ground, which restricts root expansion and bulb size.
Should I mulch garlic after planting?
Yes. Add 2–6 inches of straw, shredded leaves, or pine needles (depending on your zone) right after planting. Mulch insulates the soil, prevents frost-heave, suppresses weeds, and retains moisture through the winter.
Can I plant garlic near other vegetables?
Yes — in fact, garlic is one of the best companion plants you can grow. It acts as a natural pest deterrent, releasing sulfur compounds that help repel aphids, spider mites, and cabbage worms. Garlic pairs especially well with tomatoes, carrots, cabbage, lettuce, and roses, where it protects against common insect damage and improves overall garden health.
Avoid planting garlic near beans or peas, since its strong compounds can inhibit their root development. Used thoughtfully, companion planting with garlic strengthens nearby crops, discourages pests, and supports a more balanced garden ecosystem.
How do I know when garlic is ready to harvest?
Garlic is ready when half the leaves have turned brown and the lower leaves remain green. Stop watering 2–3 weeks before harvest for tighter skins and longer storage life.
Why is my garlic small?
Small bulbs usually result from late planting, compact soil, or overcrowding. Ensure proper spacing (4–6 inches between cloves), loose soil, and timely fall planting for best results.
How long does garlic take to grow from clove to harvest?
Most garlic varieties take 8–9 months from planting to harvest—planted in fall, harvested in midsummer. During this time, consistent moisture, clean soil, and good drainage are key to strong bulb formation.
Can I grow garlic organically?
Yes. Garlic is naturally pest-resistant and thrives under organic conditions. Use compost for fertility, rotate crops annually, and rely on companion planting for pest control instead of chemicals.
Video Summary of this issue:
As always, the tools and supplies I mention are the same ones I rely on here at The Grounded Homestead. Some are affiliate links, which means I may earn a small commission—at no extra cost to you—but every recommendation is based on real use and trust.
Looking for more professional guidance & homesteading resources?
Explore our trusted guides to learn more about growing healthy food, managing your land, and building lasting systems for your homestead. Whether you're looking for planting tips, seasonal checklists, or natural solutions that actually work—we’ve got you covered.
Start with these helpful reads:
Everything to know about Strawberries:
Start with Strawberries: Ground Your Garden with Fruit that Grows Back
6 Common Strawberry Plant Diseases and How to Treat Them Naturally
The 6 Pests That Wreck Strawberry Crops—and How to Beat Them Naturally
Beyond Straw: Choosing the Right Mulch for Every Strawberry Bed
Runner Management 101: Multiply Your Strawberry Patch with Purpose
Frost, Flood, and Fungus: Protecting Strawberries in Extreme Weather
The Best Strawberry Varieties for Continuous Summer Harvests
Top 14 Practical Uses for Fresh Strawberries (Beyond Jam)
Start a U-Pick Strawberry Business (Even on 1 Acre)
How to Fertilize Strawberries for Yield, Flavor, and Runner Control
Strawberries in Small Spaces: Balcony, Border, and Vertical Growing Techniques
Wild Strawberries vs. Cultivated: Should You Grow Fragaria vesca?
The Complete Guide to Propagating Strawberries: Growing Strawberries from Seed
How to Integrate Strawberries Into a Permaculture Garden
How to build a low-maintenance 4-bed strawberry system’
Everything to know about Raspberries:
Start with Canes: How to Plant Raspberries for a Lifetime of Fruit
Raspberry Care 101: From Cane to Crop Without the Fuss
Build a Raspberry Trellis That Lasts: Sturdy DIY Designs for Any Backyard
When and How to Cut Back Raspberries: The Right Way to Prune Summer and Fall Types
Raspberry Troubleshooting Guide: Yellow Leaves, No Fruit, and Cane Dieback
Raspberry Pest Guide: What’s Bugging Your Patch (and What to Do About It)
Everything to know about Lettuce:
Lettuce 101: How to Grow Crisp, Clean Greens Anywhere
The Lettuce Succession Plan: How to Get a Salad Every Week from Spring to Fall
Top 5 Lettuce Diseases—and What to Do When They Show Up
Top 5 Lettuce Mistakes New Gardeners Make
Top 5 Lettuce Pests—And How to Keep Them Out Naturally
Everything to know about Tomatoes:
Tomatoes 101: How to Grow Strong, Productive Plants from Seed to Sauce
Tomato Feeding Guide: What to Add, When to Add It, & How to Avoid Overdoing It
The Top 5 Tomato Problems—And How to Fix Them Before They Ruin Your Harvest
Pruning Tomatoes: When, Why, and How to Do It Without Hurting Your Plants
The Top 5 Mistakes First-Time Tomato Growers Make (And How to Avoid Them)
Everything to know about Kale:
The Top 5 Kale Pests — How to Protect Kale from Bugs Organically
How to Harvest Kale the Right Way (So It Keeps on Giving)
Kale 101: A No-Fuss Guide to Growing Tough, Nutritious Greens
What to Do When Kale Looks Rough: Yellowing, Holes, or Curling Leaves
Kale Varieties Demystified: What to Grow and Why It Matters
How to Keep Kale from Getting Bitter (Even in Warmer Months)
Everything to know about Green Beans:
Green Beans 101: Planting, Caring, and Harvesting for Steady Summer Yields
The Top 5 Green Bean Problems—and How to Fix Them Naturally
Succession Planting Green Beans for a Full Summer Harvest
The Top 5 Pests That Wreck Green Beans—And What to Do About Them
Bush vs. Pole Beans: Which Is Better for Your Garden?
Everything to know about Zucchini
Zucchini & Summer Squash 101: Planting, Caring, and Harvesting for Massive Yields
The Top 5 Zucchini Problems—And How to Solve Them Naturally
Companion Planting with Zucchini: What Helps and What Hurts
Harvesting Zucchini the Right Way (and Why Size Matters)
The Squash Vine Borer Survival Guide
Everything to know about Watermelon
How to Tell When a Watermelon is Ripe (Without Guesswork)
Watermelon 101: How to Grow Sweet, Juicy Melons from Seed to Slice
The Top 5 Watermelon Growing Problems—and How to Fix Them Naturally
The Top 5 Pests and Diseases That Target Watermelon
Companion Planting with Watermelon: What to Grow Nearby (and What to Avoid)
Everything to know about Radish
Radish Growing 101: From Seed to Crunch Without the Guesswork
When and How to Plant Radishes for Crisp, Flavorful Roots
The Top 5 Radish Pests (and How to Stop Them Organically)
How to Harvest Radishes at the Perfect Time (and Avoid Woody Roots)
The Top 5 Radish Diseases (and How to Prevent Them Naturally)
Everything to know about Blueberries
Feeding Blueberries Naturally: The Right Fertilizer at the Right Time
The Top 5 Blueberry Pests (and How to Stop Them Without Chemicals)
Why Your Blueberry Bush Isn’t Producing Fruit (and How to Fix It)
Blueberry Care 101: From Bush to Bowl Without the Guesswork
The Top 5 Blueberry Diseases (and How to Beat Them Naturally)
Everything to know about Pear Trees
The Top 5 Pear Tree Diseases (and How to Prevent Them Naturally)
Pear Tree Care 101: From Planting to Picking
When and How to Harvest Pears for the Best Flavor
The Top 5 Pear Tree Pests (and How to Stop Them Organically)
Pruning Pear Trees Without Hurting Next Year’s Crop
Everything to know about Apple Trees
The Top 5 Apple Tree Diseases (and How to Prevent Them Naturally)
When and How to Harvest Apples for Peak Flavor
Why Your Apple Tree Isn’t Producing Fruit (and How to Fix It)
The Top 5 Apple Tree Pests (and How to Stop Them Organically)
Apple Tree Care 101: From Planting to Picking Without the Guesswork
Everything to know about Onions
The Top 5 Onion Diseases (and How to Prevent Them Naturally)
Onions 101: From Seed to Storage Without the Guesswork
When and How to Plant Onions for Big, Healthy Bulbs
The Top 5 Onion Pests (and How to Stop Them Organically)
Why Your Onions Won’t Bulb (and How to Fix It)
How to Grow Onions: A Complete Harvest Guide
Everything to know about Garlic
The Top 5 Garlic Diseases (and How to Prevent Them Naturally)
Garlic Growing 101: From Clove to Harvest Without the Guesswork
The Top 5 Garlic Pests (and How to Stop Them Organically)
The Right Way to Feed Garlic for Bigger, Healthier Bulbs
Everything to know about Pumpkins
Why Your Pumpkins Aren’t Setting Fruit (and What to Do About It)
Pumpkins & Squash 101: From Seed to Storage
When and How to Harvest Pumpkins & Squash Without Ruining the Fruit
The Top 5 Pumpkin & Squash Pests (and How to Stop Them Organically)
The Top 5 Pumpkin & Squash Diseases (and How to Prevent Them Naturally)
Other Offerings:
The Summer Garden Reset: What to Do After Your First Harvest
How to Keep a Backyard Garden Alive in 90° Heat (Without Daily Watering)


Facebook
Instagram
X
Youtube